Share Your Battle: Kelya Frendul x Sand Worm

Edited in Canva Pro.
𝕴𝖓𝖙𝖗𝖔𝖉𝖚𝖈𝖙𝖎𝖔𝖓
One of the cheapest to rent yet ridiculously strong monster. Before I use the Kraken strategy, this card is normally in my collection, rented for like at least 30 days. He wins 99 mana games with ease being able to eliminate anything each turn.
Recently though, with the introduction of Kelya Frendul and easier access to protect monsters, his win rate is not as high. However, properly combo'ed with cards, he can still do his job regardless.


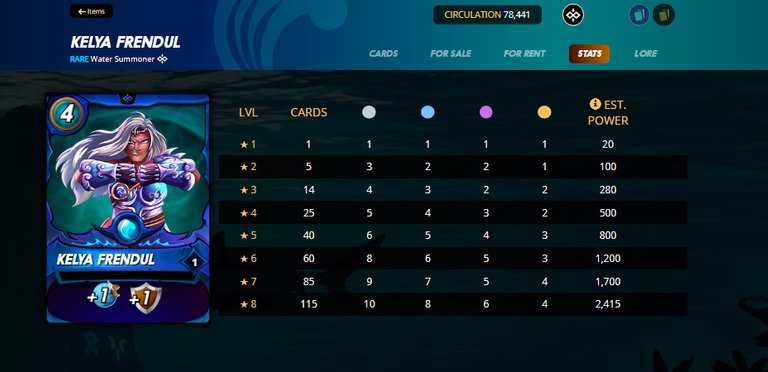
Kelya Frendul
Kelya Frendul is a decorated warrior with possessions from deep dungeons and different magical artifacts. To her, everyhing is run with money. As long as you have the fund, she would do the deed. Kelya Frendul joined the Chaos Legions in search of the legendary silver weapon simply to amass more fortune and glory.
 𝔓𝔥𝔬𝔱𝔬 𝔣𝔯𝔬𝔪 𝔪𝔶 𝔖𝔭𝔩𝔦𝔫𝔱𝔢𝔯𝔩𝔞𝔫𝔡𝔰 𝔞𝔠𝔠𝔬𝔲𝔫𝔱.
𝔉𝔲𝔩𝔩 𝔏𝔬𝔯𝔢 𝔠𝔞𝔫 𝔟𝔢 𝔣𝔬𝔲𝔫𝔡 𝔬𝔫 𝔖𝔭𝔩𝔦𝔫𝔱𝔢𝔯𝔩𝔞𝔫𝔡𝔰 ℭ𝔞𝔯𝔡 𝔏𝔬𝔯𝔢 𝔓𝔞𝔤𝔢.
Sand Worm
From the desert of Draykh-Nahka, these overgrown Sand Worms run amok. They treat the lands as water swimming underneath an unsuspecting victim before dealing a lethal blow in one hit.
In Mount Mox battle, they say that these Sand Woms can even swallow monsters of any size in one bite. Their body is so long that even flying creatures cannot escape dragging them to the ground feasting on their desecrated bodies.
 𝔓𝔥𝔬𝔱𝔬 𝔣𝔯𝔬𝔪 𝔪𝔶 𝔖𝔭𝔩𝔦𝔫𝔱𝔢𝔯𝔩𝔞𝔫𝔡𝔰 𝔞𝔠𝔠𝔬𝔲𝔫𝔱.
𝔉𝔲𝔩𝔩 𝔏𝔬𝔯𝔢 𝔠𝔞𝔫 𝔟𝔢 𝔣𝔬𝔲𝔫𝔡 𝔬𝔫 𝔖𝔭𝔩𝔦𝔫𝔱𝔢𝔯𝔩𝔞𝔫𝔡𝔰 ℭ𝔞𝔯𝔡 𝔏𝔬𝔯𝔢 𝔓𝔞𝔤𝔢.

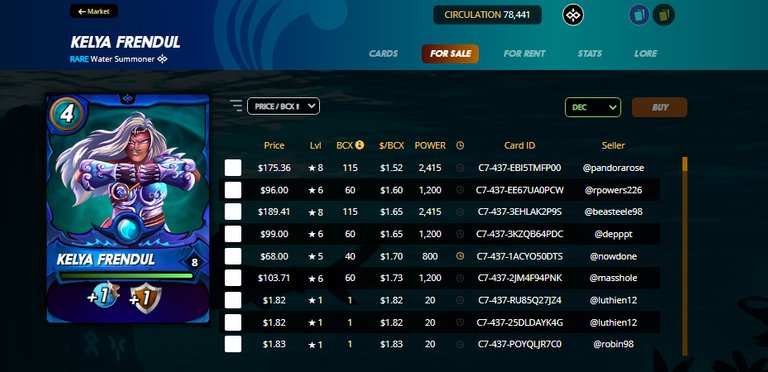
Kelya Frendul
Market Price | Buy
𝔓𝔥𝔬𝔱𝔬 𝔣𝔯𝔬𝔪 𝔪𝔶 𝔖𝔭𝔩𝔦𝔫𝔱𝔢𝔯𝔩𝔞𝔫𝔡𝔰 𝔞𝔠𝔠𝔬𝔲𝔫𝔱.
Kelya Frendul's level 1 costs only less than $2 but if you're planning to fight on higher levels, it might cost you a bit more. The cheapest max price is around $175 which would serve you until Champion league.
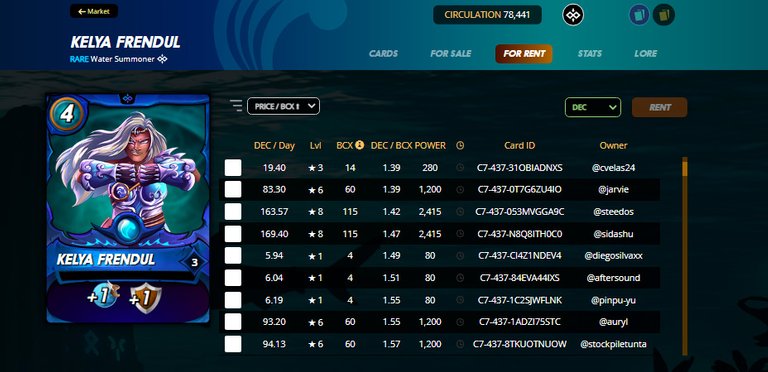
Market Price | Rent
𝔓𝔥𝔬𝔱𝔬 𝔣𝔯𝔬𝔪 𝔪𝔶 𝔖𝔭𝔩𝔦𝔫𝔱𝔢𝔯𝔩𝔞𝔫𝔡𝔰 𝔞𝔠𝔠𝔬𝔲𝔫𝔱.
Right now, I'm renting level 3 rares for fighting in Silver so my cost is roughly 20 DEC or 19.40 per day to be exact. It's a bit cheap for the price but not sustainable for long term.
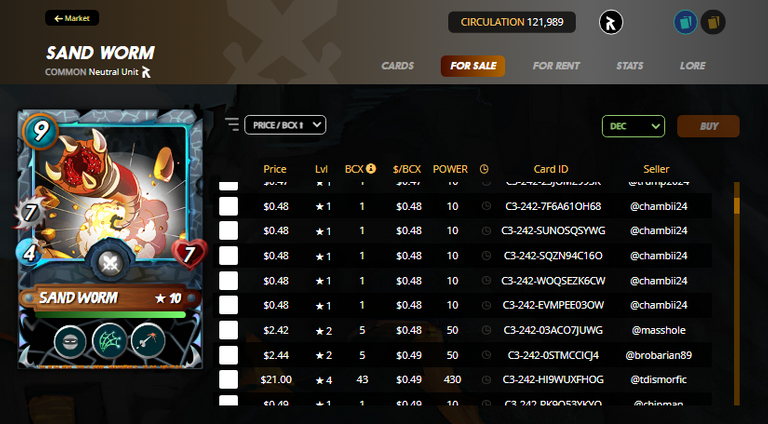
Sand Worm
Market Price | Buy
𝔓𝔥𝔬𝔱𝔬 𝔣𝔯𝔬𝔪 𝔪𝔶 𝔖𝔭𝔩𝔦𝔫𝔱𝔢𝔯𝔩𝔞𝔫𝔡𝔰 𝔞𝔠𝔠𝔬𝔲𝔫𝔱.
You can buy it now for $0.48 for a level 1 increasing as you want higher one. But right now, due to the low rental cost, it's more efficient to rent them instead of buying it. At least that's the situation as of this moment.
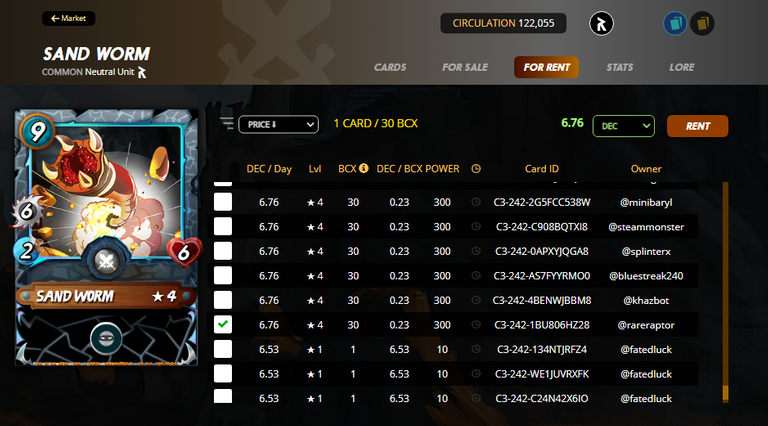
Market Price | Rent
𝔓𝔥𝔬𝔱𝔬 𝔣𝔯𝔬𝔪 𝔪𝔶 𝔖𝔭𝔩𝔦𝔫𝔱𝔢𝔯𝔩𝔞𝔫𝔡𝔰 𝔞𝔠𝔠𝔬𝔲𝔫𝔱.
I rented Sand Worm for 6.76 DEC per day for a level 4. It fits my budget right now of less than 10 DEC per card for my rental budget and it increases all of his stats altogether.
If you're only playing in Bronze, you can rent a level 2 for 0.10 DEC which is pretty cheap and all you need as it increases his speed fixing up Sand Worm's weakness.
Stats | Kelya Frendul
𝔓𝔥𝔬𝔱𝔬 𝔣𝔯𝔬𝔪 𝔪𝔶 𝔖𝔭𝔩𝔦𝔫𝔱𝔢𝔯𝔩𝔞𝔫𝔡𝔰 𝔞𝔠𝔠𝔬𝔲𝔫𝔱.
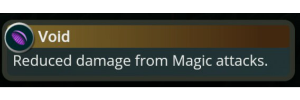
Kelya Frendul is a very strong Water summoner. While it does not give you any extra abilities like Waka Spiritblade or Scarred Llama Mage, it does give you extra armor and speed which is very useful for survival as extra armor blocks off excess damage while speed increases your evasion chance against melee and range attacks and against magic damage if you have the Phase ability.
Stats | Sand Worm
𝔓𝔥𝔬𝔱𝔬 𝔣𝔯𝔬𝔪 𝔪𝔶 𝔖𝔭𝔩𝔦𝔫𝔱𝔢𝔯𝔩𝔞𝔫𝔡𝔰 𝔞𝔠𝔠𝔬𝔲𝔫𝔱.
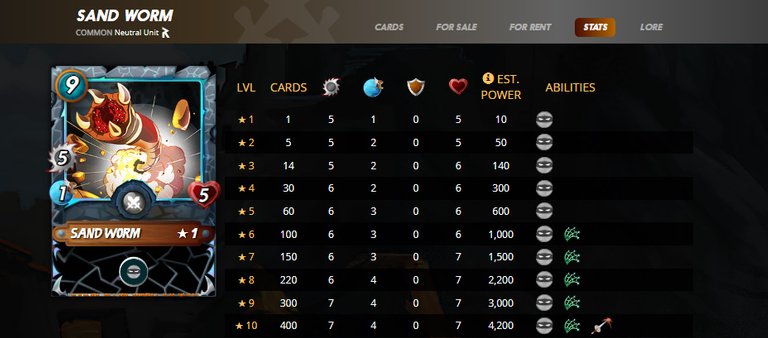
Sand Worm probably has the highest raw damage in the game. This is balanced out by his very low speed of 1 making him vulnerable to misses. His health is decent at 5 which makes him fairly easy to kill if focused. However, what makes this card good is that he's a neutral monster meaning you can use him in any element as long as you have the mana or he's not banned.
Sand Worm is a must for 99 mana fights as you can unleash the most powerful monsters in your arsenal.
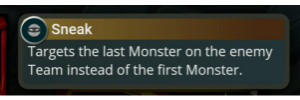
At level 1, Sneak ability is unlocked. Sneak allows the monster to attack from any position. The target also changes to the last positioned monster unless the monster with Sneak ability is on 1st position. With 5 base damage at level 1, adding Sneak is just ridiculously strong. He can one hit most back line monsters.
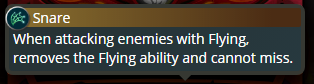
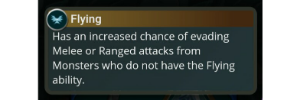
At level 6, Snare ability is unlocked. Snare removes the Flying ability effect of monster it hit. To me, this doesn't make sense because the monster would probably die anyway being hit by 5 damage. However, character-wise, it fits like a glove. Sand Worm strangles the monster pulling them down from the sky. This is how I imagine Sand Worm's Snare ability does.

At level 10, Piercing ability is unlocked. Monsters with Piercing ability deals the excess damage from armor to their health. Normally, without piercing, the armor absorbs the full damage meaning a monster with 4 health and 1 armor must still be attacked twice, first eliminating the armor, then health, regardless of the damage. Imagine the armor as a secondary health.
With Piercing ability, the high damage of Sand Worm is fully utilized as any excess damage to armor is then dealt to the target's health being able to eliminate monsters with low health and armor in one hit.
𝔄𝔟𝔦𝔩𝔦𝔱𝔦𝔢𝔰 𝔡𝔢𝔰𝔠𝔯𝔦𝔟𝔢𝔡 𝔞𝔟𝔬𝔳𝔢 𝔞𝔯𝔢 𝔣𝔯𝔬𝔪 𝔖𝔭𝔩𝔦𝔫𝔱𝔢𝔯𝔩𝔞𝔫𝔡𝔰 𝔲𝔰𝔦𝔫𝔤 𝔪𝔶 𝔞𝔠𝔠𝔬𝔲𝔫𝔱.
Battle Highlights
Click the link below to see the full battle:
https://splinterlands.com/?p=battle&id=sl_9870873dc97a66e708aefd0a041d4e8c
Other Battles:
https://splinterlands.com?p=battle&id=sl_99409c5be0430cd6a2fd44027bfccb1f&ref=konaqua122
Rules of Combat

𝔓𝔥𝔬𝔱𝔬 𝔣𝔯𝔬𝔪 𝔪𝔶 𝔖𝔭𝔩𝔦𝔫𝔱𝔢𝔯𝔩𝔞𝔫𝔡𝔰 𝔞𝔠𝔠𝔬𝔲𝔫𝔱.
99 Mana Cap. Total mana cost of all monsters must not exceed 99 mana.
Standard Rules of Combat. No change in mechanics or rules in this battle.
All elements unlocked. Summoners and Monsters from all elements can be used during this battle.
Abilities Used During This Battle


𝔄𝔟𝔦𝔩𝔦𝔱𝔦𝔢𝔰 𝔲𝔰𝔢𝔡 𝔦𝔫 𝔱𝔥𝔦𝔰 𝔟𝔞𝔱𝔱𝔩𝔢 𝔞𝔯𝔢 𝔣𝔯𝔬𝔪 𝔖𝔭𝔩𝔦𝔫𝔱𝔢𝔯𝔩𝔞𝔫𝔡 𝔲𝔰𝔦𝔫𝔤 𝔪𝔶 𝔞𝔠𝔠𝔬𝔲𝔫𝔱.
Round 1
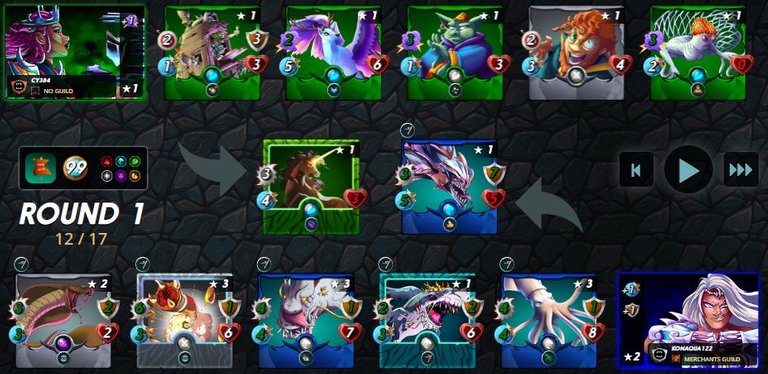
𝔓𝔥𝔬𝔱𝔬 𝔣𝔯𝔬𝔪 𝔪𝔶 𝔖𝔭𝔩𝔦𝔫𝔱𝔢𝔯𝔩𝔞𝔫𝔡𝔰 𝔞𝔠𝔠𝔬𝔲𝔫𝔱.
- Sand Worm's Sneak attack killed Mycelic Slipspawn.
Round 2
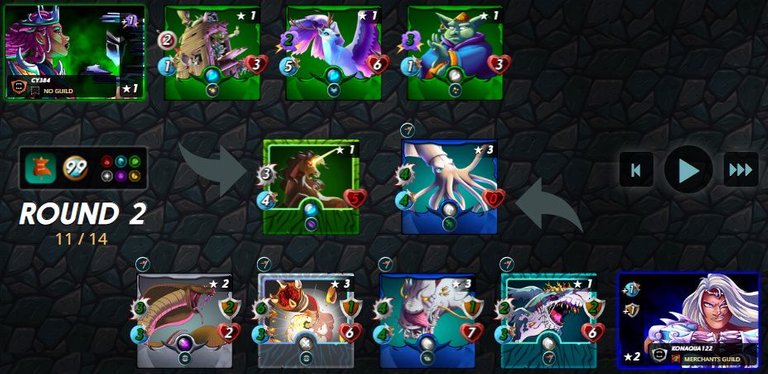
𝔓𝔥𝔬𝔱𝔬 𝔣𝔯𝔬𝔪 𝔪𝔶 𝔖𝔭𝔩𝔦𝔫𝔱𝔢𝔯𝔩𝔞𝔫𝔡𝔰 𝔞𝔠𝔠𝔬𝔲𝔫𝔱.
- Regal Peryton'sattack killed Diemonshark.
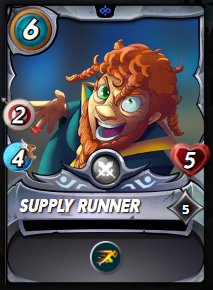
- Sand Worm's Sneak attack killed Supply Runner.
- Goblin Psychic'sattack killed Flying Squid.
Round 3
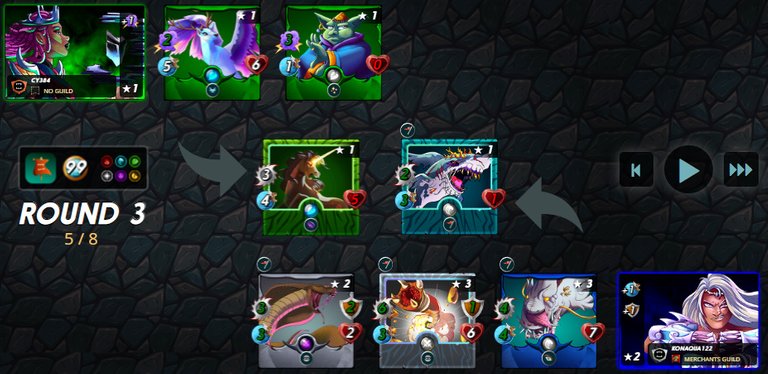
𝔓𝔥𝔬𝔱𝔬 𝔣𝔯𝔬𝔪 𝔪𝔶 𝔖𝔭𝔩𝔦𝔫𝔱𝔢𝔯𝔩𝔞𝔫𝔡𝔰 𝔞𝔠𝔠𝔬𝔲𝔫𝔱.
- Deeplurker's Opportunity's attack killed Goblin Tower.
- Uraeus Sneak attack killed Goblin Psychic.
Round 4
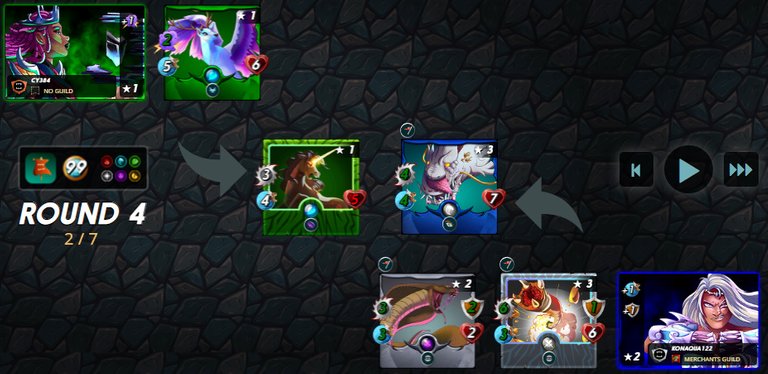
𝔓𝔥𝔬𝔱𝔬 𝔣𝔯𝔬𝔪 𝔪𝔶 𝔖𝔭𝔩𝔦𝔫𝔱𝔢𝔯𝔩𝔞𝔫𝔡𝔰 𝔞𝔠𝔠𝔬𝔲𝔫𝔱.
- Regal Peryton'sattack killed Demented Shark.
Round 5
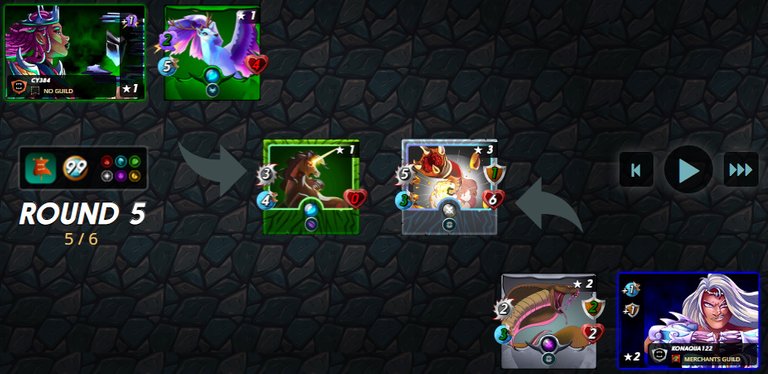
𝔓𝔥𝔬𝔱𝔬 𝔣𝔯𝔬𝔪 𝔪𝔶 𝔖𝔭𝔩𝔦𝔫𝔱𝔢𝔯𝔩𝔞𝔫𝔡𝔰 𝔞𝔠𝔠𝔬𝔲𝔫𝔱.
- Unicorn Mustang'sattack killed Deeplurker.
- Sand Worm's attack killed Unicorn Mustang.
Round 6
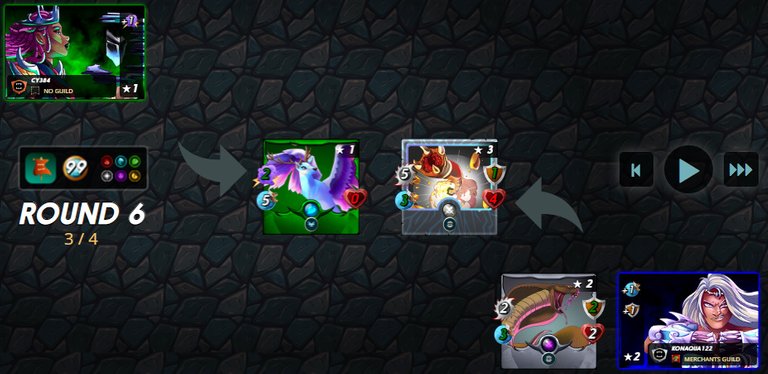
𝔓𝔥𝔬𝔱𝔬 𝔣𝔯𝔬𝔪 𝔪𝔶 𝔖𝔭𝔩𝔦𝔫𝔱𝔢𝔯𝔩𝔞𝔫𝔡𝔰 𝔞𝔠𝔠𝔬𝔲𝔫𝔱.
- Sand Worm's attack Regal Peryton.

𝑫𝒐 𝒚𝒐𝒖 𝒍𝒊𝒌𝒆 Kelya Frendul and Sand Worm Combo? 𝑾𝒉𝒚 𝒐𝒓 𝑾𝒉𝒚 𝒏𝒐𝒕?
Yes. The reason why this combo is strong is because it fills up one of Sand Worm's strongest weakness which is missing his attacks. Sand Worm can probably kill most of the cards in the game with 1 or 2 attacks but his 1-2 speed on early levels will really make you made missing around 5x in one match. Kelya Fredul's increased speed helps increase the chance of Sand Worm hitting his targets which is game breaking.
ᒪIᑎEᑌᑭ
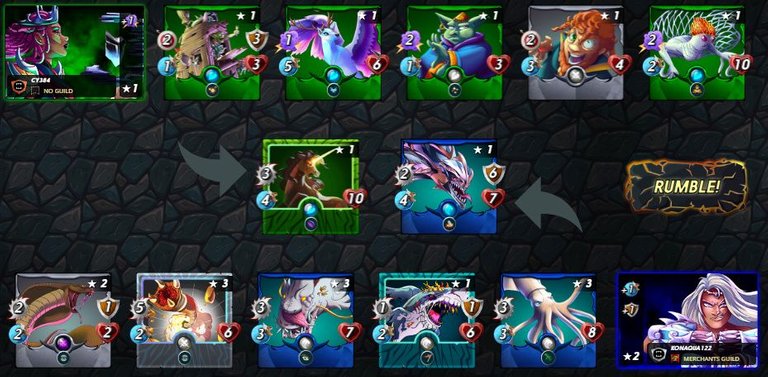
𝔓𝔥𝔬𝔱𝔬 𝔣𝔯𝔬𝔪 𝔪𝔶 𝔖𝔭𝔩𝔦𝔫𝔱𝔢𝔯𝔩𝔞𝔫𝔡𝔰 𝔞𝔠𝔠𝔬𝔲𝔫𝔱.
Summoner: Kelya Frendul: A 4 mana cost summoner with high defensive capabilities increasing your team's speed and armor by 1.
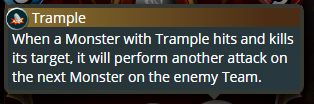
Diemonshark: Durable tank with high shield and health but with only decent 2 damage. Has Trample ability that will do an extra attack if Diemonshark deals a lethal damage to his target.
Flying Squid: Has high health and damage with Reach ability allowing him to attack from second position.
Demented Shark: A decent damage monster with Inspire ability that increases all melee damage on your team by 1 as long as this monster is alive.
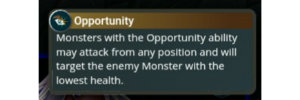
Deeplurker: Has high damage and Opportunity ability allowing him to attack from other positions. Opportunity prioritizes lowest health monster as his target of attack.
Sand Worm: Has huge melee damage but low speed. Also has sneak ability that allows him to attack from any position prioritizing the last position monster.
Uraeus: Low cost monster with 2 attack at level 2. Also has sneak ability that allows him to attack from any position prioritizing the last position monster.
ᗪIᗪ YOᑌᖇ ᔕTᖇᗩTEGY ᗯOᖇKEᗪ?
Yes. Except for the last part where Sand Worm missed a ton because of Regal Peryton's Flying ability, everything else went smoothly.
ᗯᕼᗩT ᗯIᒪᒪ YOᑌ TᖇY ᗪIᖴᖴEᖇEᑎTᒪY ᑎE᙭T TIᗰE?
I just realized this after the game but adding a higher level Supply Runner gives me access to Swiftness increasing the speed further by another point. This might make the game more easier. Other than that, just higher levels of those monsters in higher league will make it way better.

- This post is an entry for Splinterland's Share Your Battle contest.
- Other sources that I do not own are cited under their respective photos. Photos and drawings without cited sources are mine and made for this post.
- Animated Banners and Dividers are edited in Canva Pro.
- Some of the fonts used are from instafonts.io
If you're interested in playing the game, support me by registering using my referral link here

GӨӨD ᄂЦᄃK ΛПD KΣΣP GЯIПDIПG!
Good luck on your battles and on your entry to the challenge. Sounds like these two are great at what they do😉
!LADY
Thank you very much! I feel like Splinterlands and these challenges are like making a puzzle. Add a few pieces that fits together to make the best picture. !LUV !PIZZA
@ifarmgirl, @konaqua(1/1) sent you LUV. | tools | discord | community | HiveWiki | NFT | <>< daily
I gifted $PIZZA slices here:
@konaqua(1/5) tipped @ifarmgirl (x1)
Send $PIZZA tips in Discord via tip.cc!