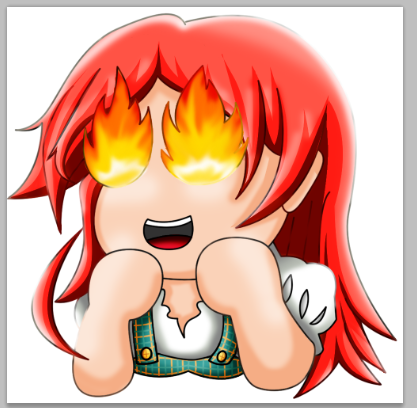
Tarsa on Fire! (Tarsa Static Emote)
Edited in Canva Pro.

Sources and Materials
Below are the materials I used in this art.
Edited in Canva Pro.
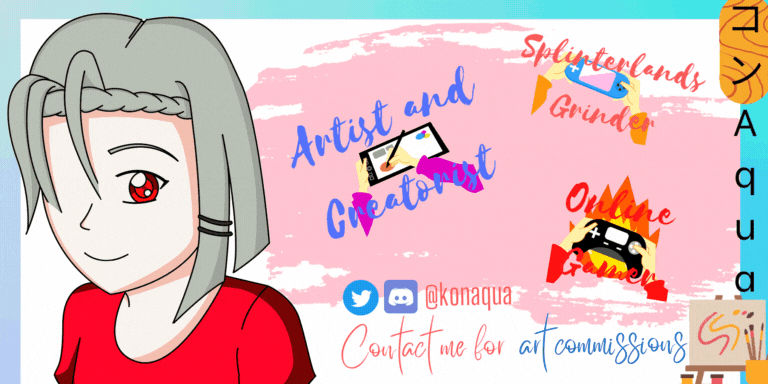
𝕴𝖓𝖙𝖗𝖔𝖉𝖚𝖈𝖙𝖎𝖔𝖓
Unlike my other emotes, I will be doing what I call a Static Emote for this week's entry. These are the type of emotes that do not have animation or kind of like a facebook sticker. I also decided to shorten my work explanation because last week, I promised to shorten that and still ended up like 2000 words where I am aiming 1200-1500.
For transparency, these decisions aren't because I'm lazy. It's the opposite. I don't think my art style "yet" is on a good level and if I also practice the animation while doing the art, it's just going to have half-assed. I want to focus on making my art better before doing the animations.
The documentation also does take a huge chunk of time, probably 2-3 days from thinking what I want to say, to getting all the materials for the tutorial. I'm cutting off a huge chunk of it so I could focus on researching art styles and techniques instead to help me better my work.
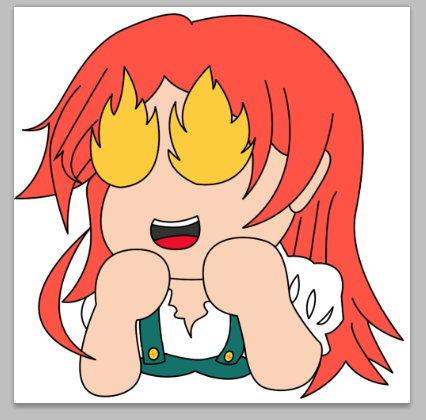
Step 1 Draft
Ever since the start of time, when I saw that Tarsa is a fire element, I have this emote idea of her having her eyes on fire in excitement. I've finally did it. If I like it, is another topic for another time.
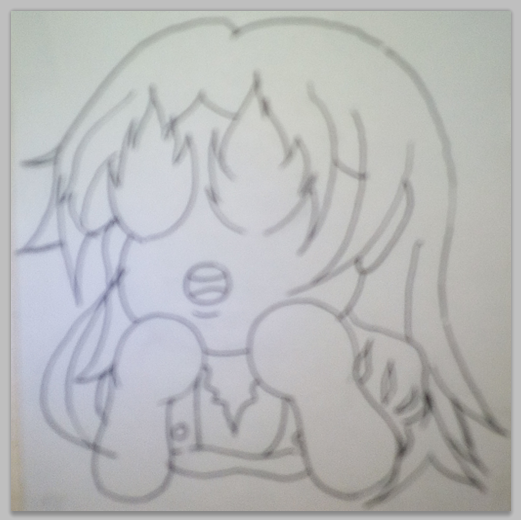
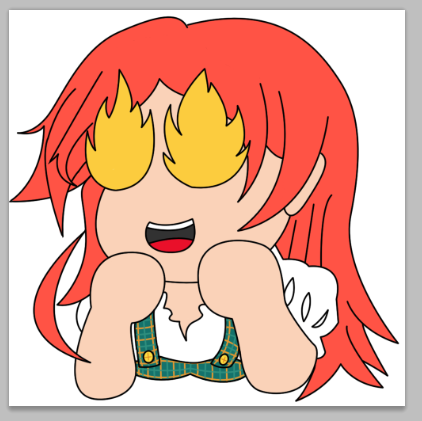
Step 2 Full Draft
I changed the mouth but still isn't satisfied. At this point, I was actually planning to scrap this as a post until something clicked on during some part of the coloring.
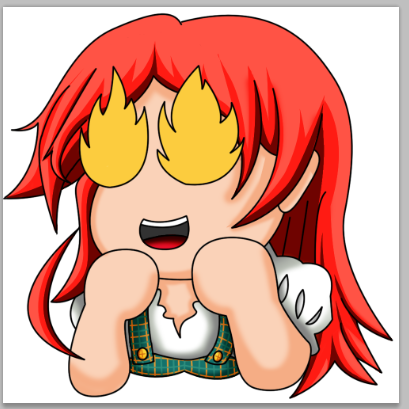
Step 3 Base Color
As usual, we simply lay the foundation of the colors. Nothing fancy, just put the base colors that will be the foundation for the shadows and highlights.
We also add the shirt design on another layer.
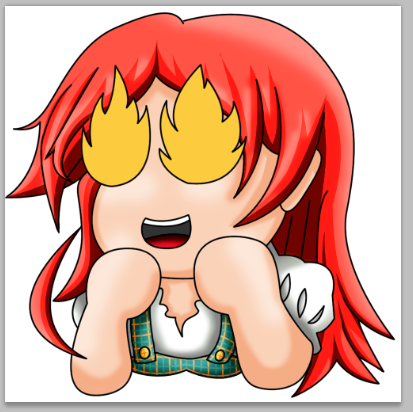
Step 4 Shadows 1
Like what I did from last week's art, I started doing double shadows. I always layout the lighter shadows first using a few rules.
- The hair consist of solid ends. This is to imitate the hair strands. It's not per hair but I discovered that using a triangular shape is more anime-ish so I stuck with that.
- Clothes and other parts will have airbrush effect. Photoshop's brush can use an airbrush effect. What this does is imitate real world airbrush or spray paints. If you do one click, it colors the middle and the end has lighter colors. If you hold it, it would continue coloring and gradually darkening until it reaches your brush size.

Step 5 Shadows 2
I was planning to use dual shadows on the body and skin like in last week's art but I thought it would be too dark. This is a chibi/emote which means the art should be more fun than serious. Instead, I applied it only on the hair because I think the hair part is really light with only one shadow.
Step 6 Highlights
I also applied one highlight only instead of two to the parts of the body and they're mostly whites It's just to balance so the art won't be too dark.
However, I applied 2 highlights to the hair just to show that the light source is strongest on that part
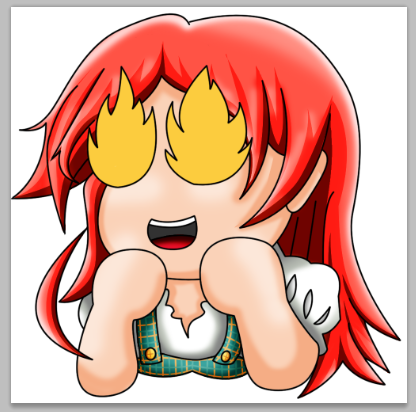
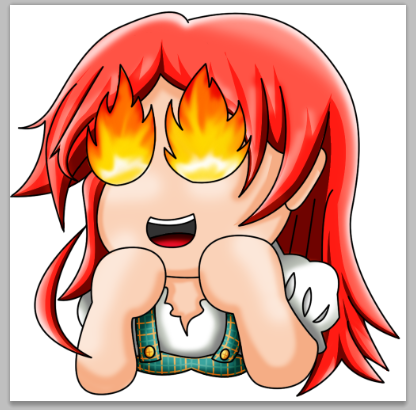
Step 7 Flaming Eyes
I want Tarsa to be excited like cheering on you as you win. Imagine you put a clutch play with your monster winning the game with just 1 health, this is the emote I want to use.
The coloring part, I did that by adding red, orange, yellow, and white in the base color. I locked the transparent pixel so I can only affect the base color on that pixel. I use the smudge tool and smudged the color upwards creating a fire like effect.
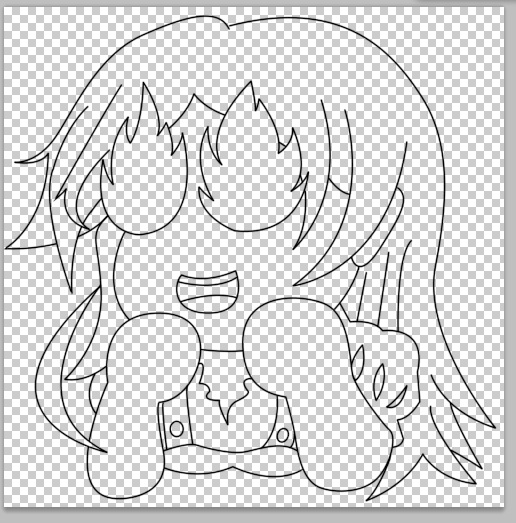
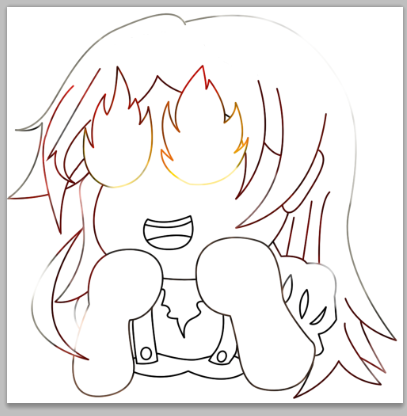
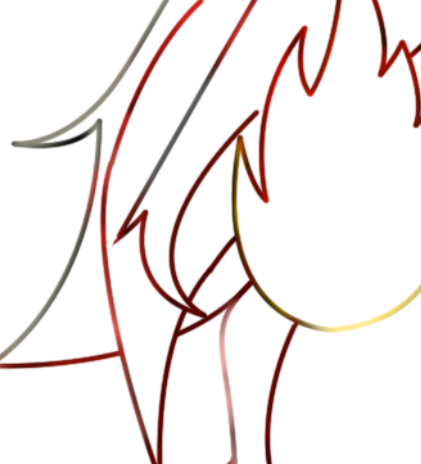
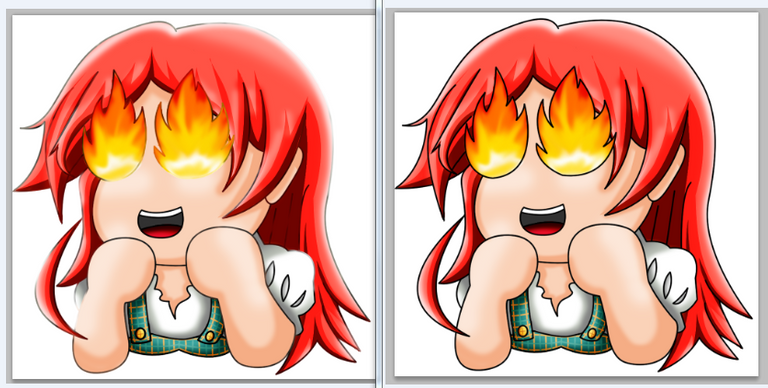
Step 8 Colored Lines
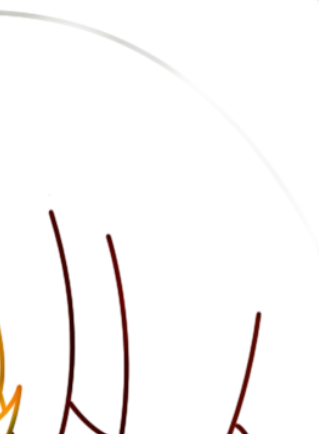
I wanted to experiment and do something different. I duplicated the lineart, locked transparent pixel and used the colors nearest to the line and colored it. Without colors, it would look like this:
I was able to do this by messing with the flow option on the brush tool. So, the flow actually tells you how hard the color would be applied. I put the flow at around 30% which means I need to do three strokes on the same place in order to achieve almost if not the same color as 100%. Think of it as an opacity change but instead of opacity being applied to your layer, it's applied on the brush.

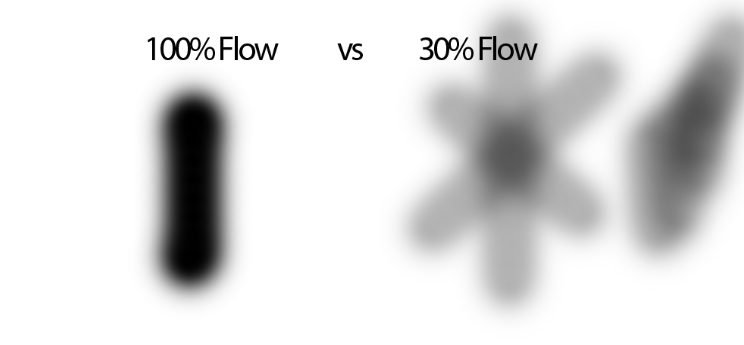
Another reason why I changed the flow is also because while I want to add color to the lines, I also don't want it to completely blend. If you zoom, you can see that it's still have the blacks to serve as the lineart but on the other one, I completely removed it byhaving 3 or 4 passes of the brush.

That is my entry for this week. I think my color combinations are slowly getting there. There's obviously still a lot of room for improvement but I can definitely see the improvement.
𝔇𝔦𝔰𝔠𝔩𝔞𝔦𝔪𝔢𝔯
- This post is an entry for Splinterland's Social Media Contest.
- Other sources that I do not own are cited under their respective photos. Photos and drawings without cited sources are mine and made for this post.
- Animated Banners and Dividers are edited in Canva Pro.
- Some of the fonts used are from instafonts.io
If you're interested in playing the game, support me by registering using my referral link here
ᕼᗩᐯE ᖴᑌᑎ ᗪᖇᗩᗯIᑎG!
Nice work. 😊
!1UP
Thank you for the support :)
You have received a 1UP from @thecuriousfool!
@monster-curator, @oneup-curator, @fun-curator
And they will bring !PIZZA 🍕.
Learn more about our delegation service to earn daily rewards. Join the Cartel on Discord.
I gifted $PIZZA slices here:
@curation-cartel(9/20) tipped @konaqua (x1)
Send $PIZZA tips in Discord via tip.cc!
Thanks for sharing! - @alokkumar121
