The Demon Lord Shall Not Fall


Introduction
With the right rules and abilities, he becomes a strong tank that protects every other monster. His Flying, Taunt, and good health and armor work together in a very natural way. Today, we look at why this monster fits so well in a lot of battles and how to build around him.


Helheim Demon has good overall stats. High speed also helps avoiding melee and range attacks along with his other abilities. Helheim Demon also gets better stats as his level goes up increasing his health and damage.
Taunt because it gives good protection for the team. This ability can be used in a lot of ways and can counter a lot of modifiers. This makes each battle easier as you now can expect which monster will receive the brunt of the damage and focusing your defense on that monster makes defending against whatever your opponent will do way much easier.

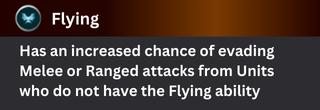
Flying: [Defense] Non Flying monsters that attack this card has their maximum hit chance reduced by 25% during that attack.

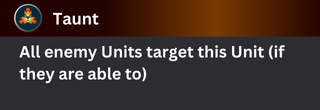
Taunt: [Defense] [Target Modifier] Opponent's monster will be forced to attack this card, if possible.

Corrosive Ward: [Defense] [Damage] Opponent's melee monsters that attack this card has their maximum armor reduced by 2.

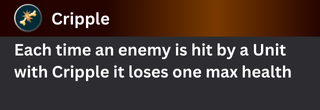
Cripple: [Negative Status] Monsters attacked by this card have their max health reduced by 1.


 |
 Earthquake |
All non-Flying monsters on the board takes 2 melee damage at the start of every round: Earthquake modifier is a strong modifier for Helheim Demon because he has Flying. While other monsters lose health every round, he stays safe from the earthquake damage and keeps evading melee and range attacks on the process. This lets your team slowly win as the opponents fall apart from the damage at multiple angles. |
 |
 Thick Skinned |
All monsters gain Shield.: Thick Skinned modifier works extremely well because Helheim Demon has Taunt and Shield, which makes him effective against melee and range attacks. With both effects active, even strong melee and ranged damage is greatly reduced. This allows him to protect your team much better while your backline deals constant damage. |
 |
 Equal Opportunity |
All monsters on the board gains the Opportunity ability that changes the targetting mechanics to "Opponent's Monster with the least health.": Equal Opportunity modifier can be helpful because Taunt forces opponents to hit Helheim Demon instead of your low-health monsters. While the enemy loses the benefit of targeting weaker units, your team still gains full value from the modifier. This gives you a big advantage when fighting in this modifier. |


 |
 |
Swiftness: [Stat Modifier] [Positive Status] As long as this monster is alive, all friendly monsters has their max speed increased by 1. Tips: Swiftness is great for Helheim Demon since he already has high speed and Flying. Higher speed makes him even harder to hit, especially against melee and ranged monsters. This gives him better survivability and lets your team avoid crumbling with their positioning. |
 |
 |
Triage: [Support] At the start of this monster's turn, restore the friendly monster's health, that is not on 1st position, by 1/3 of its max health. This ability will prioritize the monster with most damage to its health. Tips: Triage is helpful because it keeps your backline alive while Helheim Demon holds the front. Any unit that can heal him, like Corrupted Healing or Triage, keeps the pressure off your team. This creates a strong, steady defensive loop that is hard for opponents to break. |
 |
 |
Resurrect: [Stat Modifier] The first time that another friendly monster dies from an attack, immediately restore its health by 1 with max armor. Tips: Resurrect can be very strong when used with a Taunt monster. Bringing Helheim Demon back gives your team more time and more protection. Even a single extra life but full armor can turn a losing battle into a winning one depending on the opponent's lineup. |


I have two strategies for this game. First is to do it normally. Halfling Refugee and Helheim Demon tanks the opponents while Arachne Weaver heals them with Corrupted Healing and the other monsters are used for damage. The other strategy is to use the first strategy to delay battle until Little Sister gets big with her Life Leech then let Arachne Weaver support her with Corrupted Healing. On both of these strategies, since Thick Skinned modifier gives Shield to everyone, I used as much magic damage as I can to not get any disadvantages from this modifier while reaping the benefits.

Lineup

Thalgrimore
Thalgrimore is the archon you can get for free with the Campaign Mode. He costs quite a bit of mana but the -1 max health isn't really bad as a trade-off since your main goal in the game is to reduce all opponent's monster's health to 0. Just using this archon makes you 1 step into that goal automatically.

Halfling Refugee
Halfling Refugee has a very low mana cost of 1 making him a reliable emergency tank. He can block a decent amount of damage with his 6 health at low levels and that's really all he needed to do. The damage he does is just a bonus.

Helheim Demon
Helheim Demon is the core tank of this team because he has Taunt and high defensive power. When combined with the Thick Skinned rule, his Shield ability allows him to reduce damage from melee and range monsters. He also has magic damage, letting him defend and still deal some damage over time.

Kelan Gaines
Kelan Gaines brings decent magic damage that cannot be blocked by armor. His Snipe ability helps him hit backline targets and weaken important enemy units skipping the hard to kill tanks. This makes him valuable for breaking through the opponent's damage early.

Little Sister
Little Sister is added as a backup plan in case the front line dies. She may not have high magic damage but her Life Leech lets her scale throughout the match. Over time, she becomes harder to kill accumulating huge health while still dealing consistent damage.

Arachne Weaver
Arachne Weaver brings Corrupted Healing which helps your whole team recover when opponents damaged them. While it may not be ideal in long battles because Corrupted Healing takes max health each time, it still offers stronger support than others early on. Healing everyone at once is something unique to this ability unlike other healing abilities in the game.


Since the Thick Skinned modifier gives Shield to everyone, I decided to focus on using magic damage to not be able to be inhibited by the modifier. This means Shield is not stopping my attacks while also getting the advantage from it. I have a few units that can tank and also Helheim Demon that can redirect some of the damage as well while Arachne Weaver heals my team for more sustain. This loop can withstand a huge round of beating and as long as I kill the opponent's Dread Tafarian, I should win this battle.


Helheim Demon is one of those tanks that gets better the more you understand how he works. When he gets the right combo, rules, team, he becomes very hard to bring down and can carry you through long fights. One big advantage of this card is that he is cheap to rent so you wouldn't be having problems using him most of the time in your battles. Just remember that you also need the appropriate leveled archon in order to use the unit to its level.
Building a team around him is simple and fun because he works well with healers and defensive abilities. If you need a good defense where your opponent struggles to break your tank, he is a great pick. Try different lineups and see which one fits your style.


- This post is an entry for Splinterlands Social Media Contest.
- Animated Banners and Dividers are edited in Canva Pro.
- Other sources that I do not own are cited under their respective photos.
- Some of the fonts used are from instafonts.io
If you're interested in playing the game, support me by registering using my referral link here

https://bsky.app/profile/did:plc:fhsritgaf5jeg75ojwtvhnff/post/3m7cwzr46bc22
https://bsky.app/profile/did:plc:fhsritgaf5jeg75ojwtvhnff/post/3m7cwzr46bc22
The rewards earned on this comment will go to the author of the blog post.
Congratulations @konaqua122! You have completed the following achievement on the Hive blockchain And have been rewarded with New badge(s)
Your next target is to reach 3000 upvotes.
You can view your badges on your board and compare yourself to others in the Ranking
If you no longer want to receive notifications, reply to this comment with the word
STOPCheck out our last posts:
View or trade
LOHtokens.@ladiesofhive, you successfully shared 0.1000 LOH with @konaqua122 and you earned 0.1000 LOH as tips. (20/50 calls)
Use !LADY command to share LOH! More details available in this post.
Thanks for sharing! - @mango-juice
