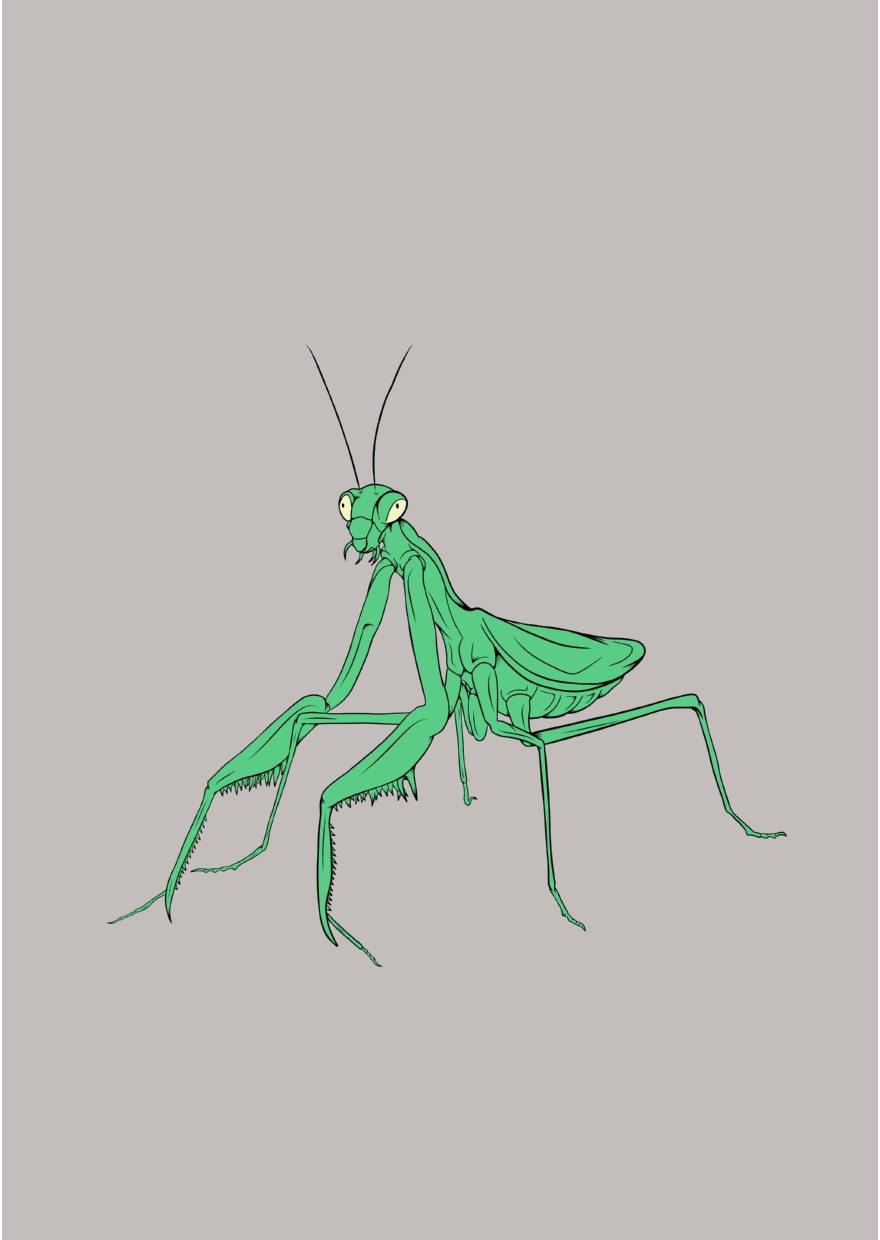
[ENG/ESP] Splinterlands Art Contest Week 202- My version Mantoid
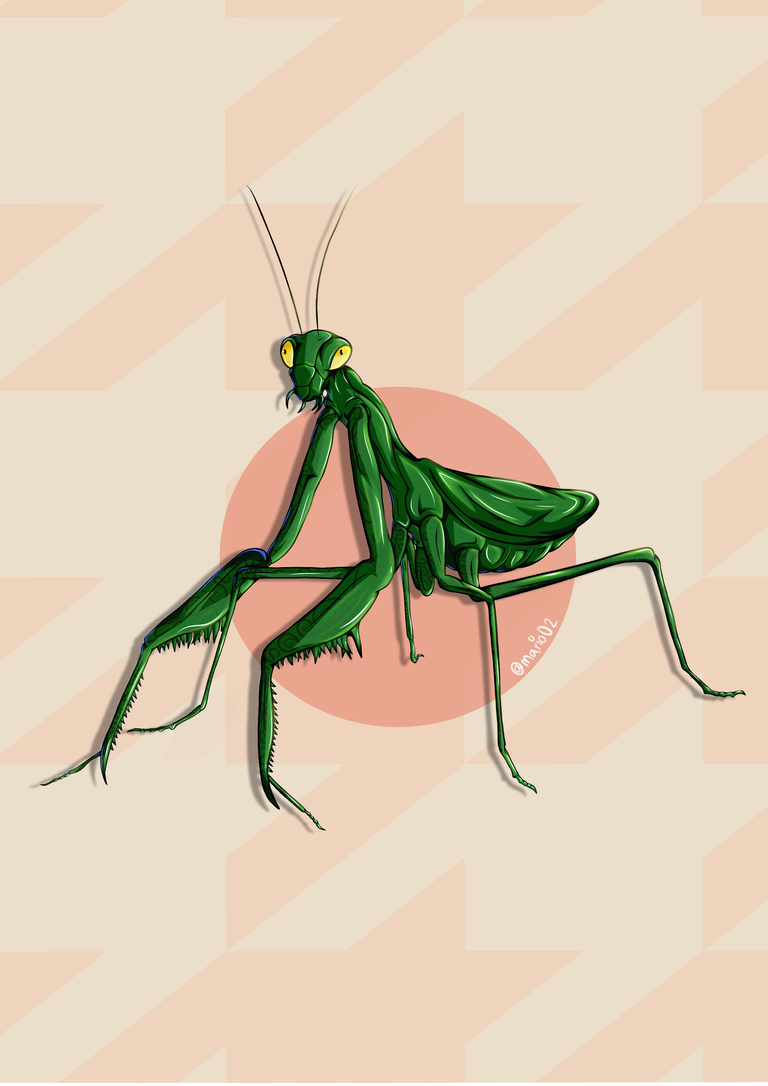
A big greeting to all of you users of the #Blockchain community of #Splinterlands. This time I want to share my entry a bit late for this week's #202 art contest, so I'll be showing you a bit of the procedure I went through to make this illustration. The character I chose for the contest is called Mantoid, a character corresponding to the Earth element. This time I wanted to vary a little and change the element of the character because usually I usually make the element of death, so I dared to look for another type of character and take this as a challenge for me, since I decided to make it using mainly a single colour or a single tone so I wanted to make my own version of it. So without further ado, let's start.
Un gran saludo para todos ustedes usuarios de la comunidad #Blockchain de #Splinterlands. En esta oportunidad quiero compartir mi entrada un poco tarde para el concurso de arte #202 correspondiente a esta semana, por lo que les estaré mostrando un poco el procedimiento que lleve a cabo para realizar esta ilustración. El personaje que elegí para el concurso es el llamado *Mantoid * personaje correspondiente al elemento Tierra. Esta vez quise variar un poco y cambiar el elemento del personaje ya que por lo general suelo realizar los del elemento de muerte, por lo que me atreví a buscar otro tipo de personaje y tome este como un reto para mí, ya que decidí realizarlo utilizando principalmente un solo color o bien un solo tono por lo que quise realizar mi propia versión del mismo. Así que sin más preámbulos comencemos.
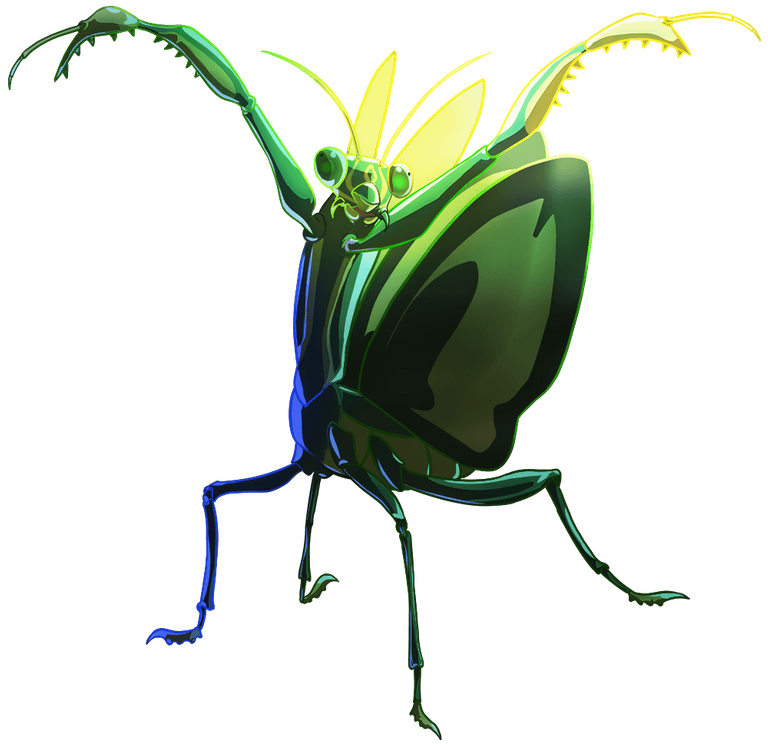
REFERENCE

Process | Procedimiento
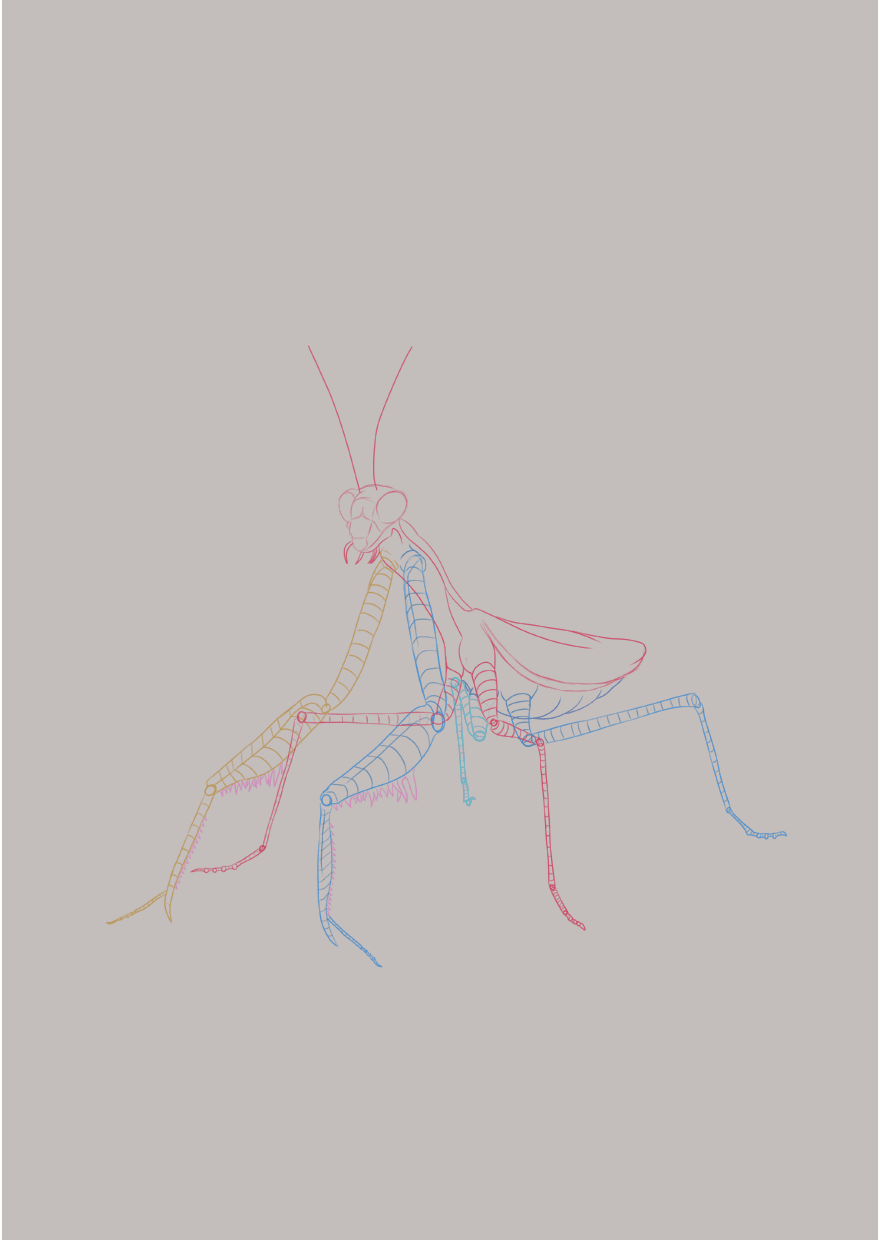
- Step #1:
I started making a sketch of the character which I was dividing it by colours to guide me to draw the main lines. For this I used a mantis as a reference to later give the desired shape to the character. Once the sketch was finished the following thing was to add the main lines to form the final lineart of the character in which I added some lines of details so that it didn't look so simple and thus to finalize the same one.
- Paso #1:
Comencé realizando un boceto del personaje el cual fui dividiéndolo por colores para guiarme al trazar las líneas principales. Para el mismo utilice como referencia a una mantis para posteriormente ir dándole la forma deseada al personaje. Una vez terminado el boceto lo siguiente fue agregar las principales líneas hasta formar así el lineart final del personaje en el que agregue algunas líneas de detalles para que no se viera tan simple y así finalizar el mismo.
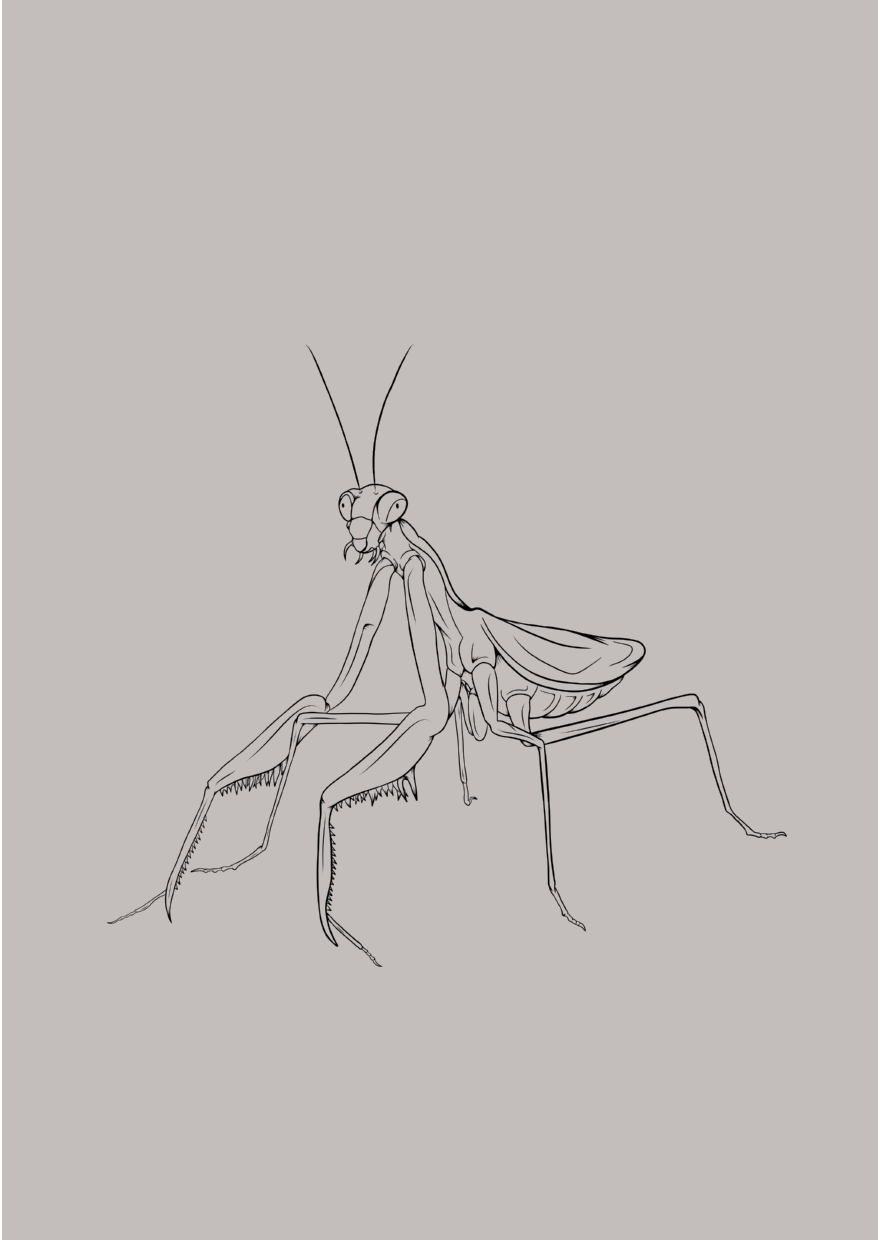
- Step #2:
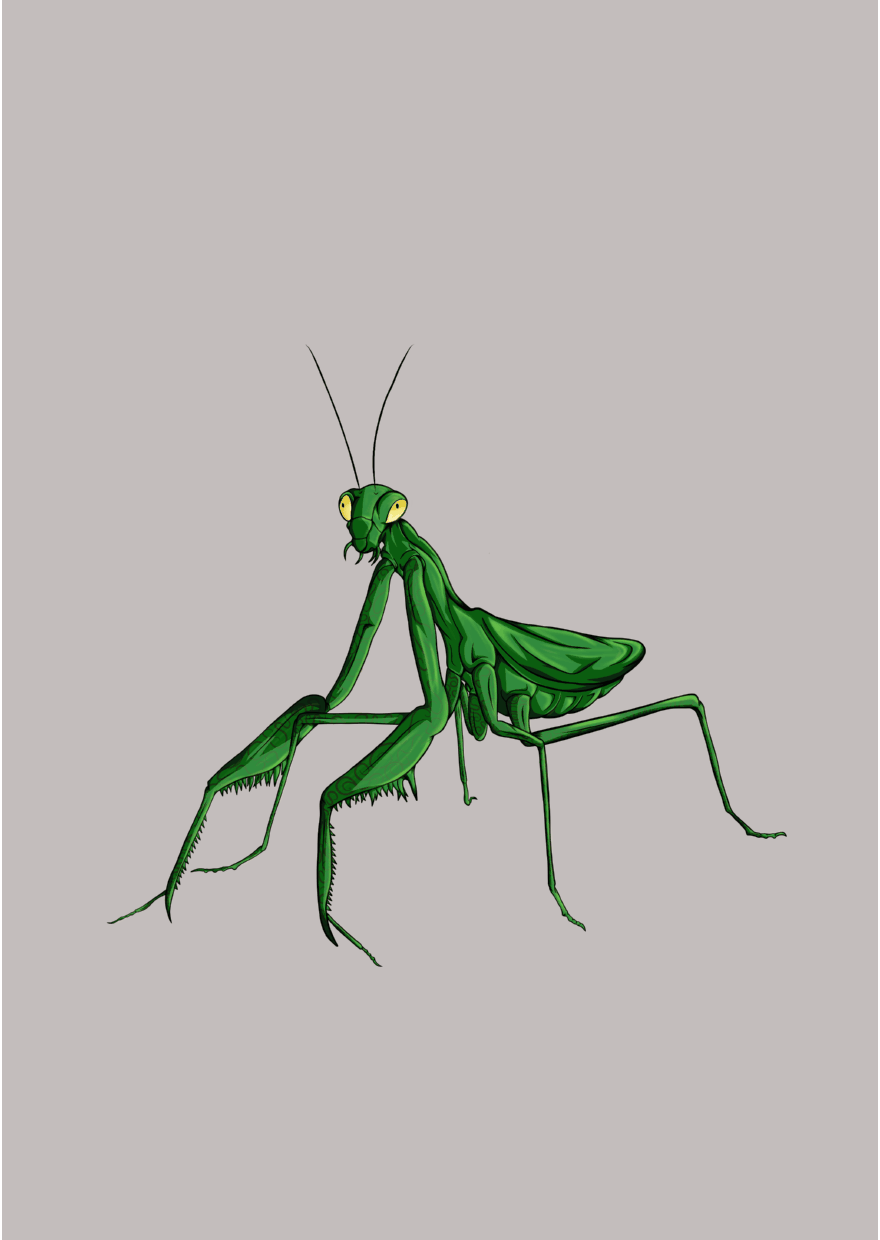
Finished the lineart of the character with all the details added the next thing I did was to add the base colours to the character in which I used a similar tone to the reference character.
- Paso #2:
Finalizado el lineart del personaje con todos sus detalles agregados lo siguiente que hice fue ir colocando los colores base al personaje en el cual utilice un tono similar al personaje de referencia.
- Step #3:
Once I placed the base colours which was literally a single colour the next was to place the shadows, this as always took me some time because I wanted to give a little more volume to the character to not look so flat and having a single base colour throughout the character I had to try to highlight the most important parts of it, so I was playing with the colour making it darker and darker. At the end of this process I wanted to give a different touch to the character so I drew some lines in the form of spirals so to speak and I placed them in all the legs of the character in a layer in overlapping mode so that they didn't interfere so much in the character.
- Paso #3:
Una vez coloque los colores base el cual fue literalmente un solo color lo siguiente fue colocar las sombras, esto como siempre me tomo algo de tiempo ya quise darle un poco más de volumen al personaje para que no se viera tan plano y al tener un solo color base en todo el personaje debía tratar de resaltar las partes más importantes del mismo, por lo que fui jugando con el color haciéndolo cada vez más oscuro. Al finalizar este proceso quise darle un toque diferente al personaje por lo que dibuje algunas líneas en forma de espirales por así decirlo y se las coloque en todas las patas al personaje en una capa en modo superposición para que estas no interfirieran tanto en el personaje.
- Step #4:
Finished the shadows of the character the next thing was to place a little light on it so that the character could stand out a little more, so little by little I was placing them with a more yellowish tone and some white lines to give a little more volume. As a final touch I added the silhouette of the character as a shadow.
- Paso #4:
Finalizadas las sombras del personaje lo siguiente fue ir colocando un poco de luz en el mismo para que el personaje pudiera destacar un poco más, por lo que poco a poco fui colocando las mismas con un tono más amarillento y algunas líneas color blanco para dar un poco más de volumen. Como toque final agregue la silueta del personaje en forma de sombra
- Step #5:
Once finished all the details to finish I wanted to make a simple background for this character, so I used a kind of mosaic in which I added a circle in the centre to finish adding the character.
- Paso #5:
Una vez terminado todos los detalles para finalizar quise realizar un fondo algo simple para este personaje, por lo que utilice una especie de mosaico en el que agregue un circulo en el centro para finalizar agregando al personaje.

And so I made this illustration for the contest. I'm very happy with the final result, believe it or not this drawing took me some time, about 3 days in 3 hours days. In spite of having taken so long, I feel that I am advancing a little more in my self-learning and I am very happy to share it with all of you. I hope you liked it, if you want you can support me and/or leave me a comment with some advice or something like that, it would be very helpful for me. Thank you very much for watching to the end and see you in a next contest!
Y así realice esta ilustración para el concurso. Estoy muy contento con el resultado final, aunque no lo crean este dibujo me llevo algo de tiempo, unos 3 días en jornadas de 3 horas. A pesar de haberme tardado tanto cada vez siento que estoy avanzando un poco más en mi autoaprendizaje y me da mucho gusto compartirlo con todos ustedes. Espero que haya sido de tu agrado si deseas puedes apoyarme y/o dejarme un comentario con algún consejo o algo asi, seria de mucha ayuda para mi. Muchas gracias por ver hasta el final y nos vemos en un proximo concurso!
Tools Used | Herramientas Utilizadas:
- Medibang Paint Pro PC version 64 bits
- Huion H610 PRO V2

Translated with DeepL (free version)
Thanks for sharing! - castleberry#6859

Thanks!!
Beautiful work, looks almost alive haha!
!1UP
Click this banner to join "The Cartel" discord server to know more.
Thanks for the support friend!!
You have received a 1UP from @kwskicky!
@monster-curator, @oneup-curator, @pal-curator
And they will bring !PIZZA 🍕.
Learn more about our delegation service to earn daily rewards. Join the Cartel on Discord.
You draw animals so well, still have last week entry in my head, this is perfect 🥰