[ES/EN] It's time to get your armor!


¡Bienvenidos!
Hacia ya bastante tiempo que no hacia un Battle Mage Secrets en mi blog, y me hace muy feliz estar de vuelta una vez trayendoles estos tutoriales de batalla ¡y vaya que me costo! al parecer el ruleset armored up no es muy prioritario en bronce, ya que de 50 batallas aparecio una sola vez, y para colmo mi oponente no se presentó a la batalla. Fue en un torneo donde pude encontrarlo de nuevo, y fue excelente pues esa batalla fue bastante mas emocionante y con mas reglas, ya que en torneos es comun tener de batallas de tres rulesets y no uno, como suele ser en Bronce.
Pero no nos vayamos por las ramas y vamos a los que nos compete en este post, que es el ruleset #ArmoredUp.
Welcome back!
It has been a long time since I did a Battle Mage Secrets in my blog, and I am very happy to be back once again bringing you these battle tutorials and it cost me a lot! apparently the ruleset armored up is not very high priority in bronze, since in 50 battles it appeared only once, and to top it off my opponent did not show up for the battle. It was in a tournament where I could find it again, and it was excellent because that battle was much more exciting and with more rules, since in tournaments it is common to have three ruleset battles and not one, as it usually is in Bronze.
But let's not go into the branches and let's go to what concerns us in this post, which is the ruleset #ArmoredUp.

 Armored Up
Este es uno de los rulesets mas ''clasicos'' por decirlo de alguna manera. Su efecto es bastante simple, cuando este está en la batalla, añade +2 de armadura a todas las cartas que participen en dicha batalla, esto fuera de cualquier otro efecto o cantidad de armadura presente, por ejemplo, si una carta tiene 3 de armadura, con este ruleset tendrá 5, 3 de base mas 2 del ruleset. Si hay por ejemplo, un Rust en el equipo oponente, la armadura se restara desde 5.
¿Cómo le sacas provecho a este ruleset?
Al ser de los rulesets mas antiguos la verdad es muy facil sacarle provecho al ruleset y tambien hacerle counter, de entrada usar ataques magicos ignora la armadura asi que no importa si una carta tiene 50 puntos en esa estadistica, por lo cual, la magia es el primer counter. Luego tenemos la habilidad Rust o debuffs de ciertos invocadores como Wizard of Eastwood, que directamente reduce 2 puntos de armadura, dejando el ruleset anulado pero solo para el oponente.
Realmente no es nada dificil ni sacarle provecho ni enfrentar a este ruleset, el tema se pone dificil es cuando el ruleset se combina con otros rulesets haciendo que tengamos que empezar a maniobrar y estudiar mas a fondo todo.
Con practica seguro que lo vas a ir dominando, asi que a darle con todo.

This is one of the most ''classics'' rulesets on the game to speak from certain way. Its effect is quite simple, when it is in battle, it adds +two points of armor to all cards participating in the battle, this out of any other effect or amount of armor present, for example, if a card has 3 armor, with this ruleset it will have 5, 3 base plus 2 from the ruleset. If there is for example, a Rust in the opponent's team, the armor will be subtracted from five.
How do you take advantage of this ruleset?
Being one of the oldest rulesets on Splinterlands, it is really easy to take advantage of the ruleset and also to counter it with the actual cards, first of all using magic attacks ignores armor so it doesn't matter if a card has 50 points in that stat, so magic is the first counter. Then we have the Rust ability or debuffs of certain summoners like Wizard of Eastwood, which directly reduces 2 points of armor, leaving the ruleset nullified but only for the opponent.
It is really not difficult to take advantage of this ruleset, the issue becomes difficult is when the ruleset is combined with other rulesets making us have to start to maneuver and study more thoroughly everything.
With practice you will surely master it, so let's give it everything.


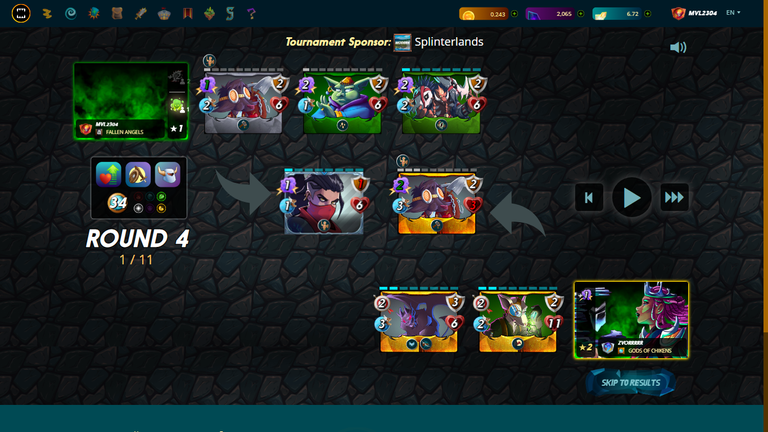
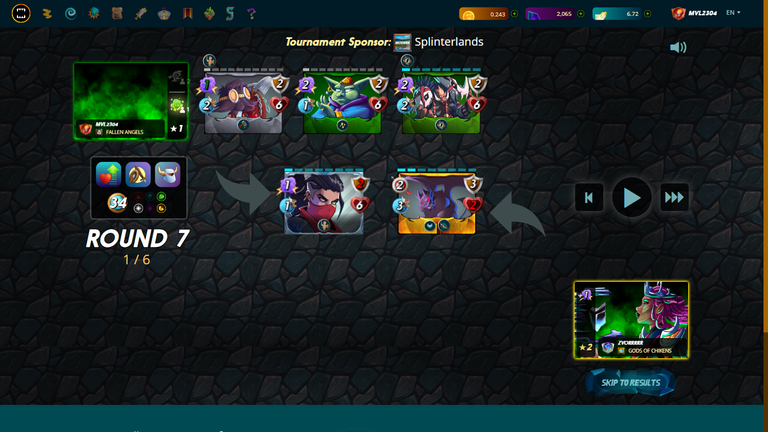
Equalizer - Rise of the Commons - Armored Up - 34 Mana Cap
Round 1
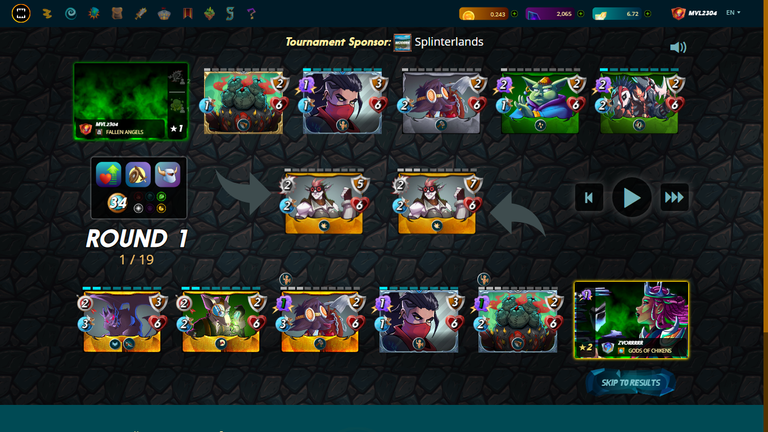
Antes que nada, quiero dejar muy en claro que yo no uso ningun bot de batalla, todas mis partidas las juego 100% manual y lo digo porque me resulta super curioso que mi oponente haya enviado las mismas cuatro cartas que envie yo, en la misma posicion, tal cual. ¿Pensamos igual? ¿Estoy al nivel del Xbot? ¿Casualidad? quien sabe. Use a Dumacke Orc como tanque por la gran armadura que tiene, mas el bono del ruleset y con el equalizer es un tanque para todo, Lurking Puffer es mi tanque secundario, con su habilidad Corrosive Ward funciona genial para tambien hacerle algo de counter a este ruleset. Moxian Rebel para darle ataque magico tanto al Lurking como a mi Scavo Hireling, que en este ruleset y con ataque magico es un 10/10. De resto mi Goblin Psychic para curar a mis tanques y el daño increible de Suidae Shaman, una de mis cartas favoritas.
First of all, I want to make it very clear that I don't use any battle bot on Splinterlands right now, all my games are played 100% manual and I have to say this because I find it very curious that my opponent has sent the same four cards that I sent, in the same position, just like that. Do we think alike, am I at the Xbot level, coincidence, who knows? I used Dumacke Orc as a tank because of the great armor he has, plus the bonus of the ruleset and with the equalizer he is a tank for everything, Lurking Puffer is my secondary tank, with his Corrosive Ward ability it works great to also counter this ruleset. Moxian Rebel to give magic attack to both Lurking and my Scavo Hireling, which in this ruleset and with magic attack is a 10/10. The rest is my Goblin Psychic to heal my tanks and the incredible damage of Suidae Shaman, one of my favorite cards.
Round 2
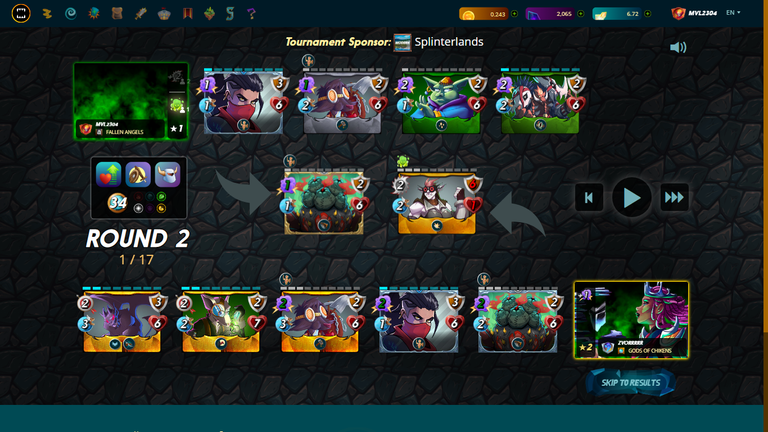
En la primera ronda mi Dumacke cayó victima del daño magico de mi oponente, que enfocó toda su alineacion en eso, el punto positivo era que su tanque estaba a nada de caer gracias al veneno de mi invocador, que por cierto, me encantan estos invocadores nuevos, son muy estrategicos. Desde esta ronda empezó a quedar claro la increible importancia de mi Suidae Shaman, que al hacer 6 puntos de daño era capaz de eliminar a TODOS mis oponentes, claro, en turnos alternos, pero para eso estaba el aguante de mi Goblin, pura estrategia.
In the first round my Dumacke fell victim to the magic damage of my opponent, who focused all his lineup on that, the positive point was that his tank was just about to fall thanks to the poison of my summoner, which by the way, I love these new summoners, they are very strategic. From this round on it started to become clear the incredible importance of my Suidae Shaman, who by doing 6 points of damage was able to eliminate ALL my opponents, of course, in alternate turns, but for that there was the stamina of my Goblin, pure strategy.
Round 3
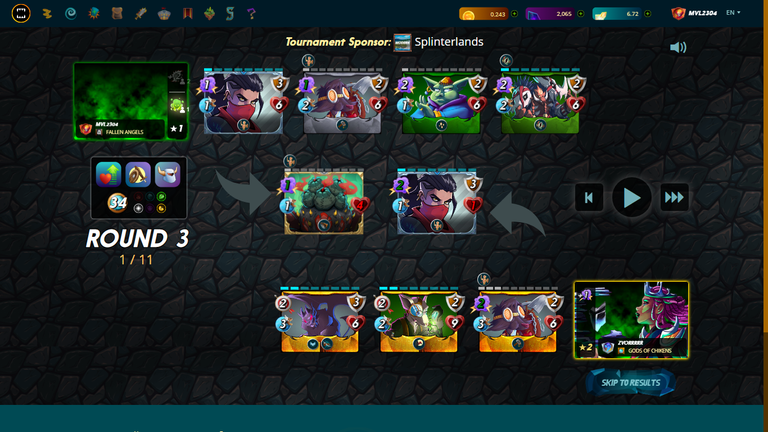
El ataque de mi Suidae fue mortal, dandome ventaja en la batalla, y como ya dije, la curacion de mi Goblin ayuda a mantener en batalla a mi Lurking Puffer, que tambien repara su armadura para defenderse del daño a distancia. Una alineacion bastante normal pero que con los rulesets se vuelve casi invencible en esta batalla.
My Suidae Shaman attack was deadly for my opponent, giving me an numeric advantage in the battle, and as I said above, my Goblin's healing helps keep my Lurking Puffer, who also repairs his armor to defend against ranged damage, in the battle. A pretty normal lineup but with the rulesets it becomes almost unbeatable in this battle.
Round 4
En este punto, no lo parece, pero ya la batalla terminó. Te explico:
Moxian Rebel, con 6 de vida y 3 de armadura va a ser curada por mi Goblin y su armadura reparada por mi Scavo a mayor cantidad de la que mi oponente puede dañarle, ya que en esta ronda mi Suidade hace su ataque mortal contra el Scavo Hireling enemigo. Y si, Venari Seedsmith tiene bastante vida pero el daño que le Gargoya Devil a mi actual tanque se lo lleva la armadura, que siempre sera reparada por mi Scavo, asi que pase lo que pase, esta batalla esta ganada por mi equipo.
At this point, it doesn't seem like it, but the battle is over. I explain:
Moxian Rebel, with 6 health and 3 armor is going to be healed by my Goblin and his armor repaired by my Scavo to a greater amount than my opponent can damage him, since in this round my Suidade makes its deadly attack against the enemy Scavo Hireling. And yes, Venari Seedsmith has enough life but the damage that Gargoya Devil does to my current tank is taken by the armor, which will always be repaired by my Scavo, so whatever happens, this battle is won by my team.
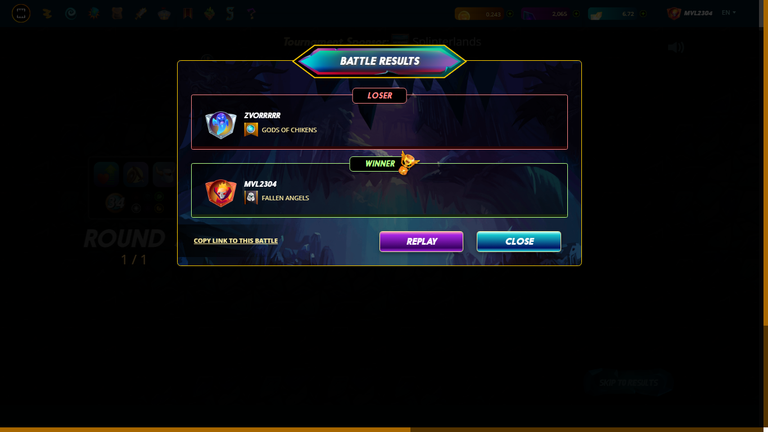

Entender los puntos debiles donde le puedes sacar ventaja a tu enemigo es primordial para convertirte en un buen jugador ¡enfocate en mejorar eso y veras como tu winrate aumentará muchisimo!
Recuerda que toda carta tiene una utilidad real y siempre podras sacarles ventaja si las estudias y analizas bien los datos que tienes a la mano, Muchas gracias por haber leído y espero que te haya gustado, no olvides seguirme si quieres ver mas contenido como este y nos vemos en mi siguiente post. ¡Saludos!
Understanding the weak points on battles where you can take advantage of your enemy is essential to become a good player, focus on improving that and you will see how your winrate will increase a lot!
Remember that every card has a utility in this game and you can always take advantage of them if you study them and analyze well the data you have at hand, Thank you for reading and I hope you liked it, do not forget to follow me if you want to see more content like this and see you in my next post. greetings!


Si eres hispano y quieres unirte a un clan haz click aqui

All game images are taken from the official game website and Splintercards, credits to whom it may concern.


!LOLZ
!PIZZA
lolztoken.com
A hippocrite
Credit: reddit
@mvl2304, I sent you an $LOLZ on behalf of speedtuning
(2/6)
Farm LOLZ tokens when you Delegate Hive or Hive Tokens.
Click to delegate: 10 - 20 - 50 - 100 HP
$PIZZA slices delivered:
@speedtuning(7/10) tipped @mvl2304
Checkout our BDVoter Daily Hive Showcase & Participate into our Daily giveaway to win various prize.
Thanks for sharing! - @yonilkar
