[ESP/ENG] 🎨 SPLINTERLANDS ART CONSTEST - WEEK 240 - MERDAALI GUARDIAN FANART ✍️
Hola a todos! esta es mi primera participación en un concurso de arte semanal de Splinterlands, así que antes de comenzar a mostrar el proceso de dibujo quisiera presentarme. Mi nombre es Hil, pero algunos amigos me llaman "Riolu", de un tiempo para acá comencé a usarlo como mi apodo hasta el punto de que mi alias en el mundo cibernetico es "rioluerr".
Hey everyone! This is my first time participating in Splinterlands's Art Constest, so before I start to show y'all the drawing process, I would like to introduce myself first. My name is Hil, but some friends call me "Riolu", since some years ago I started to use It as my nickname, to the point that It became my alias in the internet as "rioluerr".
Ahora bien, tal como ya mencione antes, esta es mi primera vez participando en estos concursos. Un amigo me convenció de participar, aunque debo admitir que sigo dudando de si fue buena idea, ya que echando un vistazo a otras publicaciones de la comunidad vi que hay un muy buen nivel de dibujos que me parece hasta un insulto subir el mio jajaja. Pero aun así me he propuesto a practicar bastante para llegar pronto a ese nivel.
Well, as a said before, this is my first time taking part in this kind of contests. Actually, a friend convinced me to enter, but I have to admit that I'm still doubting If It was a good idea because I've seen so many good drawings that I get ashamed of showing mine hahah. But after all I have decided to put my best and improve a lot to get to that level of greatness really soon.

📖 Referencia Original del Personaje /// Character Reference
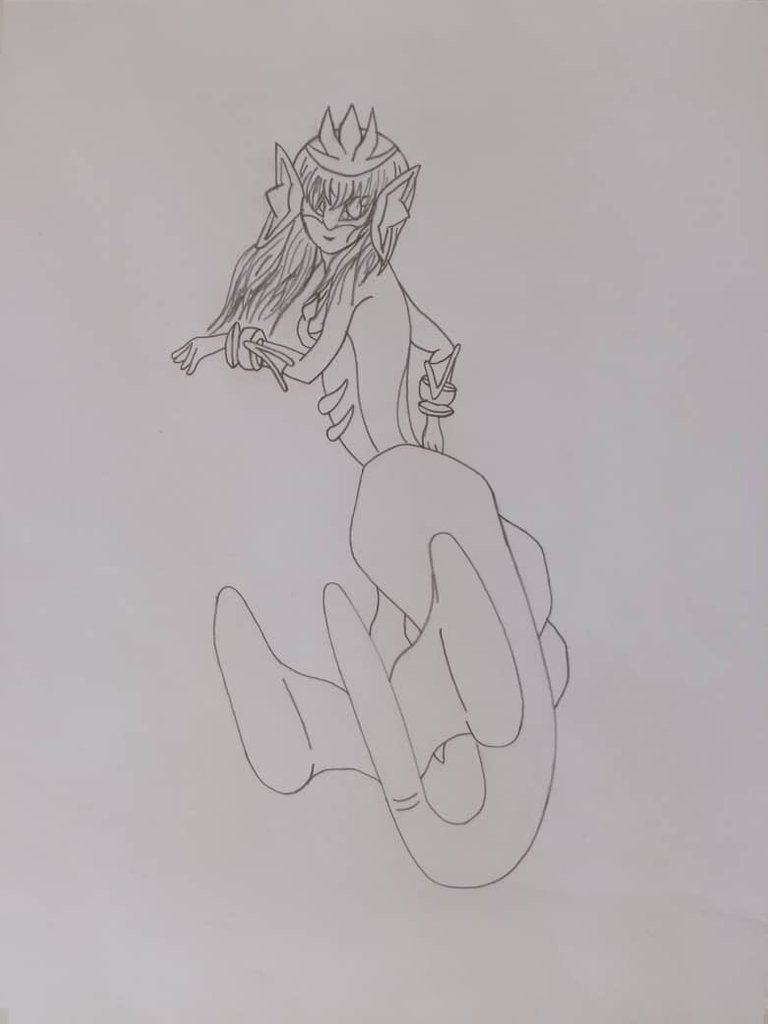
Para mi participación decidí dibujar la carta Merdaali Guardian ya que me gusta dibujar personajes con cuerpos parecidos a la anatomía de una sirena.
For my participation I decided to draw the card Merdaali Guardian because I like to draw characters with an anatomy alike to a siren.

Fuente / Source
✍️ Materiales Empleados /// Materials
Imagen de pvproductions en Freepik

🎨 Proceso de Dibujo /// Drawing Process
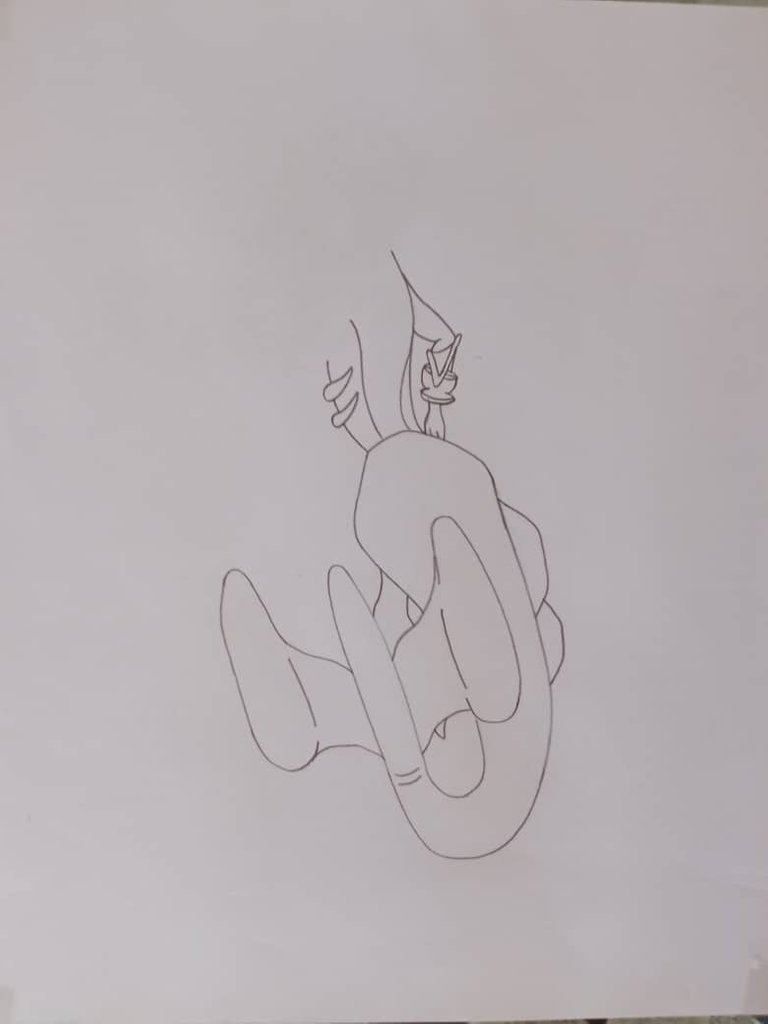
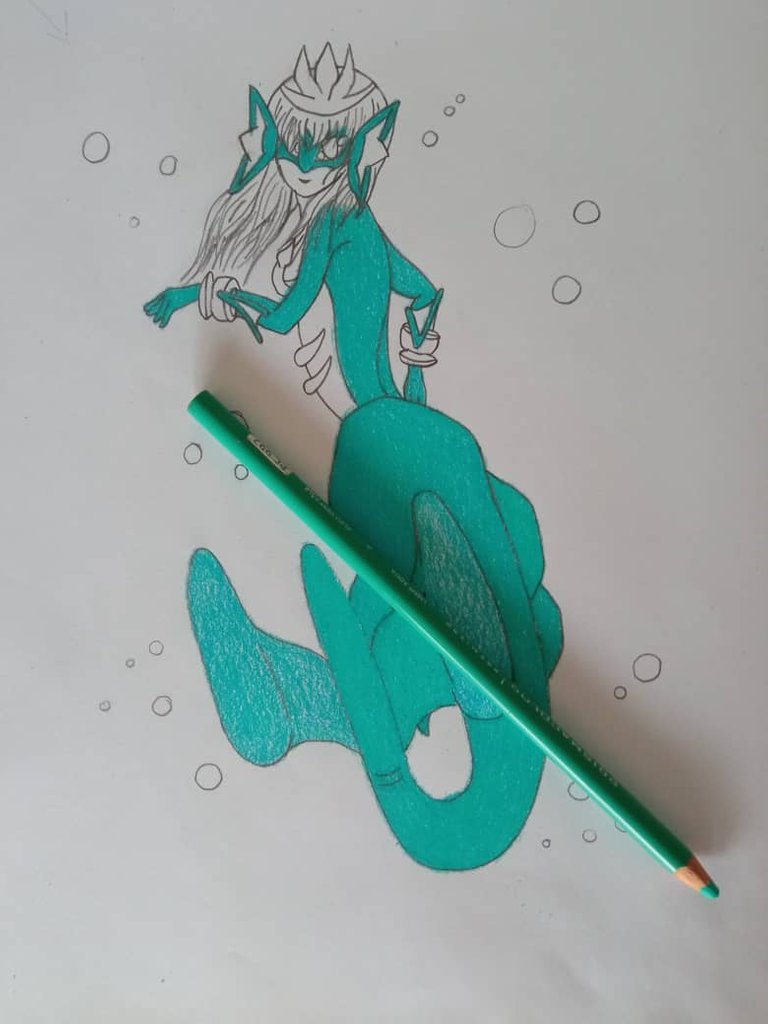
Para comenzar con este dibujo, realicé varios bosquejos con la pose seleccionada hasta quedar conforme ya que este boceto sería la base del dibujo. Una vez hecho esto procedí a calcar en una hoja en limpio para poder aplicar color en una hoja más limpia.
For the first step, I made some sketches of the pose of the body until I got satisfied with the result, so I could use It as the base for my drawing. Then I proceeded to trace the sketch in a new paper sheet so I could start applying colors in a clean surface.
Como siguiente paso, comencé a aplicar una capa suave de color aguamarina claro a lo largo de todo el cuerpo (en las zonas que corresponden, claro está).
As the next step, I started applying the light aqua color in almost all the body.
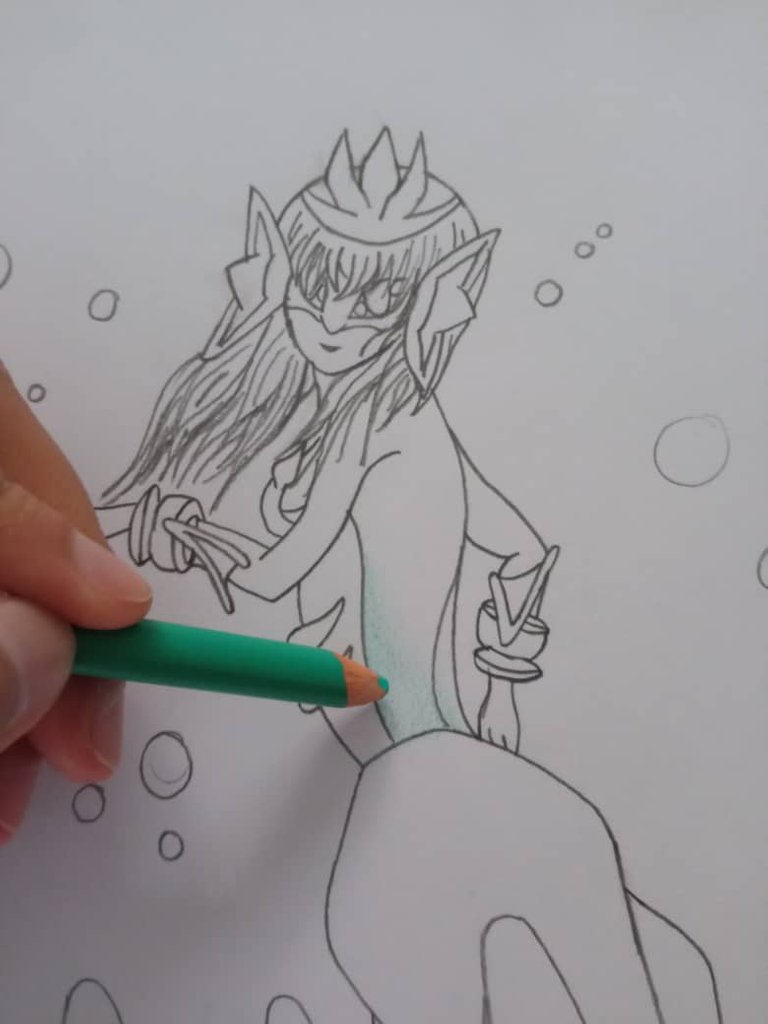
Seguidamente apliqué una capa suave de color aguamarina sobre la capa de color aguamarina claro. Luego de esto apliqué una capa más fuerte de color azul eléctrico.
The following thing that I did was to apply a soft layer of aquamarine color on the light aqua layer. After all of this, I applied a more strong layer of true blue color.
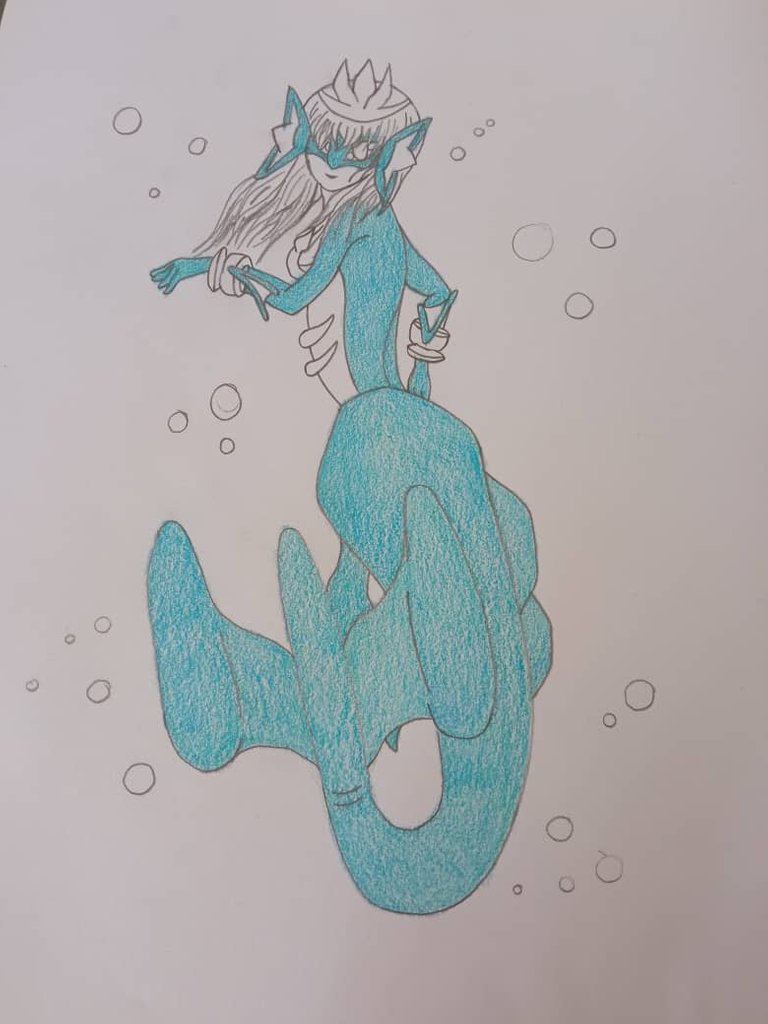
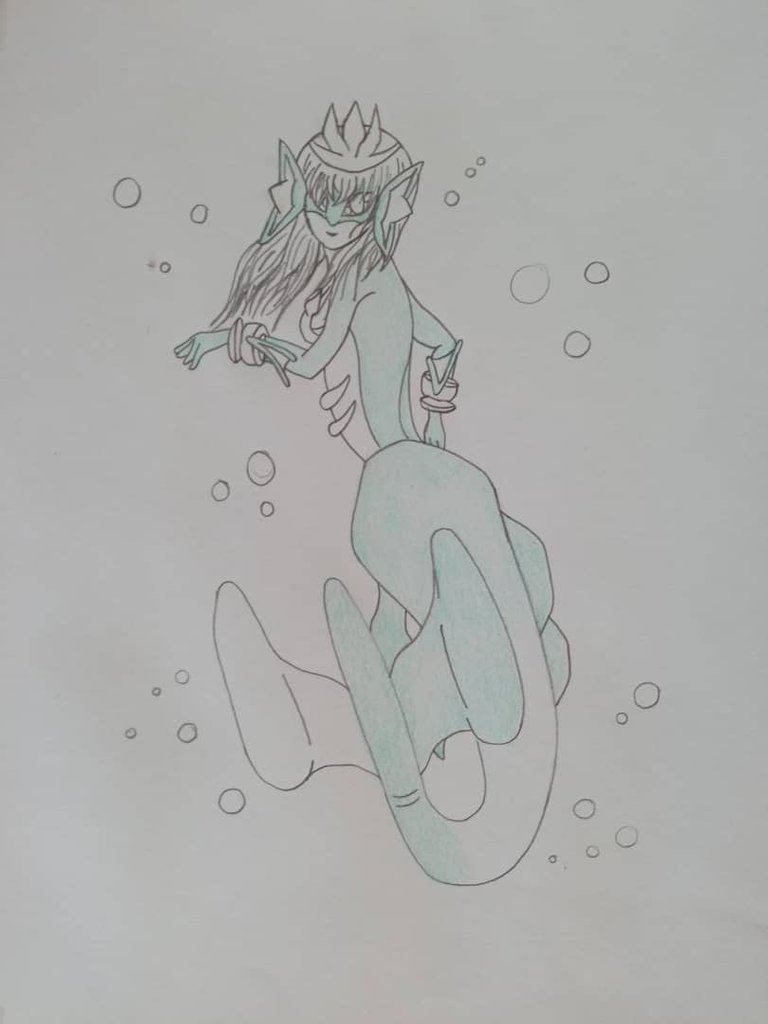
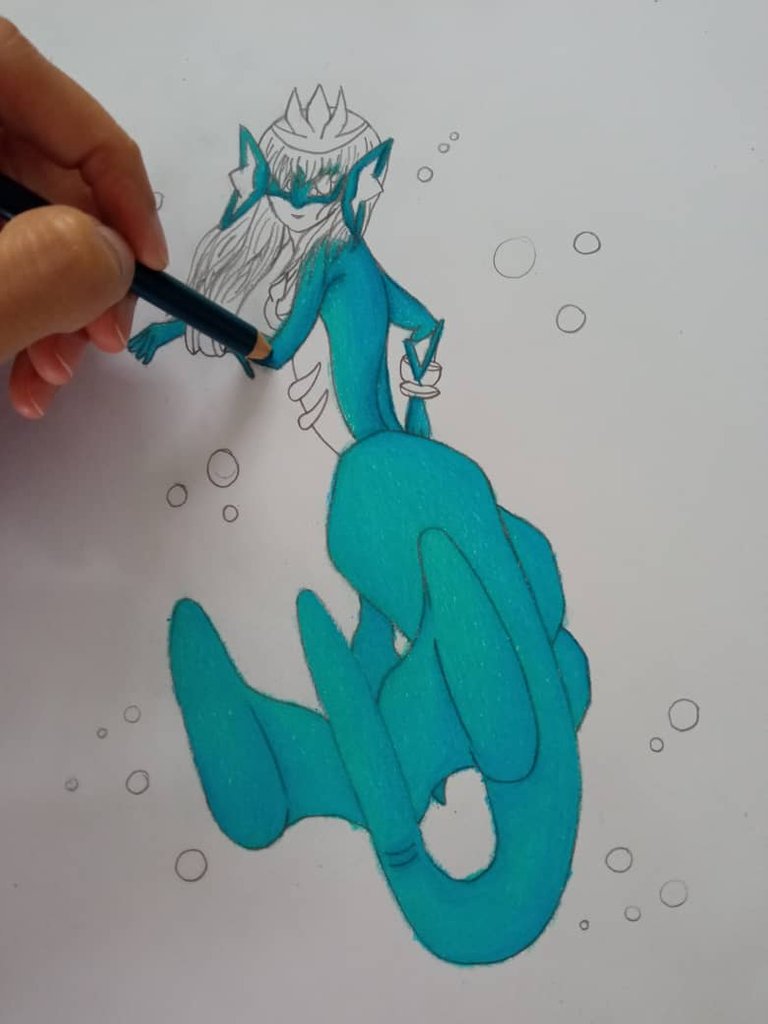
El siguiente paso fue comenzar a aplicar capas mas fuertes de todas las tonalidades de azul y aguamarina mencionadas anteriormente. Para luego rematar las sombras con los colores azul eléctrico y azul rey.
The next step was to start to apply stronger layers of every tonality of blue and aqua that I mentioned before. Then I used the colors peacock blue and true blue to apply some shadows in the body.
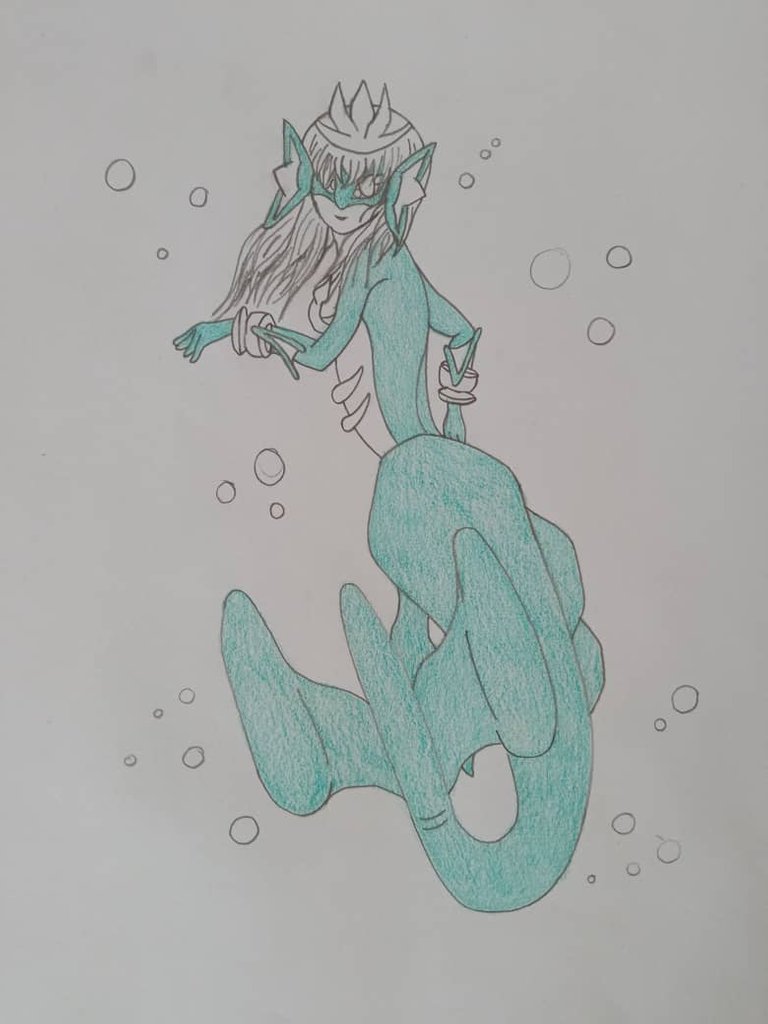
Seguido de esto, procedí a aplicar capas de color amarillo canario y el dorado metálico en la tiara y brazaletes del personaje. Luego comencé a aplicar capas de color rojo amapola, rojo carmín y magenta en todo el área del cabello. Y finalmente rematé el área de los ojos con color morado y violeta, y las zonas restantes del rostro que estaban en blanco los rellene con una suave capa de color crema.
Followed by this, I proceeded to apply some layers of canary yellow color and metallic gold color, in the zones of the crown and bracelets. Then I started to apply layers of poppy red, carmine red, tuscan red and magenta in all the area of the hair. Finally I finished the zones of the eyes with mulberry color and parma violet, and for the area of the face and body that were in blank, I filled them with a soft layer of cream color.
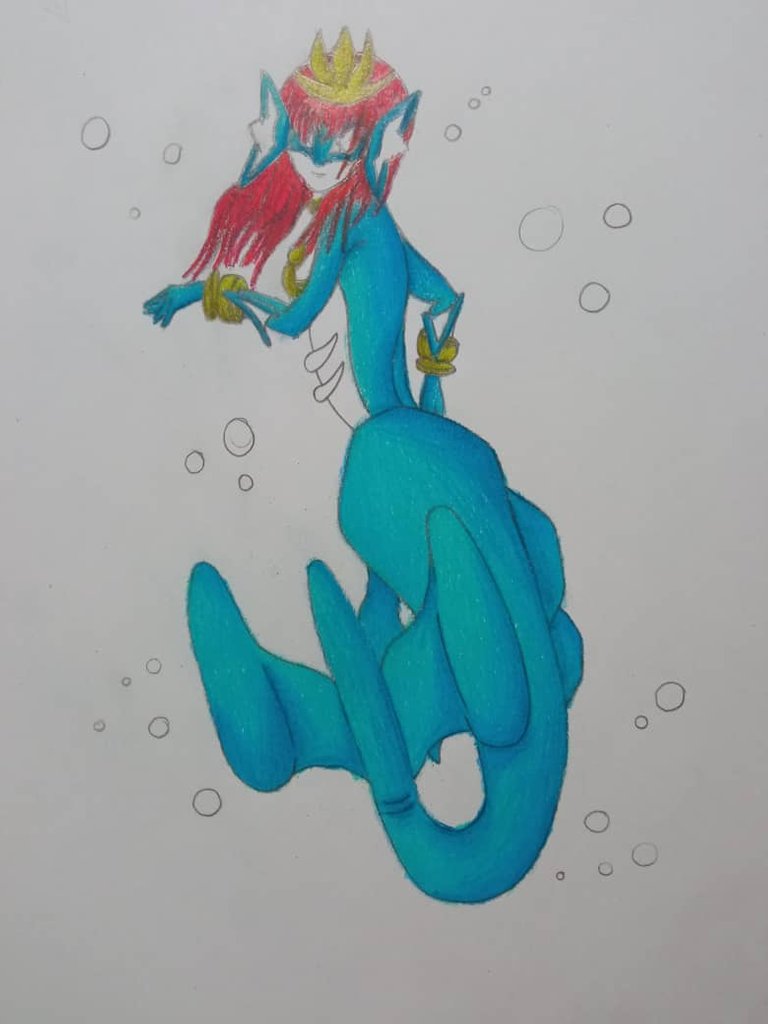
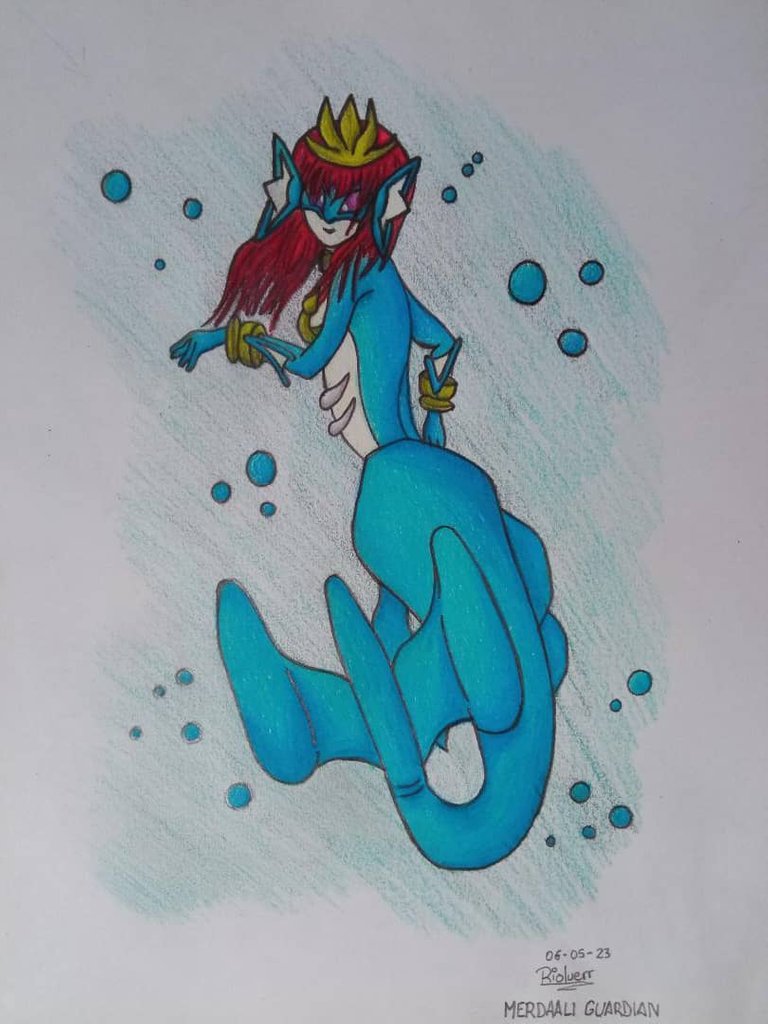
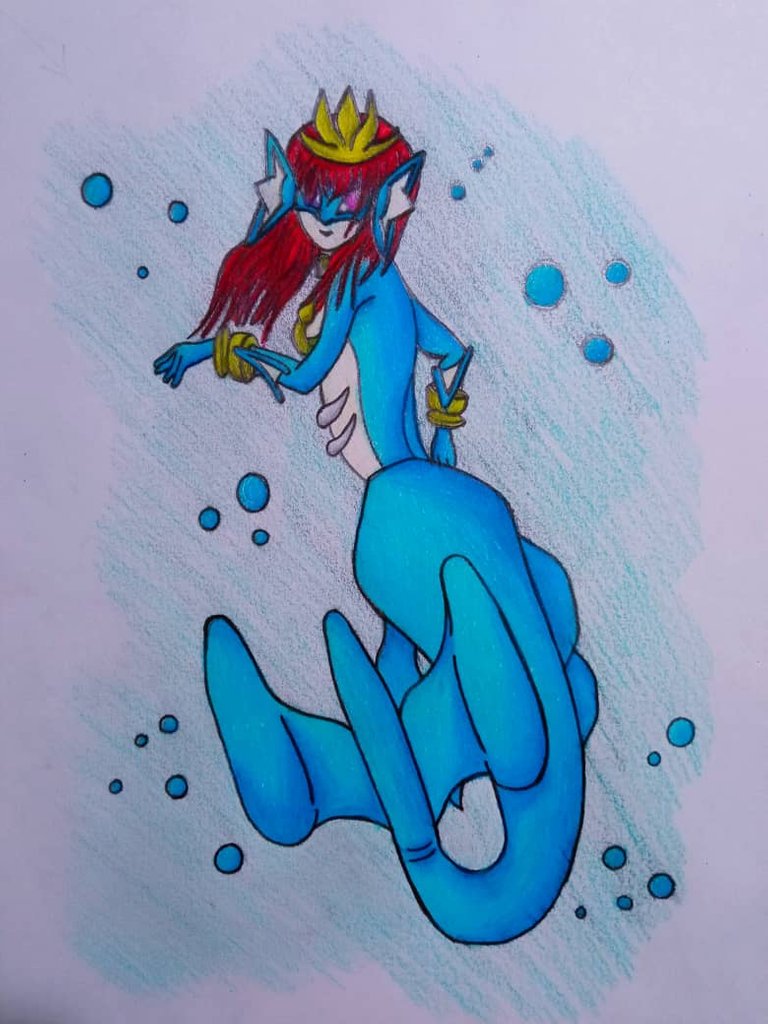
Como último detalle remarque las líneas de todo el dibujo con el lápiz 7B ¡Gracias por leer hasta acá! Aquí les dejo una imagen del resultado final del dibujo, espero que les haya gustado, no duden en dejarme su comentario mas abajo ^^
As final detail, I remarked the lines of the whole drawing with a 7B pencil. Thanks for reading this far! Here I leave an image of the final result of the drawing, I hope you liked it, do not hesitate to leave me your comment below ^^
📱 ¡Sígueme en mis redes! /// ¡Follow me on my RRSS!
👀You can follow me on my social networks so that you are aware of my next works! 👇
💫 Twitter 💫 Deviantart 💫 Instagram 💫 My old Instagram 💫 Furaffinity
Do you know you can win a Chaos Legion pack and many other things just by following some simple steps ?? Check out our Latest Daily Showcase and Participate our latest Giveaway. Thanks
Thanks for sharing! - castleberry#6859
