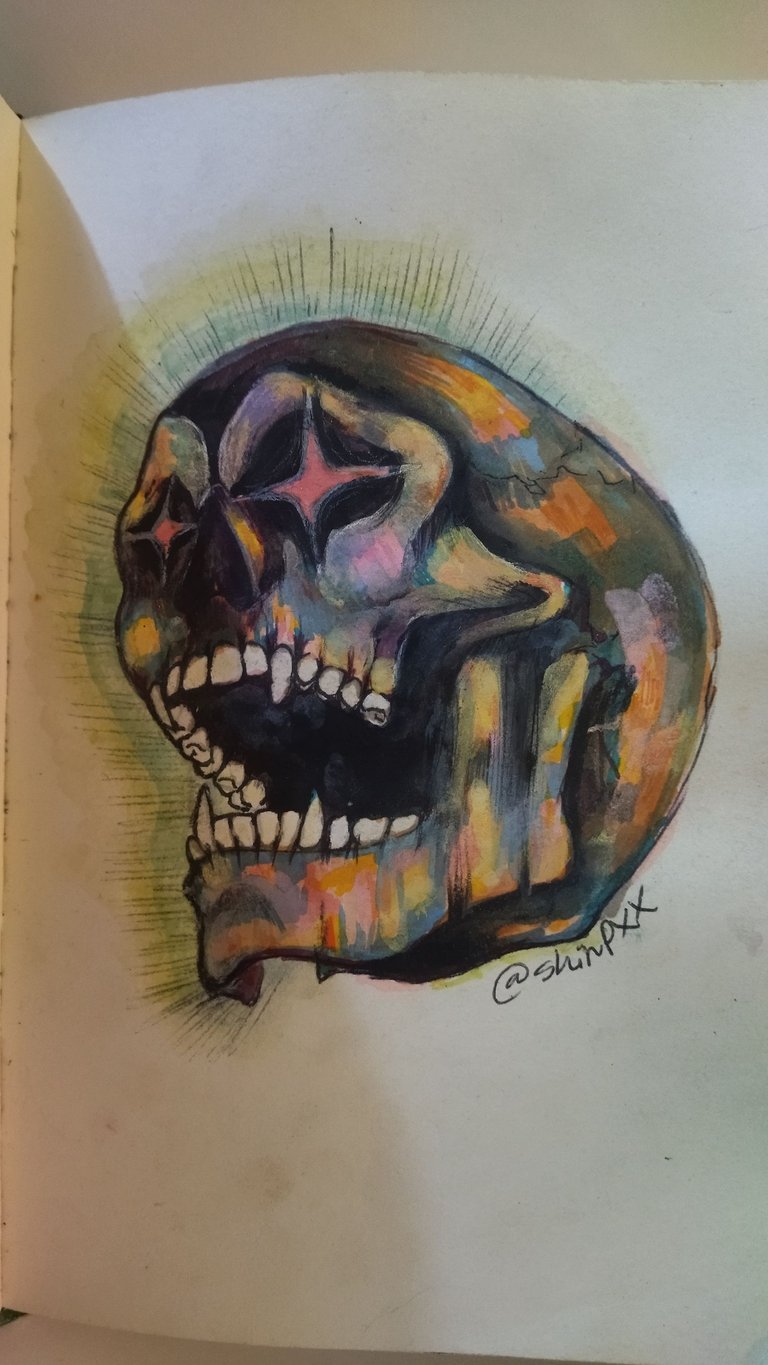
Splinterlands Art Contest | Week 269 | Hungry Skull [ESP/ENG].

Hola queridos artistas de Hive y comunidad HiveDIY y, claramente, a los jugadores de Splinterlands. Para hoy traigo un fanart que realicé el dia lunes en mis clase de diseño mientras escuchaba las entregas de mis compañeros para el concurso semanal de arte de la comunidad de Splinterlands.
Una de las mejores maneras de dar a conocer algo es creando contenido, y por eso me mantengo realizando mis usuales ilustraciones.
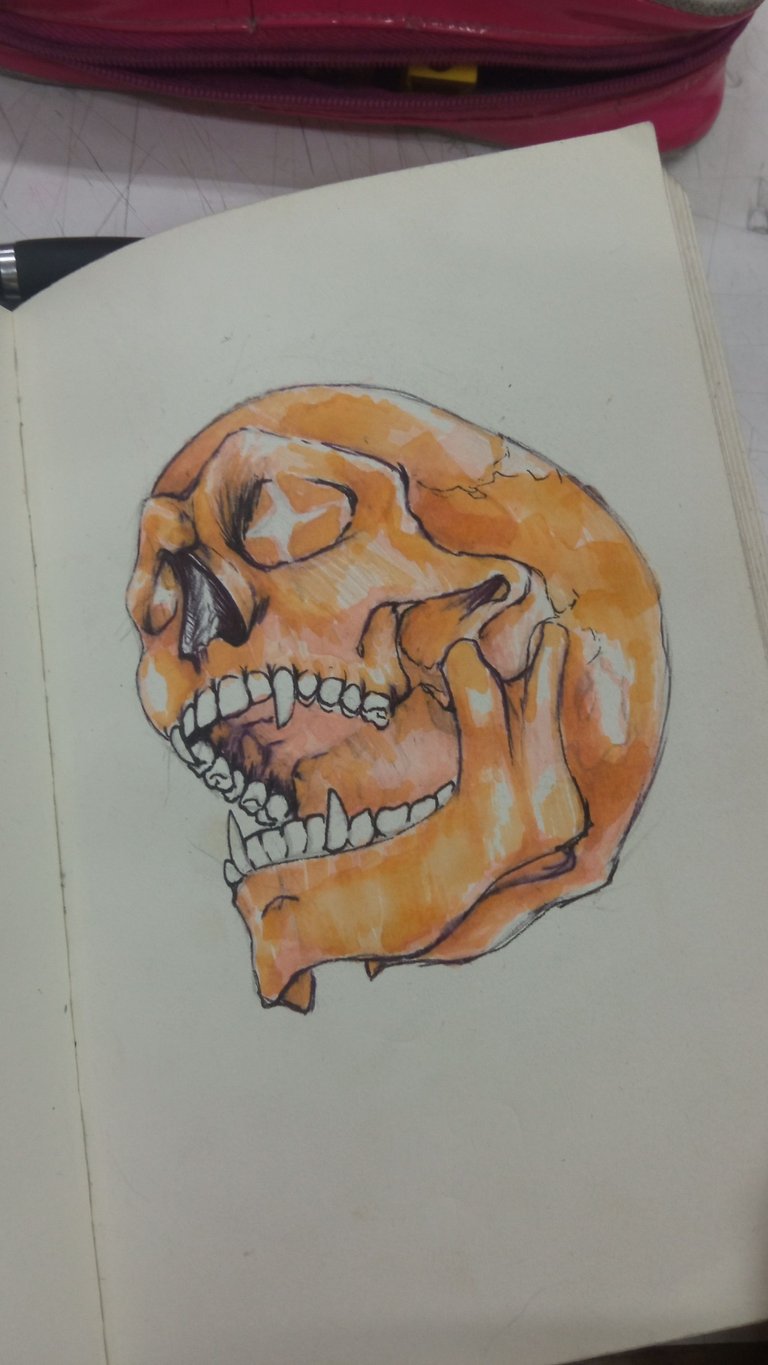
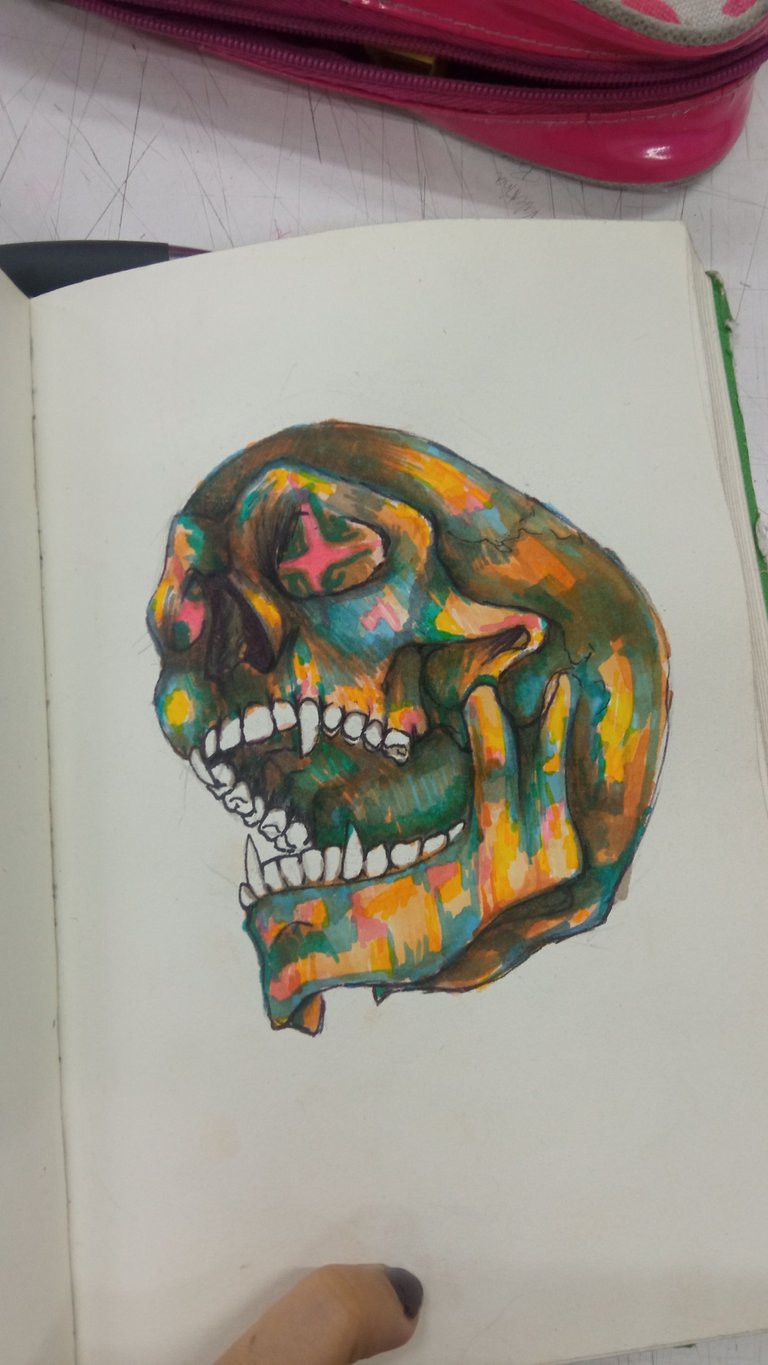
Ultimamente me mantengo ubicando más personajes de Splinterlands que no se adapten a mi zona de confort, para poder dibujar cosas nuevas y practicar. En este caso fue tanto un estudio de la calavera como el uso de marcadores, ya que es la primera ilustración que realizo unicamente con este material.
A continuación les adjunto el paso a paso de cómo realicé la ilustración de este personaje, espero les guste.

Hello dear Hive artists and HiveDIY community and, clearly, Splinterlands players. For today I bring a fanart I made on Monday in my design class while I was listening to my classmates' submissions for the weekly Splinterlands community art contest.
One of the best ways to make something known is to create content, and that's why I keep doing my usual illustrations.
Lately I keep placing more Splinterlands characters that don't fit my comfort zone, so I can draw new things and practice. In this case it was both a study of the skull and the use of markers, since it is the first illustration that I do only with this material.
Here is the step by step of how I made the illustration of this character, I hope you like it.
Proceso 🌱 Process
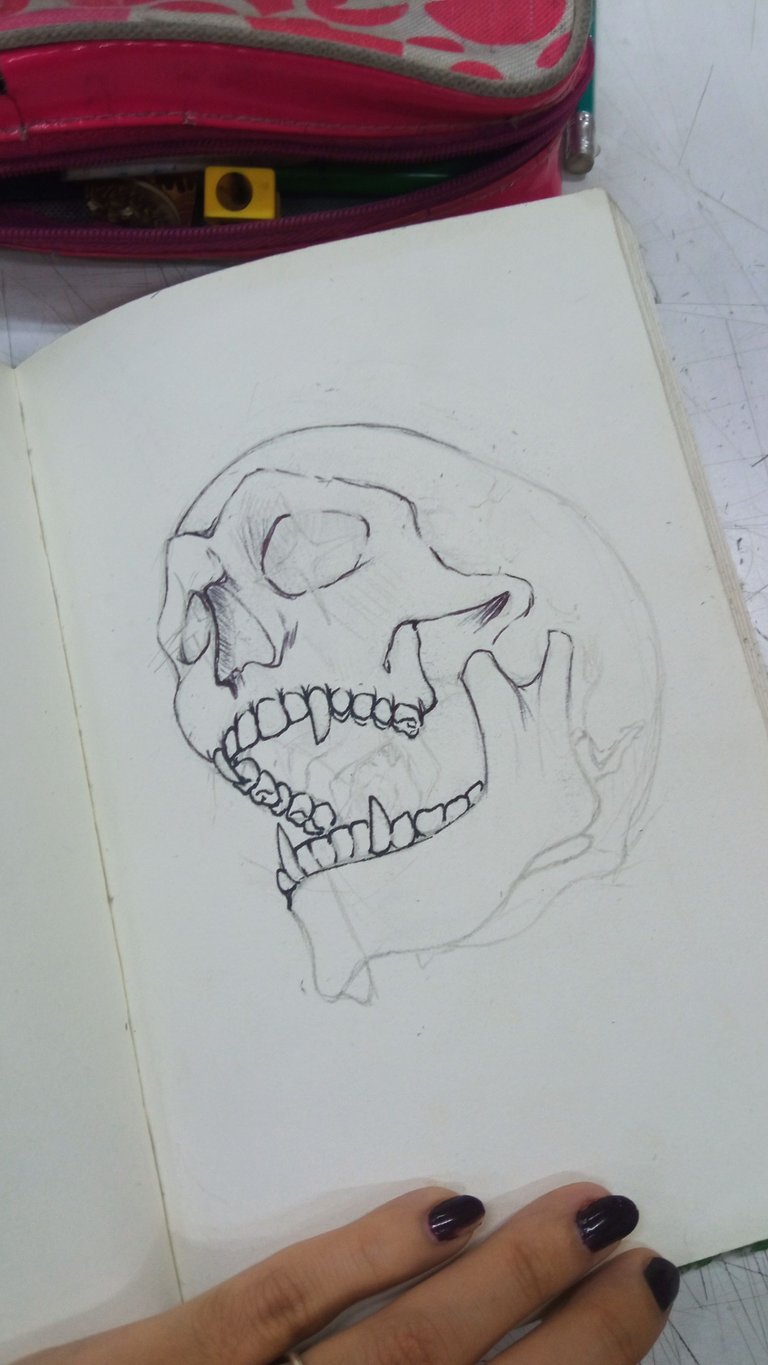
Sketch
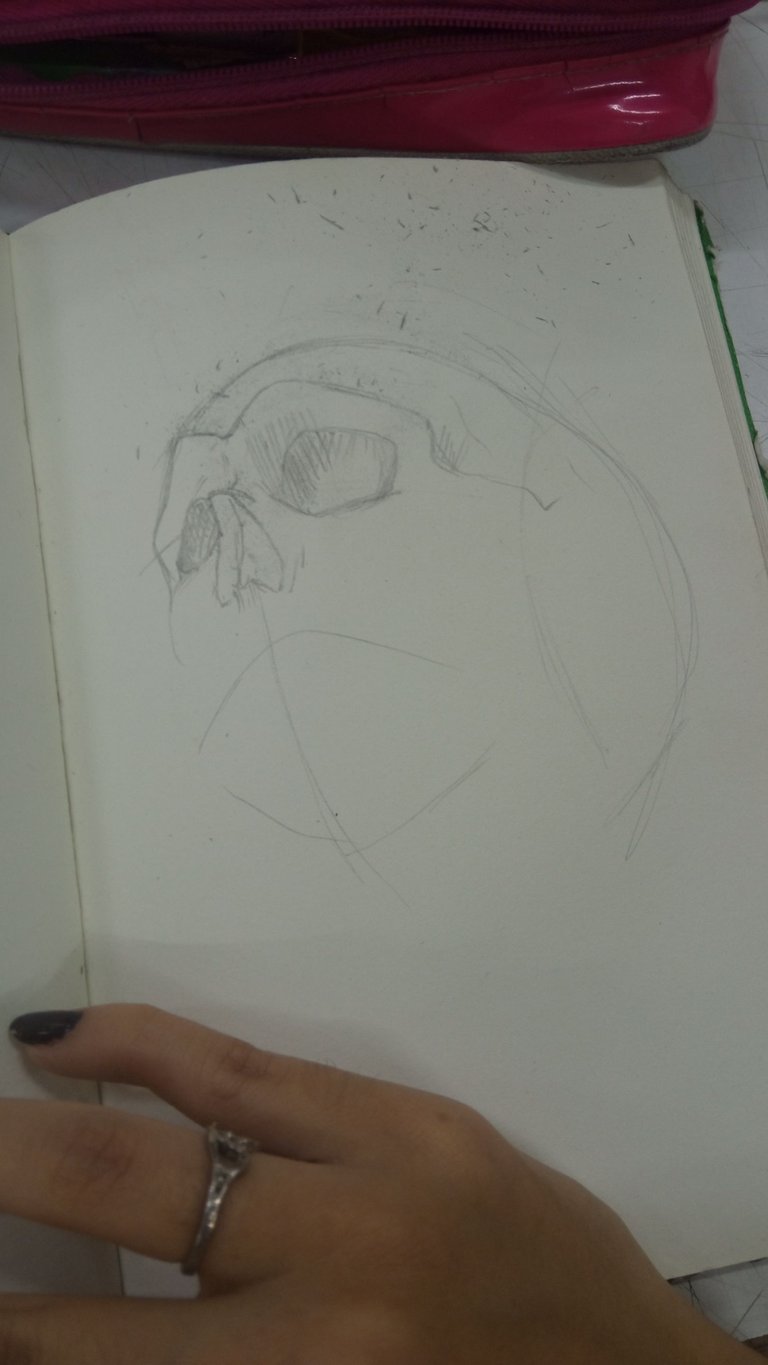
Para empezar la ilustración, busqué una imagen con una posición llamativa de una calavera.
Terminé guíandome un poco de la siguiente imagen
He de admitir que la perspectiva fue bastante compleja de lograr, y la dentadura quedó un poco desprolija.
To start the illustration, I looked for an image with a striking position of a skull.
I ended up taking a little guidance from the following image
I must admit that the perspective was quite complex to achieve, and the teeth were a bit messy.

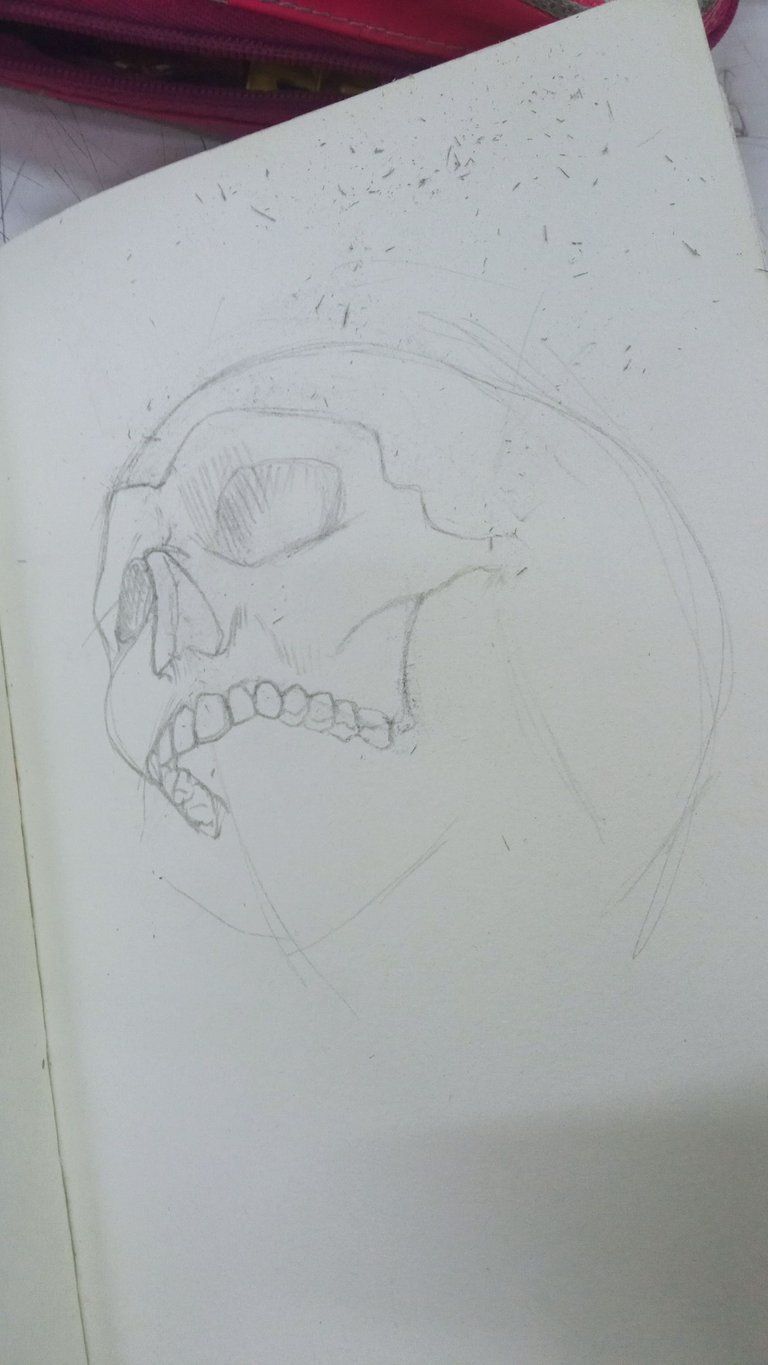
Posterior a dibujar la imagen referencial, agregué detalles caracteristicos de la carta original como el destello en los ojos y los colmillos a la dentadura de la calavera.
After drawing the reference image, I added details characteristic of the original card such as the glint in the eyes and the fangs to the teeth of the skull.
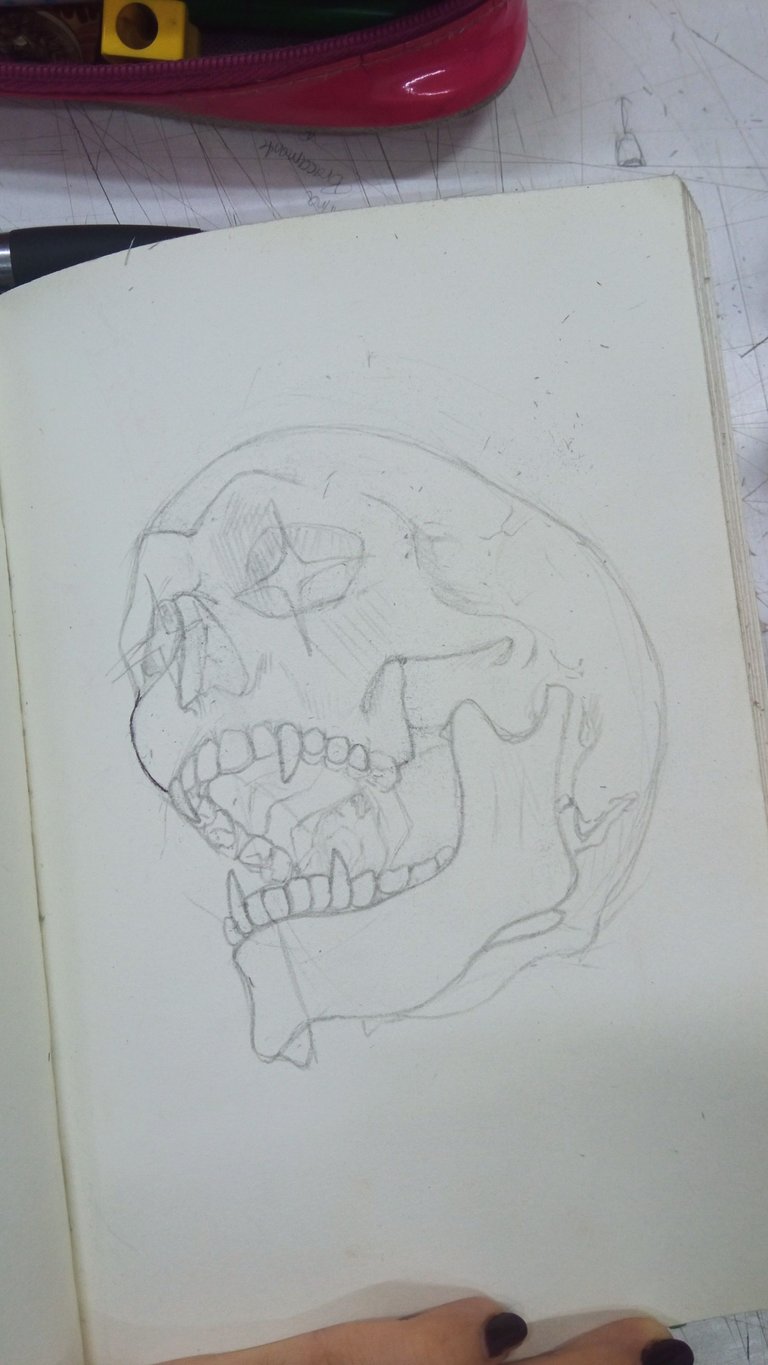
Lineart
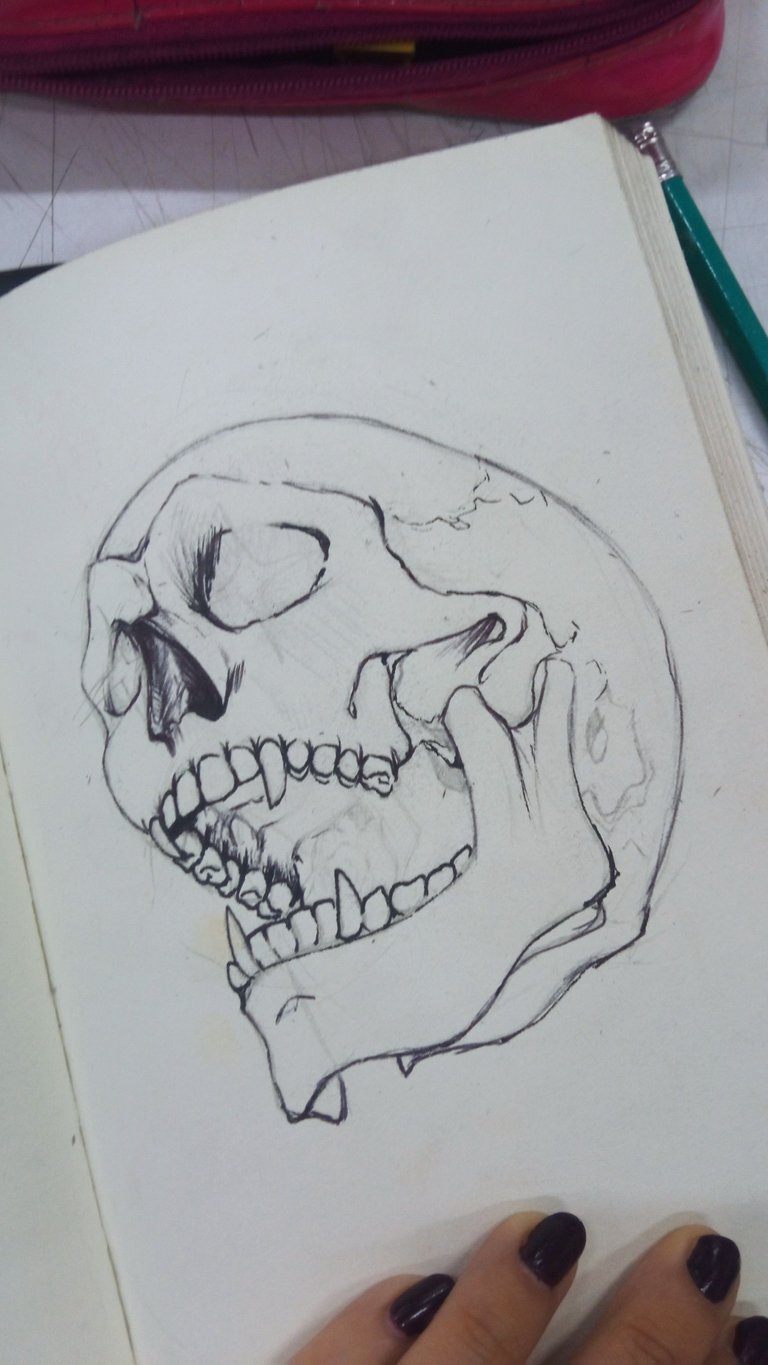
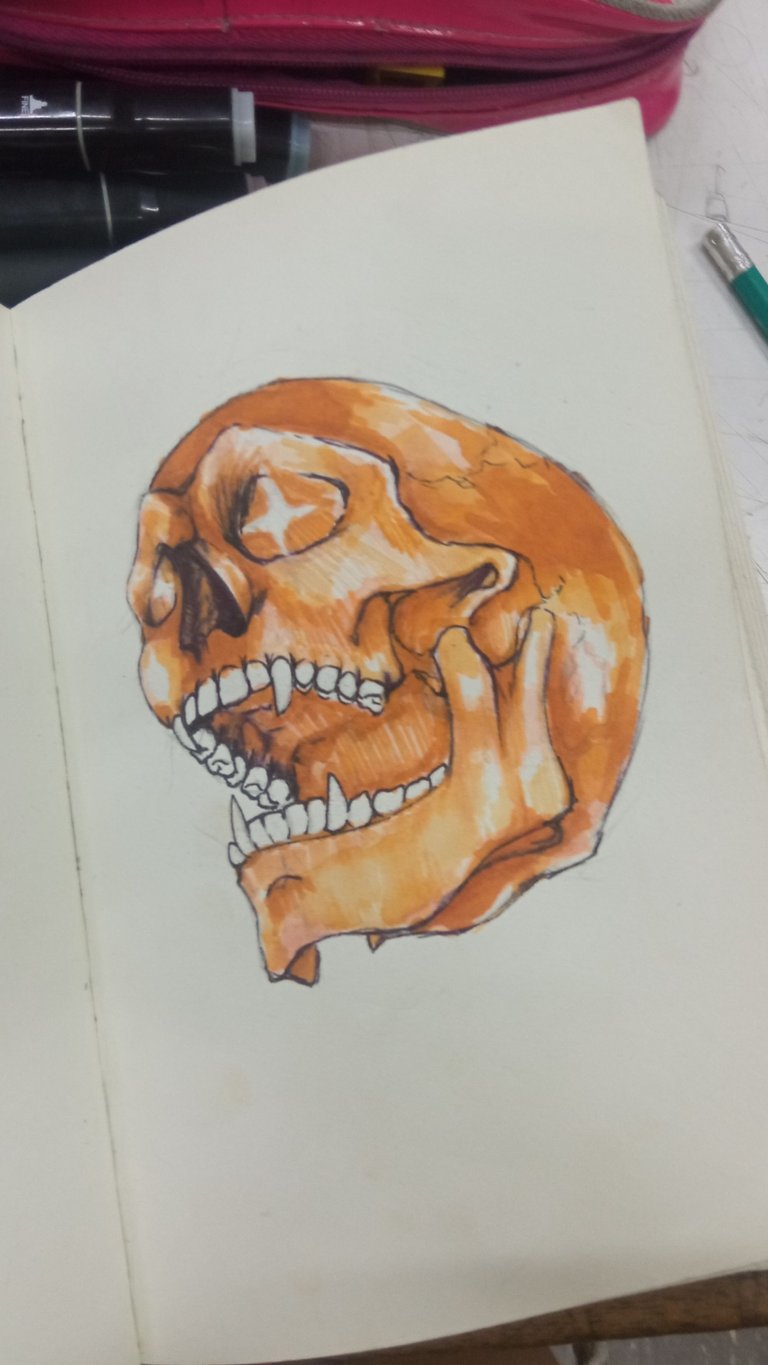
Para el lineart utilicé un boligrafo convencional de color negro, y un rapidograph de 05mm para resaltar más en algunas zonas.
For the lineart I used a conventional black pen, and a 05mm rapidograph to highlight more in some areas.
Coloring
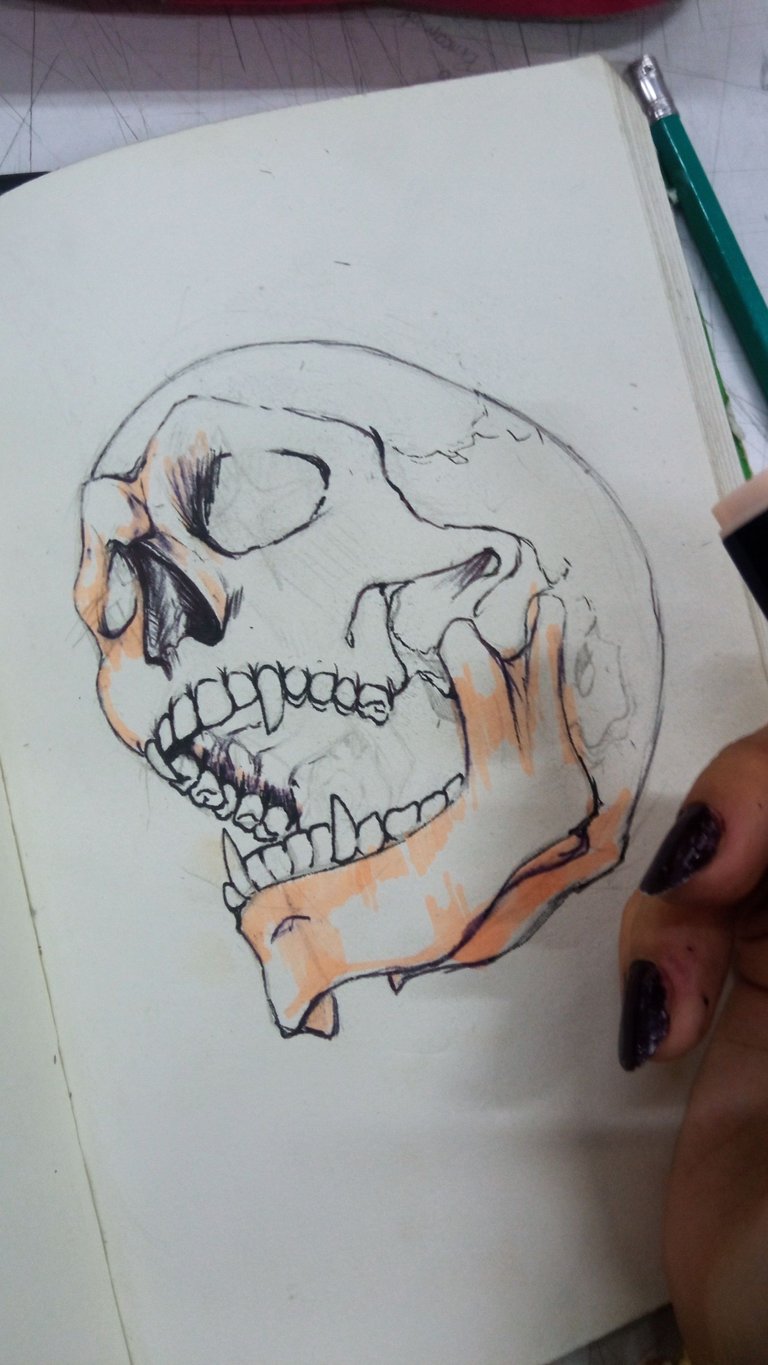

Para colorear empecé aplicando primero los colores más claros para poder ir poco a poco mezclandolos. Tuve un inconveniente y es que comencé a colorear por inercia, aplicando por logica los colores en tonos tierras que le corresponden a la calavera, y olvidé chequear de que color lucía el personaje original, que iba más hacía el gris azulado.
For coloring I started by applying the lighter colors first so that I could gradually mix them. I had a problem and that is that I started coloring by inertia, applying by logic the colors in earth tones that correspond to the skull, and I forgot to check what color the original character looked like, which was more towards the bluish gray.
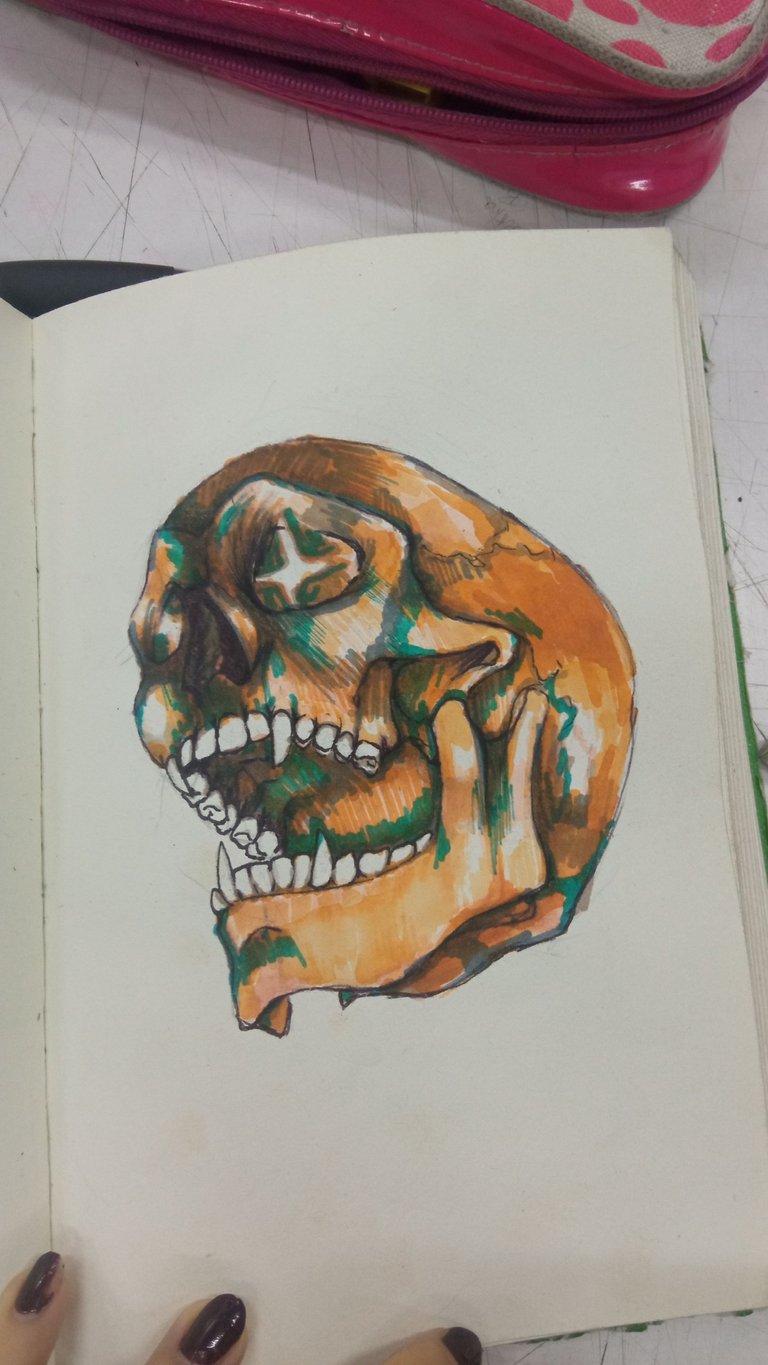
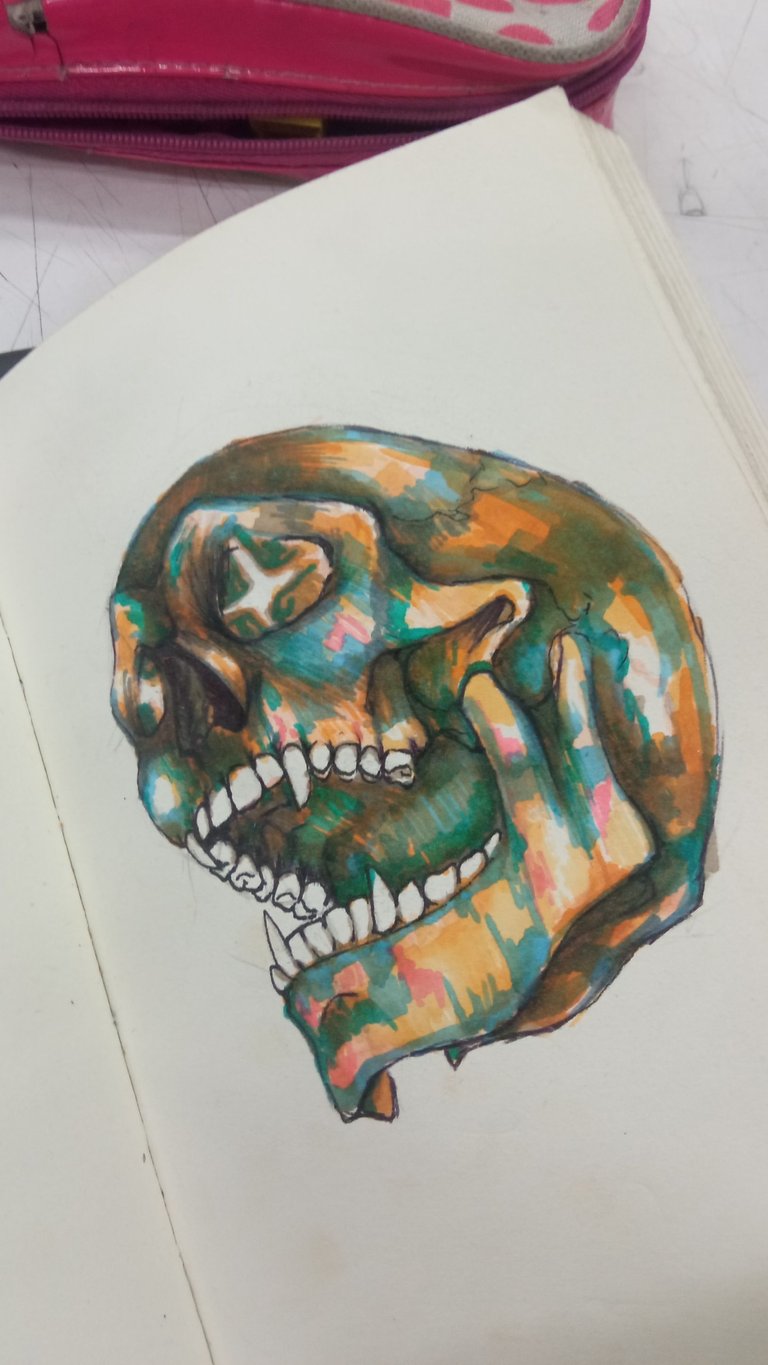
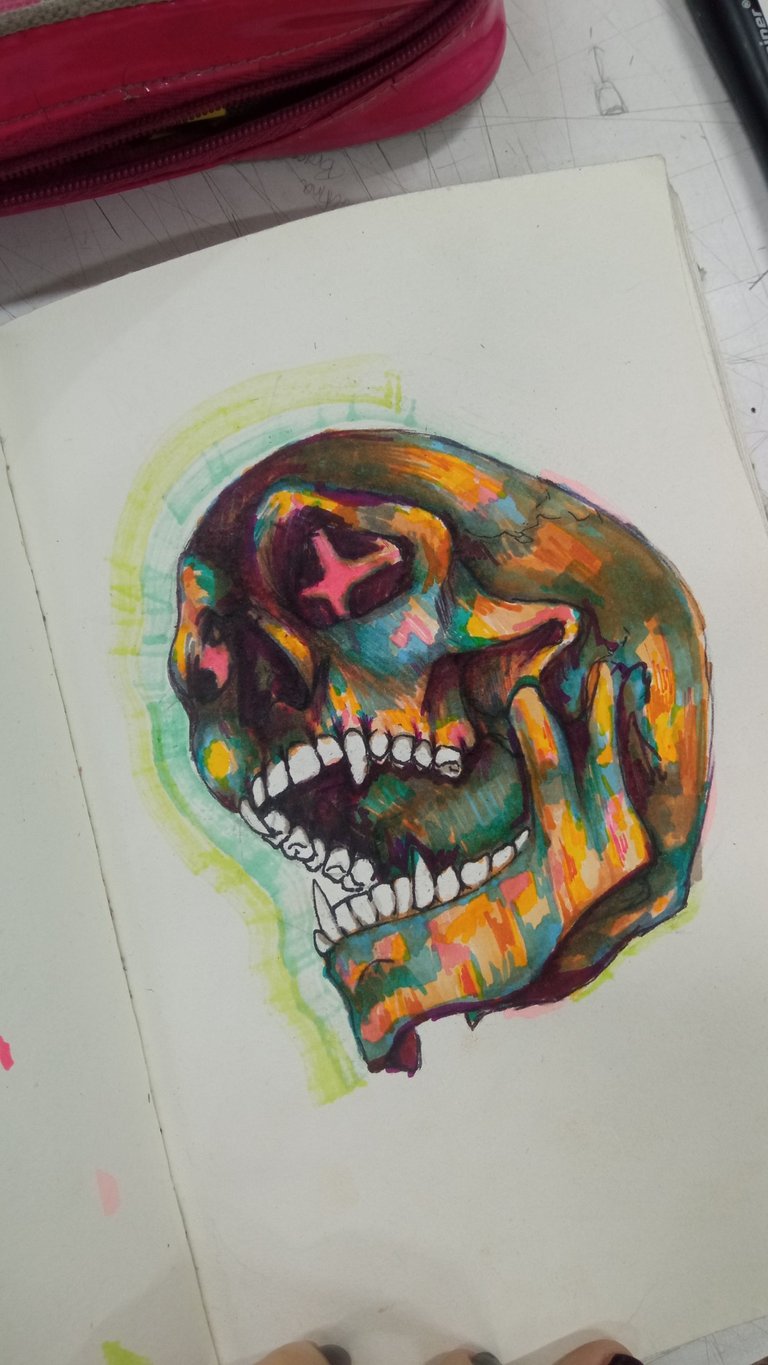
En un intentó de arreglarlo, comencé a aplicar un tono de azul y terminó resultando en un color verdeso. Ahí fue donde legitimamente entre en panico cuando seguía viendo que los colores no mezclaban bien y sencillamente decidí agregar más colores para darle otro estilo.
Sin duda fue una experiencia dificultosa utilizar los marcadores para completar una ilustración por primera vez, hay que tener buen manejos de estos para saber un poco como pueden variar los resultados.
In an attempt to fix it, I started applying a shade of blue and ended up with a greenish color. That's where I legitimately panicked when I kept seeing that the colors didn't blend well and simply decided to add more colors to give it another style.
Without a doubt it was a difficult experience to use markers to complete an illustration for the first time, you have to have a good command of these to know a little how the results can vary.
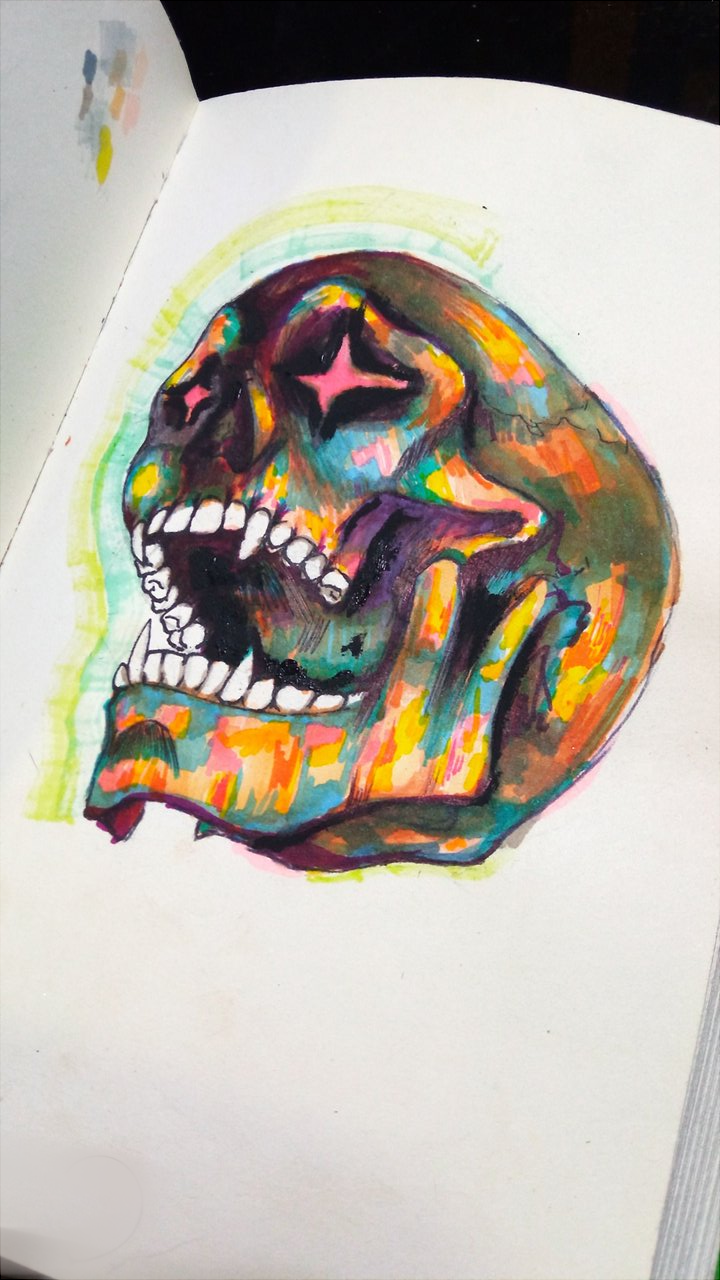
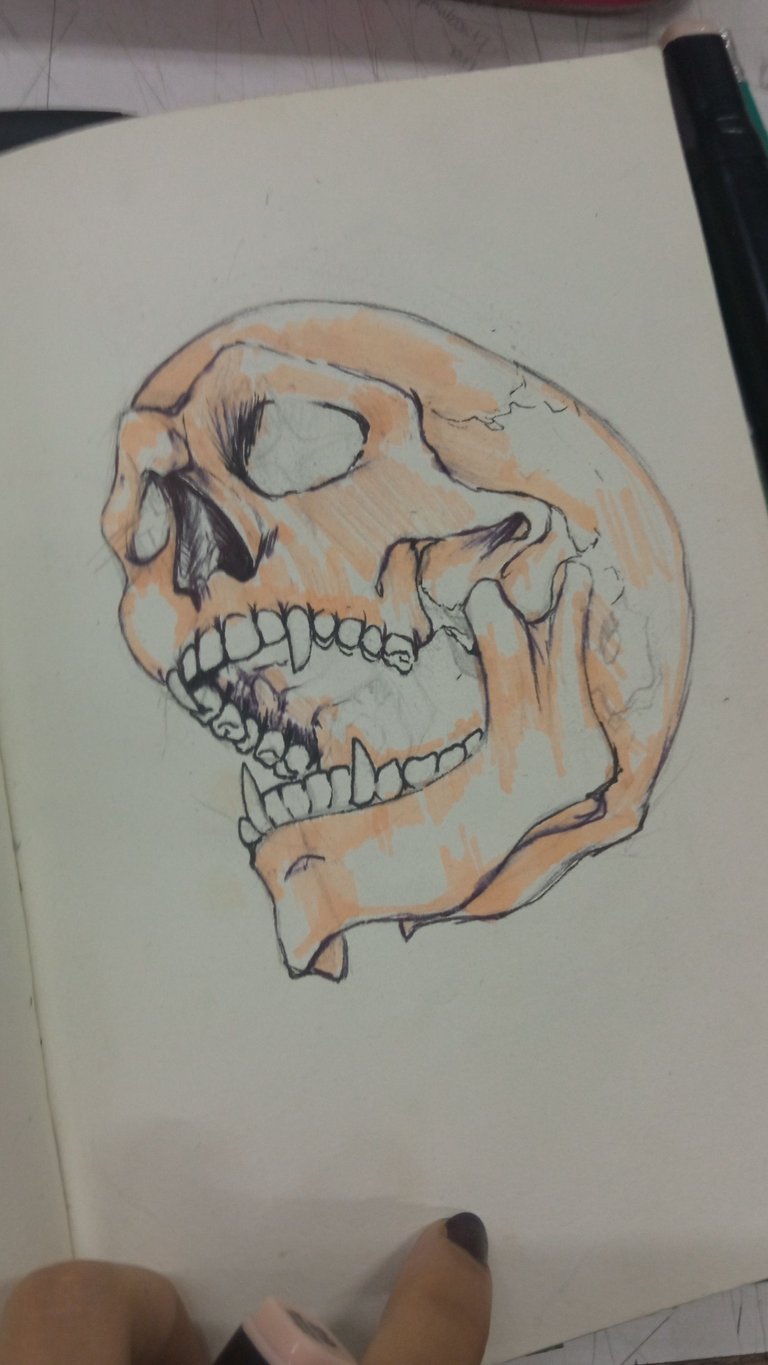
No me terminó agradando al 100% el resultado final, sentía que los trazos finales eran muy toscos.
Por eso al llegar a casa intenté mejorarlo un poco con las tecnicas que mejor manejo, aunque les estuve diciendo que era totalmente marcador, les mentí, jeje.
Empecé aplicando un poco de agua con un pincel para mezclar un poco los colores, y con pinturas acuarelas difuminé un poco más la mezcla de los colores de la ilustración.
Esperé que secara totalmente, y empecé a sombrear con pintura al frío negra, la nariz, las cuencas de los ojos, y algunos otros espacios que necesitaban más definición, para los detalles más pequeños volví a utilizar el boligrafo negro.
Posteriormente agregué pequeños detalles e iluminaciones con un lapiz de color blanco, como los destellos de los ojos que habían quedado totalmente opacados por el resto de marcadores.
I was not 100% happy with the final result, I felt that the final strokes were too rough.
That's why when I got home I tried to improve it a little with the techniques I know best, although I was telling them that it was totally marker, I lied, hehe.
I started by applying a little water with a brush to mix the colors a little, and with watercolor paints I blurred a little more the mixture of the colors of the illustration.
I waited for it to dry completely, and I started to shade with black cold paint, the nose, the eye sockets, and some other spaces that needed more definition, for the smallest details I used the black pen again.
Later I added small details and illuminations with a white pencil, like the sparkles of the eyes that had been totally overshadowed by the rest of the markers.
I hope you liked it. Thanks for watching ฅ^-ﻌ-^ฅ♡


Has sido curado por @visualblock / You've been curated by @visualblock
Bienvenidas delegaciones / Delegations welcome
Trail de Curación / Curation Trail
Vota por nuestro Testigo aliado - @hispapro / Vote for our allied Witness - @hispapro
Más información sobre el testigo aquí / More information about the witness here
¡Felicidades! Esta publicación obtuvo upvote y fue compartido por @la-colmena, un proyecto de Curación Manual para la comunidad hispana de Hive que cuenta con el respaldo de @curie.
Si te gusta el trabajo que hacemos, te invitamos a darle tu voto a este comentario y a votar como testigo por La Colmena.
Si quieres saber más sobre nuestro proyecto, te invitamos a acompañarnos en nuestro servidor de Discord.
Bello trabajo, así no te haya quedado como lo esperabas en su momento vale la pena el esfuerzo y la dedicación, es un fan-art y lo puedes hacer a tu estilo.
!DIY
You can query your personal balance by
!DIYSTATSTe quedó genial. Me gustó la mezcla de colores. 😊
Suerte en el concurso
!discovery 40
This post was shared and voted inside the discord by the curators team of discovery-it
Join our Community and follow our Curation Trail
Discovery-it is also a Witness, vote for us here
Delegate to us for passive income. Check our 80% fee-back Program
Congratulations @shinfxx! You have completed the following achievement on the Hive blockchain And have been rewarded with New badge(s)
Your next target is to reach 500 comments.
You can view your badges on your board and compare yourself to others in the Ranking
If you no longer want to receive notifications, reply to this comment with the word
STOPCheck out our last posts: