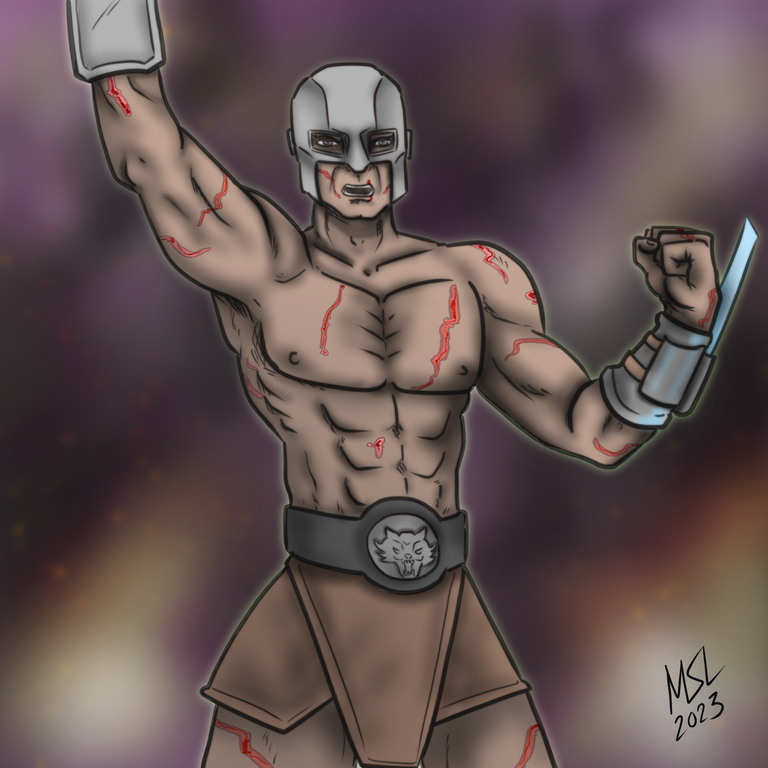
Splinterlands Art Contest Week 269: Kotriphus Bayne
This is my entry for the weekly Splinterlands Art Contest found
HERE
From the Splinterlands Wiki: https://splinterlands.fandom.com/wiki/Kotriphus_Bayne
Some criminals are too dangerous for even the Gloridax to keep, so occasionally they are sold in dark deals to even darker entities. In one such transaction, control of the ruthless and scarred destroyer known as Kotriphus Bayne was transferred one night to the Lord of Darkness and the Death Splinter. Those held captive in the Draykh-Nahka prison are said to be the most dangerous criminals in the world, and Bayne was too dangerous to be held even there. It is well known that Gloridax prisoners never emerge from captivity, but in certain rare circumstances these prisoners are found useful (or profitable). Now the rumors around Mount Mox say the Dragons have built an even larger prison than Draykh-Nahka’s north of Mount Mox, not far from the great Arena in Praetoria. This new prison, which allegedly has even greater security than the Draykh-Nahka dungeons, was built to hold prisoners so deadly and powerful that their very existence must be kept secret from the Splinterlands. They say that even before the Praetorian land was unveiled, dark and terrible secrets were held in this prison. Kotriphus Bayne was one of these secrets, and he will now be unleashed as a Death Gladiator.
Created in Clip Studio Paint Pro on a Surface Pro 4. Here is the time lapse video:
And here is the drawing broken down into individual process steps:
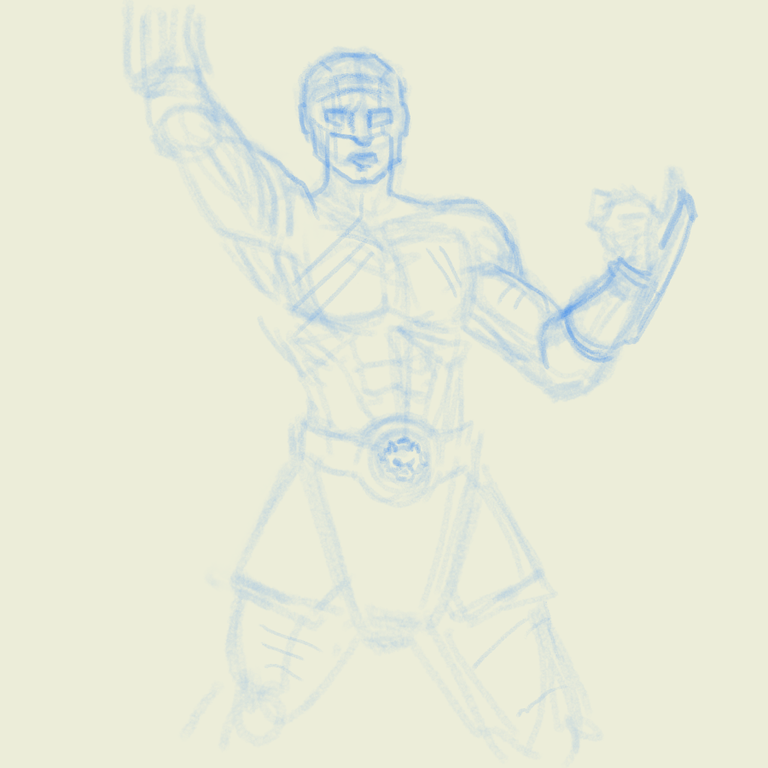
One: Rough Draft
Two: Line Art. Did it with a slightly rougher pen than my usual line work. Also, re-sized it afterwards. 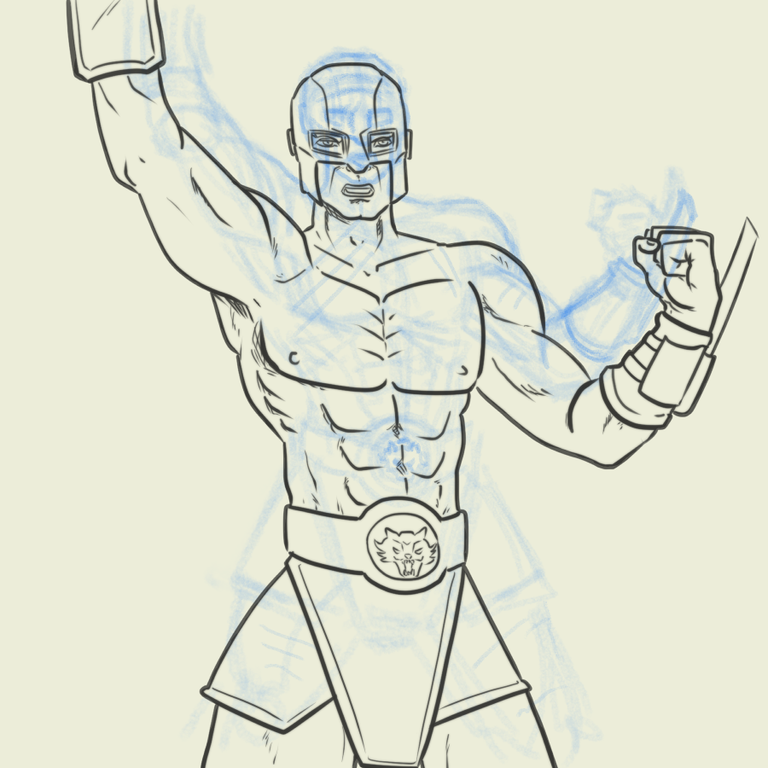
Three: Color flat layer. Fill in the entire silhouette with a skin tone. 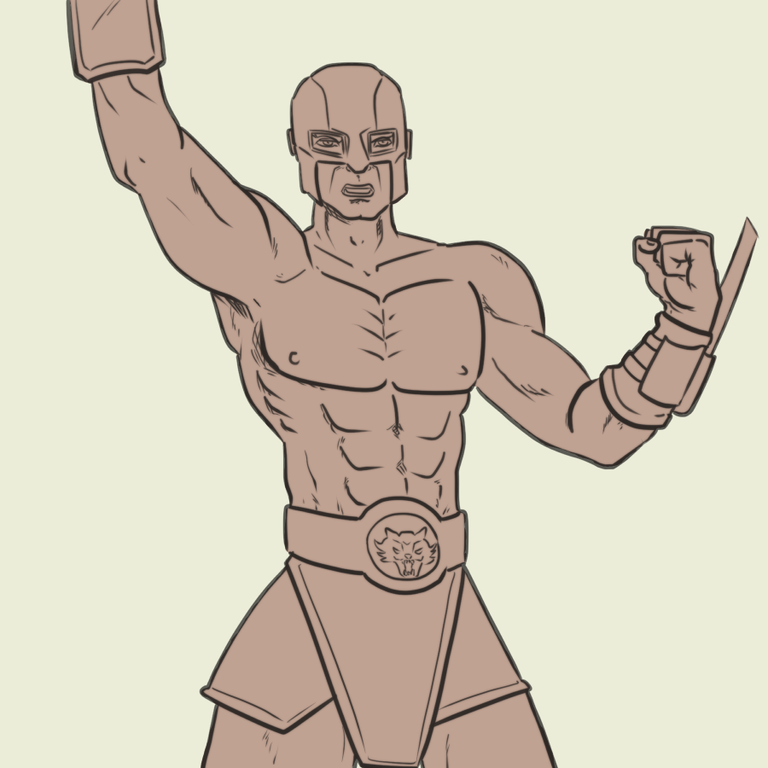
Four: Color layers. Make a separate color layer for the leather and the metal pieces. 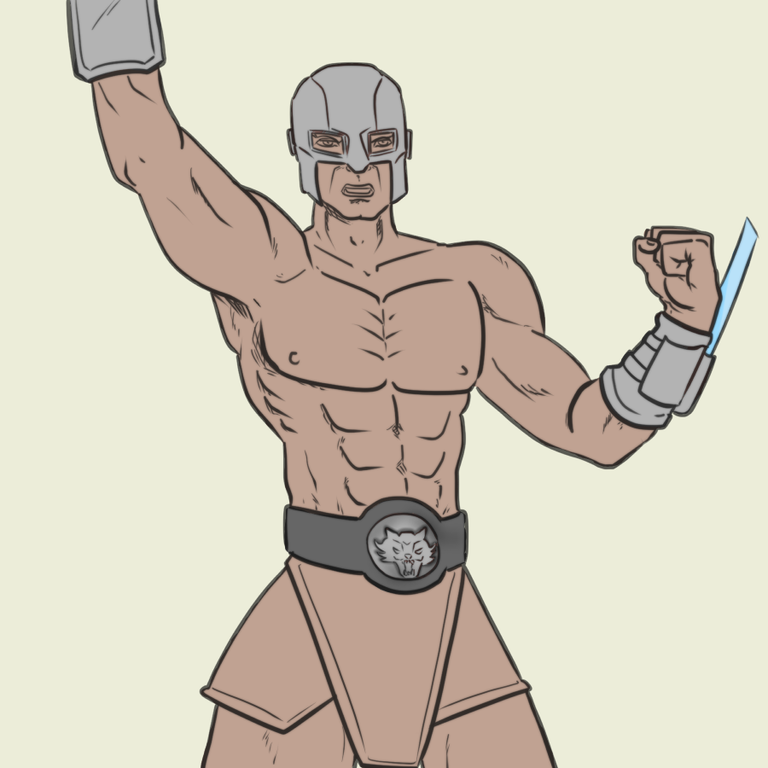
Five: Shading. Gah. 
Six: Oh yeah he's supposed to have scars. 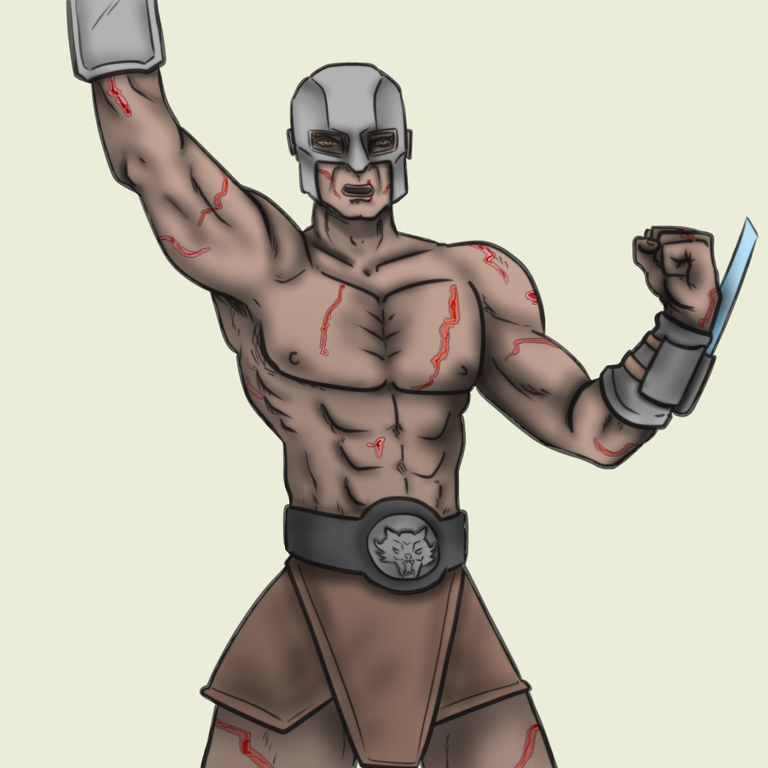
Seven: Background. Just fill it in and airbrush it. He has a slight aura around him because when I did the background layer I used the fill tool and forgot to do the are behind the flat silhouette. Then later when I blurred the layer to get rid of some detail, it left that aura there because that is where the edge of the background paint was. Turns out I think it looks better that way so we'll call that a Happy Accident. 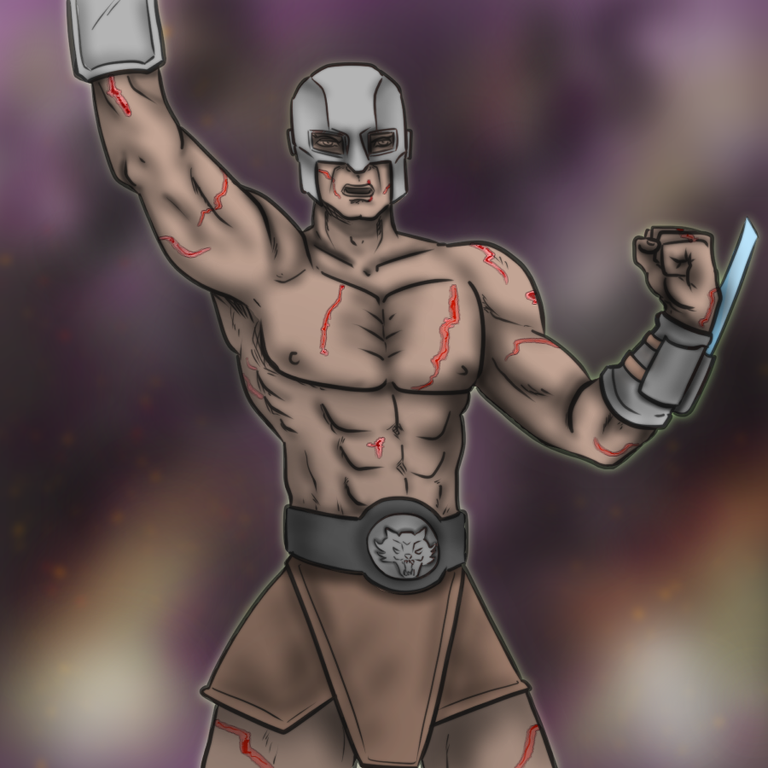
Eight: Details and signature. Add a little brightness to the eyes and the blade then sign the piece so I know it's complete. 
Nine: Profit!
That was a nice step to step artwork
It is really nice!