Radiated Scorcher | My entry for this week's Splinterlands Art Contest
Splinterlands Art Contest!
Hello guys, how is everyone? I hope everyone is doing fine because I'm not XD. I think I'm getting a fever. By the looks of it I'll probably get sick in a day or so. Because of that I had some trouble finishing this entry. I even selected a simple one but still I had some trouble drawing it because of the headache and sore throat. Anyway I just finished it and decided to post it. I didn't want to miss the deadline so here he is hehe.
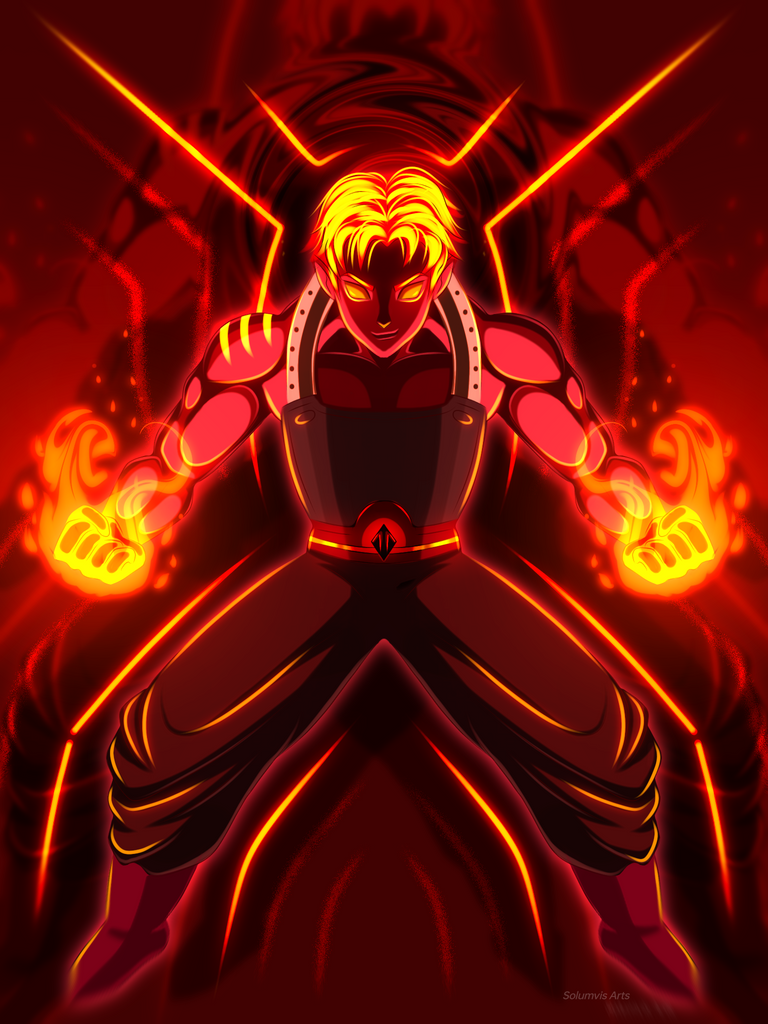
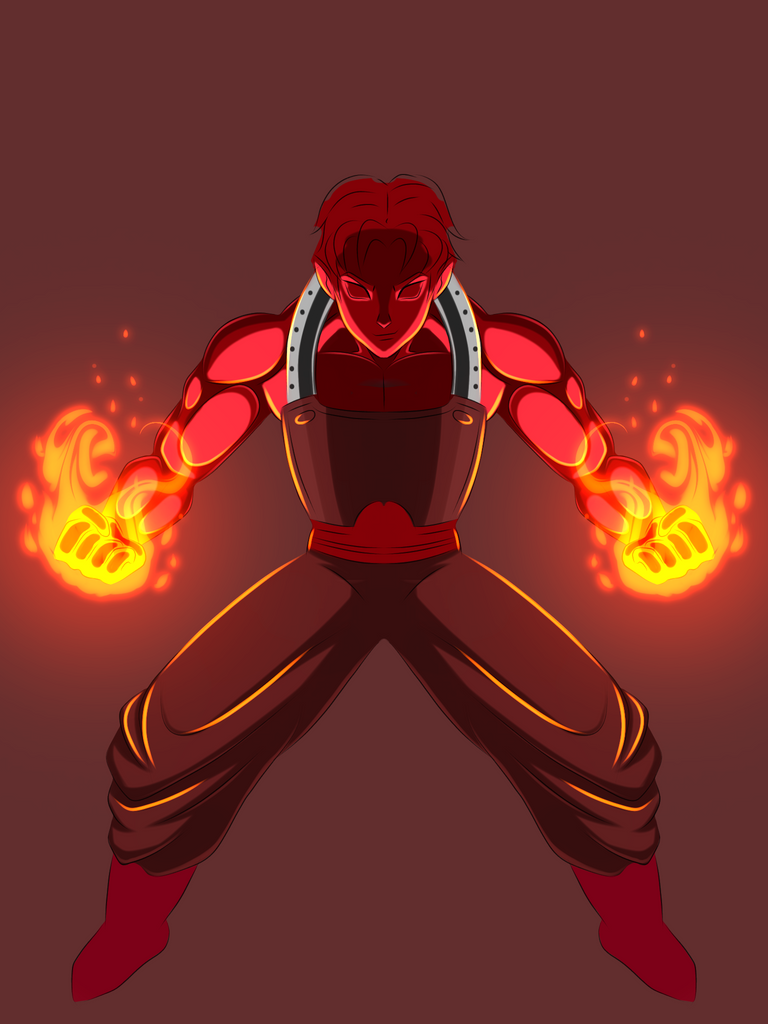
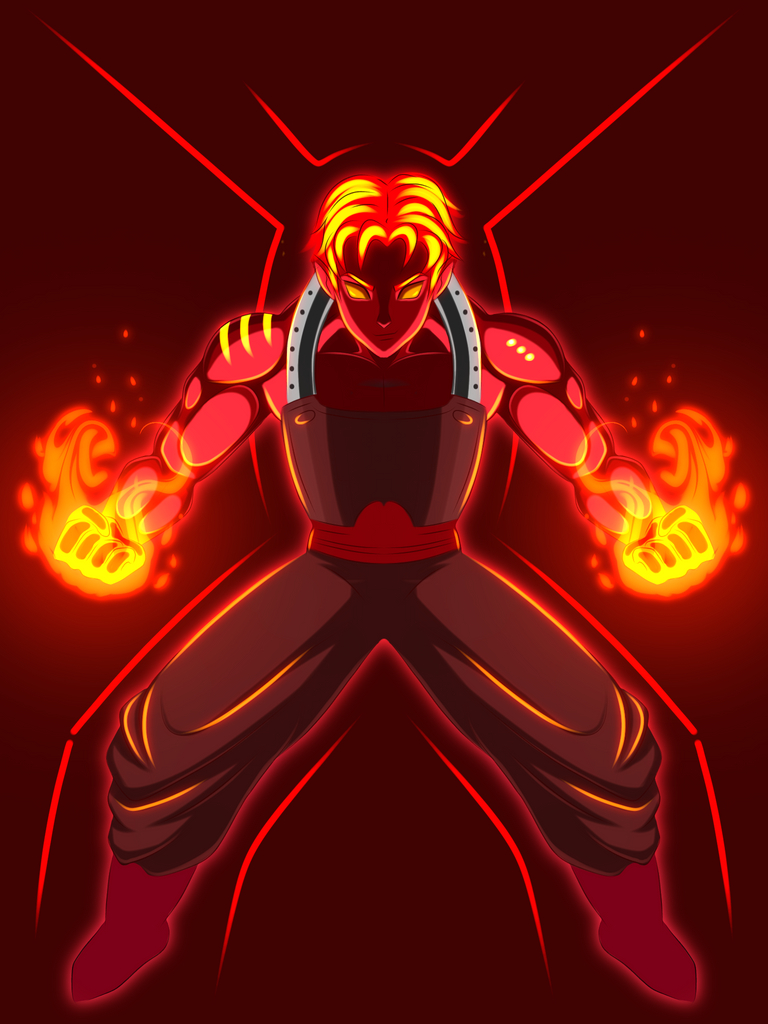
Radiated Scorcher
The process...
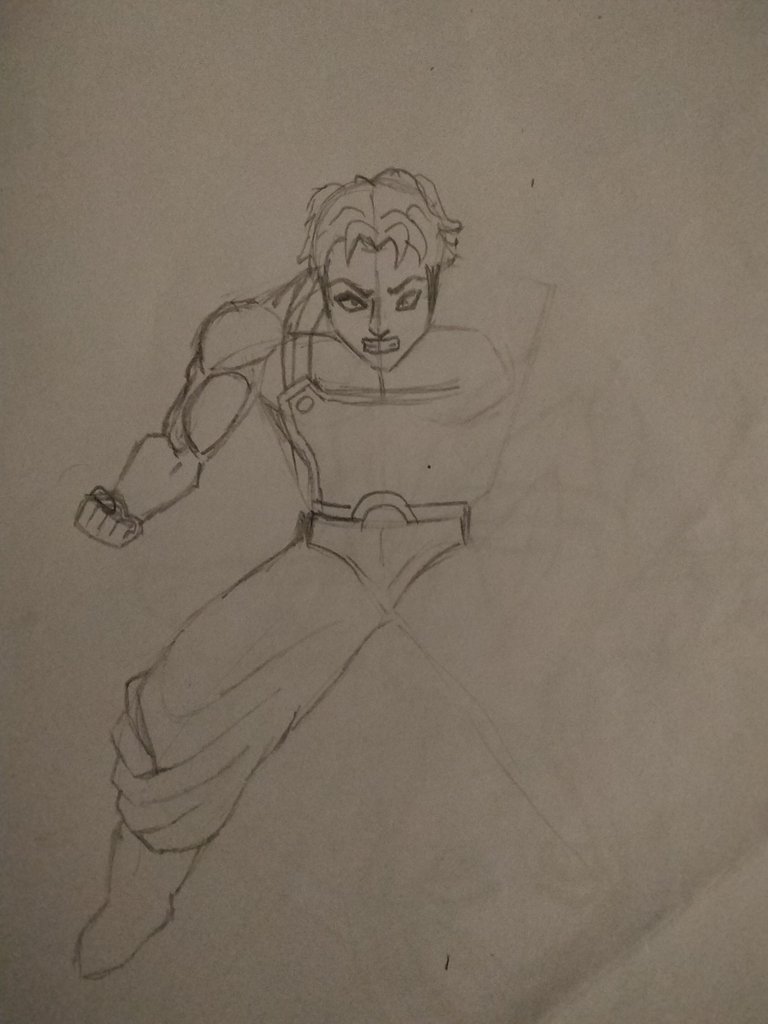
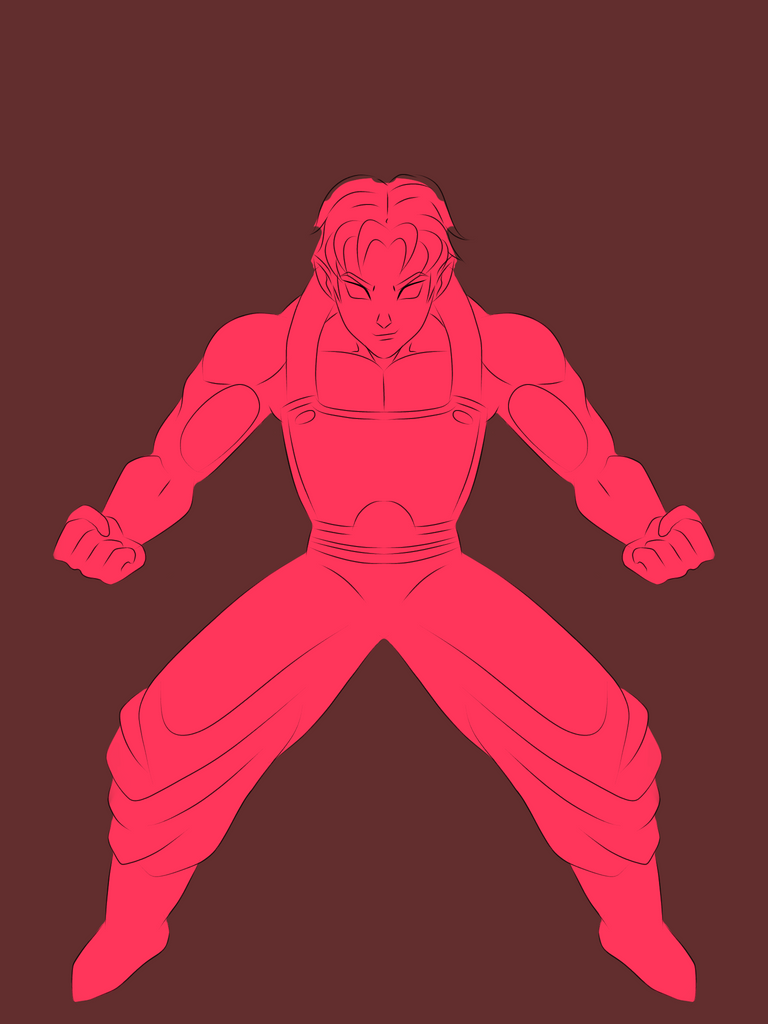
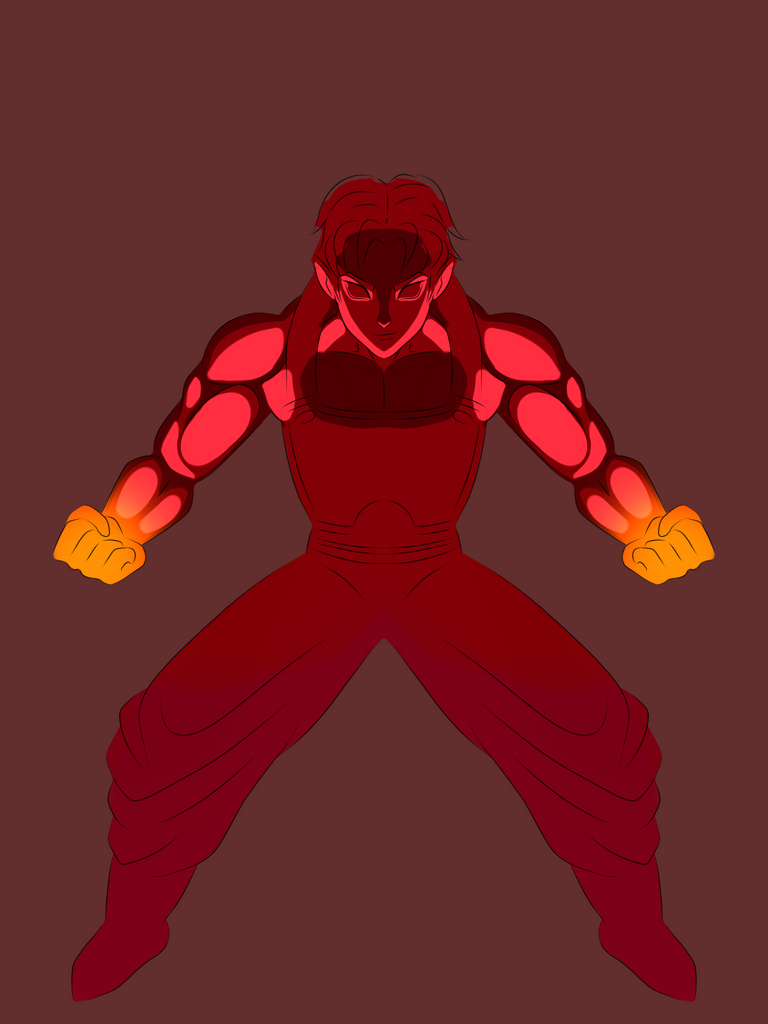
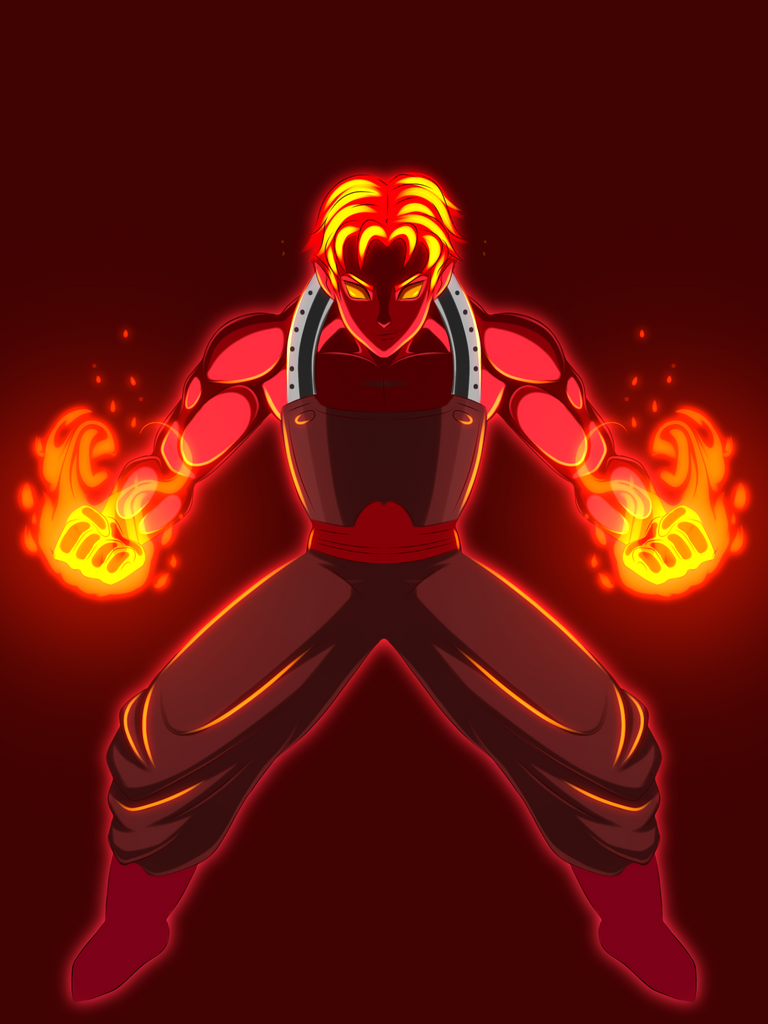

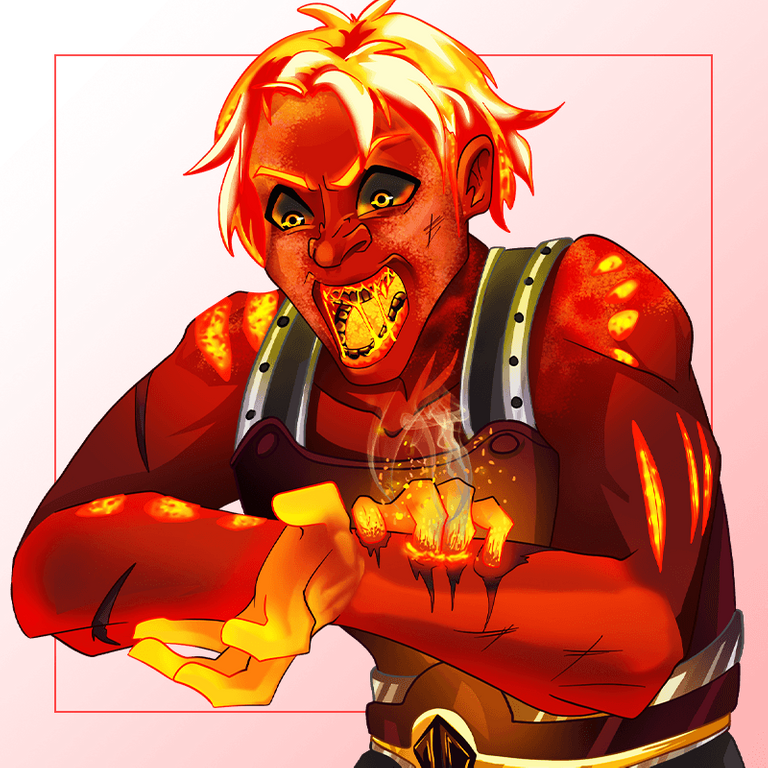
So for this week I decided to draw Scorcher. I wanted to draw him in a charging pose so I dived into the dragon Ball universe and found a pose appropriate for my idea. I did a very fast rough sketch here. Its probably the worst sketch I ever done because I was rushing to post it on time. Anyway once it was imported to Ibis app I managed to fix most of the issues in it. After making a clean lineart I started to paint it.
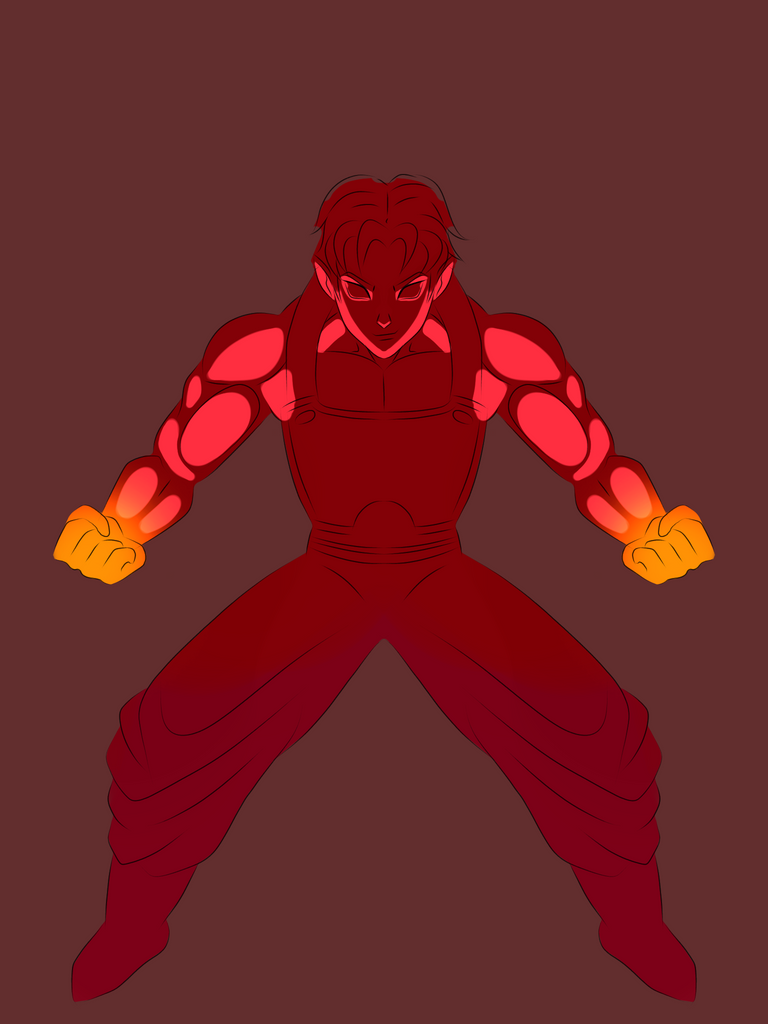
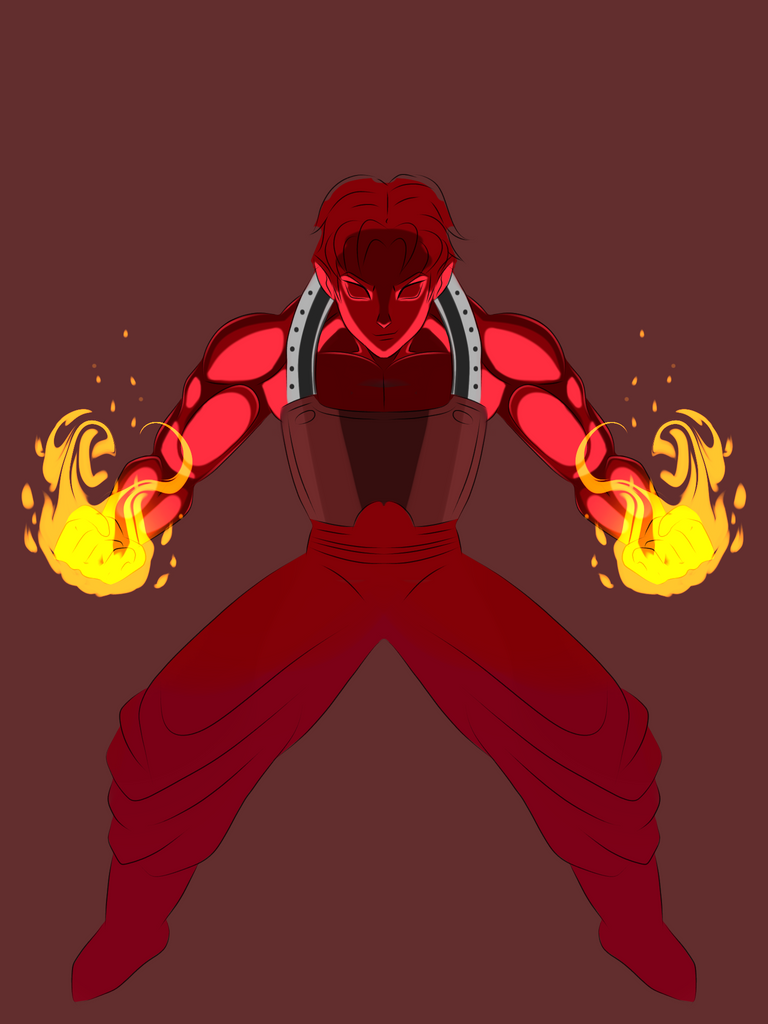
I decided to paint it in respect to the two light source as shown in my artwork. I had some practice with this type of lighting condition because recently I painted Djinn in this style. I shaded his body according to the direction of the source of light and used two dark shades to show the intensity of the light source. The light source however was painted later on after I finished rendering the body. His hands look molten which can be used as the source of fire here. Since the palm was yellow it was quite easy to paint the flame. After painting it I increased the intensity by airbrushing it twice with red colour on a Add layer. Once I was done with it I moved on to other areas of his body like his pants and chest armour. Here the reference image doesn't show anything below his chest so I improvised that area. Both the armour and all the clothes and other accessories below the chest was also shaded in respect to the direction of the source of light.
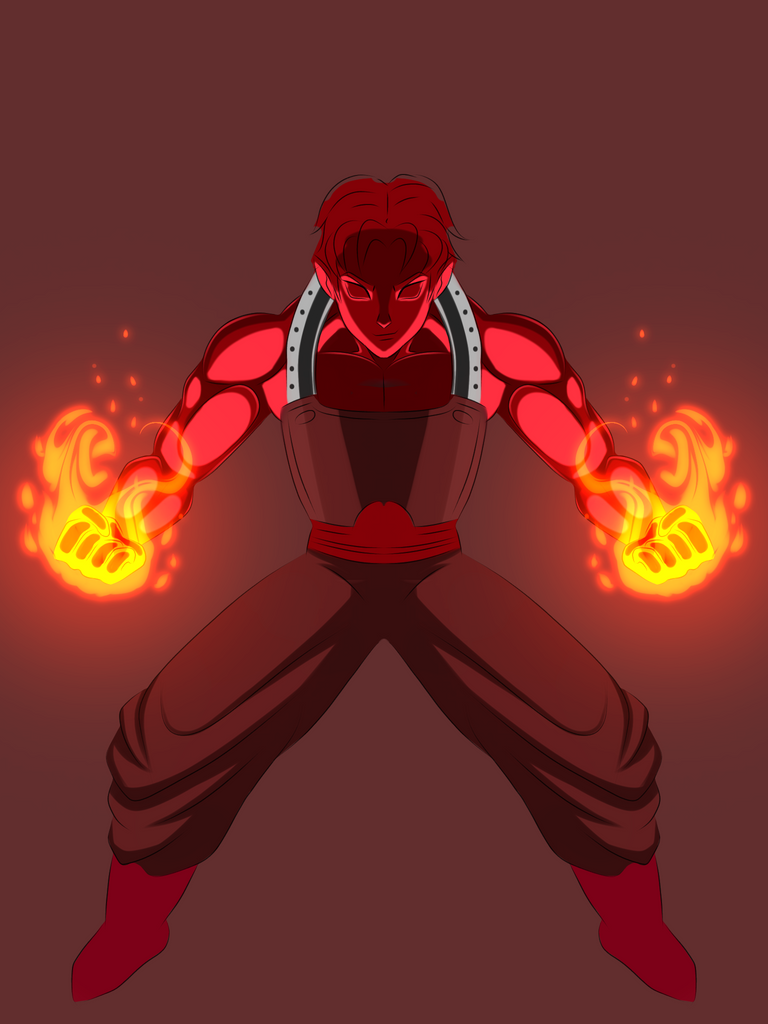
After that it was time to add the highlights, the best part if you ask me hehe. I always say this on all my blogs huh. Maybe I should omit this from my future blogs XD. I don't want my them to be repetitive lol. Once that was done I made a simple background with some lines and to show a form of radiation like symbol. I made the main one in glow style and the rest of them in overlay mode and blurred it. I also used the character's layer in a zoomed overlay mode to create the background. After that I added a radial blur to it and I was done with the work hehe. I hope you guys like it :)
Result
Tools use: Ibis paint, x Notebook and Pencil
Duration: 6hrs
Pose reference
Thank you so much for your support ☺️
He looks super powerful! Your color choices are perfect, even in your reduced-power state.
🤒 Get to feeling better soon, Solumviz!
🌬🌦🧡
Yay! 🤗
Your content has been boosted with Ecency Points, by @bhattg.
Use Ecency daily to boost your growth on platform!
Support Ecency
Vote for new Proposal
Delegate HP and earn more
Thanks @bhattg 🤩. Appreciate it 😊
Thanks for sharing! - castleberry#6859

Thanks bro 😊
My allergy's gone and now you're sick. XD Get well soon!
The reference looks fun to draw!
Thanks Kat. I'm already recovering hehe