Drawing a glimpse of Mario Galaxy - Dibujando un vistazo a Mario Galaxy (ENG/ESP)
Hello to all my dear hive friends, I hope you are feeling well. Today I have made a drawing of one of my favourite videogames, Mario Galaxy; this time being the character of my interest an adorable yellow sparkle. This work is a practice to gain experience in the world of colours, as I mostly draw in light-dark and this represents something new for me.
Without further ado, let's see how to make this lovely sparkle!
Hola a todos mis queridos amigos de la colmena, espero que se encuentren bien. Hoy he hecho un dibujo de uno de mis videojuegos favoritos, Mario Galaxy; siendo esta vez el personaje de mi interes un adorable brillo amarillo. Este trabajo es una práctica para adquirir experiencia en el mundo de los colores, ya que principalmente dibujo en claro-oscuro y esto representa algo nuevo para mí.
¡Sin más preámbulos, veamos cómo hacer que este hermoso brillo!
Photograph of my property. - Fotografía de mi propiedad.
What is a sparkle?
In Mario Galaxy, sparkles are baby stars that can grow into suns, comets or giant stars (maxi-stars, superstars). They are adorable and represent the goal of the game; they like to eat pieces of the star and therefore grow bigger and bigger.
I have taken the following image as a reference:
¿Qué es un destello?
En Mario Galaxy, los destellos son estrellas bebés que pueden convertirse en soles, cometas o estrellas gigantes (maxi-estrellas, superestrellas). Son adorables y representan el objetivo del juego; les gusta comer pedazos de la estrella y por lo tanto crecer más y más.
He tomado la siguiente imagen como referencia:

Materials
- 0.5 mm mechanical pencil.
- Letter paper.
- School colours.
- An old book as a support.
- Eraser.
Step by step
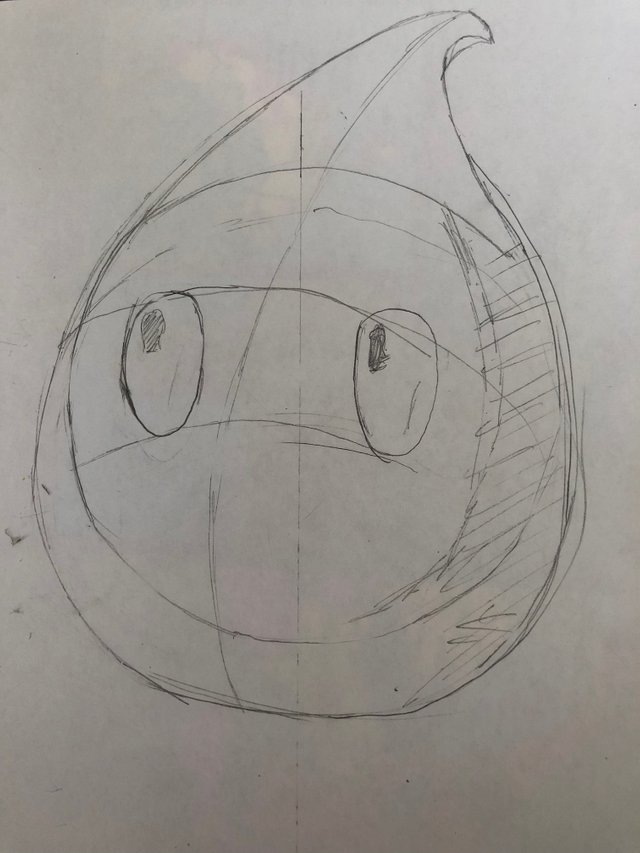
To start with this drawing it is first very important to make light strokes that can be erased. Therefore I use a mechanical pencil, which causes less damage to the paper.
We start with a basic circle. The curved line in the centre will define the direction of the star's face, which is slightly inclined. Following this line, we go around the circle and end at the top point. We can see that the design has acquired a drop shape.
Materiales
- Portaminas de 0,5 mm.
- Papel carta.
- colores de la escuela.
- Un libro antiguo como soporte.
- Borrador.
- Paso a paso
- Para empezar con este dibujo es muy importante primero hacer trazos ligeros que se puedan borrar. Por lo tanto, uso un lápiz mecánico, que daña menos el papel.
Empezamos con un círculo básico. La línea curva del centro definirá la dirección de la cara de la estrella, que está ligeramente inclinada. Siguiendo esta línea, damos la vuelta al círculo y terminamos en el punto superior. Podemos ver que el diseño ha adquirido forma de gota.
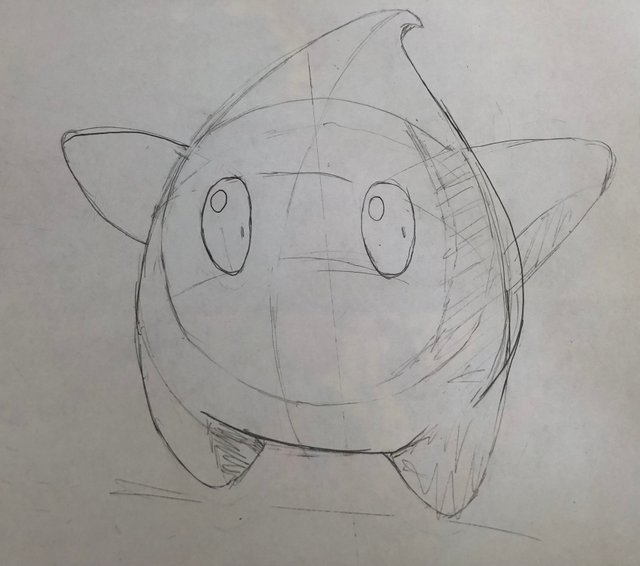
We make the legs, and place details. The shaded or striped parts are the places where the shadows will go; this is done with the intention of seeing the depth from the beginning.
Hacemos las patas, y colocamos detalles. Las partes sombreadas o rayadas son los lugares por donde irán las sombras; esto se hace con la intención de ver la profundidad desde el principio.
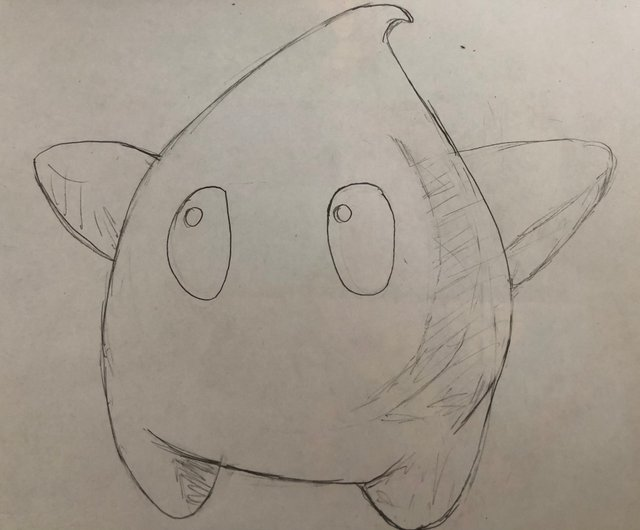
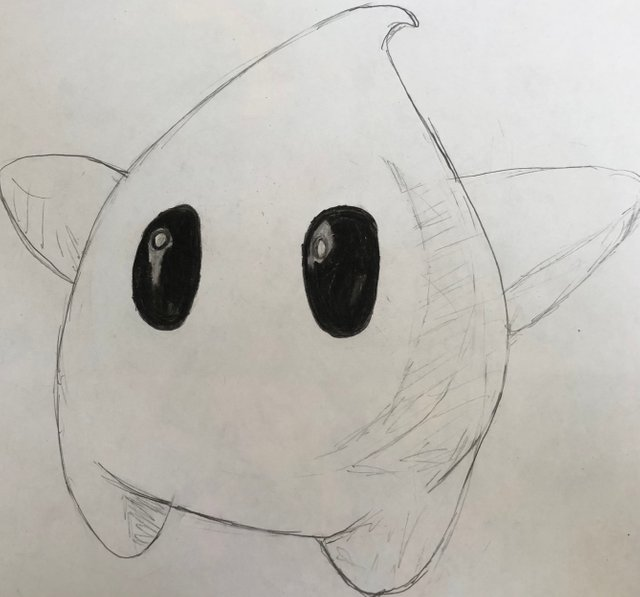
We arrange details, proportions and shapes. Very delicately, we erase the lines of the initial sketch to leave the star ready to draw. A trick to erase without tearing the sheet is to hold both ends of the sheet and erase gently.
Ordenamos detalles, proporciones y formas. Con mucha delicadeza, borramos las líneas del boceto inicial para dejar la estrella lista para dibujar. Un truco para borrar sin rasgar la hoja es sujetar ambos extremos de la hoja y borrar suavemente.
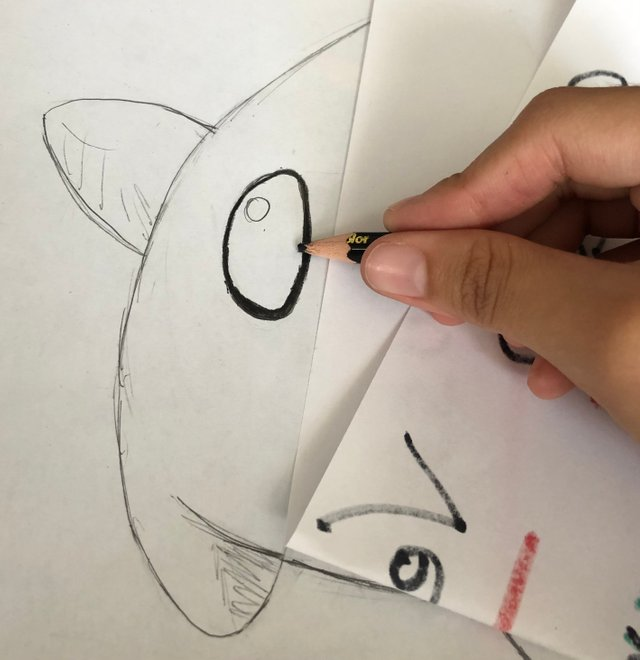
We start to colour the eyes with black. To avoid smudging the paper, rest your hand on an extra clean sheet of paper.
Empezamos a colorear los ojos con negro. Para evitar manchar el papel, apoya la mano sobre una hoja de papel extra limpia.
With the eyes ready, we make sure to clean the surrounding area with an eraser. In the centre we mark the reflection of the light with grey and white.
Con los ojos listos, nos aseguramos de limpiar la zona de alrededor con una goma de borrar. En el centro marcamos el reflejo de la luz con gris y blanco.
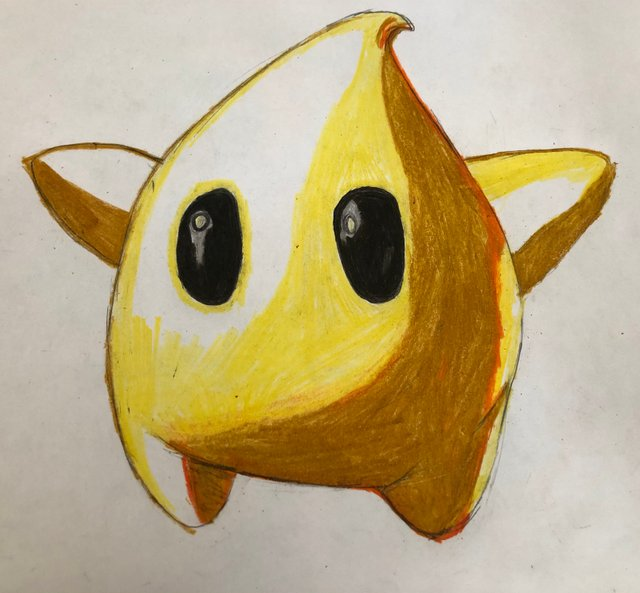
To make the shading, I start to mark with a light brown the places that were previously scratched with graphite (erasing it, of course). With a soft orange I mark the colour transition between the yellow and the light brown.
Para hacer el sombreado, comienzo a marcar con un marrón claro los lugares que previamente fueron rayados con grafito (borrándolo, por supuesto). Con un naranja suave marco la transición de color entre el amarillo y el castaño claro.
Using a darker brown, I mark the most marked shadows; the lower legs, the ends and the belly. I also intend to make a better transition between the yellow and the brown and add more shadows.
Usando un marrón más oscuro, marco las sombras más marcadas; la parte inferior de las piernas, las puntas y el vientre. También pretendo hacer una mejor transición entre el amarillo y el marrón y añadir más sombras.
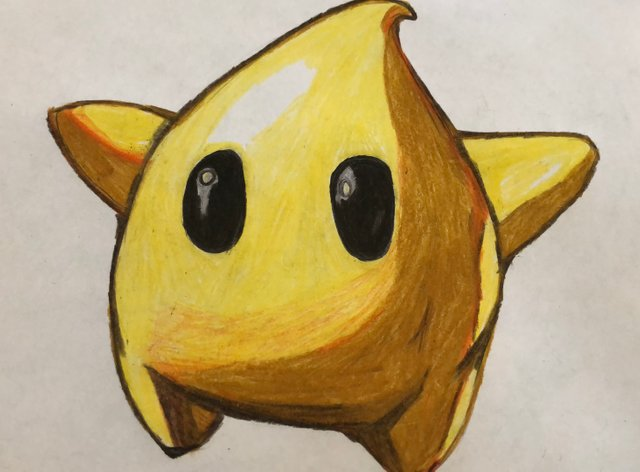
We sharpen the colour in some places to increase its power, and give a greater sense of depth.
Acentuamos el color en algunos lugares para aumentar su potencia y dar una mayor sensación de profundidad.
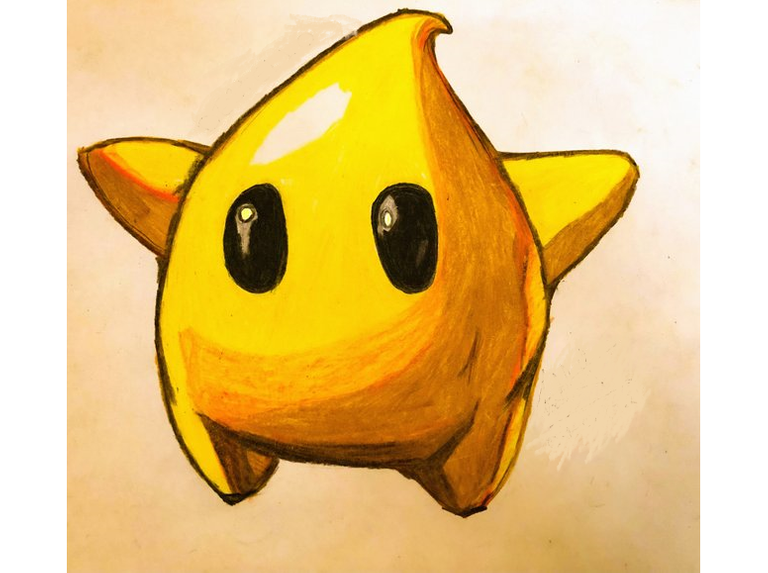
Now we have our Sparkle ready!
Using Lightroom I correct any deficiencies the camera may have. For this, I use the lighting and contrast effects to bring out the colours.
Photos with the final result
¡Ya tenemos nuestro Sparkle listo!
Con Lightroom corrijo las deficiencias que pueda tener la cámara. Para ello, utilizo los efectos de iluminación y contraste para resaltar los colores.
Fotos con el resultado final.

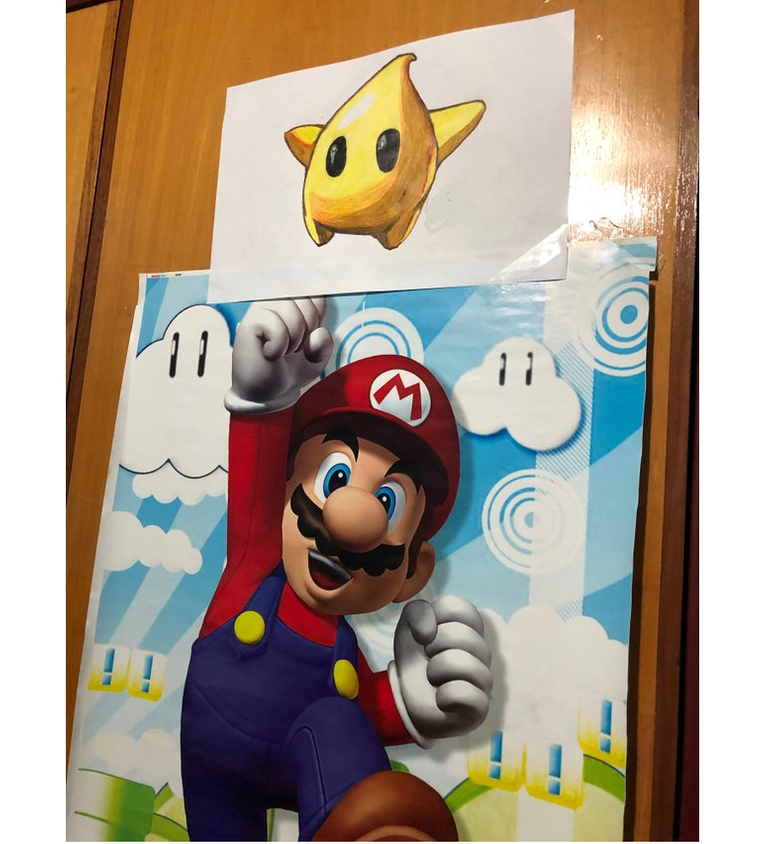
I gave this drawing to my brother, who initially gave me the idea. We put it on top of his Mario Bros poster, just like in the game, where the Sparkle accompanies Mario on his adventures.
Le regalé este dibujo a mi hermano, quien inicialmente me dio la idea. Lo ponemos encima de su póster de Mario Bros, igual que en el juego, donde el Sparkle acompaña a Mario en sus aventuras.
The photographs shown are my own, taken with my iPhone X exclusively for this community.
I hope you liked my drawing and explanation, that you find the tips useful and that we can share them in the comments box. Thank you very much for reading.
Best regards!
Las fotografías mostradas son mías, tomadas con mi iPhone X en exclusiva para esta comunidad.
Espero que te haya gustado mi dibujo y explicación, que te resulten útiles los consejos y que podamos compartirlos en la caja de comentarios. Muchas gracias por leer.
¡Saludos!