🌿 CHILD OF THE FOREST 🌿 Splinterlands Art Contest SPT W-252
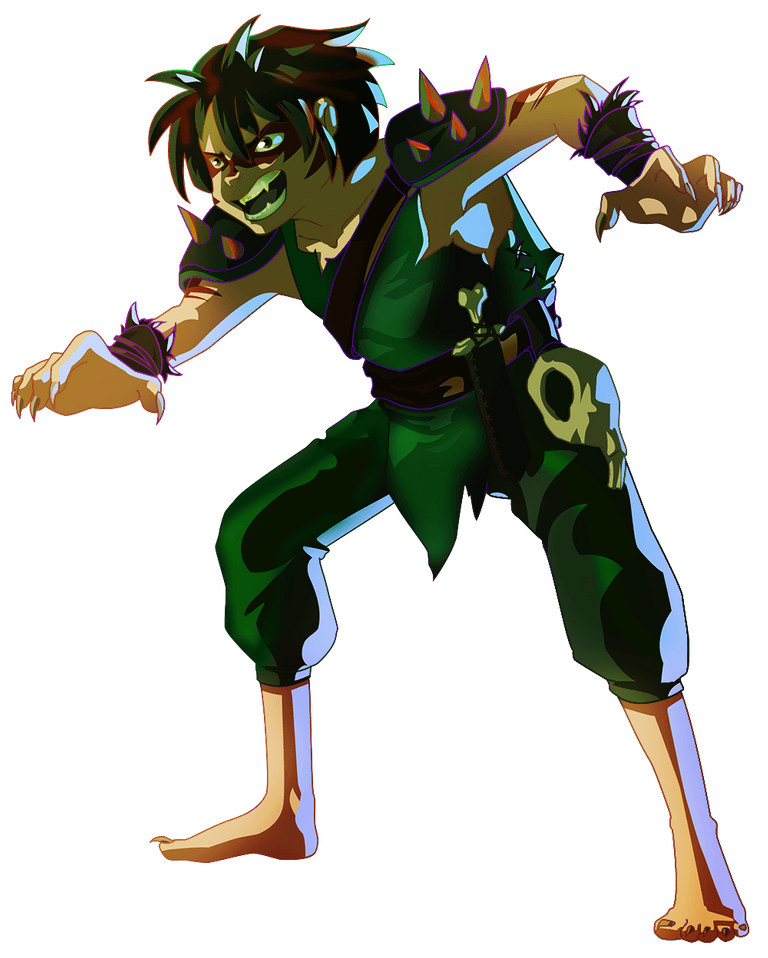
🌿 El día de hoy quiero compartirles mi participación para el concurso de arte semanal de @splinterlands. Para el dibujo de esta semana he decidido hacer al personaje CHILD OF THE FOREST. Decidí hacerlo ya que a primera vista me pareció muy interesante y creí que a mi estilo podría verse muy bien. También el contexto de su historia podía encajar perfectamente en mis fondos.
En mis primeras participaciones en este reto semanal opté por hacer dibujos que yo llamo "sencillos", no porque sean sencillos, sino porque no son dibujos con fondos, pero de igual manera son complicados de hacer. Pero para esta semana decidí hacer algo más elaborado, y sinceramente disfruto más haciendo escenas completas, que esas escenas transmitan algo y te sumerjan en ella. Así que sin más dilación, vamos con el proceso.
- Today I want to share with you my entry for the @splinterlands weekly art contest. For this week's drawing I decided to do the character CHILD OF THE FOREST. I decided to do it because at first sight I found him very interesting and I thought that in my style he could look very good. Also the context of his story could fit perfectly with my backgrounds.
- In my first participations in this weekly challenge I chose to make drawings that I call "simple", not because they are simple, but because they are not drawings with backgrounds, but they are still complicated to make. But for this week I decided to do something more elaborate, and honestly I enjoy more making complete scenes, that these scenes transmit something and immerse you in it. So without further ado, let's go through the process.
PROCESO | PROCESS
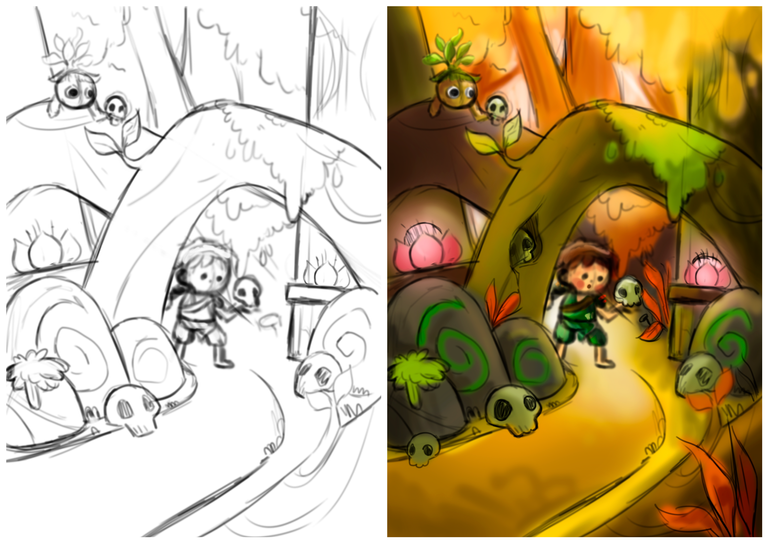
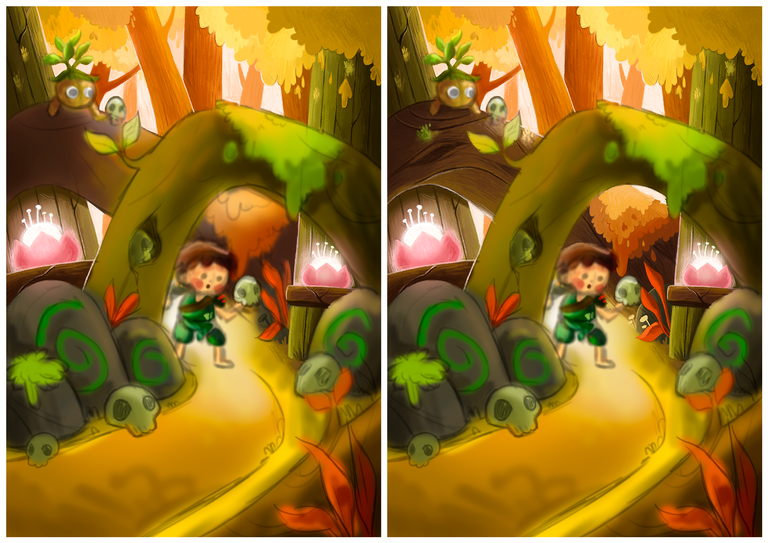
Para hacer el boceto me inspiré en su historia, quería hacer una escena en un bosque encantado, lleno de una naturaleza peculiar, para ello hice algunos troncos un poco fuera de lo común, agregué algunas rocas con un diseño único para darle más armonía a la obra y como detalle extra, ya que el niño tiene un cráneo amarrado en su pierna, decidí agregar algunos cráneos por el suelo y uno escondido en el tronco principal. Para hacer al niño decidí hacerlo con una pose algo dinámica, como si acabara de encontrar un cráneo (en este caso es el cráneo que lleva amarrado en su pierna), también agregué a otro personaje, que este caso es su mejor amigo.
Luego de tener la escena lista, comencé el estudio de color. Ya tenía en mente que usaría colores verdes, pero no sabía con qué color complementarlo, así que fui probando poco a poco y al final decidí usar colores amarillos y naranjas y rojos para complementar bien la obra. Al final siento que fue la decisión correcta y creo que haberme tomado el tiempo para elegir los colores valió la pena.
- To make the sketch I was inspired by his story, I wanted to make a scene in an enchanted forest, full of a peculiar nature, for that I made some trunks a bit out of the ordinary, I added some rocks with a unique design to give more harmony to the work and as an extra detail, since the boy has a skull tied on his leg, I decided to add some skulls on the ground and one hidden in the main trunk. To make the boy I decided to make him with a dynamic pose, as if he had just found a skull (in this case it is the skull tied on his leg), I also added another character, which in this case is his best friend.
- After I had the scene ready, I started the colour study. I already had in mind that I would use green colours, but I didn't know what colour to complement it with, so I tried little by little and in the end I decided to use yellow and orange and red colours to complement the work well. In the end I feel it was the right decision and I think that taking the time to choose the colours was worth it.
Llegó la hora de colorear y para ello empecé por el fondo, a menudo suelo colorear en una sola capa, así que empiezo a colorear desde el fondo hasta lo que está más adelante. Bueno, empecé a colorear los árboles del fondo, utilizando varios tonos de naranjas y marrones para los troncos y para las hojas utilicé amarillos y mostazas.
Después procedí a colorear los pilares de roca que están en los costados. Para ello me tomé mi tiempo porque quería hacer cada detalle. Agregué algunas grietas para darle un toque más antiguo y también coloreé las lámparas con forma de flor.
Después de ello procedí a colorear el primer tronco con forma peculiar, para ello fui haciendo algunos garabatos tratando de unir cada uno de los tonos marrones que había, luego fui agregando detalles con unos tonos más oscuros para que diera la sensación de ser un tronco. También coloreé las hojas que caen sobe él utilizando los mismos tonos naranjas que utilicé en el fondo.
- It was time to colour and for this I started with the background, I often colour in a single layer, so I start colouring from the background to the front. Well, I started colouring the trees in the background, using various shades of oranges and browns for the trunks and for the leaves I used yellows and mustards.
- Then I proceeded to colour the rock pillars on the sides. For this I took my time because I wanted to do every detail. I added some cracks to give it a more antique touch and I also coloured the flower-shaped lamps.
- After that I proceeded to colour the first trunk with a peculiar shape, for that I made some doodles trying to join each of the brown tones that were there, then I added some details with darker tones to give the sensation of being a trunk. I also coloured the leaves that fall on it using the same orange tones that I used in the background.
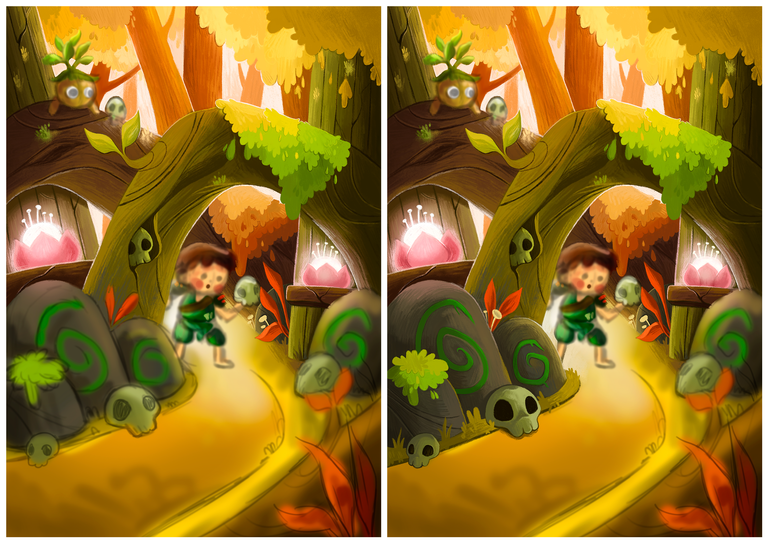
Dejando atrás la zona "naranja" por así decirlo jaja, llegó la hora de colorear la zona "verde", para ello comencé por colorear el tronco principal, aquí utilicé colores marrones verdosos que sinceramente me encantan, también utilicé tonos más oscuros para las partes más oscuras y para hacerle esos patrones que le hago a los troncos. Para las hojas que caen sobre él utilicé colores verdes y amarillos para que la transición con los colores del fondo no fuera tan brusca.
En el siguiente paso procedí a colorear las rocas del lado izquierdo. Para ello fui jugando con los tonos claros y oscuros, tomándome mi tiempo para darle los detalles suficientes y también colorear las líneas verdes que son las que le dan ese toque único a las rocas. Luego procedí a colorear los dos cráneos que están en esa parte del dibujo y un poco del césped.
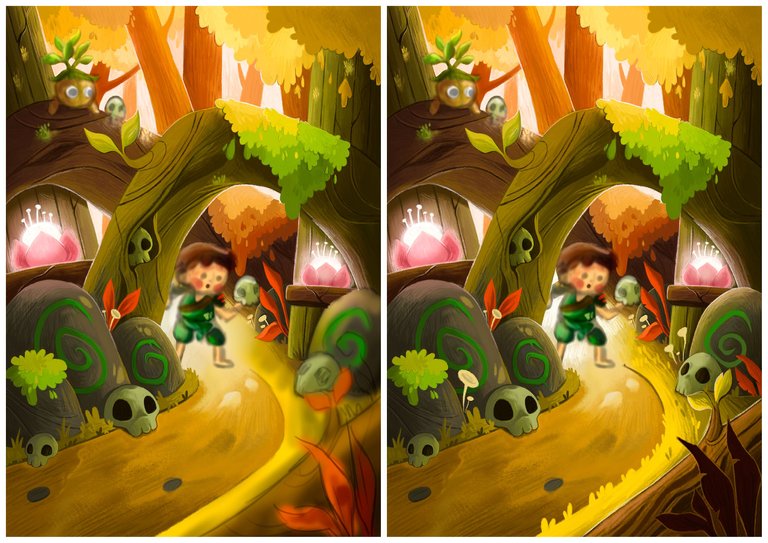
A medida que avanzaba en el dibujo iba agregando algunas flores extra, las cuales habitualmente uso para que no se sientan vacías algunas zonas. Luego de hacer eso, coloreé el camino de tierra que conduce hacia el niño. Esta parte fue sencilla y sin mucho trabajo, solo fue jugar con los tonos y darle una textura de tierra para que combinara con todo el dibujo.
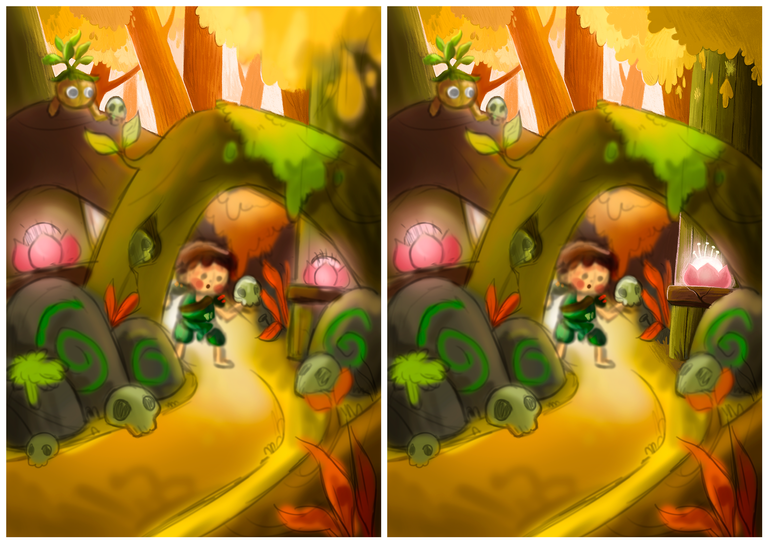
Para terminar el fondo coloreé lo que me faltaba del lado derecho, incluidas las piedras, algunas flores, el cráneo que faltaba y coloree el tronco que está abajo a la derecha, no sé si se dieron cuenta, pero cambié el color de la hoja del tronco por un color verde y también cambié el color de las hojas que estaban atrás del tronco por unas más oscuras. Esto lo hice porque esas hojas llamaban la atención y no quería eso. La intención es que la mirada de las personas se centren en el niño y esa hoja llamaba un poco la atención.
- Leaving behind the "orange" area so to speak haha, it was time to colour the "green" area, for this I started by colouring the main trunk, here I used greenish brown colours that I honestly love, I also used darker tones for the darker parts and to make those patterns that I do to the trunks. For the leaves that fall on it I used green and yellow colours so that the transition with the background colours was not so abrupt.
- In the next step I proceeded to colour the rocks on the left side. For this I played with the light and dark tones, taking my time to give enough detail and also to colour the green lines that give the rocks that unique touch. Then I proceeded to colour the two skulls that are in that part of the drawing and a bit of the grass.
- As I progressed in the drawing I added some extra flowers, which I usually use so that some areas don't feel empty. After doing that, I coloured in the dirt road leading to the boy. This part was simple and without much work, it was just playing with the tones and giving it an earthy texture to match the whole drawing.
- To finish the background I coloured what was missing on the right side, including the stones, some flowers, the missing skull and I coloured the trunk at the bottom right, I don't know if you noticed, but I changed the colour of the leaf on the trunk for a green colour and I also changed the colour of the leaves behind the trunk for darker ones. I did this because those leaves attracted attention and I didn't want that. The intention is for people's eyes to focus on the child and that leaf was a bit of an eye-catcher.
Ya para finalizar el dibujo procedí a colorear a los personajes, primero empecé por colorear al mejor amigo, originalmente él sostendría un cráneo, pero también llamaría la atención. Así que decidí hacerlo con una expresión de asombro y con una mirada que dirigiera la tención al niño (por cierto, el detalle de las hojas en su cabeza quedó increíble).
Y ya para finalizar llegó la hora de colorear al niño, fue divertido hacer cada uno de sus accesorios, la verdad son muy originales. Pero, aquí también decidí cambiar algo y en este caso fue la dirección del rostro y su expresión. Esto se debe a que primeramente cambié la pose y expresión del personaje y para que ambos combinaran de buena manera tuve que cambiar la expresión del niño. Es como si el niño hubiera encontrado la calavera y se la estuviera enseñando a su mejor amigo, por ende el mejor amigo se asombra.
Jaja hacer estos cambios fue complicado y me llevó mucho tiempo, pero valió la pena porque hizo que el dibujo se viera mejor. Y esto también sirve como consejo para ustedes artistas, si ven que algo no funciona, cámbialo, tal vez ese cambio sea lo que tu dibujo necesita.
- To finish the drawing I proceeded to colour the characters, first I started by colouring the best friend, originally he would hold a skull, but he would also draw attention to himself. So I decided to do it with an expression of astonishment and with a look that would draw the child's attention (by the way, the detail of the leaves on his head was amazing).
- And finally it was time to colour the boy, it was fun to make each of his accessories, they are really original. But, here I also decided to change something and in this case it was the direction of the face and his expression. This is because first I changed the pose and expression of the character and in order to combine both in a good way I had to change the child's expression. It's as if the boy had found the skull and was showing it to his best friend, hence the best friend is amazed.
- Haha making these changes was complicated and time consuming, but it was worth it because it made the drawing look better. And this also serves as a tip for you artists, if you see that something doesn't work, change it, maybe that change is what your drawing needs.
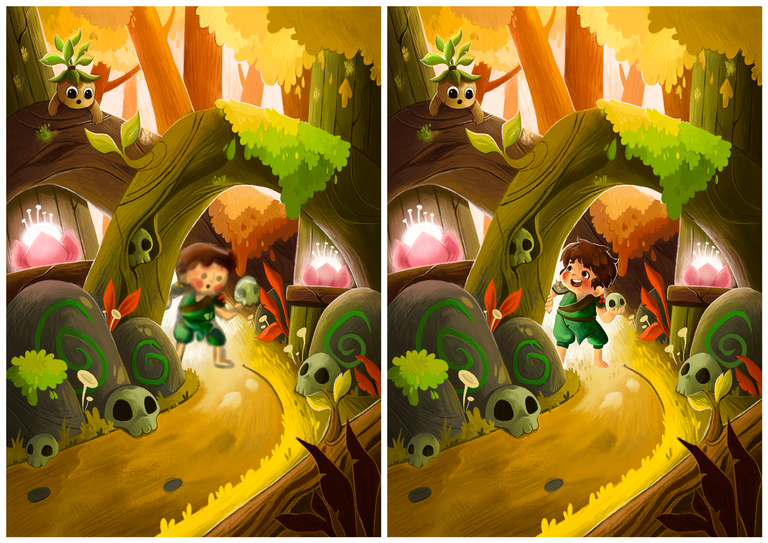
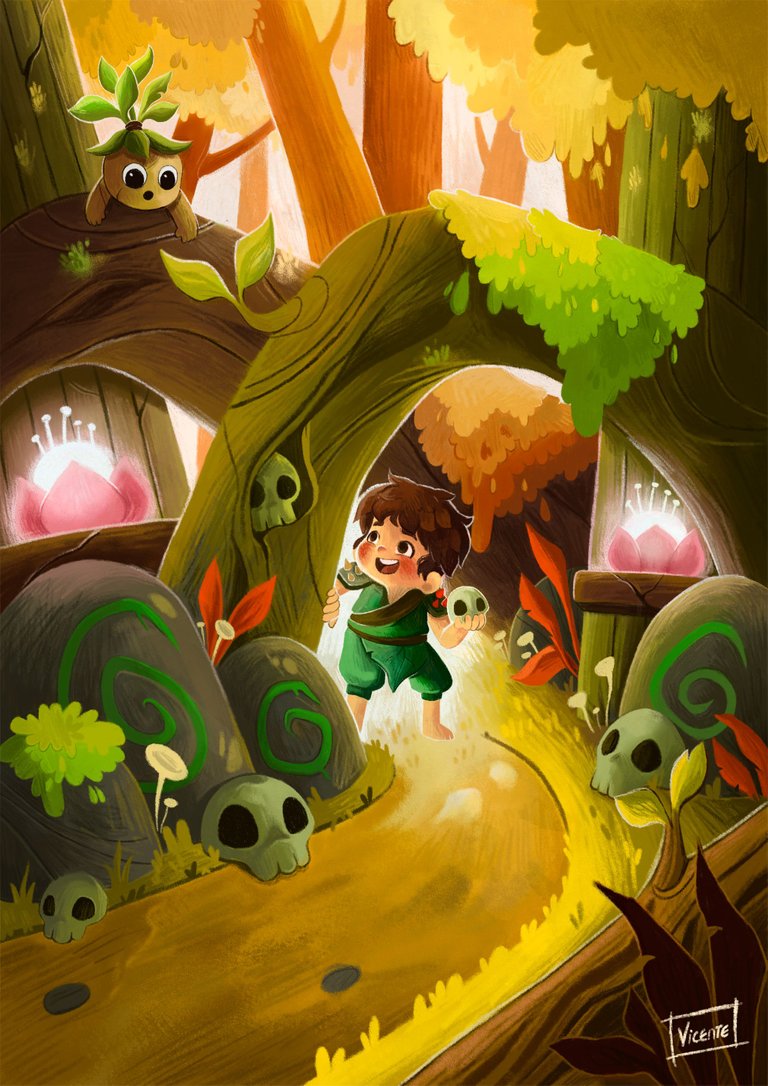
🌿 Espero que lo hayan disfrutado. Aquí les dejo el resultado final.🌿
- I hope you enjoyed it. Here is the final result.🌿
Tableta gráfica Huion. / Huion graphics tablet.
Programa Photoshop. / Photoshop program.
Traductor Deepl. / Deepl Translator.
Instagram:@byvicente99

Separador y Fotos editadas en Canva
Photos edited in Canva
Te quedo muy hermoso, y tierno amigo, le diste un toque personal muy lindo. Me encanto. La mejor de las suertes en el concurso. Éxitos, y saludos @vicente99 ✨
!DIY
Muchas gracias amiga! Que bueno que te gustó y gracias por el apoyo! Saludos.
You can query your personal balance by
!DIYSTATS¡Felicidades! Esta publicación obtuvo upvote y fue compartido por @la-colmena, un proyecto de Curación Manual para la comunidad hispana de Hive que cuenta con el respaldo de @curie.
Si te gusta el trabajo que hacemos, te invitamos a darle tu voto a este comentario y a votar como testigo por La Colmena.
Si quieres saber más sobre nuestro proyecto, te invitamos a acompañarnos en nuestro servidor de Discord.
Que esperas para unirte a nuestro trail de curación y formar parte del "proyecto CAPYBARAEXCHANGE", tu casa de cambio, rapida, confiable y segura
Thanks for sharing! - castleberry#6859

Thanks so much for the support!
hands down this is the best entry for me , I'm not gonna lie, i love the lighting so much , this looks like an illustration for a front cover of a kids book
Thanks so much! It is a pleasure for me to hear that it is the best entry of this week. I did my best and I see that it was worth it. All the best!