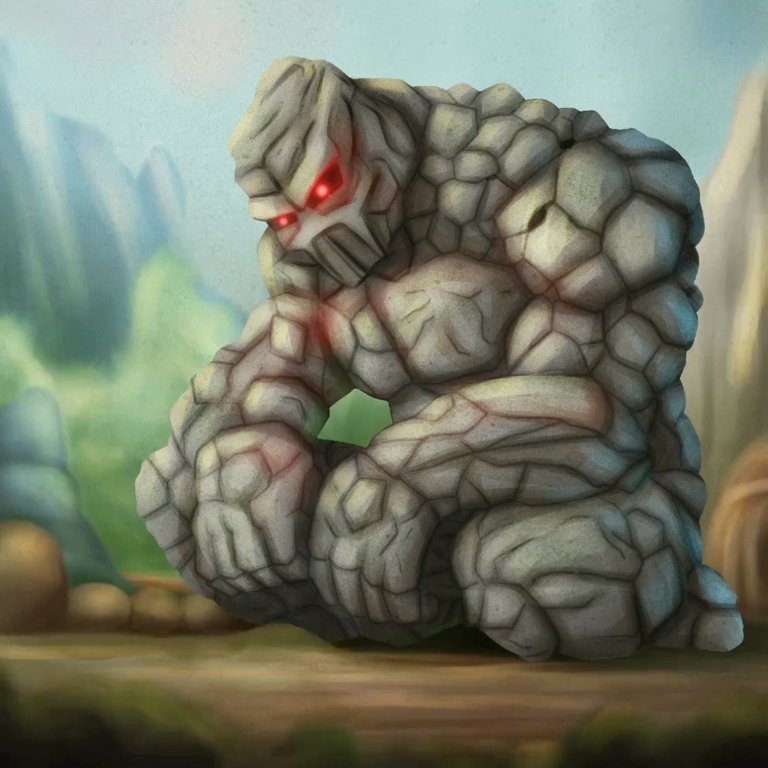
[Splinterlands] Stone Golem - Social Media
Hello to all digital art lovers! Welcome to my art blog. I am pleased to share with you my latest artwork, inspired by the character of "Stone Golem" from Splinterlands.
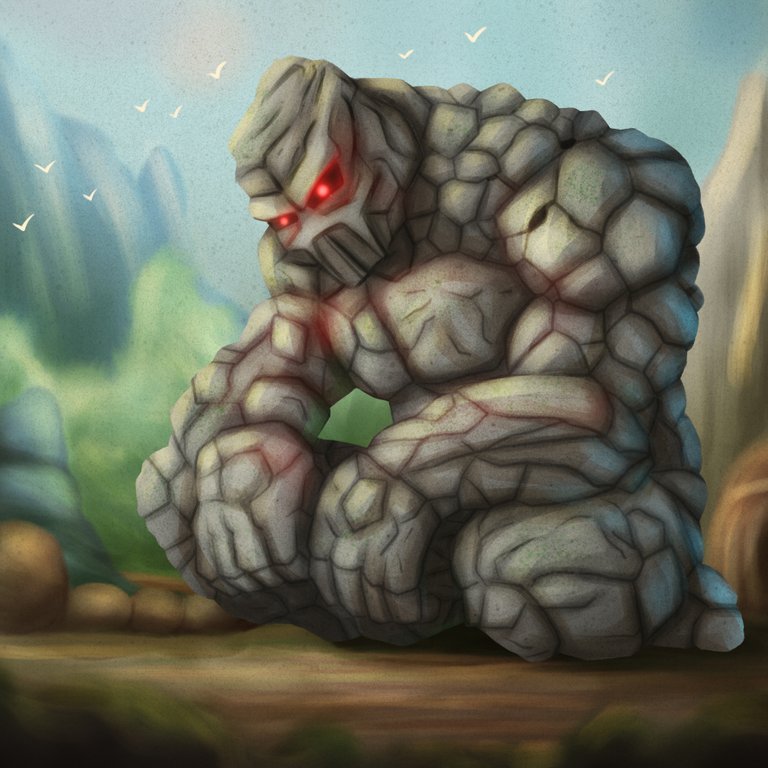
For this Splinterlands social media section, I couldn't resist the opportunity to represent one of my favorite characters from this universe. The "Stone Golem" is a gigantic stone being that fascinates me with his imposing presence and his unique and robust appearance.
This fanart was quite a challenge for me, especially trying to get the rocky texture that characterizes the character. It took me quite some time to study the characteristics of the golem, in order to be able to capture it realistically in my artwork. However, the final result was very gratifying and I am very happy with how it turned out.
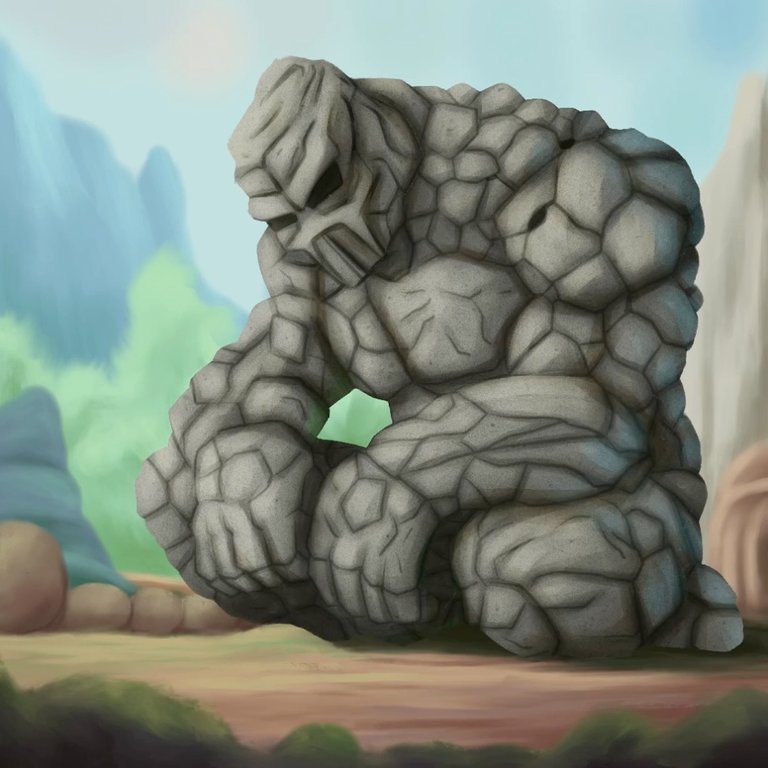
On this occasion, I decided to represent the "Stone Golem" in a passive pose, sitting on the ground while several birds fly away from him. I wanted to convey a sense of tranquility and serenity in the scene, contrasting with the imposing figure of the golem.
I hope you enjoy my artwork as much as I enjoyed creating it. Don't forget to follow me on my social networks to keep up to date with my next artistic creations! Thanks for reading!
Next I show you the step by step of the development of the illustration.
¡Hola a todos los amantes del arte digital! Bienvenidos a mi blog de arte. Me complace compartir con ustedes mi última obra de arte, inspirada en el personaje de "Stone Golem" de Splinterlands.
Para esta sección social media de Splinterlands, no pude resistirme a la oportunidad de representar a uno de mis personajes favoritos de este universo. El "Stone Golem" es un ser gigantesco de piedra que me fascina por su imponente presencia y su aspecto único y robusto.
Este fanart fue todo un reto para mí, especialmente al tratar de obtener la textura rocosa que caracteriza al personaje. Me llevó bastante tiempo estudiar las características del golem, para poder plasmarlo de manera realista en mi obra de arte. Sin embargo, el resultado final fue muy gratificante y estoy muy contento con cómo quedó.
En esta ocasión, decidí representar al "Stone Golem" en una pose pasiva, sentado en el suelo mientras varias aves vuelan a lo lejos de él. Quería transmitir una sensación de tranquilidad y serenidad en la escena, que contrastara con la imponente figura del golem.
Espero que disfruten de mi obra de arte tanto como yo disfruté creándola. ¡No olviden seguirme en mis redes sociales para estar al tanto de mis próximas creaciones artísticas! ¡Gracias por leer!
A continuación les muestro el paso a paso del desarrollo de la ilustración.
Drawing development / Desarrollo ✏️ 
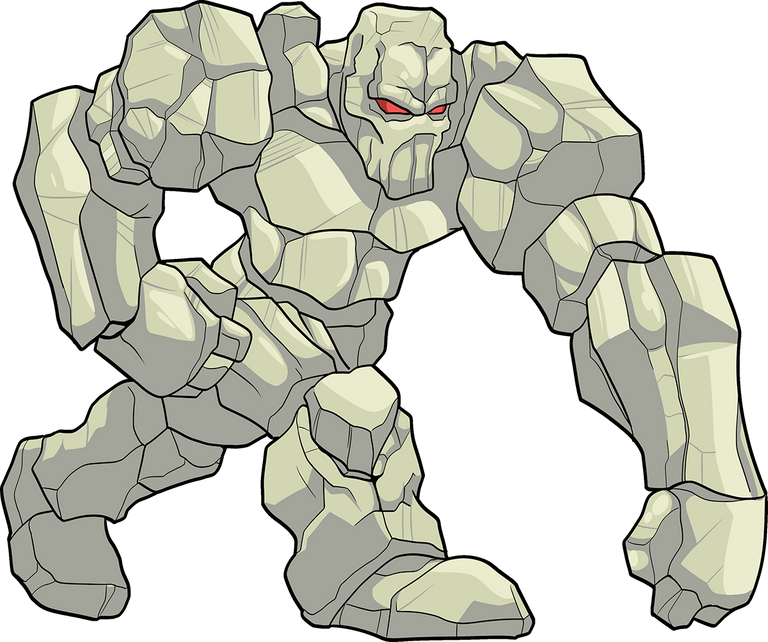
The Stone Golems that reside around the Crags of Maglar are quite terrifying to any stranger who wanders into their domain. In spite of the sheer power and weight of them, these Golems are surprisingly gentle and peaceful. A good day for a Stone Golem is one in which he did a lot of heavy lifting.
Los Golems de Piedra que residen alrededor de los Riscos de Maglar son bastante aterradores para cualquier extraño que se adentre en sus dominios. A pesar de su enorme poder y peso, estos Golems son sorprendentemente amables y pacíficos. Un buen día para un Golem de Piedra es aquel en el que ha levantado mucho peso.
Research: As I mentioned before, before starting to draw, it is important to study and analyze the character in question. I researched the characteristics of the "Stone Golem", such as its size, texture, colors and proportions, in order to be able to capture it realistically in my artwork.
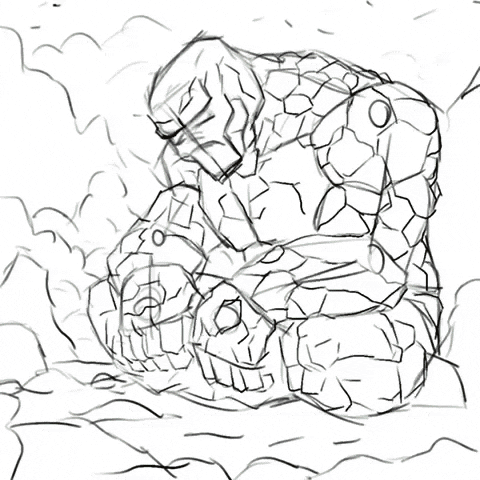
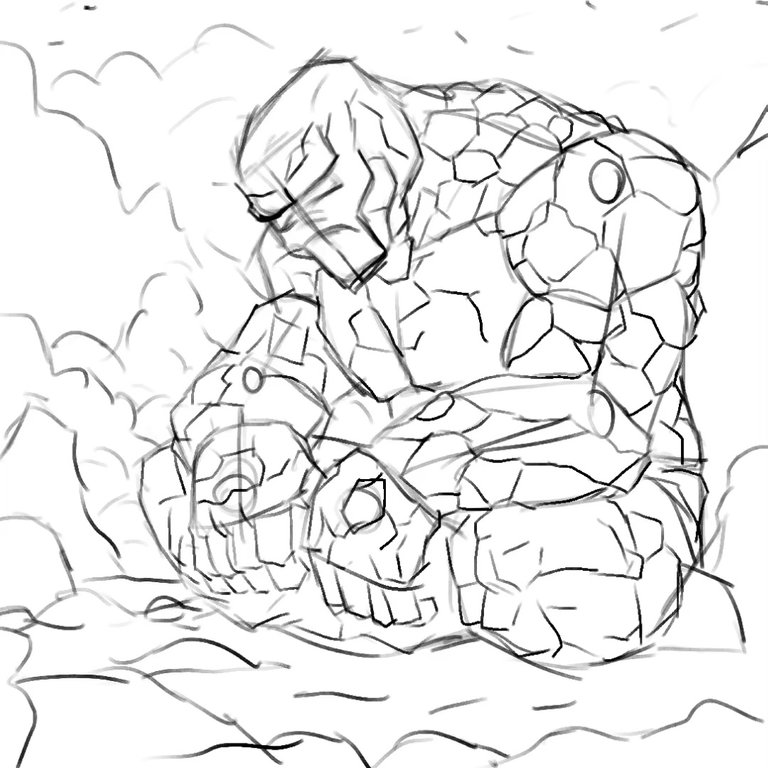
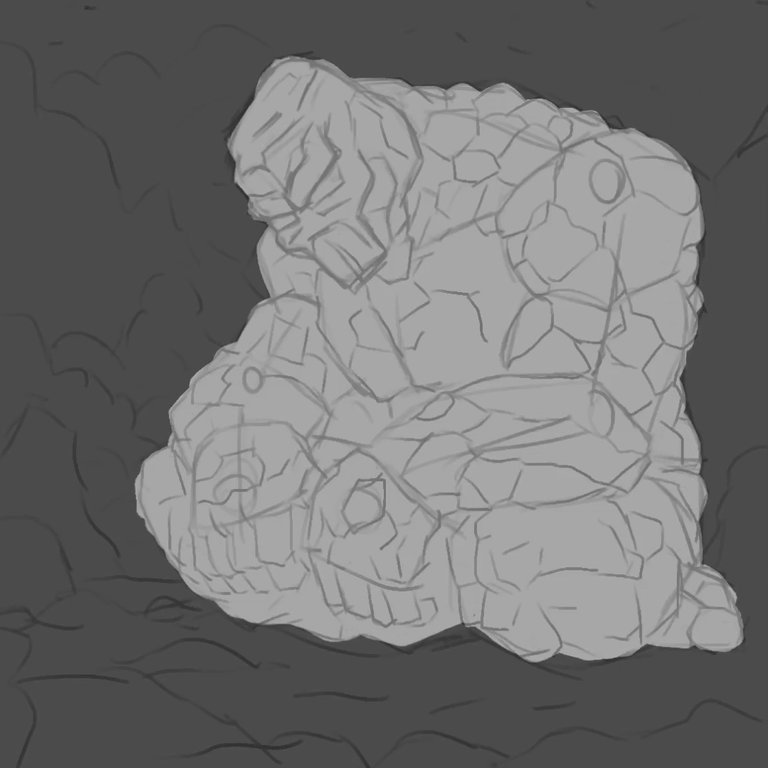
Sketches: I started with some sketches. This allowed me to experiment with different poses and compositions until I found the one I liked the most.
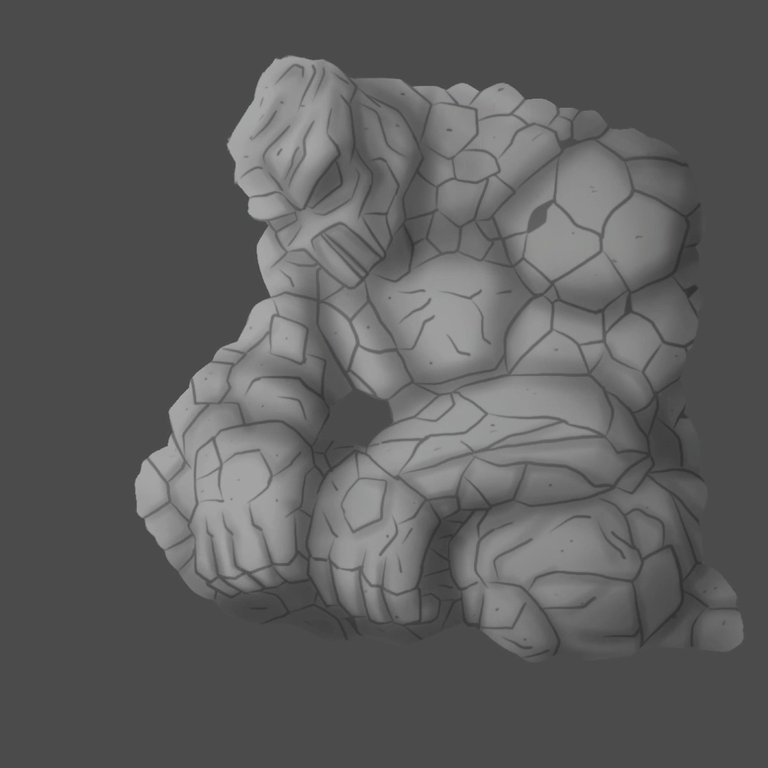
Contour lines: Once I had my sketch, I started drawing the contour lines of the "Stone Golem" with a pencil tool in my drawing software. I used a graphic tablet to have more precision in the strokes. Here I outline the structure of each stone that gives shape to the golem's body.
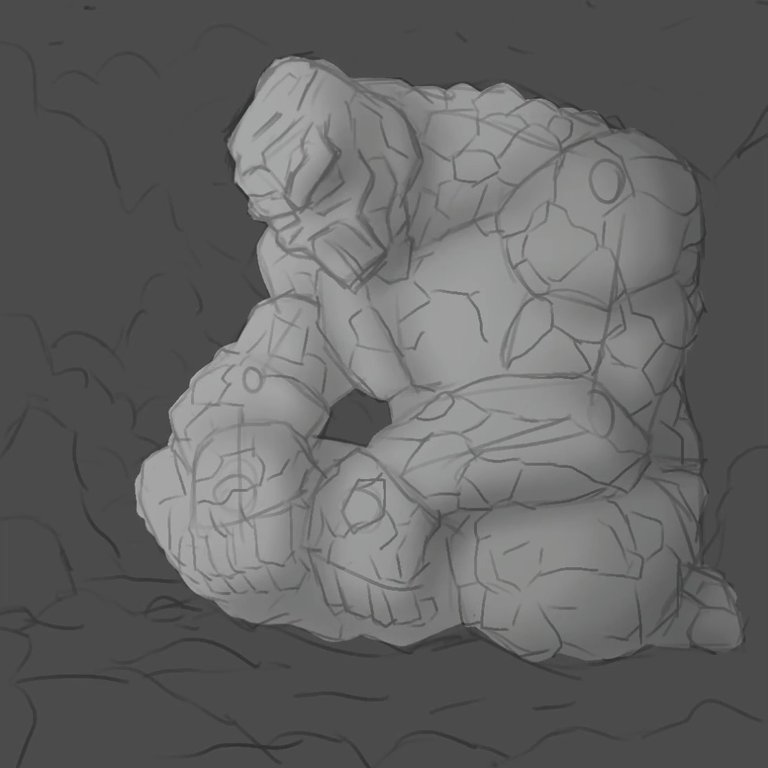
Grayscale: Instead of starting with color, I chose to use the grayscale technique to create a solid base of shadows and lights. This allowed me to have more control over the lighting and contrasts in the artwork. I used different shades of gray to give depth and realism to the character.
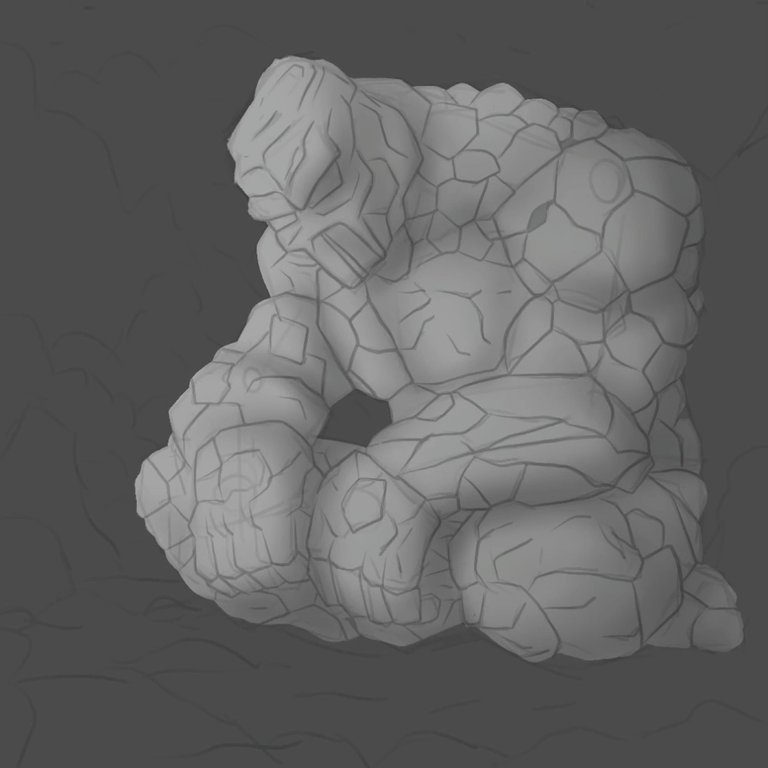
Rock Texture: Once I had the base shadows and highlights, I added the rock texture of the "Stone Golem". I used a texture brush tool to add different tones and shadows on the surface of the golem. I also used blurring tools to soften the edges and create a smooth transition between the shades of gray.
Investigación: Como mencioné anteriormente, antes de comenzar a dibujar, es importante estudiar y analizar el personaje en cuestión. Investigué las características del "Stone Golem", como su tamaño, textura, colores y proporciones, para poder plasmarlo de manera realista en mi obra de arte.
Bocetos: Comencé con algunos bocetos. Esto me permitió experimentar con diferentes poses y composiciones hasta encontrar la que más me gustó.
Líneas de contorno: Una vez que tenía mi boceto, comencé a dibujar las líneas de contorno del "Stone Golem" con una herramienta de lápiz en mi software de dibujo. Utilicé una tableta gráfica para tener mayor precisión en los trazos. Acá delimite la estructura de cada piedra que da forma al cuerpo del golem.
Escala de grises: En lugar de comenzar con el color, opté por utilizar la técnica de escala de grises para crear una base sólida de sombras y luces. Esto me permitió tener un mayor control sobre la iluminación y los contrastes en la obra de arte. Utilicé diferentes tonos de gris para dar profundidad y realismo al personaje.
Textura rocosa: Una vez que tenía la base de sombras y luces, agregué la textura rocosa del "Stone Golem". Utilicé una herramienta de pincel de textura para agregar diferentes tonos y sombras en la superficie del golem. También utilicé herramientas de difuminado para suavizar los bordes y crear una transición suave entre los tonos de gris.
 |  |
|---|
 |  |
|---|
 |  |
|---|
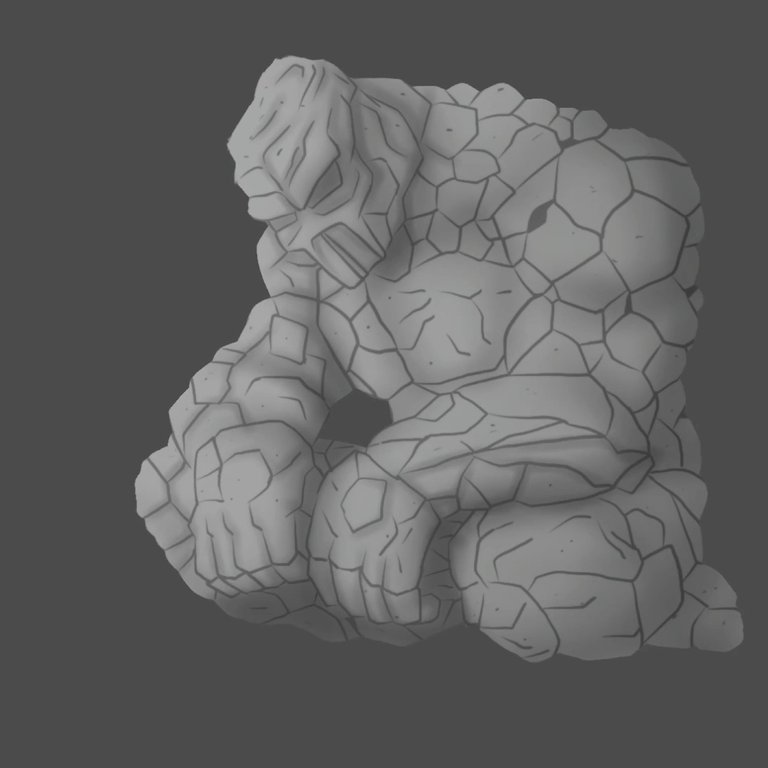
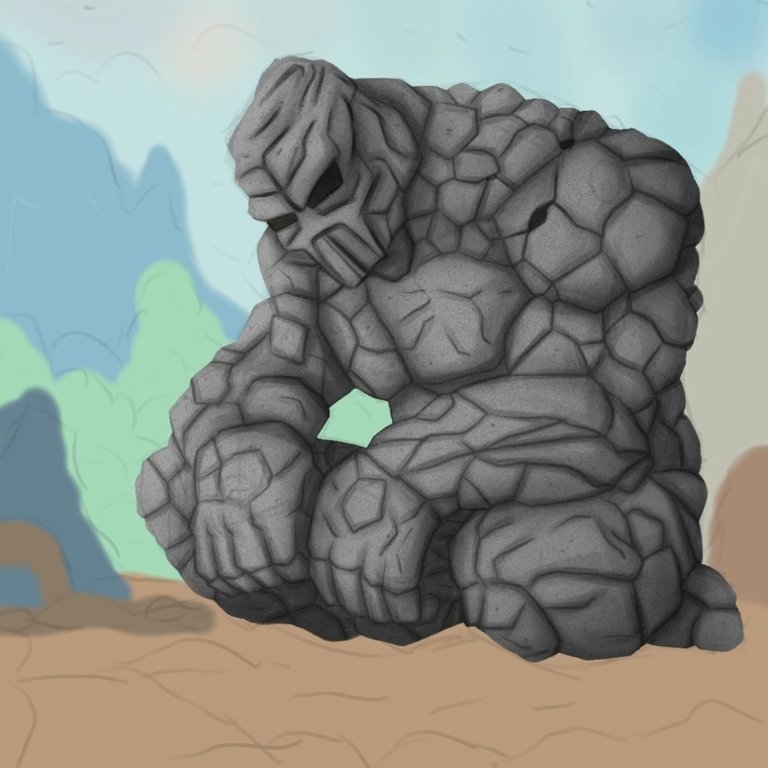
Color application: After I had the base of shadows and highlights and the rocky texture, I started to apply the color. I used a brush tool to add different shades of brown and beige to create a realistic stone look on the character.
Additional details: To give the scene a more realistic touch, I added some additional details such as cracks and rocks on the ground, and birds flying in the distance. This allowed me to bring the artwork to life and make the scene look more real.
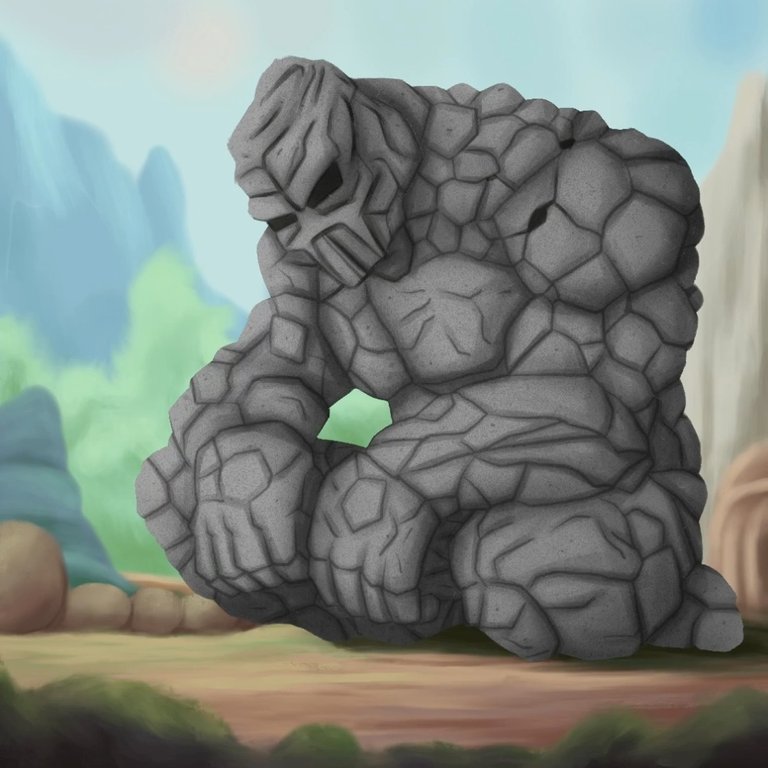
Final adjustments: Finally, I adjusted the colors and shadows of the artwork to make sure everything looked balanced and cohesive. I also added my signature and uploaded it to my social media to share my artwork with the world.
I hope this tutorial was helpful for those interested in creating digital art using the grayscale technique and then applying color! If you have any questions or want to share your own artwork, feel free to do so in the comments - thanks for reading!
Aplicación de color: Después de tener la base de sombras y luces y la textura rocosa, comencé a aplicar el color. Utilicé una herramienta de pincel para agregar diferentes tonos de marrón y beige para crear una apariencia realista de piedra en el personaje.
Detalles adicionales: Para darle un toque más realista a la escena, agregué algunos detalles adicionales como las grietas y rocas en el suelo, y las aves volando a lo lejos. Esto me permitió darle vida a la obra de arte y hacer que la escena pareciera más real.
Ajustes finales: Finalmente, ajusté los colores y sombras de la obra de arte para asegurarme de que todo se veía equilibrado y coherente. También agregué mi firma y la subí a mis redes sociales para compartir mi obra de arte con el mundo.
¡Espero que este tutorial haya sido útil para aquellos interesados en crear arte digital utilizando la técnica de escala de grises y luego aplicando color! Si tienen alguna pregunta o quieren compartir sus propias obras de arte, no duden en hacerlo en los comentarios. ¡Gracias por leer!
 |  |
|---|
 |  |
|---|
 |  |
|---|
Final design / Diseño final 🎨
Used tools / Herramientas usadas📌

- Programs: Imovie
Procreate
SketchBook
Tablet: Ipad Pro
Apple PencilBrushes: Airbrush
Pencil
Felt-tip pen
Skin brushTime: 8 hours

Past drawings / Dibujos pasados 🔙
 |  |  |  |
|---|
Thank you for your attention. We'll see you again in the next post, don't miss it.
Gracias por la atención prestada. Nos veremos de nuevo en el proximo post, no se lo pierdan.
 °
°


Copyright © @victartex - All Rights Reserved. Design and editing by own authorship.
El punto de partida de todo logro es el deseo.
Napoleon Hill
Thanks for sharing! - @alokkumar121

Congratulations @victartex! You have completed the following achievement on the Hive blockchain And have been rewarded with New badge(s)
Your next target is to reach 54000 upvotes.
You can view your badges on your board and compare yourself to others in the Ranking
If you no longer want to receive notifications, reply to this comment with the word
STOPCheck out our last posts:
Support the HiveBuzz project. Vote for our proposal!