Medusa - Digital color tutorial on Pencil Sketch.
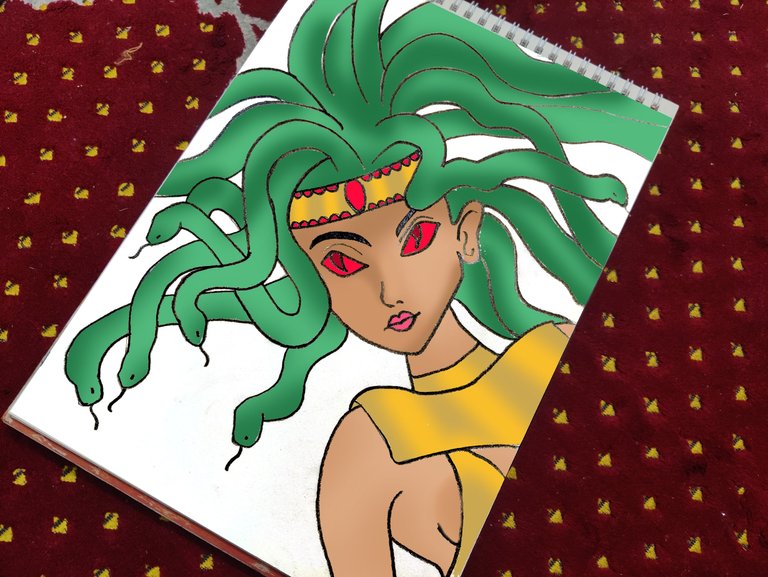
I did this art in a different approach where I did the pencil sketch in hand on a real paper and later I did the coloring part in Adobe Photoshop.
As I'm going to publish this post in DIYhub community that needs art tutorial and not art process, I'm going to talk in details about the digital coloring part that I did in this art.

This is the picture that I followed from a gaming site which is splinterlands.com.
Tools:
For the sketch in real:
- Sketchbook.
- 0.5 mm Mechanical Pencil.
- 2B Wooden Pencil.
For the digital color in my PC. I used Adobe Photoshop for the coloring part.
- Curves for highlighting the outline color.
- Paint Bucket Tool for fill color.
- Eyedropper Tool for matching the color.
- Clone Stamp Tool for smoothing the color where the color is not well painted.
- Brush Tool for giving gradient like color.
- Magic Wand Tool for selecting specific area for coloring.
The Process with the tutorial:
The Pencil Sketch:
.jpg)
I like to do closeup sketch of such things and I was focusing on the face and the hair snakes as hair. Whooshing away the confusion, I started the sketch and I started with the head band as I was looking at that part as the root. Then I started drawing the snakes.
.jpg)
And here they are, both the snakes and the character herself but she was missing her face (things on her face actually).
.jpg)
Look at the snakes that I drew. They're not same as the original picture, I gave them my own touch so they become easier to draw for me.
.jpg)
Then after drawing the face, I came to the finishing of the sketch but it was not much clear as I was using the 0.5 mm Mechanical Pencil till this point.
.jpg)
Then I used the 2B Wooden Pencil and I twisted my hand on the whole sketch and gave it a deeper stroke and even after that, I had to work more on the digital part because the app was not getting the stroke as permitted. And this is the finishing of the sketch part, now let's go to the digital part.
Digital Coloring:
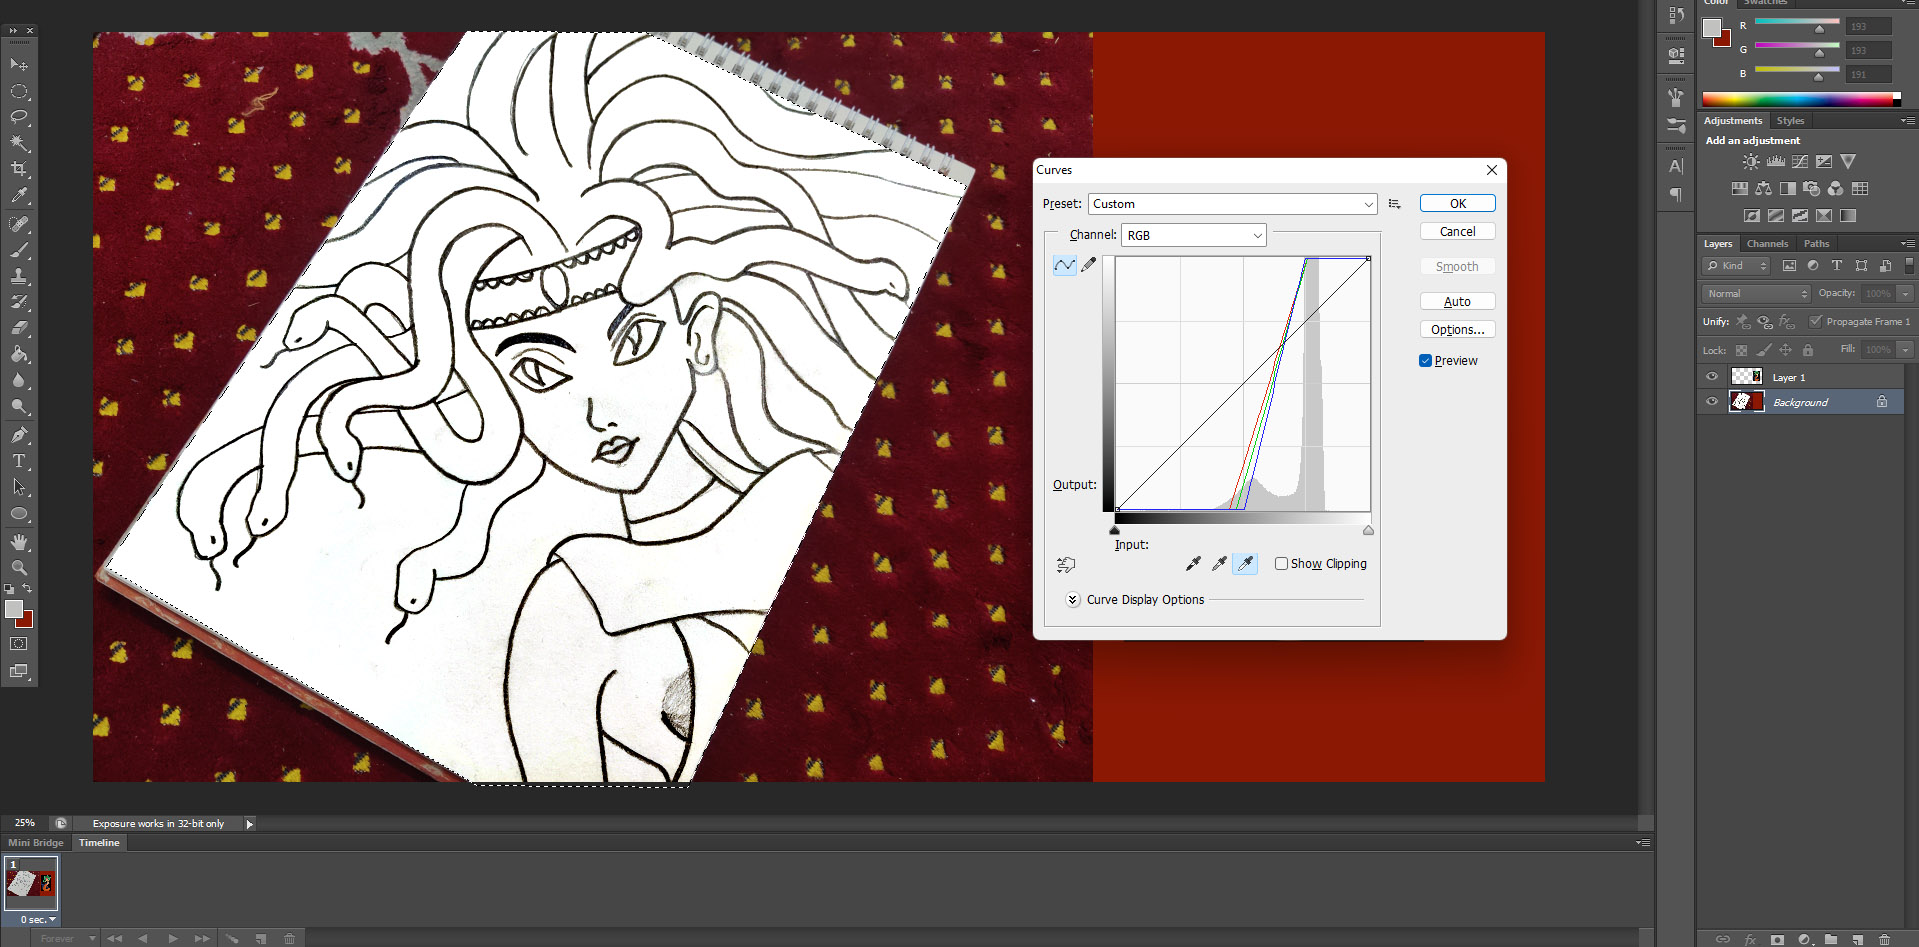
The app was not getting the strokes as permitted and as a result I wasn't able to do fill color on the specific parts, the whole page was getting filled. So I commanded for the Curves Tool pressing CTRL+M in shortcut (This can be found in main menu. From Image to Adjustments and then Curves).
In the Curves Tool, I used those two options where the left one works on the deep part (Black) and the right one works on the White part. When I clicked on any strokes with the left option, the whole outline includes the page became darker. Then I used the right option and touched on the blank white space and those space became whiter.
And I got a good stroke of the drawing and I could finally do the fill color without any problem.
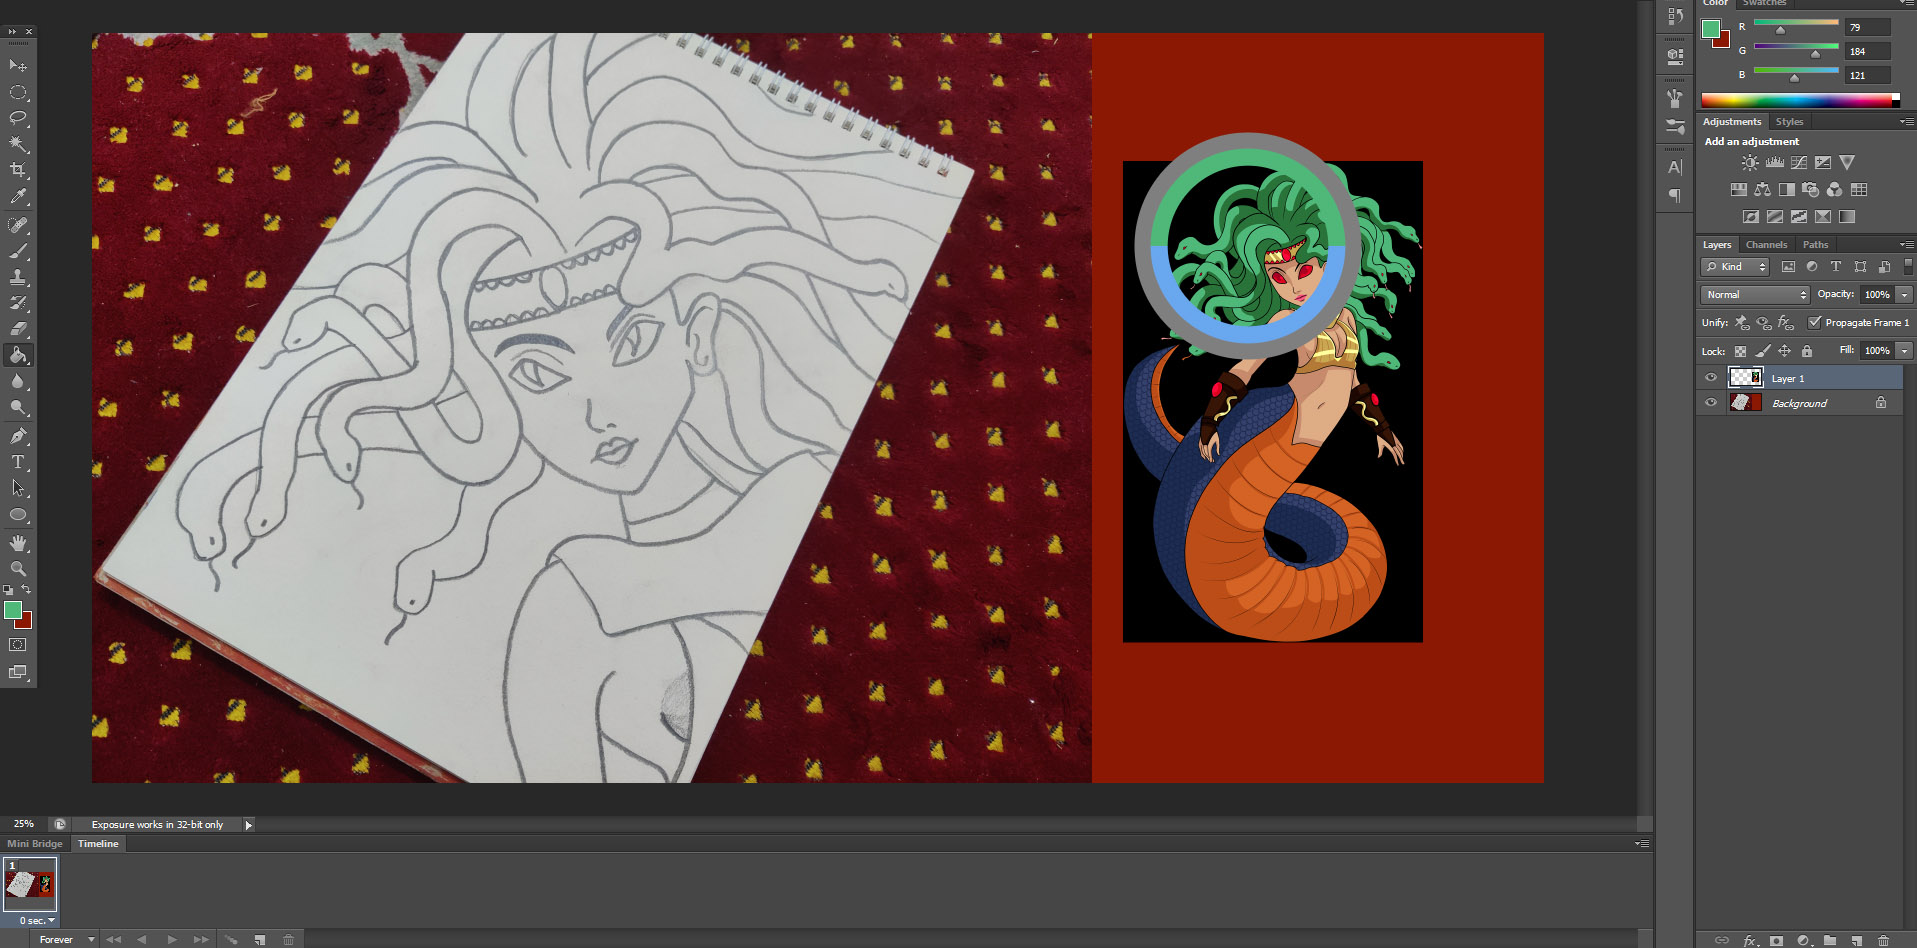
Then I copied the original picture from the website and I used the Paint Bucket Tool to fill the colors and I used Eyedropper Tool pressing ALT while I was still in Paint Bucket Tool and I chose the matched the snakes color first and applied them on my snakes.
Then I did same with all other colors and I filled almost the whole character with matching colors from the original picture. But the work hasn't finished.
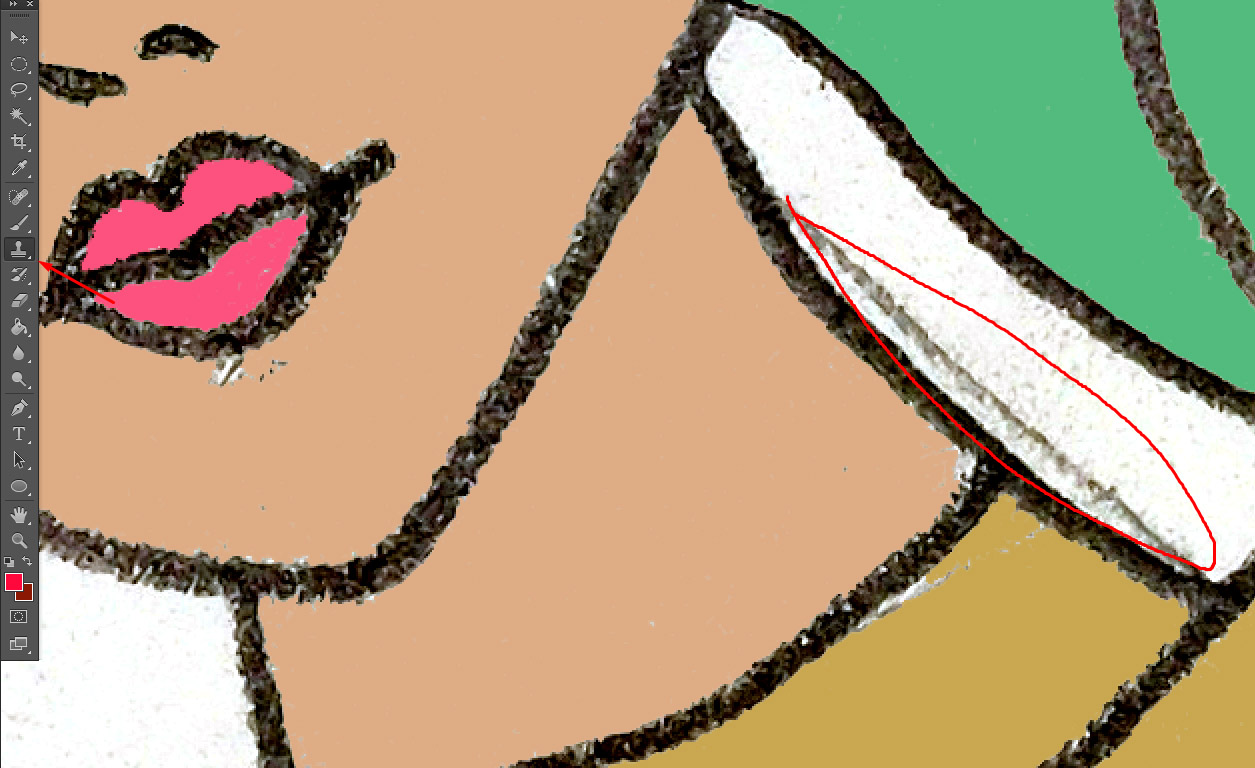
There were these pencil spots beside the neck and under the lip and on some more places that I adjusted using the Clone Stamp Tool. The Clone Stamp Tool lets you use the color that you select on anywhere you want to. Its just Cloning colors or anything. As examples, I used the white background color beside the neck to adjust that line, I used face color to adjust that part under the lip.
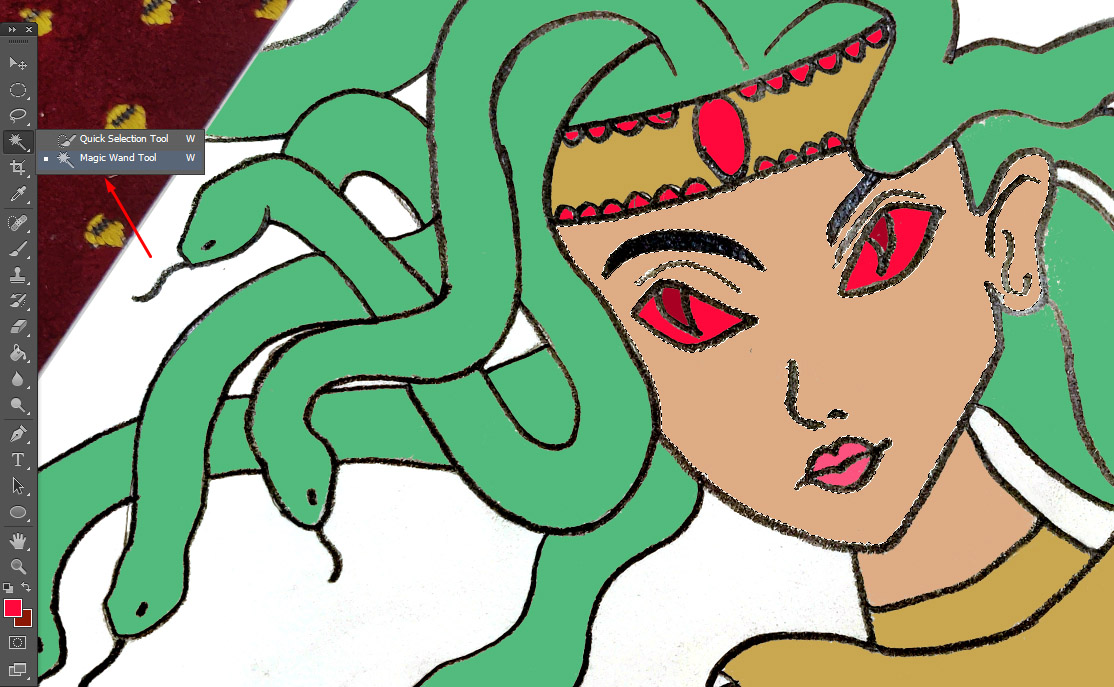
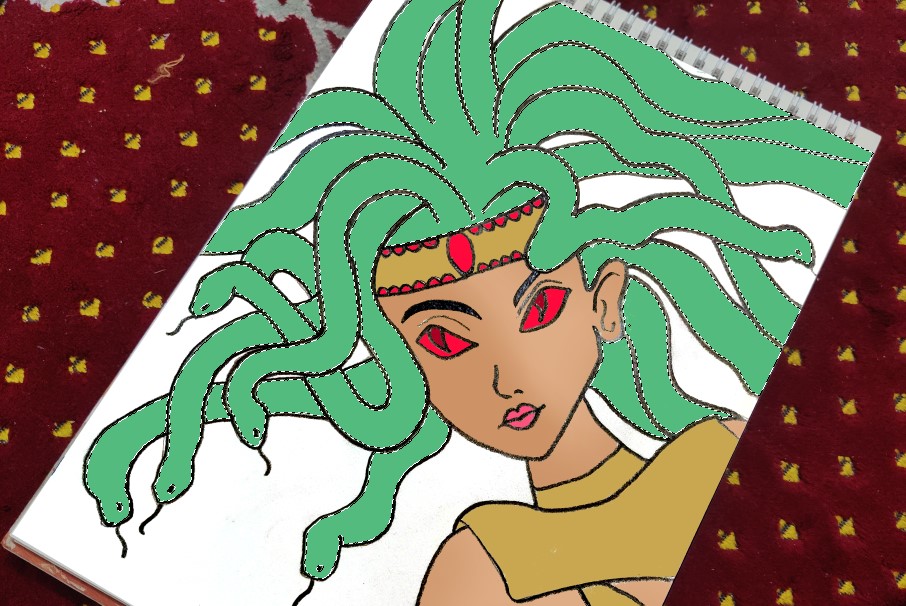
Then I used the Magic Wand Tool pressing W to select specific area as I need to work on some specific areas at once to smoothen the color.
As examples, at first I worked on the snakes, then I worked on the face and skin and then I worked on the hair band and the part of the costume.
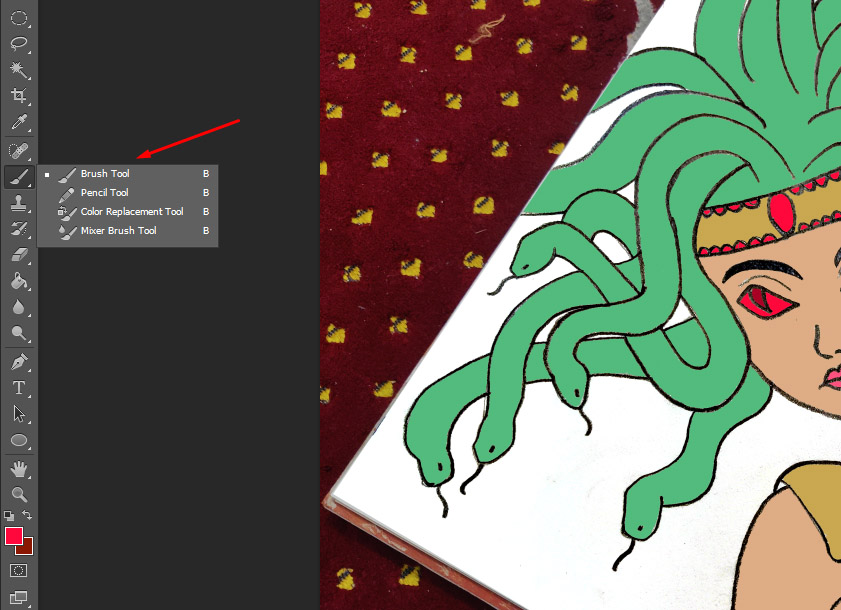
Then I chose Brush Tool to smoothen the fill colors. This part is more like doing gradient colors. The Brush Tool can be accessed by pressing B.
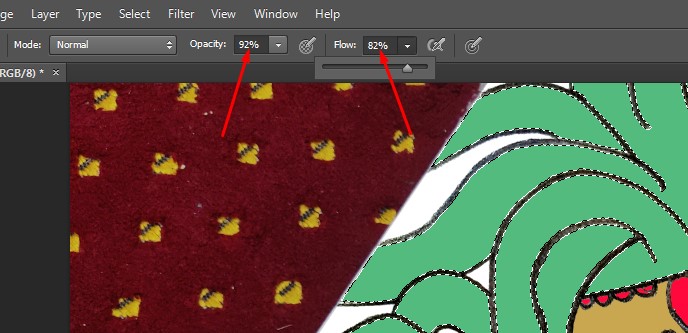
And there are these options on the upper part from where I can change the opacity and flow of the Brush Tool and they are needed when you want to blend the color more or less.
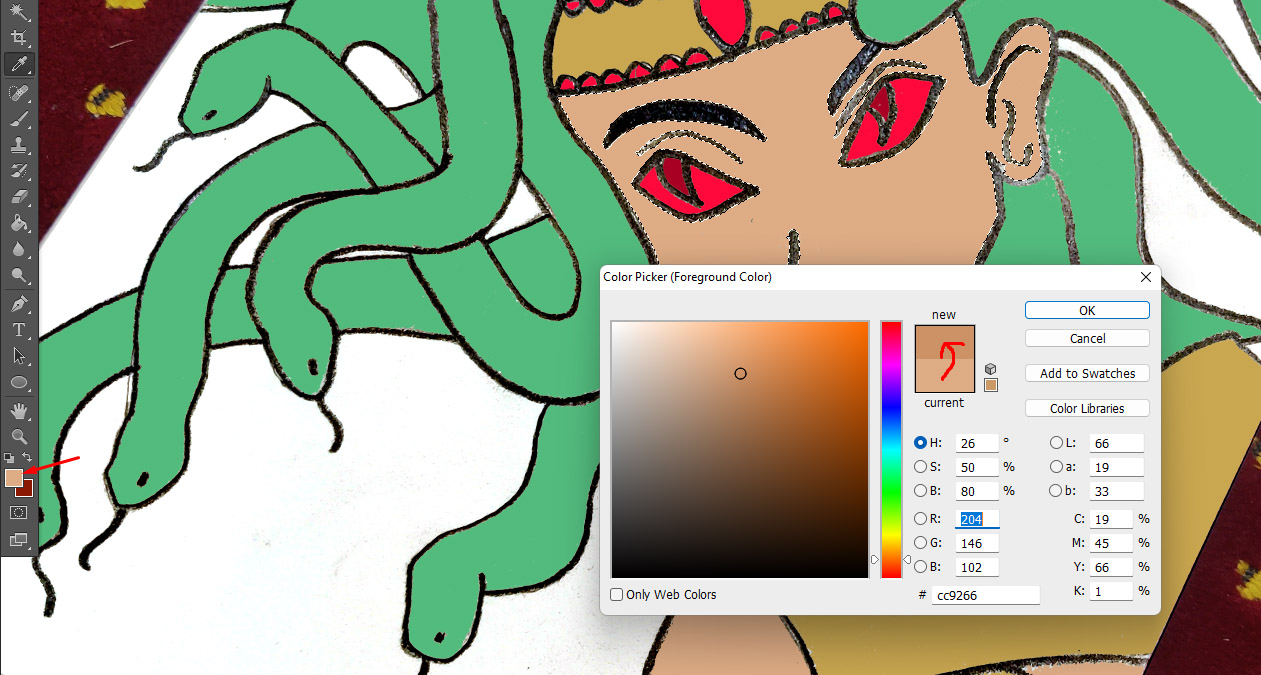
At this point I was working on the face and after matching the base color of the face by using Eyedropper Tool, I clicked on the color picker and I changed the color into a little deeper and I applied that on the face.
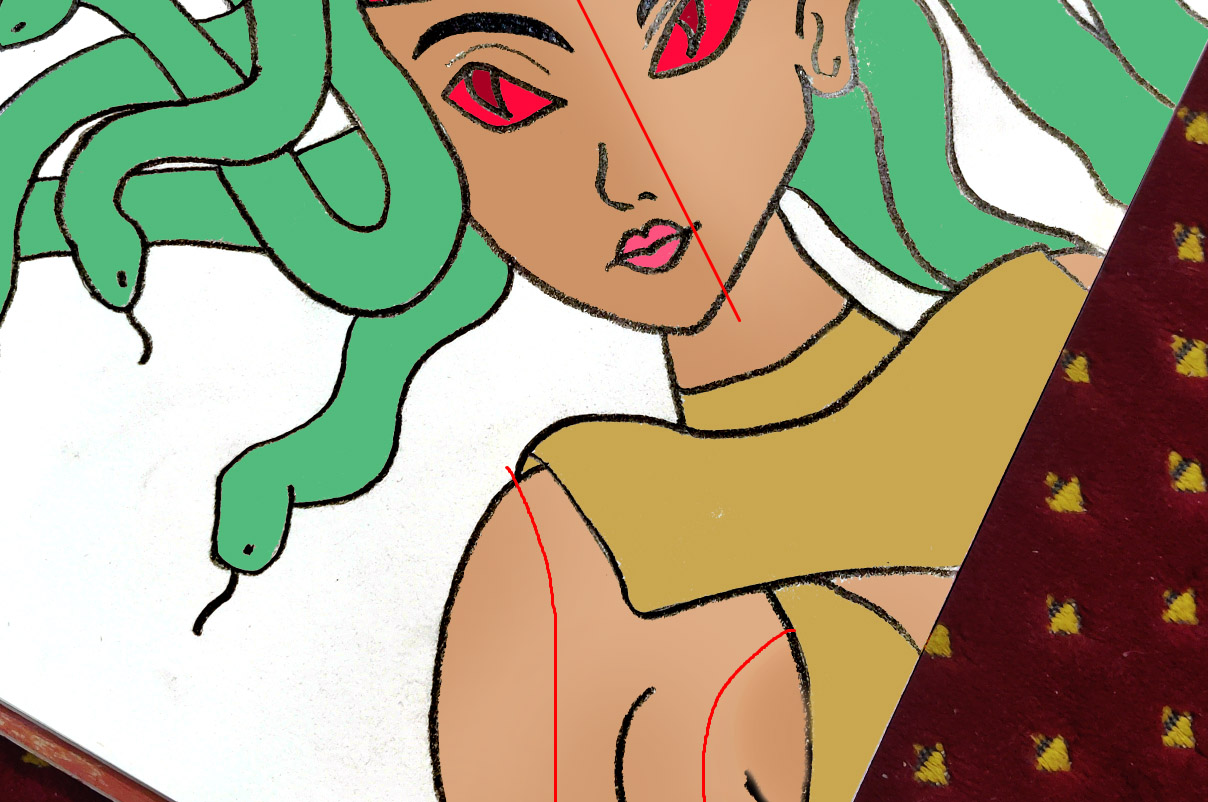
Look at the left part of the face and the right part of the face, they're a little different in color and I did the color bending part there.
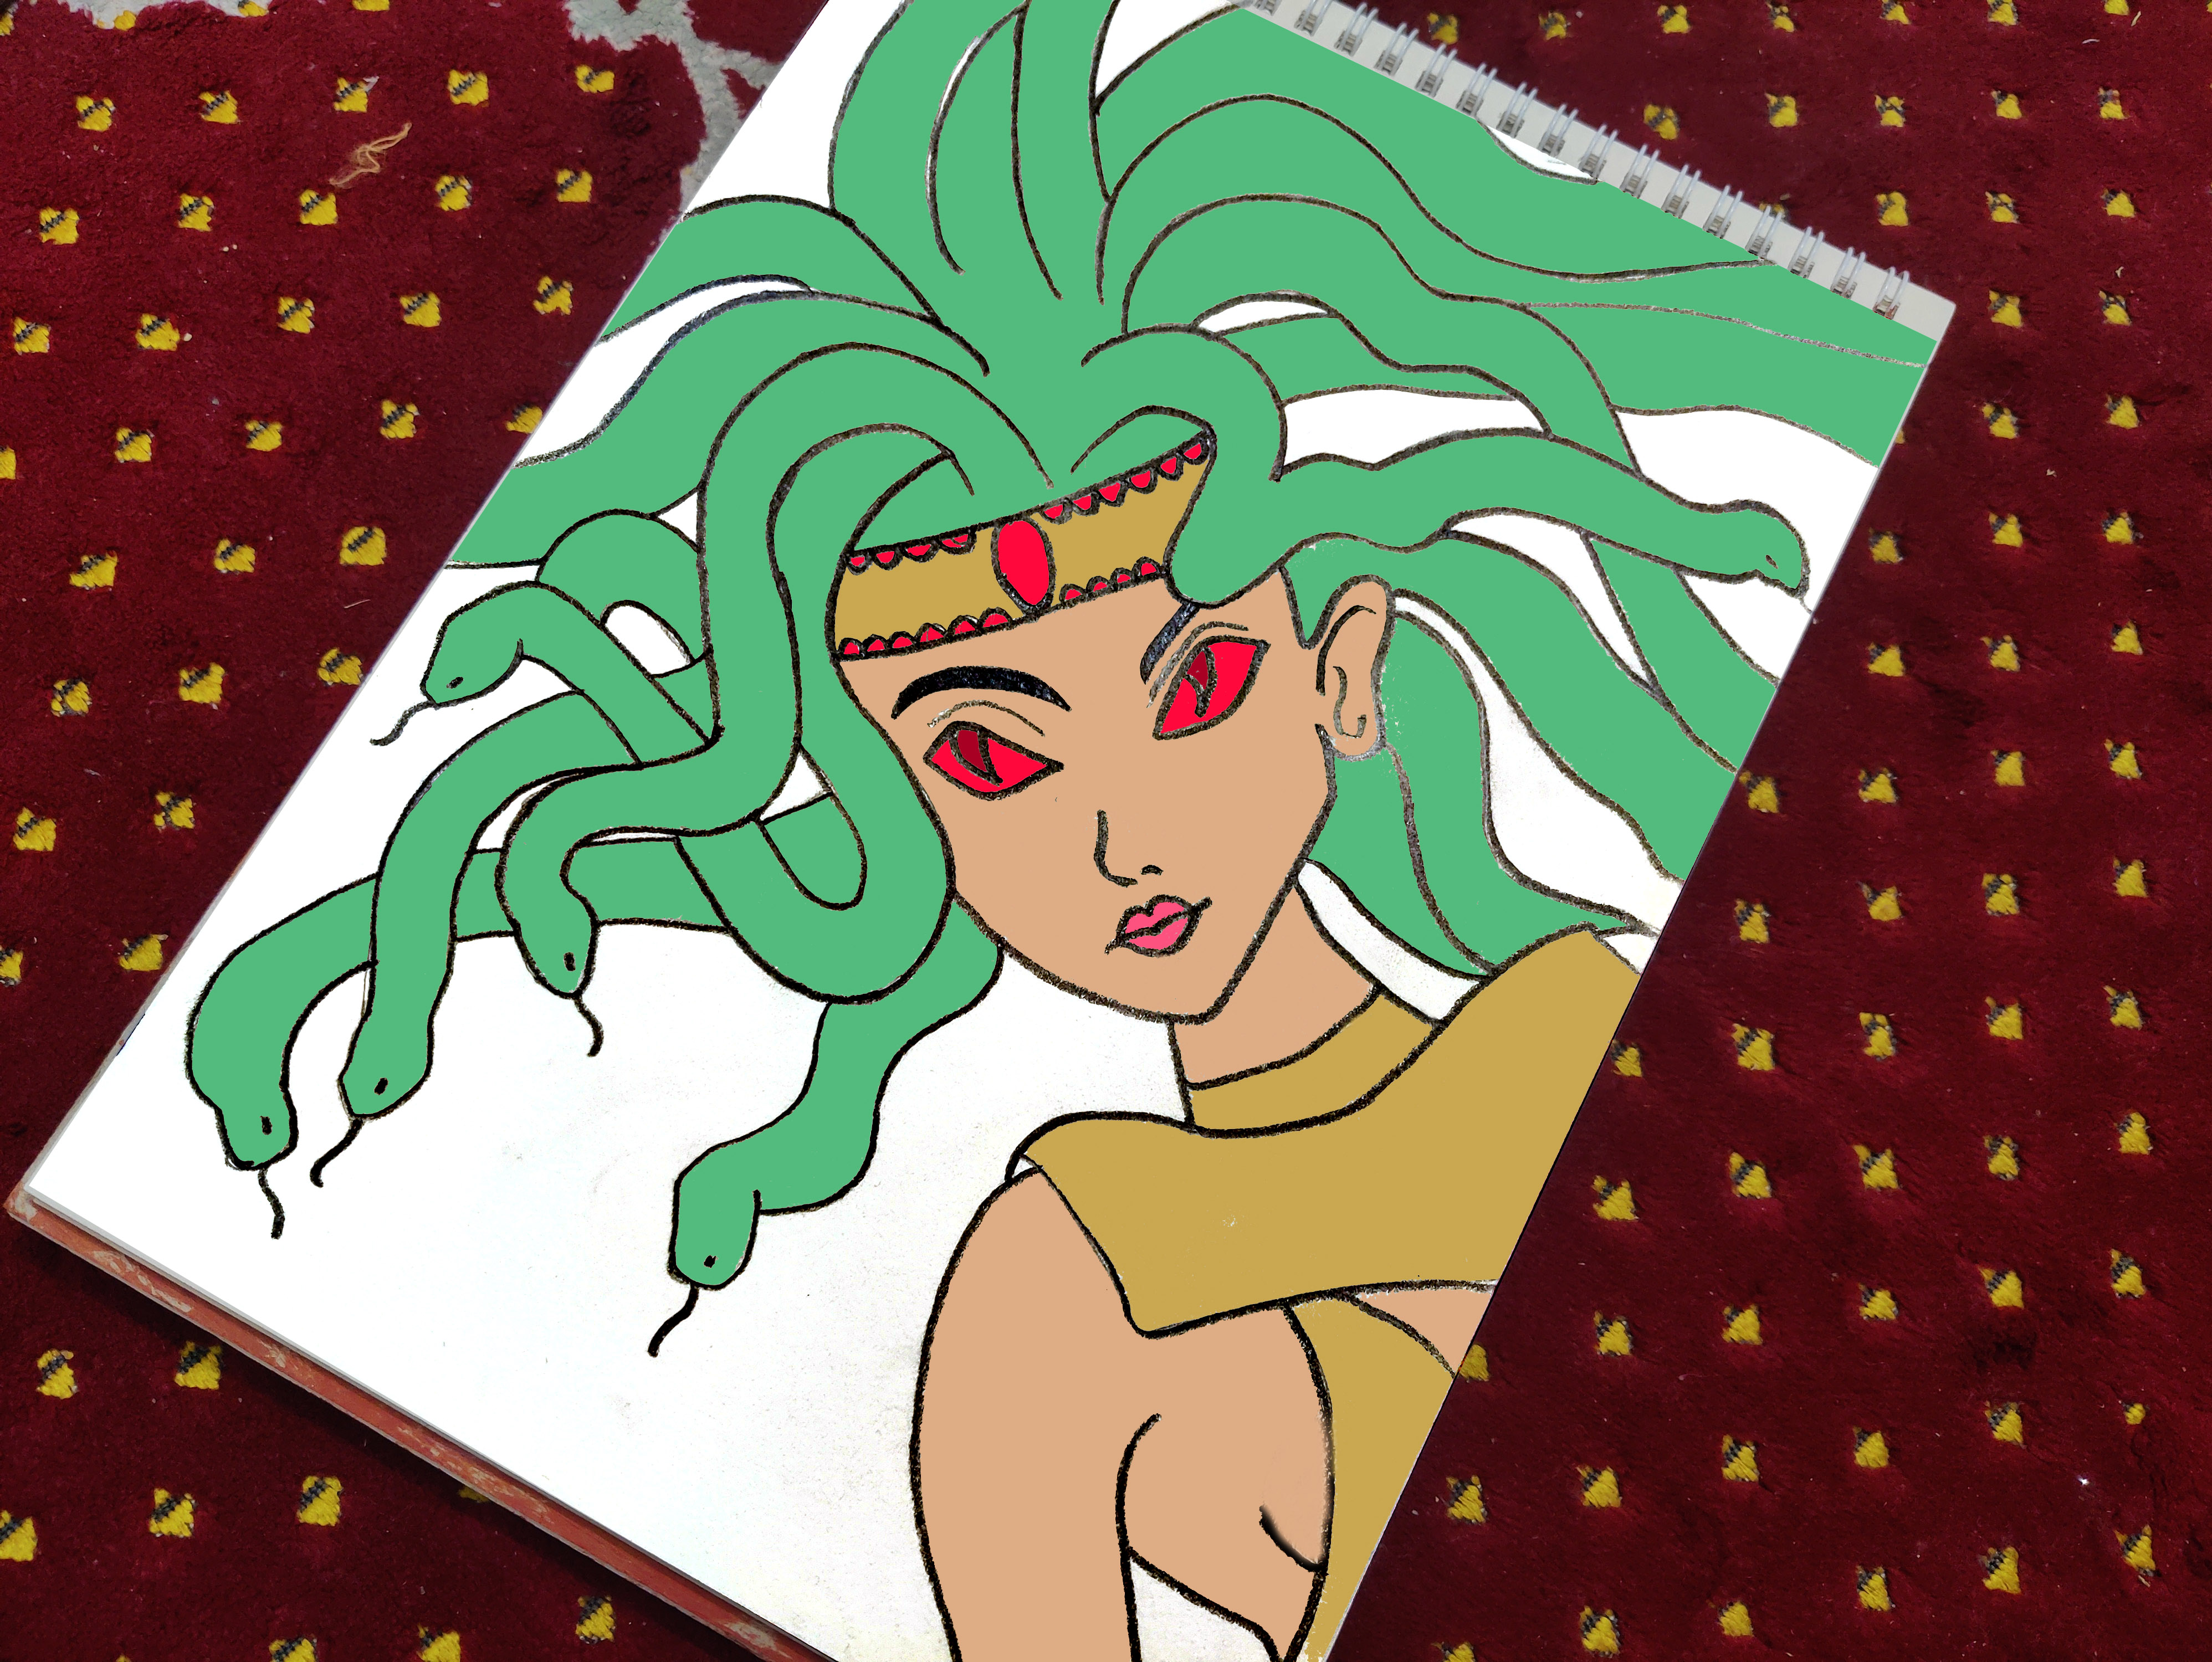
Then I finished doing blending on the whole coloring part and look how its changed now. Let me place them side by side to see how they're different.
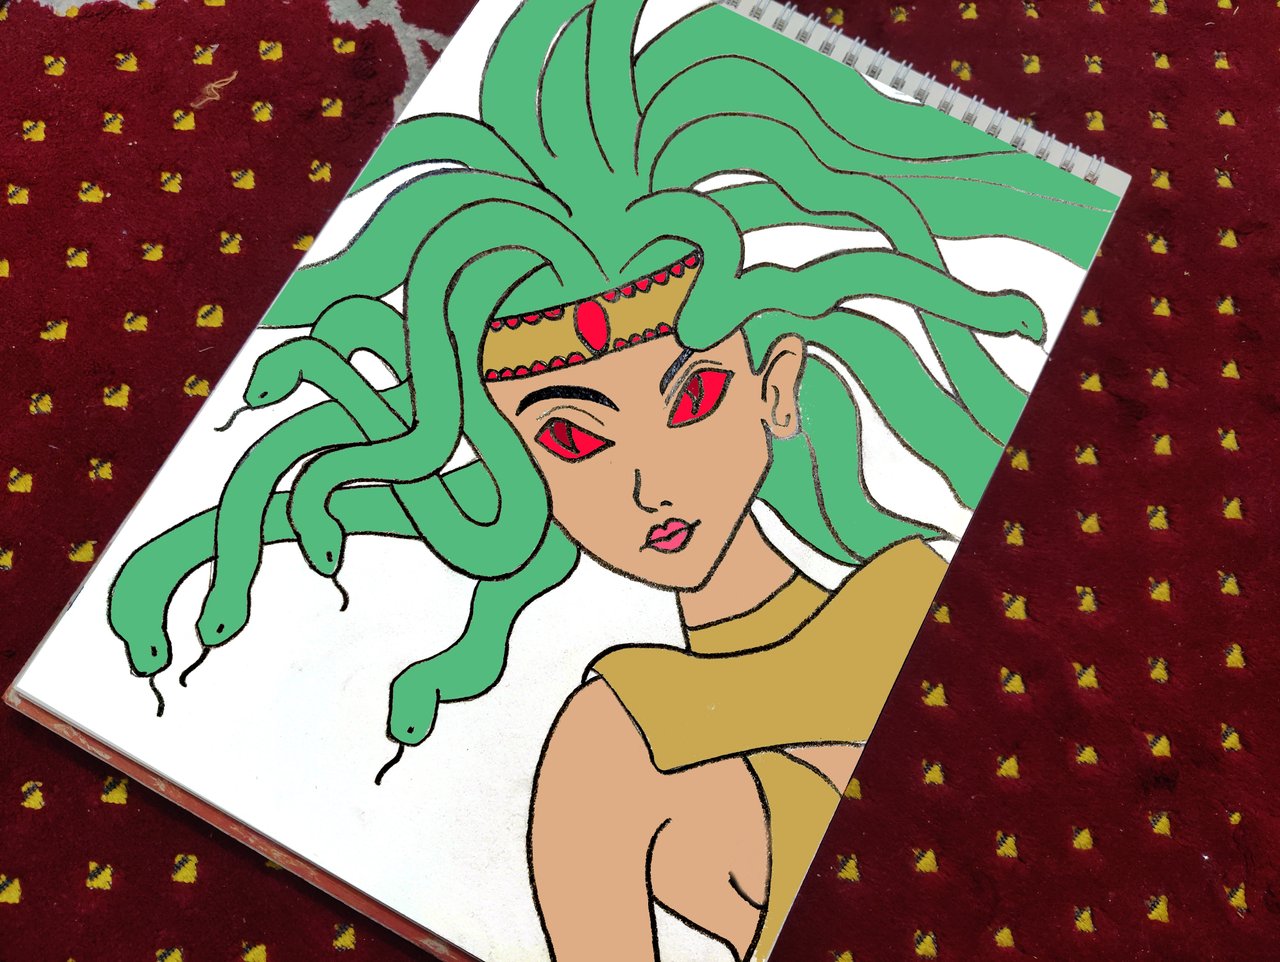 | |
|---|---|
| Before | After |
I feel the final part gets a good blending vibe on it now and it looks finished to me now, what do you say?
I hope this detailed post of around 1k words fits for the Tutorial niche in DIYhub Community.
How's it? I'd like to get some honest opinions.
If anybody has any kinds of advice, suggestions for my work, I would be happy to receive them.
Thanks for reading and watching my work.
Thanks for the upvote. Greetings.
My Tweet: https://twitter.com/chefofart/status/1603821966116368384
Thank you for sharing this post in the DIYHUB Community!
Your content got selected by our fellow curator sharminmim & you just received a little thank you upvote from us for your great work! Your post will be featured in one of our recurring compilations which are aiming to offer you a stage to widen your audience within the DIY scene of Hive. Stay creative & HIVE ON!
Please vote for our hive witness <3
Wow so I hope my post fits for the tutorial. Thanks a lot for the curation and for making me happy. HUGS 🤗.
Congratulations @artchef! You have completed the following achievement on the Hive blockchain And have been rewarded with New badge(s)
Your next target is to reach 400 upvotes.
Your next target is to reach 100 comments.
You can view your badges on your board and compare yourself to others in the Ranking
If you no longer want to receive notifications, reply to this comment with the word
STOPTo support your work, I also upvoted your post!
Check out our last posts:
Support the HiveBuzz project. Vote for our proposal!
You are really very talented. It is a beautiful thing to be able to make such drawings.
Medusa is a legend that I have been reading for a long time and it is not a creature but a victim story. Congratulations, very successful.
Thanks a lot for leaving your valuable opinions about my work.
Me gusta dibujar tambien, y es un arte que apasiona mucho. te ha quedado muy bonito el dibujo. Saludos
Da gusto ver gente con ideas afines. Gracias por apreciar mi trabajo.
Nice job! Keep it coming. Greetings from the Philippines!
Thanks for the appreciation. I'll try to keep showing my works more here.
You're welcome (^_^)
Click on the badge to view your board. Click here to check your ranking.
Thank you to our sponsors. Please consider supporting them.
Check out our last posts:
Wow, this is beautiful.
So detailed I would try some pencil work too. Thanks for sharing
Click on the badge to view your board. Click here to check your ranking.
Thank you to our sponsors. Please consider supporting them.
Check out our last posts: