Keyla Frendul - Through the Eyes of the Machines
Hey Splinterfans!
Today I'm sharing a little Splinterlands art project I've been working on.
I made a nice rendering of Keyla that I made with multiple different AIs and Programs!
I've used AI tools before, but generally speaking I'll use them to enhance some (bad) art that I made, then do some drawing/editing on top of the AI's enhancements. That way, it looks how I want it, and it's not completely "lazy" in some sense.
Anyway...
My art skills are uh... Not there anymore? I used to be able to draw, now I can't. I think pursuing Mechanical Design and Computer Science destroyed some of my artistic creativity. (Though with that skill I have been working on a 3D model that I'm going to 3D Print for another submission later...) What I have now is the ability to use tools and basic image editing skills.
It's been something I've thought of for a while, how hard (or easy) is it to process at least 2 images though a layered cycle of AI editing, filters and enhancements without making it bad?
I've used a few neat tools off github before, but I wanted to try something fairly easy, free and accessible so I went the route I chose.
So I set a goal: Take the Original art, turn it into a more hand-drawn look, with more focus on the purple tones, as well as some kind of blue tiled background.
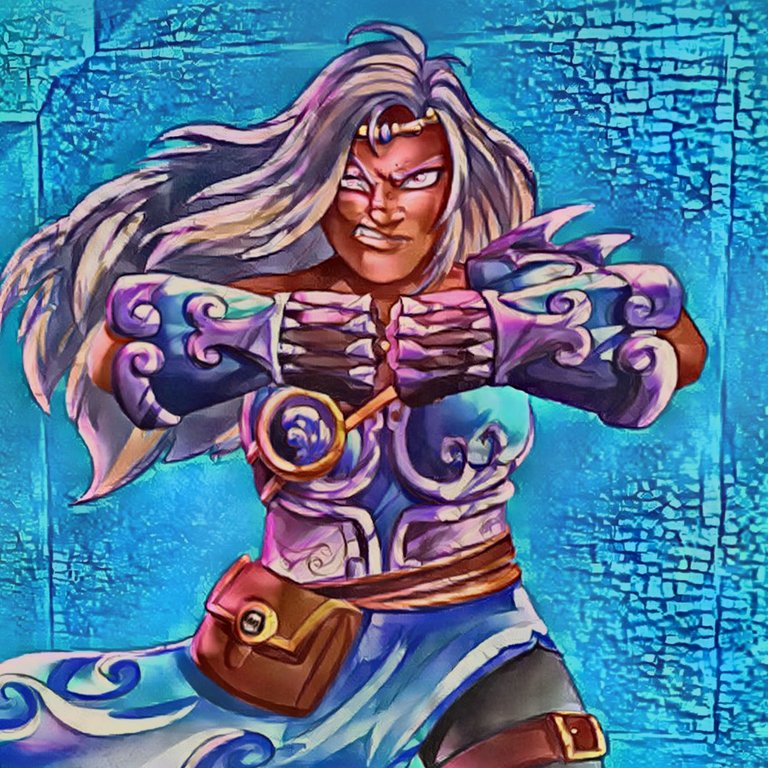
Step 1: Original Image
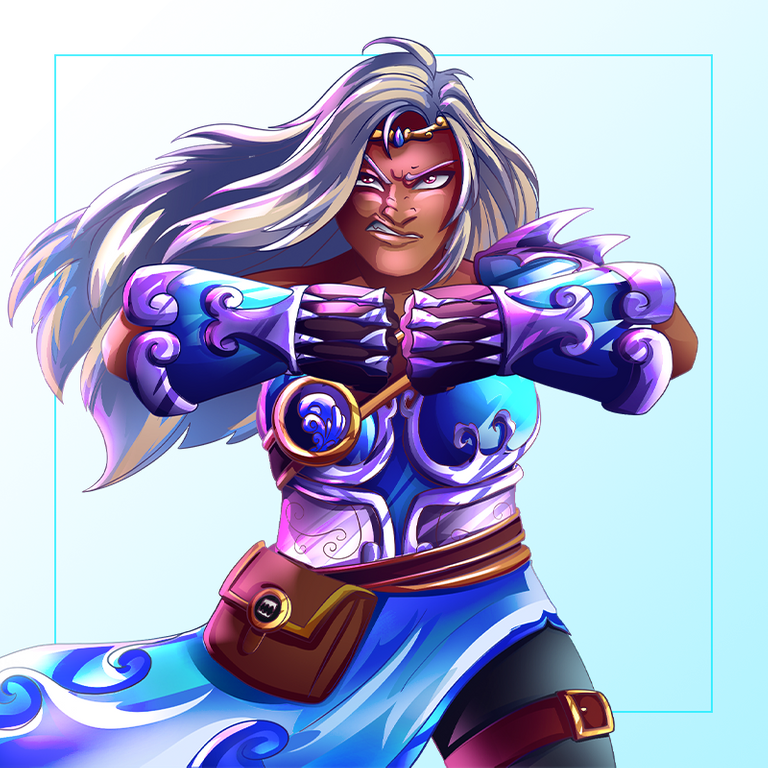
Well, there's not much to say here.
I went to the Splinterlands website, and went to the "Lore" tab to download this image. This Art in itself looks great though, that goes for all the new Chaos Legion cards though!
(I'll list all the tools I use at the end in the credits to keep the body free of links 👍)
Step 2: Style Applied
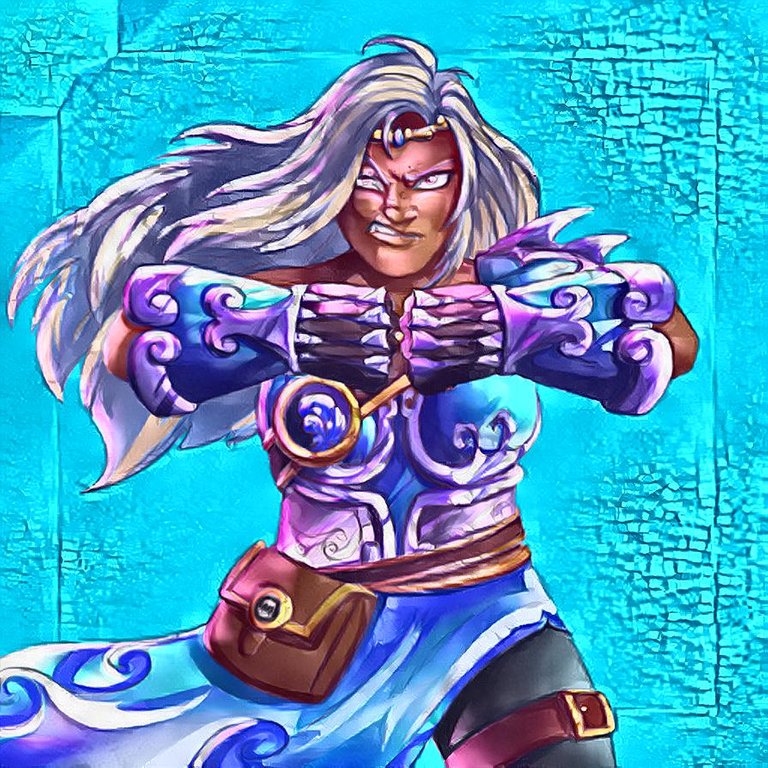
This step was primarily to change the look of the lines, as well as add a nice background. I used a free AI service for this. I chose a preset "Style" available and tuned a few settings then hit generate. There's still some issues here too, like the left eye has been a bit destroyed in this process, and I'm still looking for a little more detail and darker tones here.
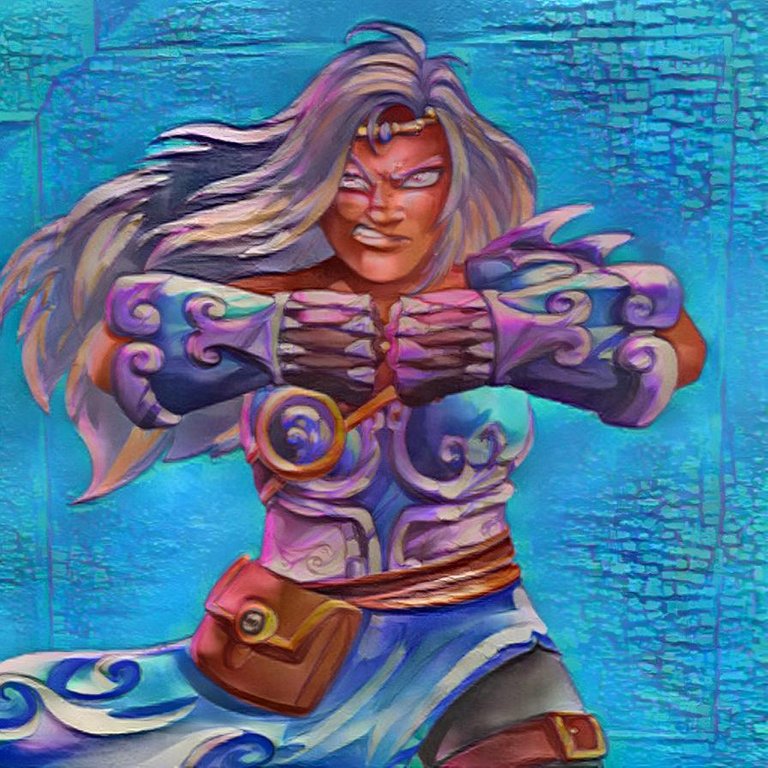
Step 3: Image Enhanced
Like with almost every AI tool, you need to tune a few settings which is what I did beforehand here. I used this tool to provide more clarity and definition, applied some HDR effects, and darkened the image. The color tones are looking better now, and the image is looking closer to the result I want.
Step 4: Second Image Generated
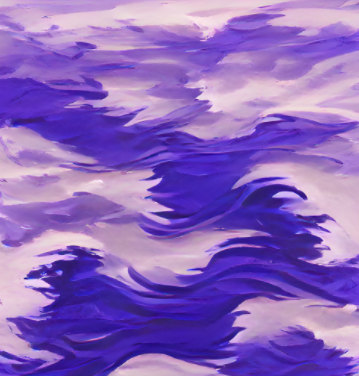
Here I used a fun text-based AI image generator to create a image off "Purple Wind over oceans" I hope to merge this into the previous image and produce more purple in the image as well as create a little bit of blur. This will hopefully help the final step do the job well. This picture actually looks pretty nice already, and text based image generators are just fun to use too.
Step 5: Second Image Merged into First
It didn't work quite as well as I wanted. I should have applied the style more harshly. I used the same service as the second step here, and merged the previous image into it. This will work though, and the final step should figure out want I want going on here hopefully.
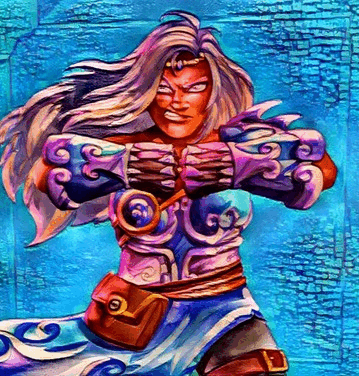
Step 6: Auto-Enhancement and Filter applied
Here I used Google Photos and simply used the Auto-Enhance function, which adjusts some values and essentially provides some enhancement and filter effects. This worked well, and it looks about like want I want now. Fortunately these robots seem to be behaving well today. At this point too, I'm like 2 hours deep on this project realized that it wasn't going to be as quick as I thought. Plus, I still have to write the blog that I'm writing now. I'm happy though, because I was worried this project might be too low effort but as it turns out it can take a while. Using default settings across the board when using multiple layers like this absolutely destroys the image, so it takes a little bit of time and understanding I think.
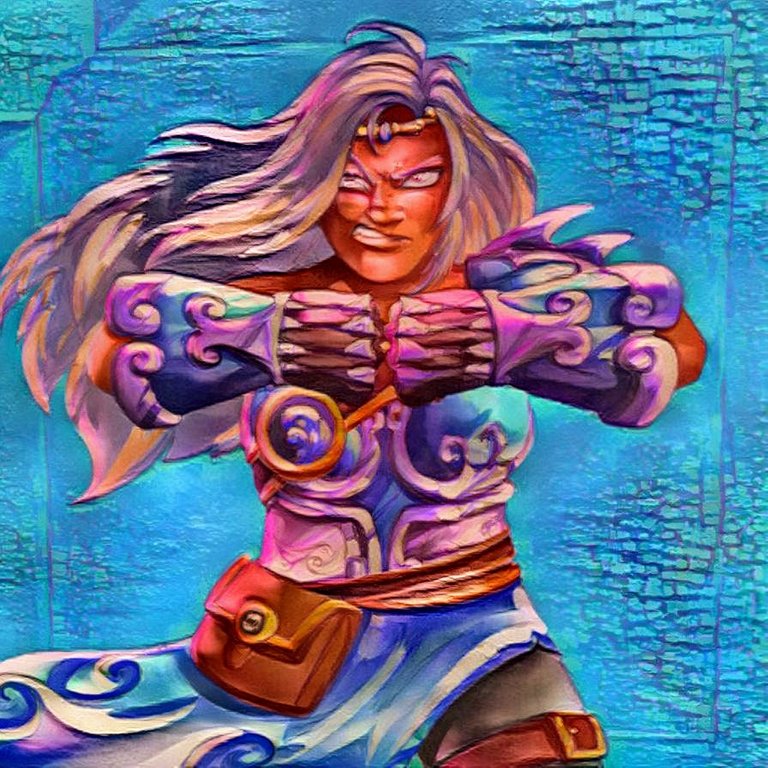
Step 7: Light Manual Editing
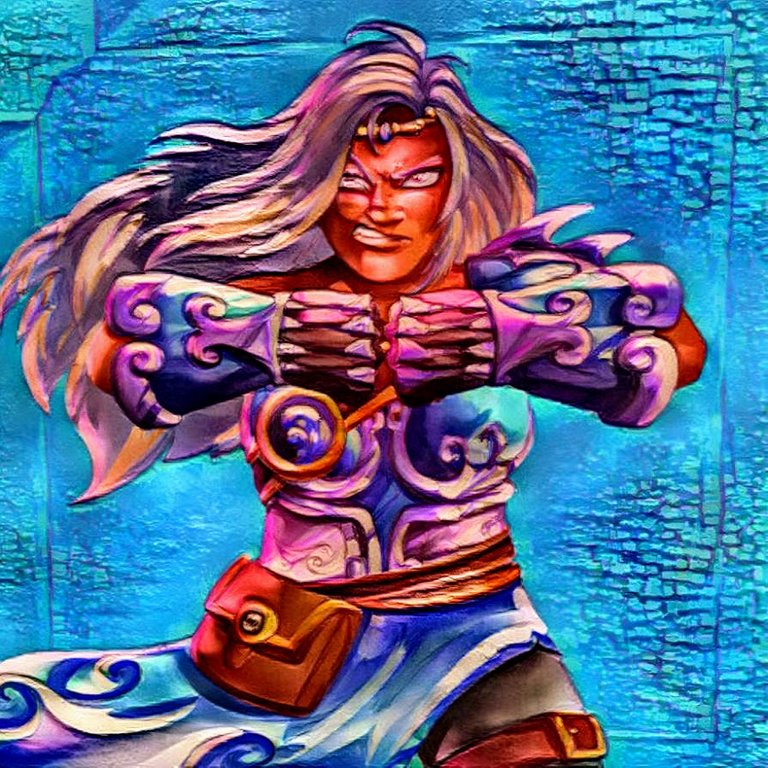
Here I some final tuning myself to make it look a little nicer in my eyes. I thing it turned out quite well! I wish I could have made this by hand, and for how long it took me to make this I probably could have learned a thing or 2 about drawing, but it was also really fun and interesting to see! I am still a huge nerd and more an Art lover than creator at the end of the day, so I hope this works well for my submission!
Thoughts on using multiple layers of AI or Auto-Editing of some kind...
I've experimented a few times, and it works well if you are seeking an abstract result, but keeping detail or image integrity is harder than I thought. So, with some learning of the settings, finding a good "order" of things, using the right tools and programs, and accepting that you will have to try and fail a few times on some steps, it works out. I haven't done any other Splinterlands ones yet, but I will try to do something more advanced next time. Theoretically anyone could do a project like the one I did today because the tools I used were all free and any steps could be done in a web browser. Definitely worth checking out some of these, even if just for fun!
So, in the end, after hopping around the internet and using these tools for a couple hours, I created (what I think) is a pretty cool version of Keyla!
Thank you for reading!
Credits:
Original Keyla Art from @splinterlands. A Submission to the Weekly Art Contest. Check out the latest one here.
Step 2 and 5 created utilizing Nightcafe.
Step 3 Enhanced using Autoenhance AI.
Step 4 Generated with Wombo Dream.
Step 6 Edited and Enhanced in Google Photos.
Referrals:
- Haven't played Splinterlands yet? You can start playing for free here!
- Earn BCH while making short posts about things like Splinterlands using Noise.Cash!
- Have extra internet speed and want a passive way to earn BTC or JMPT? Take a look at Honeygain.
- Haven't made an account on Hive yet? Getting started is easy and free to start with Ecency.

Woaahhh that's a cool edit man I appreciate that. Thank you for sharing your expertise.
!1UP !PGM
100 PGM token to send 0.1 PGM three times per day
500 to send and receive 0.1 PGM five times per day
1000 to send and receive 0.1 PGM ten times per day
Discord
Support the curation account @ pgm-curator with a delegation 10 HP - 50 HP - 100 HP - 500 HP - 1000 HP
Get votes from @ pgm-curator by paying in PGM, here is a guide
Create a HIVE account with PGM from our discord server, here is a guide
I'm a bot, if you want a hand ask @ zottone444
You have received a 1UP from @japex1226!
@monster-curator, @oneup-curatorAnd they will bring !PIZZA 🍕
Learn more about our delegation service to earn daily rewards. Join the family on Discord.
Nice edit… I just updated this card some days ago to level 2.