YODIN ZAKU - Splinterlands Art Contest Week 238!
𝕾𝖆𝖑𝖚𝖉𝖔𝖘 𝖆 𝖙𝖔𝖉𝖆 𝖑𝖆 𝖈𝖔𝖒𝖚𝖓𝖎𝖉𝖆𝖉 NTF GAMELA🤗🤗
❣ ❣ ❣ ¡¡¡ Buenas noches queridos fanáticos de Splinterland , y hivers !!! 😘
Play Splinterlands Now

🎆🤯 Splinterlands Art Contest Week 238! 🤯🎆
- 🔥 🔥 YODIN ZAKU 🔥 🔥 -
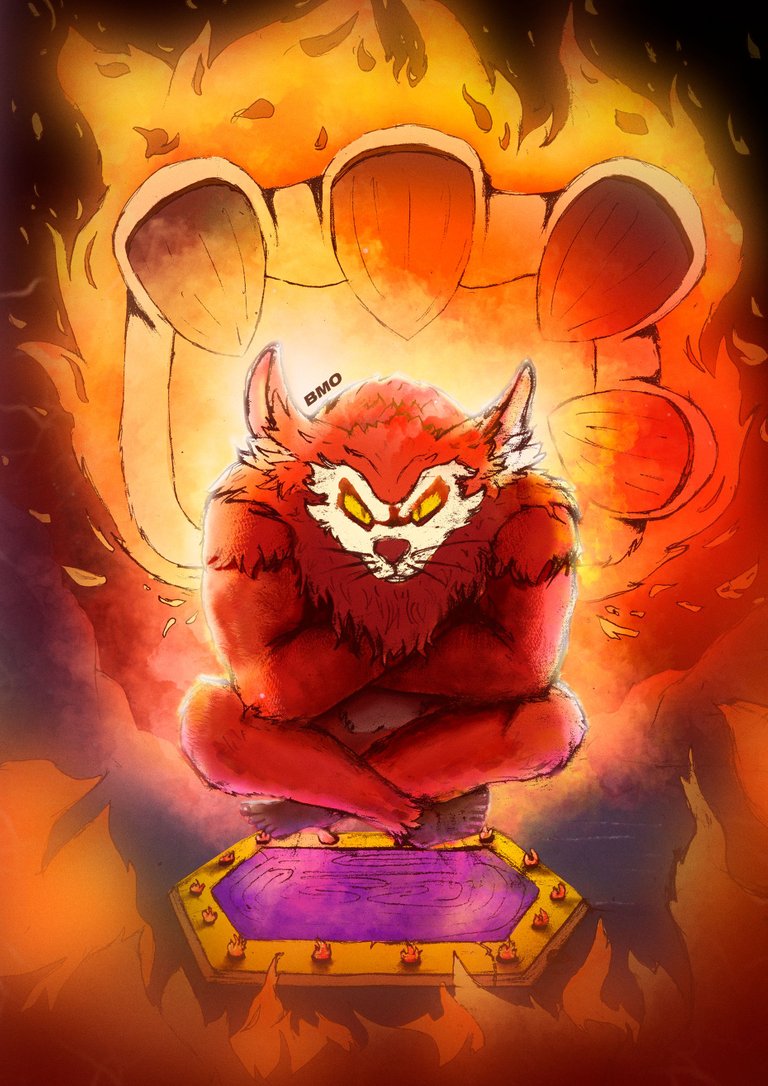
Esta vez encontré atractivo ésta figura de que creo yo es un panda rojo, un panda rojo muy furioso ya que según la historia que me invente, este personaje acaba de salir de una jaula mística, de la cual fue liberado gracias a su propio despertar consciente.
🤔 Debido a que fue toda una prueba durante años para obtener una madurez mental y salir a salvar a su pueblo que fue invadido por otras razas; y aquí la razón de su furia, pero contenida a la vez ya que tiene una estrategia bajo la manga …
𝕲𝖗𝖊𝖊𝖙𝖎𝖓𝖌𝖘 𝖙𝖔 𝖙𝖍𝖊 𝖊𝖓𝖙𝖎𝖗𝖊 𝕳𝕴𝖁𝕰 𝖈𝖔𝖒𝖒𝖚𝖓𝖎𝖙𝖞 🤗🤗
❣ ❣ ❣ ❣ Good evening dear #Splinterland fans , and hivers !!!!! 😘
This time, I have the opportunity to share with you, the illustration created for the 🤯 Splinterlands Art Contest Week 238 !!!! 🤯 This time I found attractive the figure of 🔥 🔥 🔥 YODIN ZAKU 🔥 🔥 🔥, which I think is a red panda, a very angry red panda since according to the story I made up, this character just came out of a mystical cage, from which he was released thanks to his own conscious awakening. Because it was a whole test for years to obtain a mental maturity and go out to save his people who were invaded by other races; and here the reason for his fury, but contained at the same time because he has a strategy up his sleeve ...
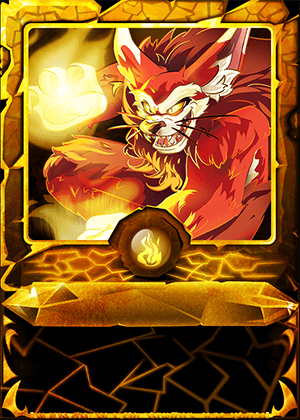
Yodin Zaku
💡🏃💡🏃💡🏃💡🏃💡🏃💡🏃💡🏃💡🏃💡🏃💡🏃💡🏃💡🏃💡🏃💡🏃💡🏃💡🏃💡🏃💡🏃💡🏃💡🏃💡
.
💡🏃💡🏃💡🏃💡🏃💡🏃💡🏃💡🏃💡🏃💡🏃💡🏃💡🏃💡🏃💡🏃💡🏃💡🏃💡🏃💡🏃💡🏃💡🏃💡🏃💡
- 𝓟𝓐𝓢𝓞 𝟏 -
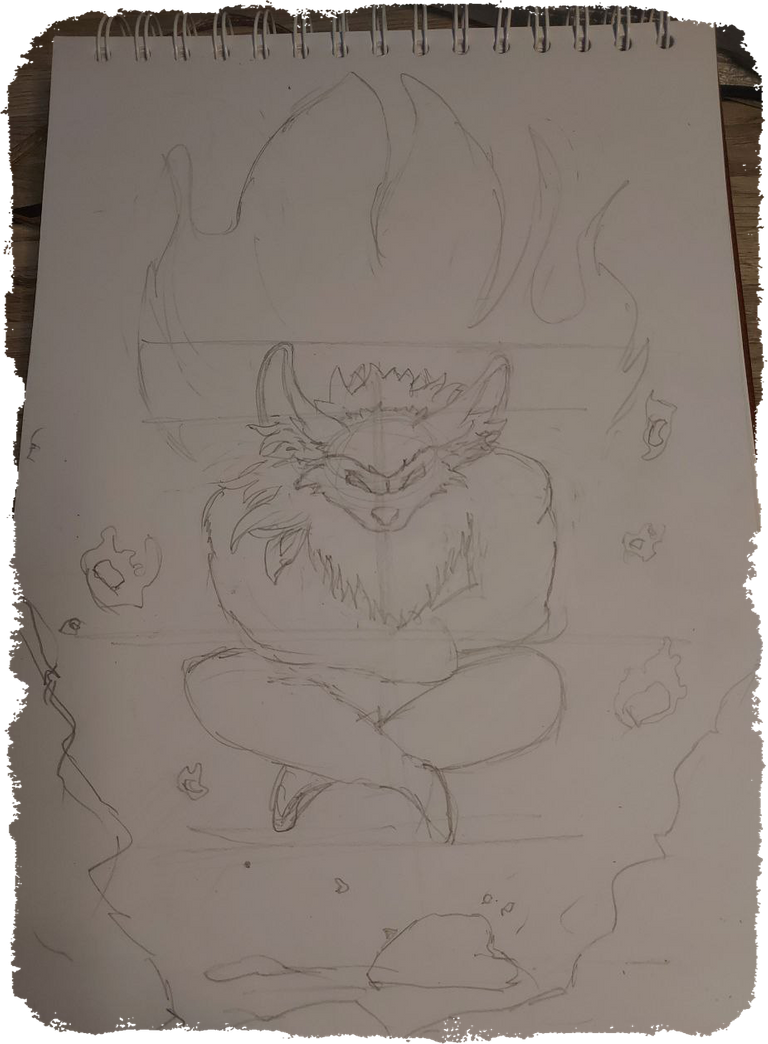
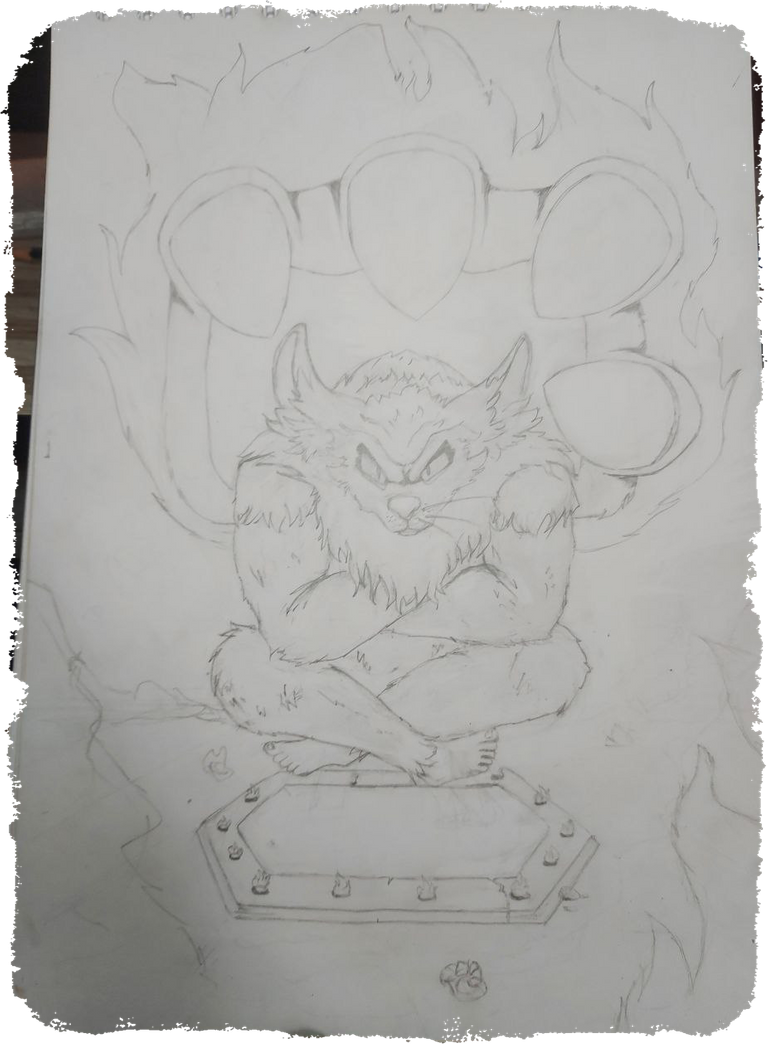
Decidí hacer la pose de yoga “Sukhasana” 🧘 levitando, ya que es una cualidad mística que posee este personaje, además esta postura es una las más básicas del yoga y de los cuales te permite tener una armonía en los pensamientos. ✌
I decided to do the yoga pose "Sukhasana" 🧘 levitating, since it is a mystical quality that this character possesses, besides this posture is one of the most basic of yoga and of which allows you to have a harmony in thoughts. ✌
- 𝓟𝓐𝓢𝓞 𝟐 -
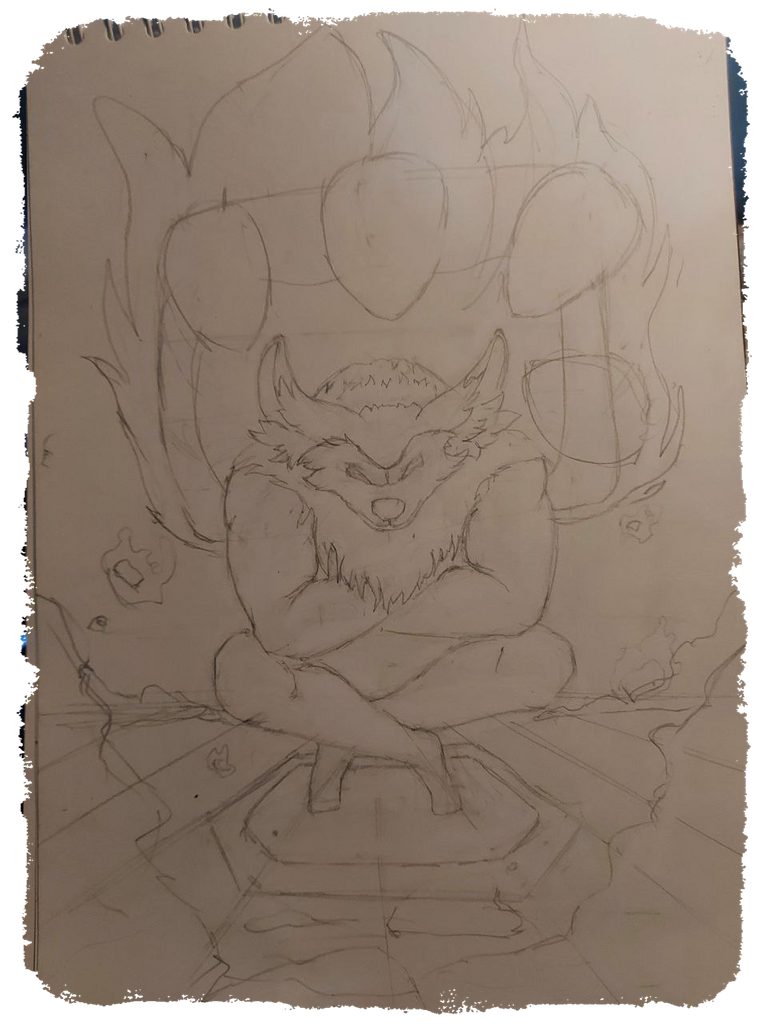
👉 Luego de establecer la silueta mentalmente y establecer las figuras que aparecerán en mi lienzo, procedo una nueva idea durante este proceso, y es que me pregunté ¿quién o qué o que cualidad falta resaltar de este panda?, y la respuesta obvia fue que faltaba su puño de fuego, el fuego está en el pero no el fuego no lo controla sino el controla el fuego interior, el controla sus impulsos furiosos. 👁🗨 Es así que decidido ponerlo atrás del personaje principal alegando a que él es quien siempre está al mando de su gran poder interior.
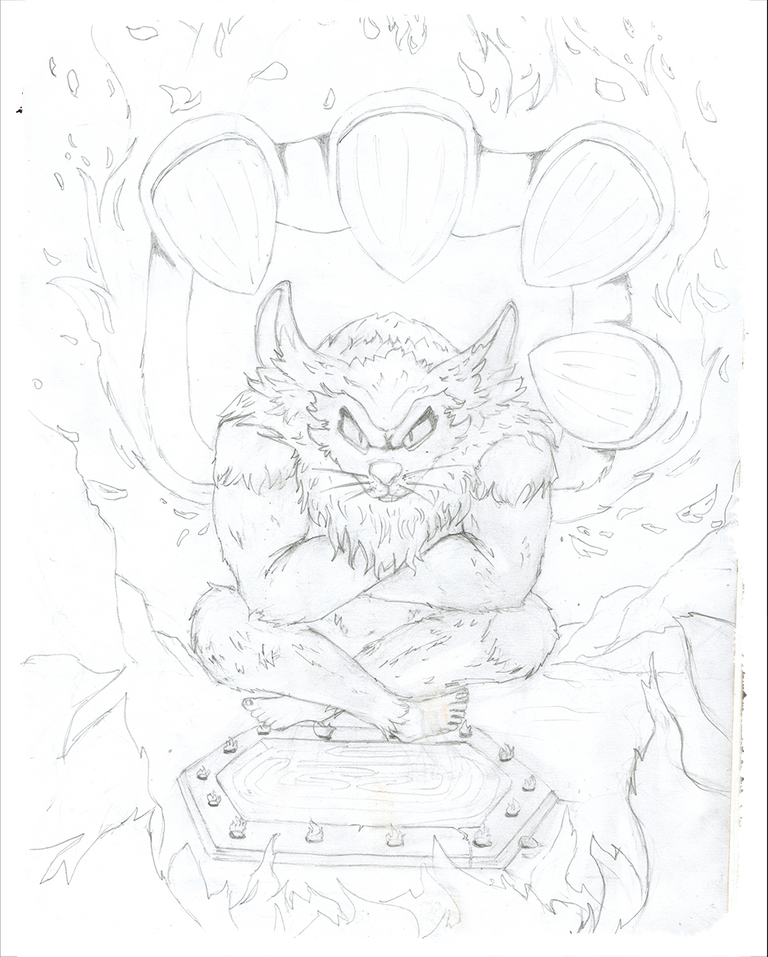
Después un rato de estar dibujando, añadí los detalles como el portal, por el cual salió y de inmediato se puso en pose de yoga para que pueda pintarlo en un instante, capturar ese preciso momento 🙄🤭
👉 After establishing the silhouette mentally and establishing the figures that will appear on my canvas, I proceed a new idea during this process, and that is that I asked myself who or what or what quality is missing to highlight of this panda, and the obvious answer was that his fist of fire was missing, the fire is in him but not the fire does not control him but the fire controls the inner fire, he controls his furious impulses. 👁🗨 So I decided to put him behind the main character claiming that he is the one who is always in command of his great inner power.
After a while of drawing, I added the details such as the portal, through which he came out and immediately got into yoga pose so I could paint him in an instant, capturing that precise moment 🙄🤭.
- 𝓟𝓐𝓢𝓞 𝟑 -
😎 Antes de enviarlo a Photoshop para proceder con la pintura, completé la idea agregando fuego al estilo de viñeta en la parte inferior, partes de fuego que se desprenden del fuego principal y corregí pequeños trazos; esto claro, luego de un pequeño descanso musical, especialmente me gusta el Jazz.
- 𝘼 𝙀𝙎𝘾𝘼𝙉𝙀𝘼𝙍-
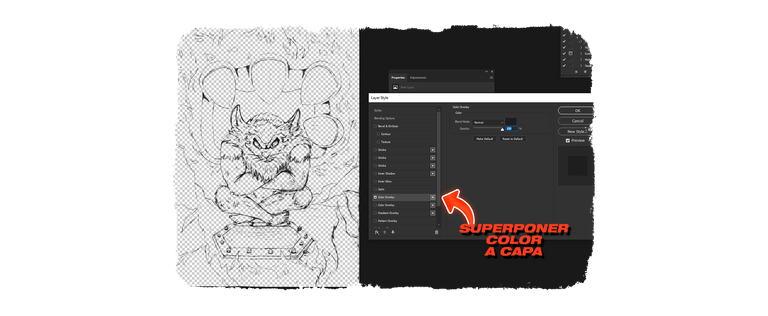
- 𝓟𝓐𝓢𝓞 𝟒 -
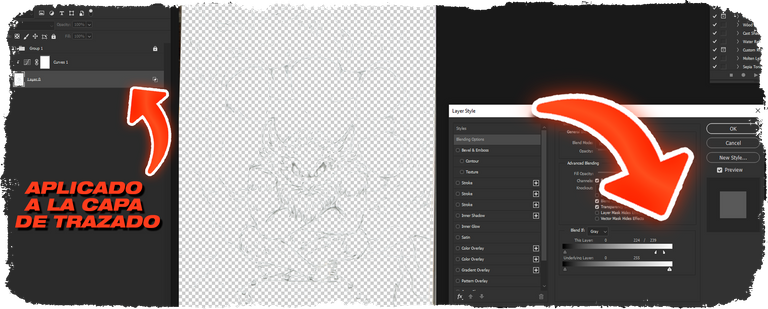
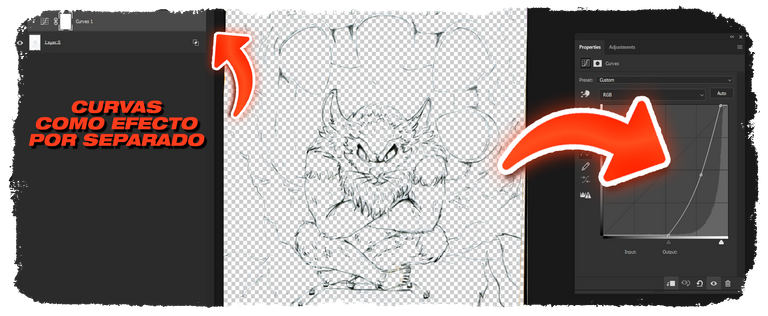
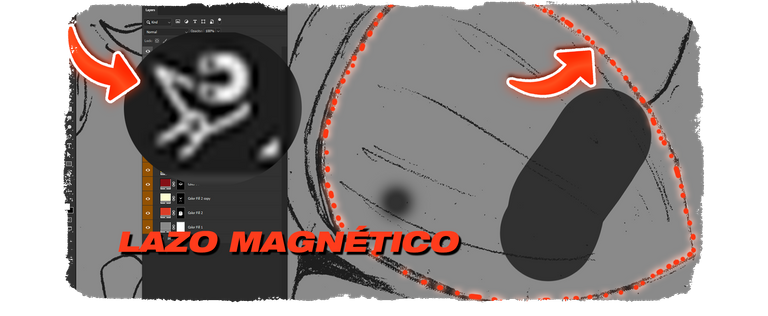
✍ 👦 Aquí accedo al modo de fusión de la capa para quitarle la mayor parte de blanco y quedarme con el trazo, este paso es importante ya que me permitirá colorear más cómodamente, colocando capas por debajo del trazado del dibujo.
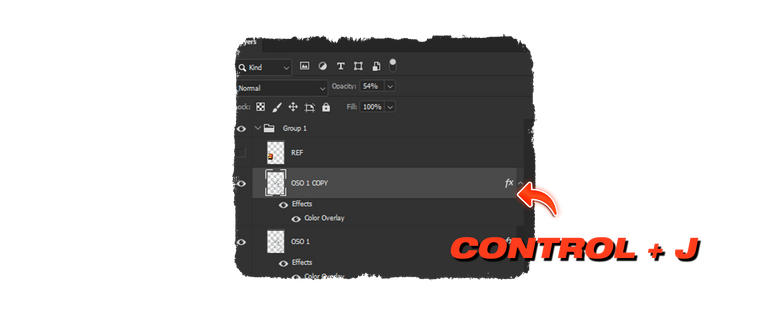
- 𝓟𝓐𝓢𝓞 𝟓 -
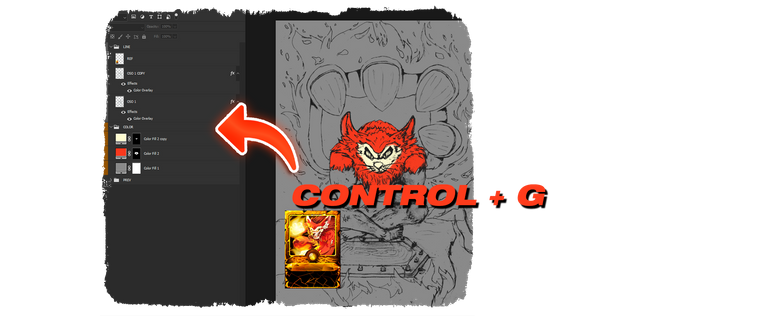
- 𝓟𝓐𝓢𝓞 𝟔 -
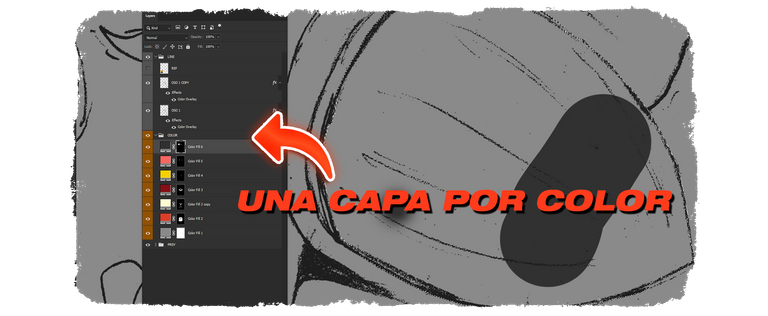
- 𝓟𝓐𝓢𝓞 𝟕 -
- 𝓟𝓐𝓢𝓞 𝟖 -
- 𝓟𝓐𝓢𝓞 𝟗 -
- 👀👀👀👀👀 👏 👀👀👀👀👀 -
Perdónenme por no documentar todo ya que es mi primera vez y casi no suelo captar paso a paso además que mi computadora aún no me permite grabar el proceso, ya que sino se me cierra los programas o se pone muy lento. 🙏 🙏
🙇♂️ After this I got lost in myself, adding and removing things, also putting a dark background on it as I felt it stood out more with the glow of the fire.
🤦♂️ I immersed myself so much that I lost track of time, while enjoying a cup of coffee ☕.
Forgive me for not documenting everything as this is my first time and I don't usually capture step by step plus my computer still doesn't allow me to record the process, otherwise it closes the programs or gets very slow. 🙏 🙏

- 𝓟𝓐𝓢𝓞 𝟏𝟎 -
😉 Pero en sí para los últimos efectos es solo cuestión de ponerse creativo, suponiendo las sombras y luces, los detalles de pelo, etc.… también utilizando las opciones que da Photoshop sin llegar a lo “plástico”, siendo los principales: glow (duplicado de capa con modo de fusión en Añadir) Ruido (en el panel de efectos) hue&saturation (para cambiar el tono de algunas partes que quizá no cuadra) y curvas para corregir el contraste.
👌 👌 Llegué a acentuar aún más el contorno, ya que no se distinguía bien del fondo del puño de fuego, esto lo hice borrando sutilmente el trazo en la parte de dichas partes y añadiendo un contorno glow para tipo blanco para que lo separe del resto, también con ayuda un pincel de nube le di un toque para hacerlo destellar aún más, además de algunas partículas que lo hice con el pincel default de Photoshop.
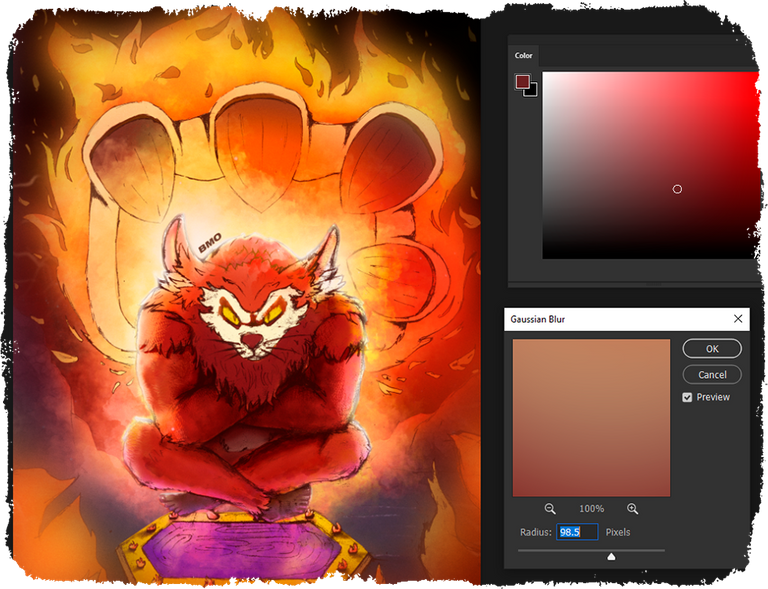
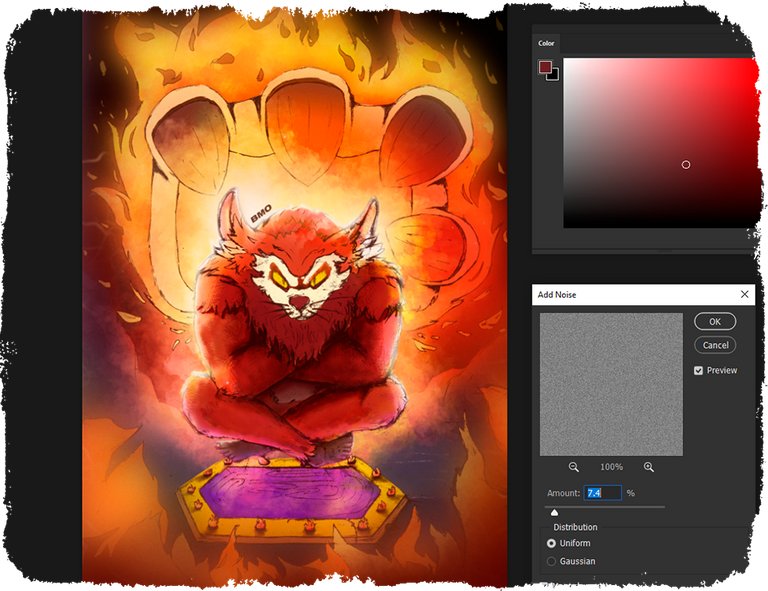
Después de todo esto, junto todas las capas en una sola y procedo a añadirle el DESENFOQUE GAUSSIANO y GRADIENTE CENTRAL juntamente con el RUIDO, con los cuales se puede lograr un efecto de profundidad a la ilustración.
👌 👌 I got to accentuate even more the outline, since it was not well distinguished from the background of the fist of fire, I did this by subtly erasing the stroke in the part of those parts and adding a glow outline for white type to separate it from the rest, also with the help of a cloud brush I gave it a touch to make it sparkle even more, plus some particles that I did it with the default Photoshop brush.
After all this, I join all the layers in one and proceed to add the GAUSSIAN BLUR and CENTRAL GRADIENT together with the NOISE, with which you can achieve a depth effect to the illustration.
- 𝐀𝐑𝐓𝐄 𝐅𝐈𝐍𝐀𝐋 -
🤩 🤩 Finalmente, este fue todo el trabajo que hice para esta ilustración, y quedando en paz conmigo mismo de haber terminado un dibujo 🧐 para compartirlo con esta gran comunidad,
espero les guste y capten cada detalle y mensaje del personaje y a seguirle dando, que se vienen aún más…
💞
Les deseo a todos una buena amanecida 🌞 o atardecer 🌝 o anochecer 🌜 y a disfrutar de su buen amigo el café
☕ ☕ ☕ ☕ ☕ ☕ ☕ ☕ ☕ ☕ ☕ ☕ ☕
¡¡¡ HASTA LA PROXIMA!!!
🤩 🤩 Finally, this was all the work I did for this illustration, and being at peace with myself for having finished a drawing 🧐 to share it with this great community, I hope you like it and catch every detail and message of the character and keep on giving it, there are more to come... 💞
I wish you all a good sunrise 🌞 or sunset 🌝 or sunset 🌜 and to enjoy your good friend the coffee
☕ ☕ ☕ ☕ ☕ ☕ ☕ ☕ ☕ ☕ ☕ ☕ ☕
Until next time!
📌🎇🏃♂️✌🔥👁🗨📌🎇🏃♂️✌🔥👁🗨📌🎇🏃♂️✌🔥👁🗨📌🎇🏃♂️✌
👆
Yo uso Photoshop
para editar las imágenes que ven en mis publicaciones
Yo uso Davinci Resolve para editar el video que ven en mi publicacione, incluyendo imágenes, voz y texto.
El audio fue grabado con Audacity .
I use Photoshop to edit the images you see in my posts.
I use Davinci Resolve to edit the video you see in my posts, including images, voice and text.
The audio was recorded with Audacity.
Translated with https://www.deepl.com/translator
espero les guste y capten cada detalle y mensaje del personaje y a seguirle dando, que se vienen aún más…
💞
Les deseo a todos una buena amanecida 🌞 o atardecer 🌝 o anochecer 🌜 y a disfrutar de su buen amigo el café
☕ ☕ ☕ ☕ ☕ ☕ ☕ ☕ ☕ ☕ ☕ ☕ ☕
¡¡¡ HASTA LA PROXIMA!!!
🤩 🤩 Finally, this was all the work I did for this illustration, and being at peace with myself for having finished a drawing 🧐 to share it with this great community, I hope you like it and catch every detail and message of the character and keep on giving it, there are more to come... 💞
I wish you all a good sunrise 🌞 or sunset 🌝 or sunset 🌜 and to enjoy your good friend the coffee
☕ ☕ ☕ ☕ ☕ ☕ ☕ ☕ ☕ ☕ ☕ ☕ ☕
Until next time!
📌🎇🏃♂️✌🔥👁🗨📌🎇🏃♂️✌🔥👁🗨📌🎇🏃♂️✌🔥👁🗨📌🎇🏃♂️✌
👆
Yo uso Photoshop para editar las imágenes que ven en mis publicaciones
Yo uso Davinci Resolve para editar el video que ven en mi publicacione, incluyendo imágenes, voz y texto.
El audio fue grabado con Audacity .
I use Photoshop to edit the images you see in my posts.
I use Davinci Resolve to edit the video you see in my posts, including images, voice and text.
The audio was recorded with Audacity.
Translated with https://www.deepl.com/translator
tampoco me humillas con el arte
esta bueno, vere cómo vas.
ta bien :P
Congratulations @bmo77! You have completed the following achievement on the Hive blockchain And have been rewarded with New badge(s)
Your next target is to reach 50 upvotes.
You can view your badges on your board and compare yourself to others in the Ranking
If you no longer want to receive notifications, reply to this comment with the word
STOPCheck out our last posts:
Support the HiveBuzz project. Vote for our proposal!
Esta genial tu dibujo, te deseo mucha suerte en el concurso de arte. Los consejos para el uso de photoshop me parecen muy bien, yo también lo uso pero no se como sacarle provecho en el dibujo así que estaré pendiente de tus publicaciones. Te invito al Discord de la comunidad Hive NFTGame Latino para que conozcas a otros colegas y por allá nos puedas ayudar con el diseño de personajes si no es molestia.
Saludos
!PGM
BUY AND STAKE THE PGM TO SEND A LOT OF TOKENS!
The tokens that the command sends are: 0.1 PGM-0.1 LVL-0.1 THGAMING-0.05 DEC-15 SBT-1 STARBITS-[0.00000001 BTC (SWAP.BTC) only if you have 2500 PGM in stake or more ]
5000 PGM IN STAKE = 2x rewards!
Discord
Support the curation account @ pgm-curator with a delegation 10 HP - 50 HP - 100 HP - 500 HP - 1000 HP
Get potential votes from @ pgm-curator by paying in PGM, here is a guide
I'm a bot, if you want a hand ask @ zottone444
Realmente me está encantando la plataforma, y me complacerá mucho poder ayudar a otros miembros de la comunidad con relación a la ilustración.
Además de compartir mis experiencias.
Muchas gracias por considerarme. 🤓
Mi amigoooo qué buen dibujo, de verdad te deseo mucha suerte en el reto de arte, me gusto el resultado final, también me gusto que dieras el paso a paso de tu dibujo, creo que en unos días tendré que consultarte algunas cosas sobre photoshop CC por el servidor de discord de NftGameLtino, me gusto y espero ver que continúes compartiendo tu arte con nosotros
!HUG
!PIZZA
I sent 1.0 HUG on behalf of @zonadigital21.
(1/3)
Genial , será un gusto poder apoyar en lo que necesites, estaré al pendiente 🤝
$PIZZA slices delivered:
@zonadigital21(2/5) tipped @bmo77
How hot!!! I love how interactive your step by step and the final result of this card... Good luck!!!
😃 woo bro ... it's awesome to have you around, I really appreciate your time.
I will learn a lot from your art mi hermano 🤜
Do you know you can win a Chaos Legion pack and many other things just by following some simple steps ?? Check out our Latest Daily Showcase and Participate our latest Giveaway. Thanks
Esta versión que hiciste de Yodin Zaku, está bien realizado y tomando en cuenta que lo hiciste en PC con Photoshop, se ve que sabes como utilizar todas las herramientas del programa, yo he hecho también algunos dibujos utilizando este programa como herramienta, pero obvio no me quedan iguales al los tuyos, simplemente épico tu dibujo sigue así felicitaciones.
Maravilloso diseño,sige asi que vas muy bien