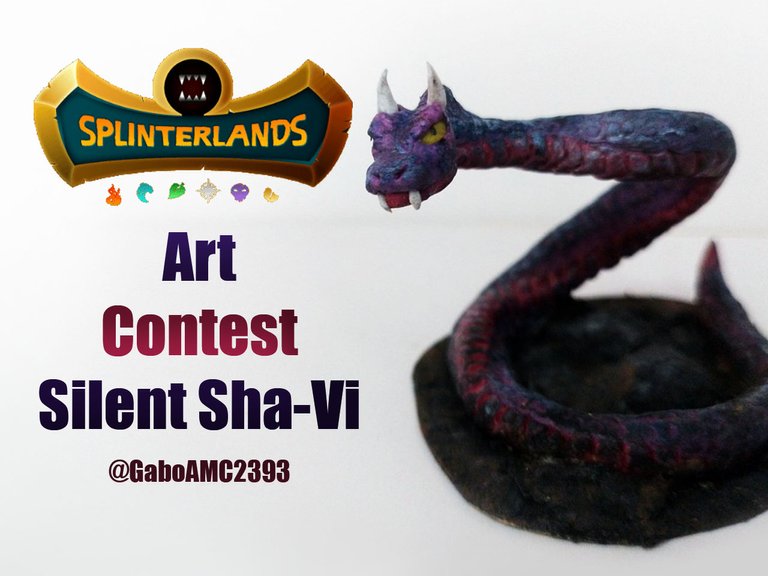
Splinterlands Art Contest: Silent Sha-Vi Sculpture
Greetings, fellow art lovers. This week I decided to participate in the Splinterlands art contest with a somewhat peculiar figure. For some time I had seen it, but I said to myself that it was very simple but the truth is that it is not, it is a character that can be done with a lot of details and give a realistic touch to do something great with a character whose card does not have too much detail.
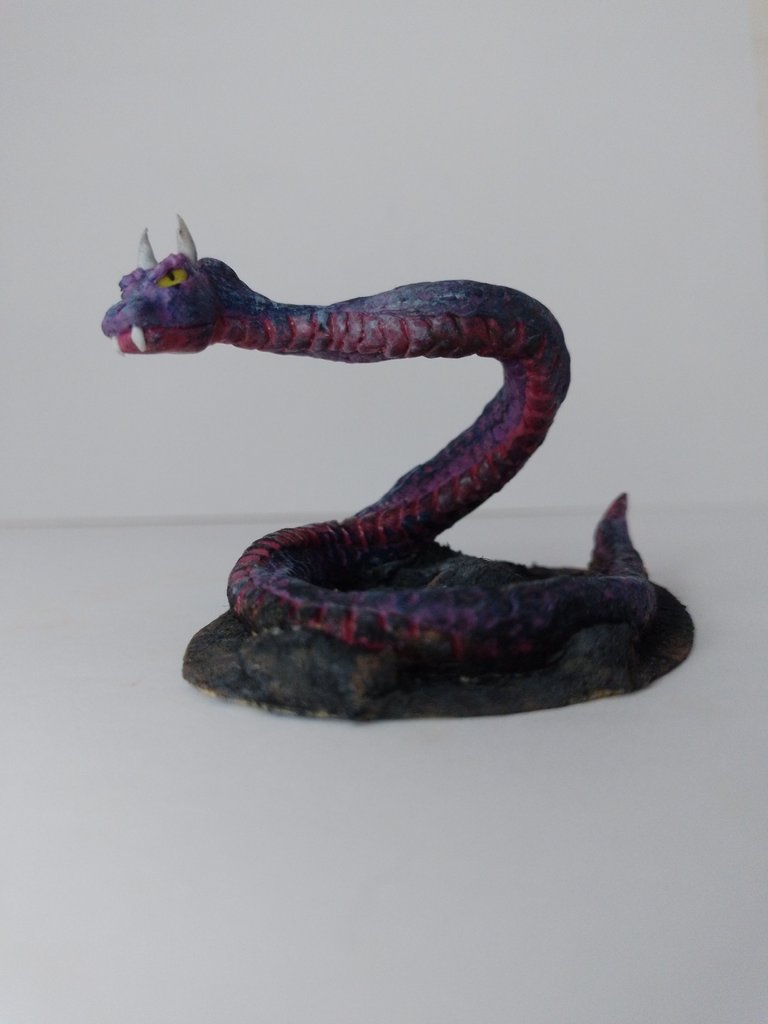
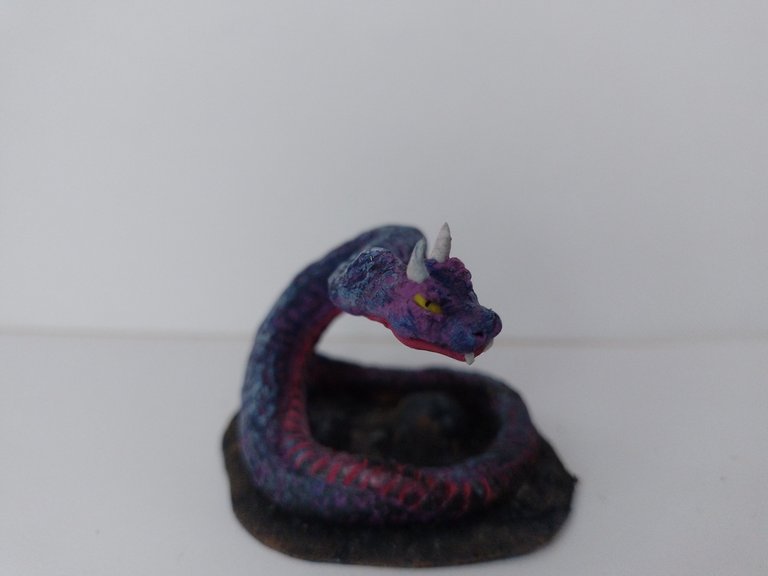
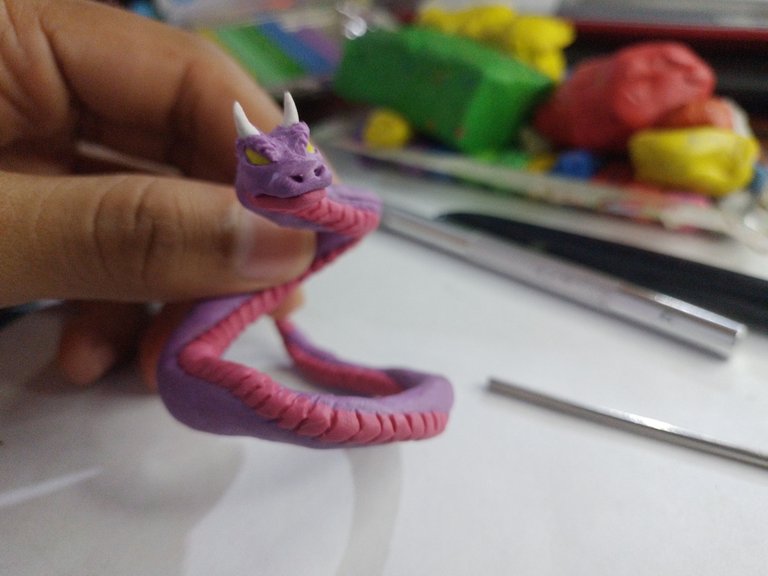
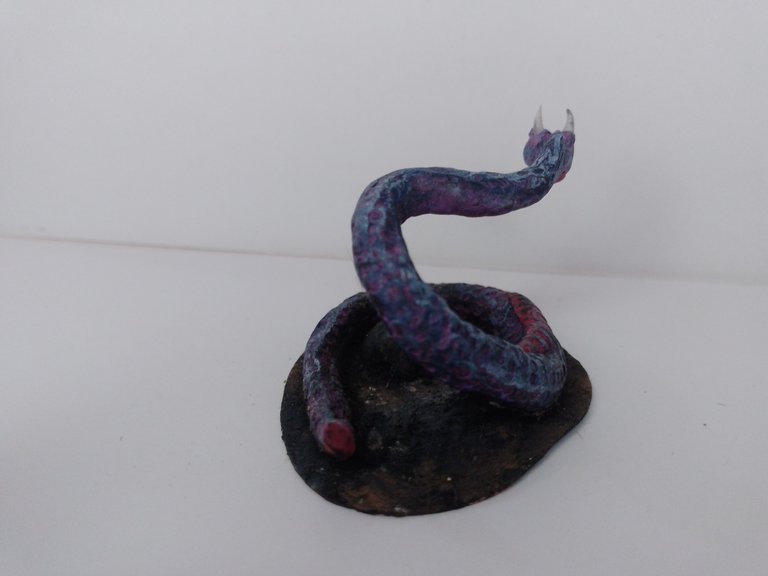
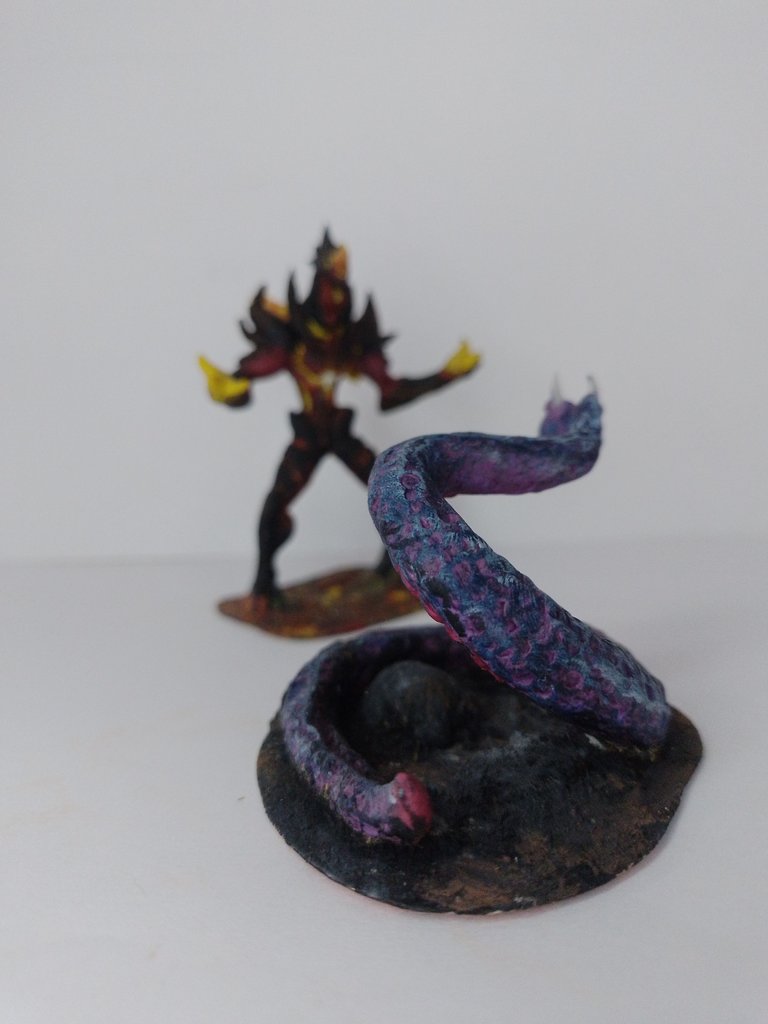
I'm talking about Silent Sha-Vi. It is a Giant snake, its appearance alone looks really scary but when I saw it, I said to myself that it would be interesting to try to make this character with a more realistic touch, creating a sculpture of the character.
So, I present to you my sculpture for this week. Below are some pictures:
Español
Saludos, amigos amantes del arte. Esta semana decidí participar en el concurso de arte de Splinterlands con una figura un tanto peculiar. Desde hace tiempo la había visto, pero me dije que era muy sencilla pero lo cierto es que no, es un personaje que bien se puede hacer con gran cantidad de detalles y darle un toque realista para hacer algo genial con un personaje cuya carta no tiene demasiado detalle.
Les hablo de Silent Sha-Vi. Es una serpiente Gigante, su sola apariencia luce realmente atemorizante pero cuando la vi, me dije que sería interesante tratar de hacer a este personaje con un toque más realista, creando una escultura del personaje.
Así pues, les presento mi escultura para esta semana. A continuación algunas fotografías:
Reference
Referencia
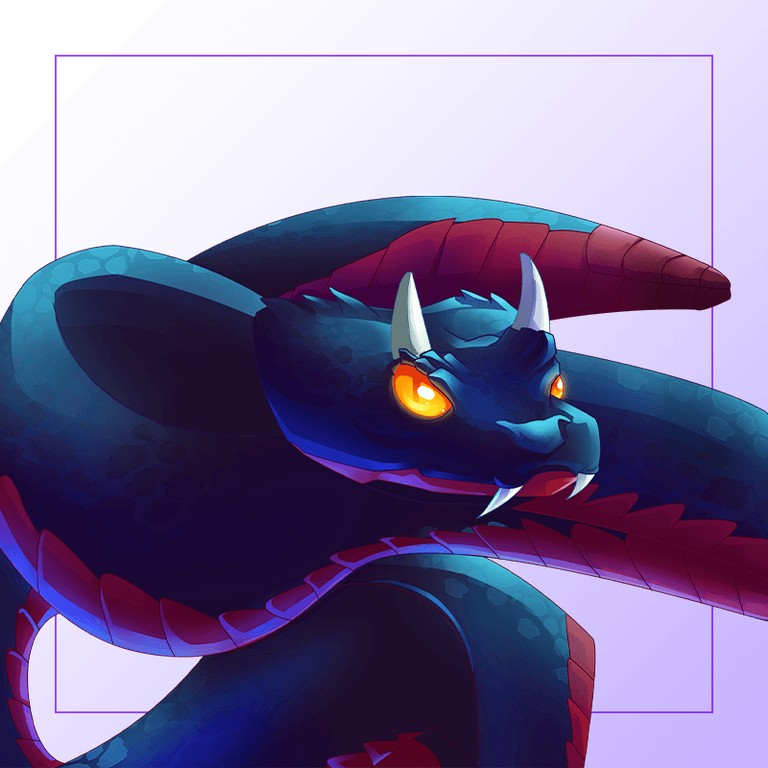
Source/Fuente
https://next.splinterlands.com/card-detail/357/regular/7?tab=lore
Step by step
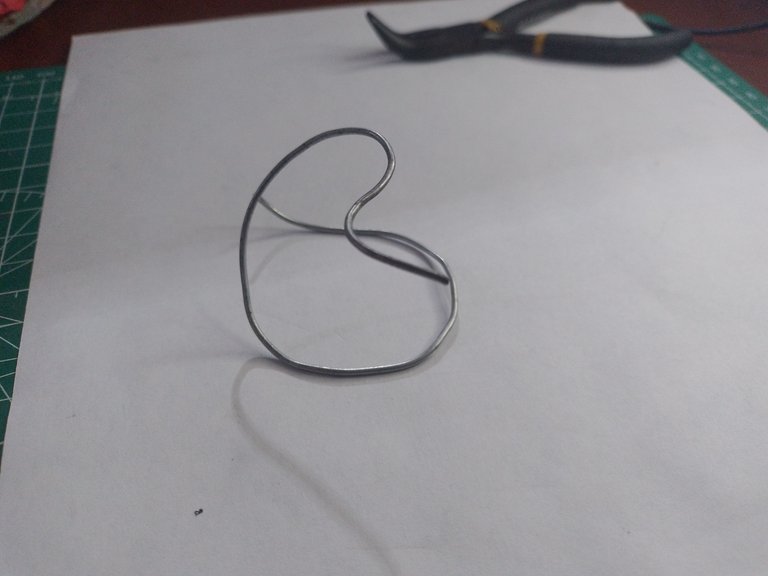
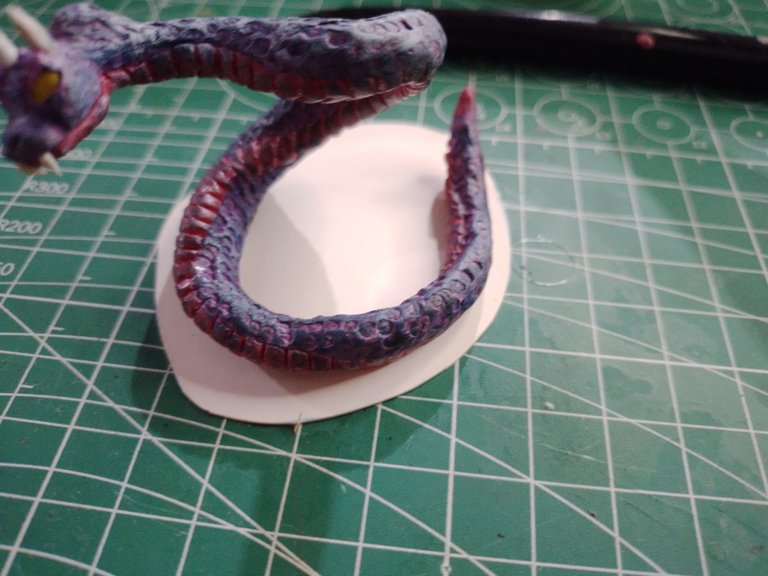
To accompany the publication, I will show you the step by step of the figurines. The first thing I made was the wire skeleton. As you could see in the other pictures, it is a snake that is upright so it will need support to maintain its position.
Paso a paso
Para acompañar la publicación, les mostraré el paso a paso de la figuritas. Lo primero que hice fue el esqueleto de alambre. Como pudieron observar en las otras fotografías, es una serpiente que está erguida así que que necesitará soporte para mantener la posición.
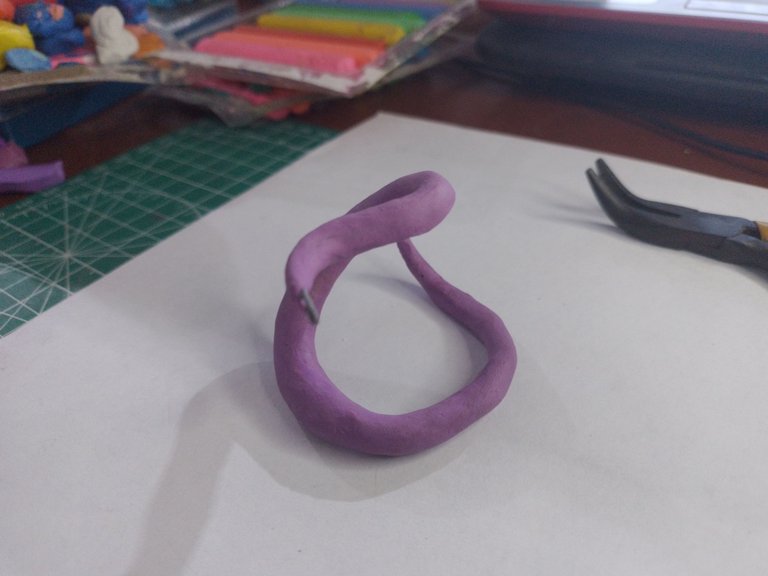
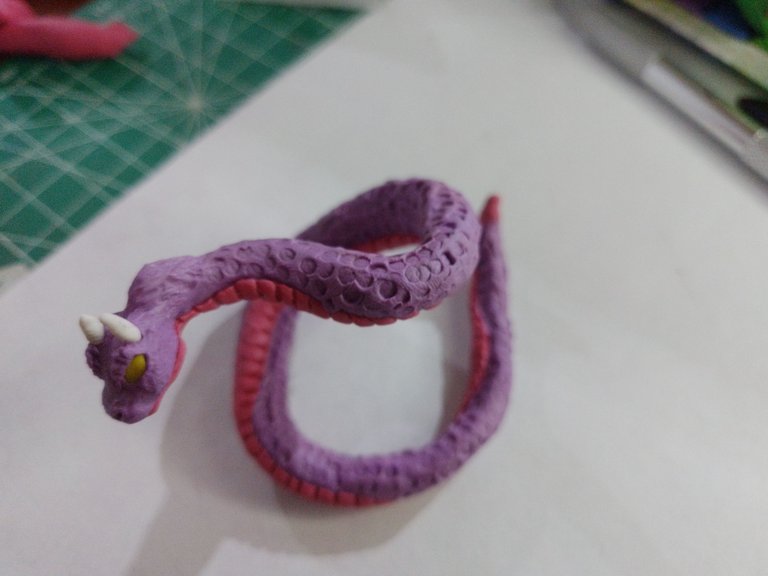
I used two shades of plasticine for this sculpture, one in purple and the other in pink for what would be the snake's abdomen. These two shades contrast, although they could belong to the same color scale. They look very well together, although later I would paint it to leave the real colors of the snake, or at least those that I think it would have if the drawing of the card had a realistic finish.
Usé dos tonalidades de plastilina para esta escultura, una de color morada y otra rosada para lo que sería el abdomen de la serpiente. Estas dos tonalidades hacen contraste, aunque bien podrían pertenecer a la misma escala de colores. Lucen muy bien juntas, aunque luego la pintaría para dejar los colores reales de la serpiente, o al menos los que creo yo que tendría si tuviese un acabado realista el dibujo de la carta.
 |  |
|---|
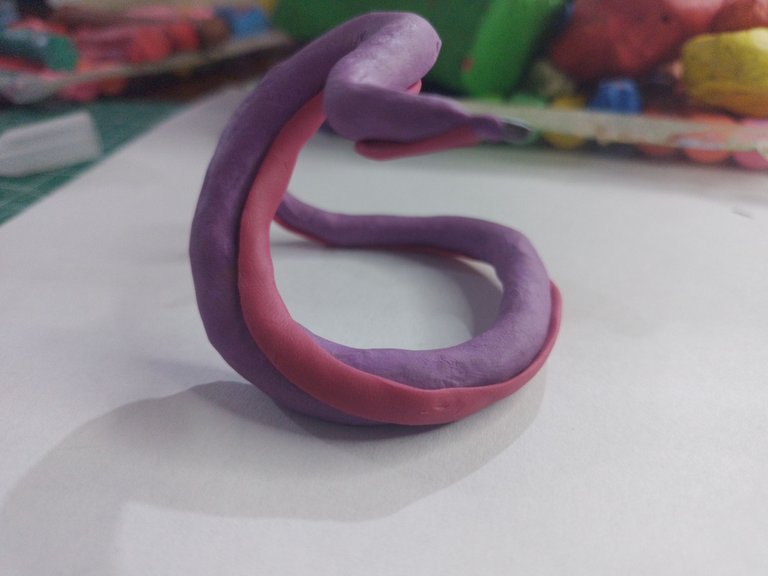
So it looks like a worm, but it's time to make it the details and things that will really make it look like a snake. For example, the lines on the sectioned abdomen, which will help it crawl on the ground. The idea is to make each section look like a separate plate, so try to mold it as if they were sections and not a complete plasticine plate.
Así parece una lombriz, pero es hora de hacerle los detalles y las cosas que realmente la harán parecer una serpiente. Por ejemplo, las líneas en el abdomen seccionado, que le sirven para arrastrarse en el suelo. La idea es que cada sección parezca una placa separada así que hay que tratar de moldearla como si fuesen secciones y no una placa completa de plastilina.

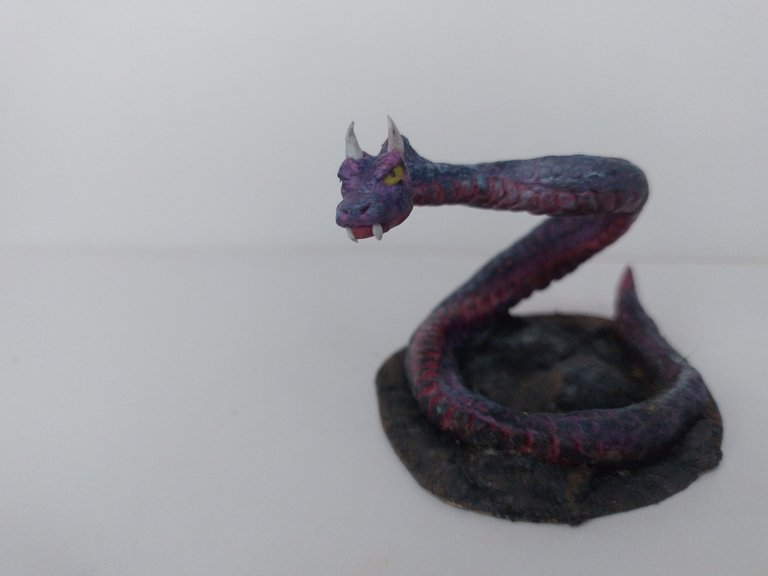
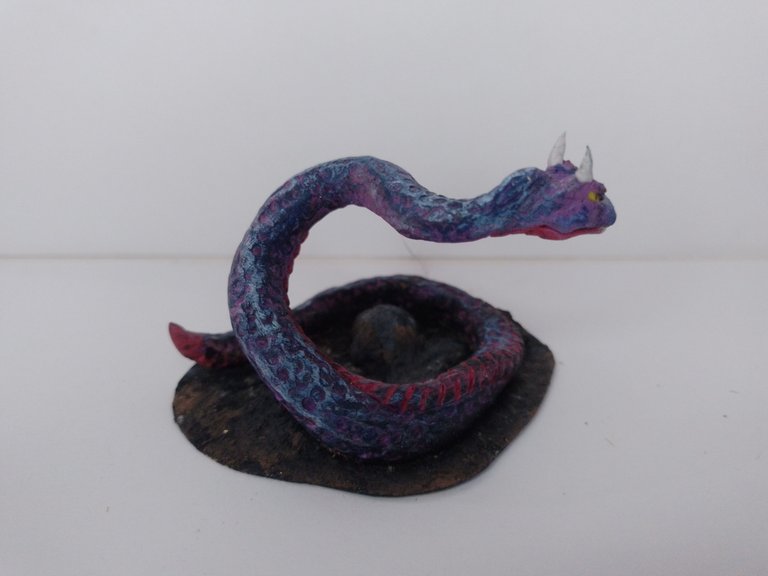
To finish the body of the snake, I made the head, at least the basic shape it has. I made it similar to the shape of a dragon's head. Elongated but a little narrow at the eyes, with a bulge at the top to emphasize the horns.
Para terminar el cuerpo de la serpiente, le hice la cabeza, al menos la forma básica que esta tiene. La hice parecida a la forma de la cabeza de un dragón. Alargada pero un poco estrecha en los ojos, con una protuberancia en la parte superior para que hiciera énfasis en los cuernos.
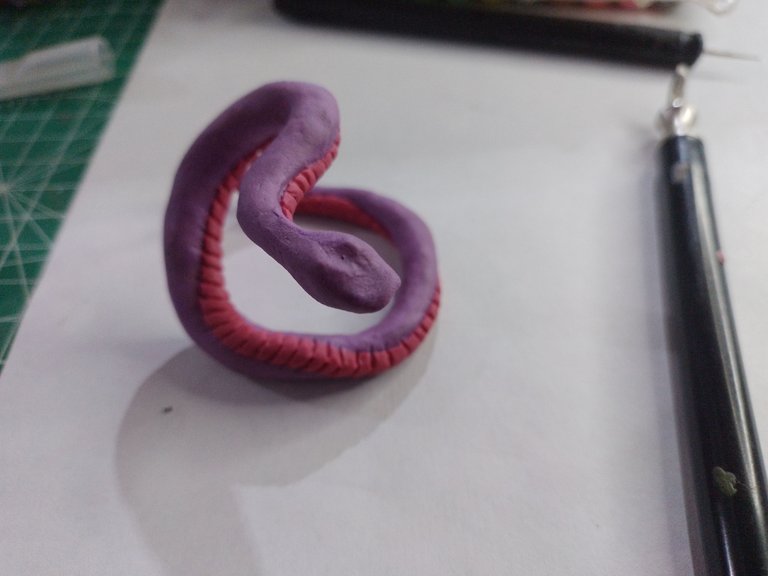
Notice below how the creature's head took shape once I placed the eyes, the nostrils, the mouth itself and the horns. It certainly looks like a dragon, which is what I wanted to achieve with the shape I told you before.
Fíjense a continuación cómo fue tomando forma la cabeza de la criatura una vez que le coloqué los ojos, los orificios nasales, la propia boca y los cuernos. Ciertamente parece un dragón, que era lo que buscaba lograr con la forma que les dije anteriormente.
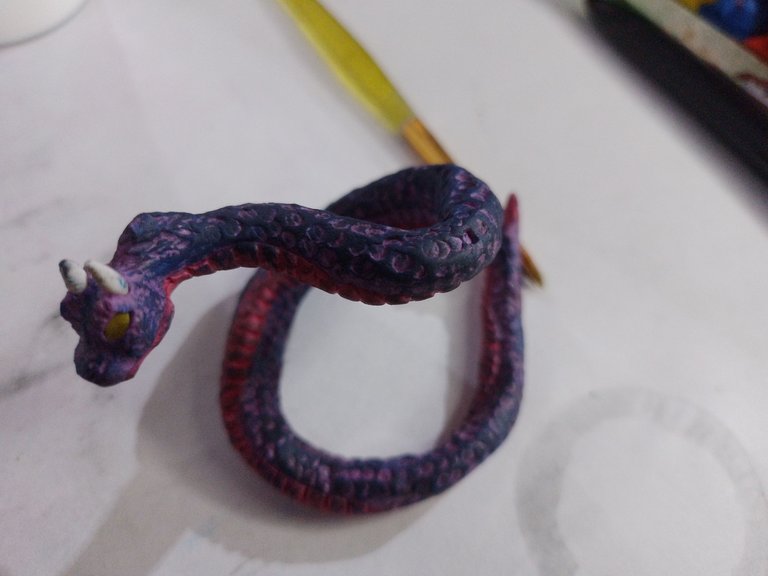
I want you to notice this finish I did on the body. I used my knitting needle, the rounded part, to create this texture of circles on the purple part, so that it would not be a smooth surface, but one with different shapes and textures.
On this textured surface I applied a small layer of black and blue paint, using the dry painting technique.
Quiero que se fijen en este acabado que le hice en el cuerpo. Usé mi aguja de tejer, la parte redondeada, para crear esta textura de círculos en la parte morada, para que no fuese una superficie lisa, sino una con diferentes formas y texturas.
Sobre esta superficie con textura apliqué una pequeña capa de pintura negra y azul, valiéndome de la técnica de pintado en seco.
 |  |
|---|
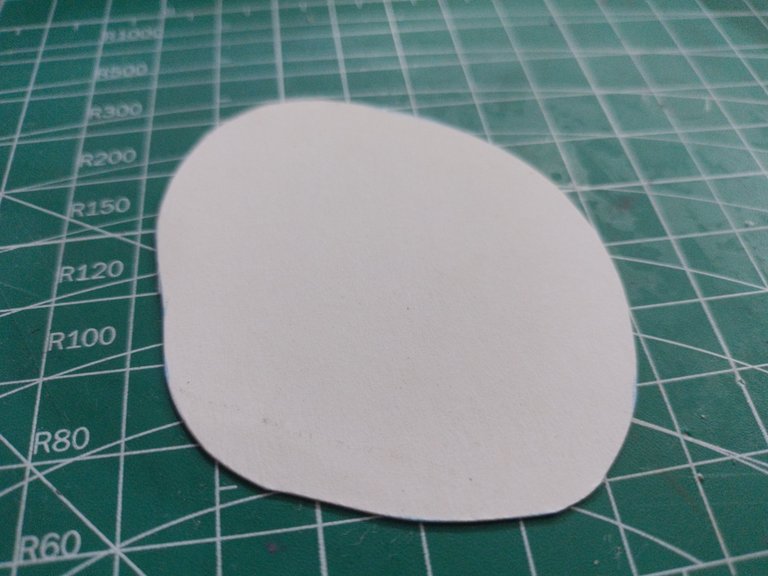
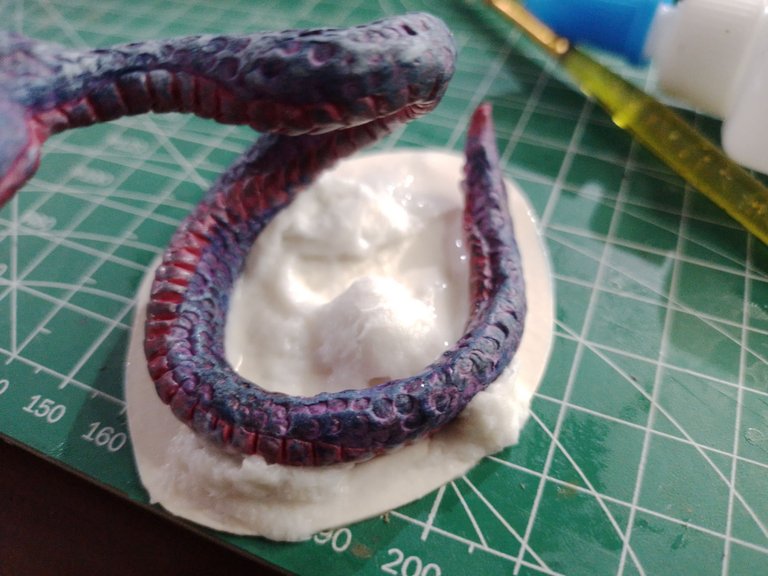
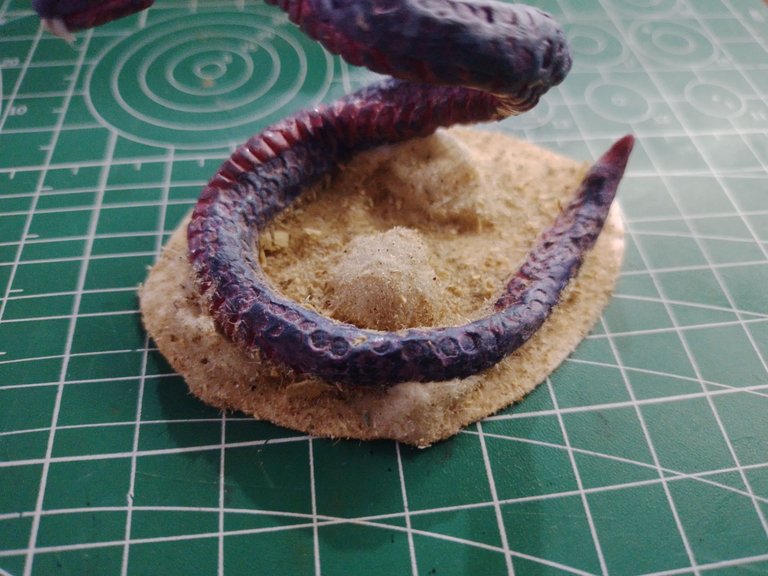
For the base, I cut a piece of cardboard with a shape appropriate to the body of the snake itself, to place it on top of the base and create a floor that simulates the snake's habitat.
Para la base corté un trozo de cartulina con una forma adecuada al cuerpo de la propia serpiente, para colocarla encima de la base y crear un suelo que simulara el habitad de la serpiente.
 |  |
|---|
To make this base I simply used glue and paper. I placed the thin paper on top of the cardboard with glue, I did it imperfectly and with a lot of bumps, as you can see in the pictures below:
Para hacer esta base simplemente usé pegamento y papel. El papel delgado lo coloqué encima de la cartulina con pegamento, lo hice de manera imperfecta y con muchas protuberancia, tal como pueden ver en las fotografías de abajo:
 |  |
|---|
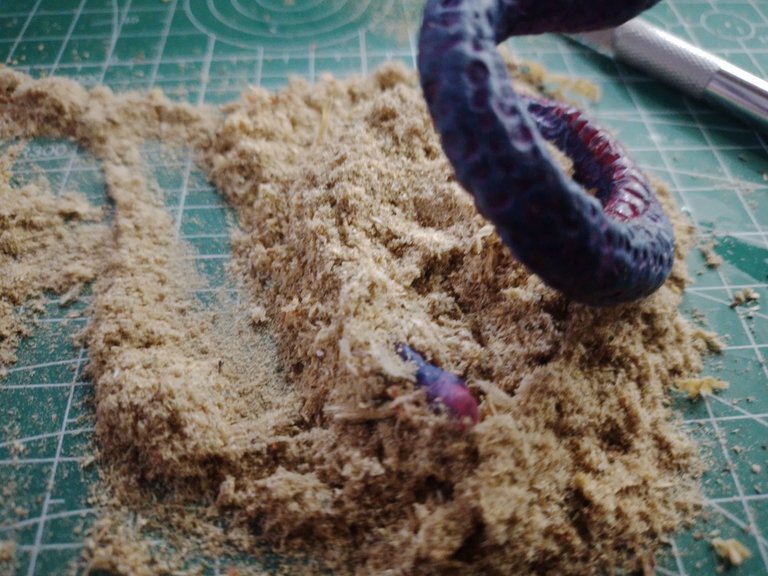
After the glue dried, I applied another layer of glue on top of the cardboard and paper and dropped a pile of sawdust on top, then I blew it out and the whole base that had glue on it was covered with the small sawdust particles. After it dried I applied different coats of paint and this is how the base was finished, as you can see in the following pictures.
Después de que el pegamento secó, apliqué otra capa de pegamento encima de la cartulina y el papel y dejé caer un montón de aserrín encima, luego lo soplé y toda la base que tenía pegamento quedó cubierta con las pequeñas partículas de aserrín. Después de que secó apliqué distintas capas de pintura y así quedó la base terminada, tal como pueden observar en las siguientes fotografías.
 |  |
|---|
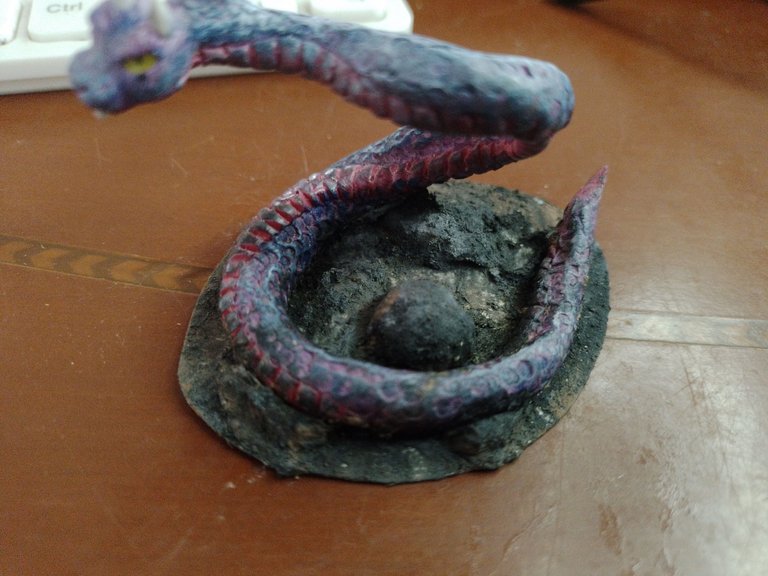
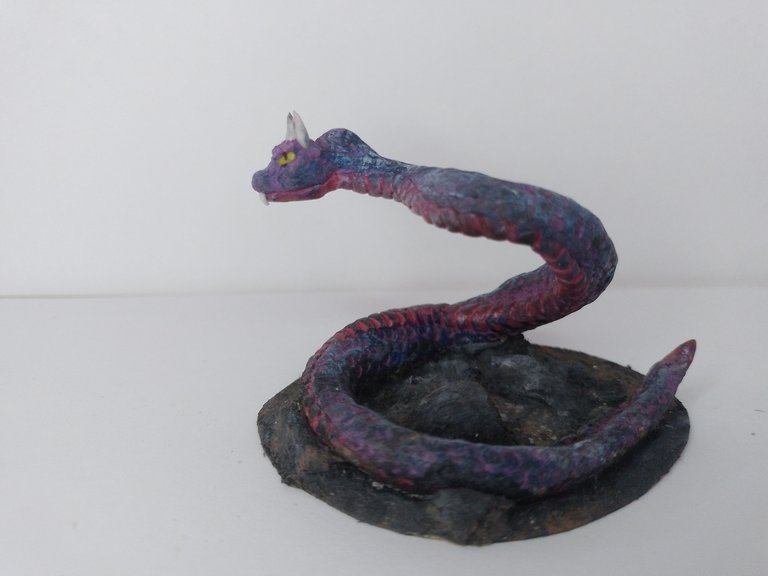
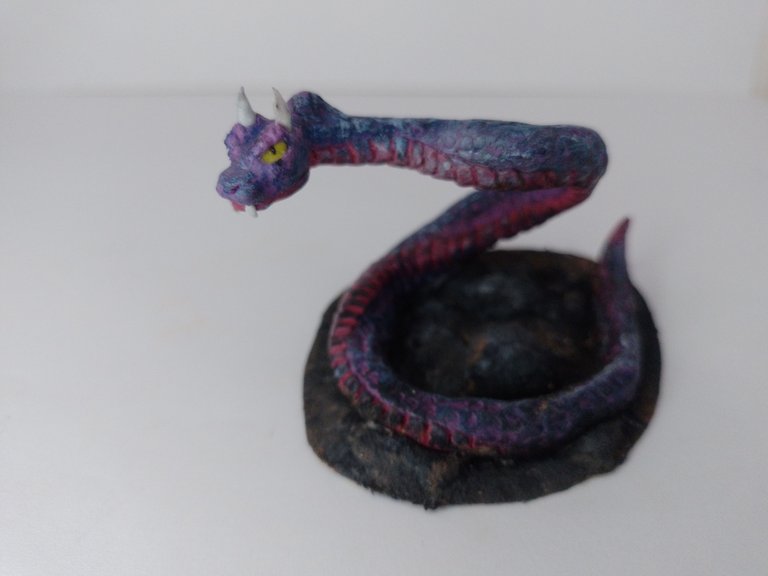
In this way the figure was completely finished. Below is a series of photographs of the final result:
De esta manera la figura quedó completamente terminada. A continuación una serie de fotografías del resultado final:
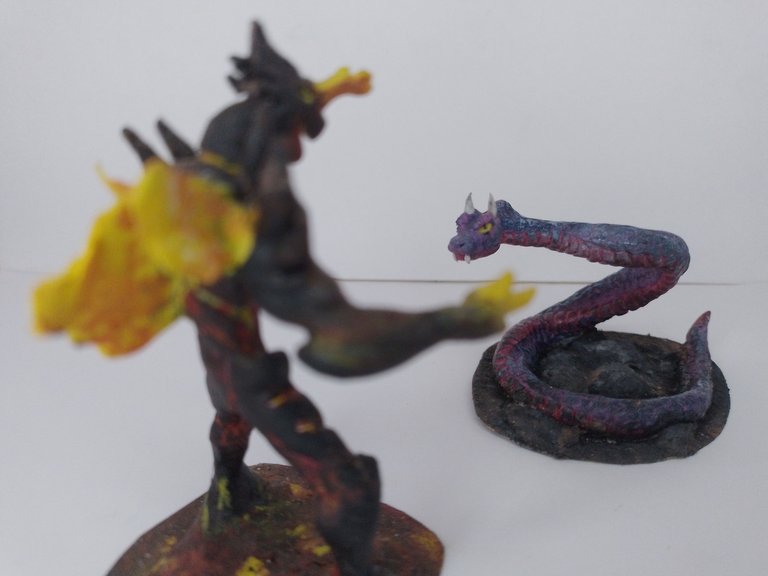
Here I did a sort of dramatization, where I confronted these two splinterlands beasts that I have already done, as if they were facing each other.
Aquí hice una suerte de dramatización, donde enfrente a estas dos bestias de splinterlands que ya he hecho, como si estuviesen enfrentándose.
Well folks, that's all for now. I would love for you to leave your thoughts on this sculpture below in the comments, as always I will be happy to read them.
I appreciate you taking the time to visit my publication. With nothing more to add, I'll take my leave then...
See you next time!
Bien amigos, esto ha sido todo por ahora. Me gustaría que dejaran sus opiniones sobre esta escultura abajo en los comentarios, como siempre estaré encantado de leerlos.
Agradezco que se tomaran el tiempo de visitar mi publicación. Sin más que agregar, me despido entonces...
¡Hasta la próxima!


Thanks for the support!
Esta serpiente te quedo espectacular, los colores, cada detalle, tiene una mirada y una pose tan imponente wowww.
Me encanto esa dramatizacion que creaste con ambos personajes, que genial se ven...
Mucha suerte en el concurso.
!DIY
!PIZZA
Traté de hacerle mucho detalle para que quedase lo más parecido a una serpiente real, en lugar de solo algo de caricatura. Y sí, ese escenario con aquellos dos personaje quedó muy bien también, muchas gracias por los tokens y el comentario.
$PIZZA slices delivered:
@dayadam(1/5) tipped @gaboamc2393
https://reddit.com/r/Splinterlands/comments/1brtwh4/silent_shavi_sculpture/
The rewards earned on this comment will go directly to the people( @gaboamc2393 ) sharing the post on Reddit as long as they are registered with @poshtoken. Sign up at https://hiveposh.com.
Saludos amigo, un trabajo increíble y es fascinante como siempre está creando cada una de esas esculturas con plastilina, donde cada uno de los detalles de esa serpiente están muy buenos y permite que sea muy llamativo. Gracias por compartirlo con nosotros.
Epa amigo David, saludos. Fíjate que sí, la magia está en todos estos detalles que uno se ingenia para darle a la pieza, porque al final esto es lo que más destaca, los detalles.
You can query your personal balance by
!DIYSTATSTe quedó espectacular....lo que más me gusta de tus publicaciones son las fotografías. Esta vez mis favoritas las del resultado final. Quedaron estupendas. Buen trabajo 👍🏽
!discovery 50
!DIY
Es que de nada vale hacer algo genial si no le tomas buenas fotos, yo humildemente logré tomarle las fotos lo mejor que pude jejeje algunas a veces salen borrosas pero se hace lo que se puede.
This post was shared and voted inside the discord by the curators team of discovery-it
Join our Community and follow our Curation Trail
Discovery-it is also a Witness, vote for us here
Delegate to us for passive income. Check our 80% fee-back Program
You can query your personal balance by
!DIYSTATSCheckout our BDVoter Daily Hive Showcase & Participate into our Daily giveaway to win various prize.
Thank you very much for your support!
Esta buenísima, cuanta elegancia tiene esta escultura mi Bro.
Jejeje una mirada aterradora que también es elegante! Saludos!