Twisted Jester Amigurumi/ Splinterlands Art Contest #256
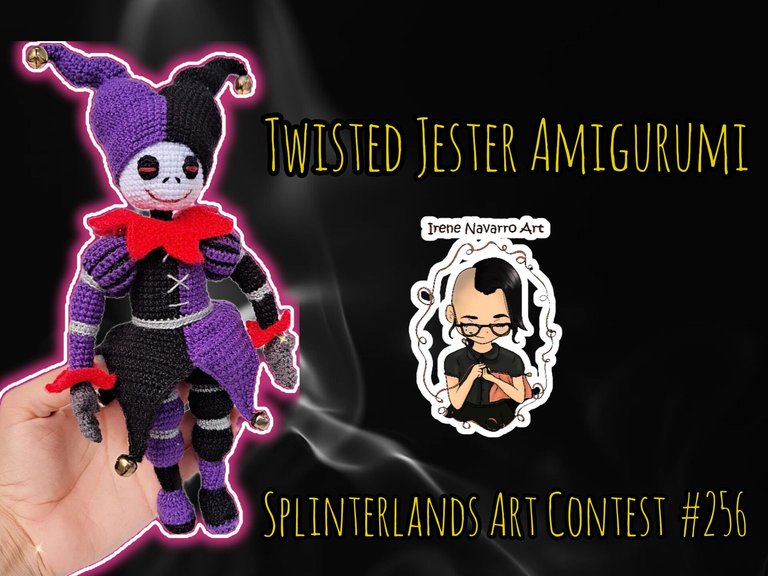
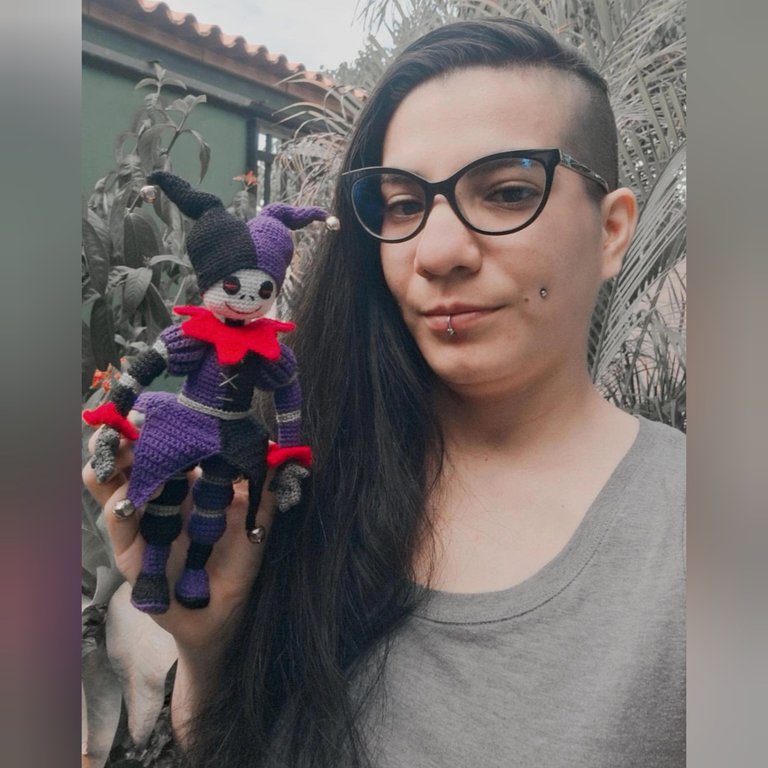
Saludos querida comunidad, el día de hoy les comparto mi participación en el Splinterlands Art Contest #256, para esta oportunidad hice un amigurumi de la carta Twisted Jester, cuyo Lore nos dice que es Capitan de la guardia personal del Lord de la Tinieblas, además de que no olvida su pasado y la masacre de su familia aún continúa atormentándolo de ira. Acá les cuento el proceso de elaboración el cual hice en 8 días 🥰
Greetings dear community, today I share my participation in the Splinterlands Art Contest #256, for this opportunity I made an amigurumi of the Twisted Jester card, whose Lore tells us that he is Captain of the personal guard of the Lord of Darkness, also that he does not forget his past and the massacre of his family still continues to haunt him with anger. Here I tell you the elaboration process which I did in 8 days 🥰

Proceso / Process
Los materiales que usé para este amigurumi son: hilo acrílico para crochet, hilo para coser, ganchillos de 1.25 mm y 0.90 mm, relleno de fibra acrílica antialérgica, alambre de cobre para la estructura interna, pinzas para bisutería, aguja lanera y aguja de coser, 6 cascabeles.
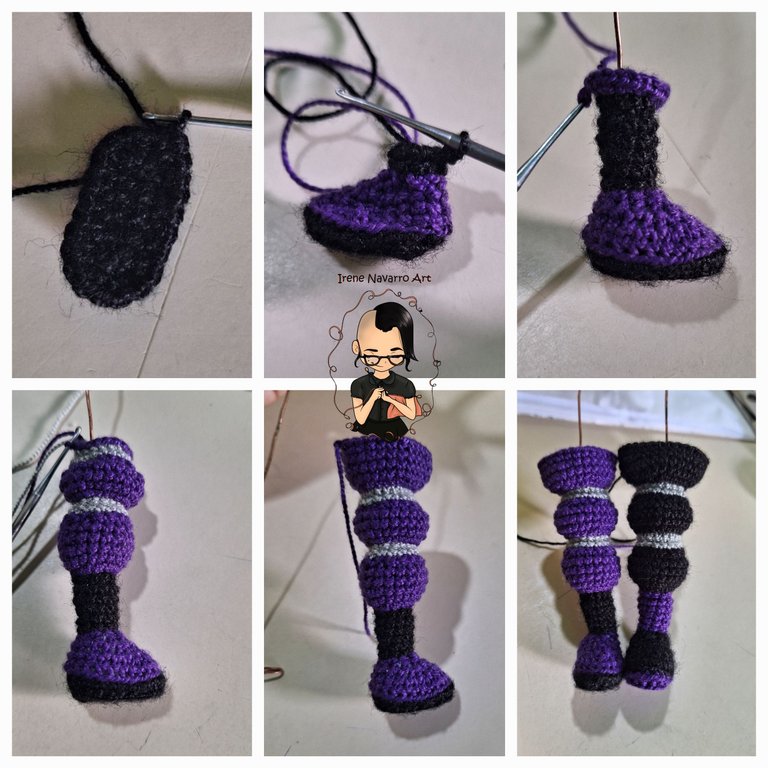
Hice el trabajo de pies a cabeza, comenzando por los zapatos, para la suela del zapato hice el óvalo de 22 puntos bajos con 5 cadenas de inicio en color negro, luego cambié a color morado para el cuerpo del zapato, al llegar al tobillo cambié a hilo negro hasta casi llegar a la pantorrilla donde cambié nuevamente a morado, haciendo aumentos y disminuciones para crear el efecto del pantalón, el cual tiene unas pequeñas divisiones en las cuales usé hilo gris plata, la pierna termina con un total de 27 puntadas. Para hacer la siguiente pierna, hice el mismo procedimiento pero intercambiando los colores negro y morado, de modo que el patrón de colores quedara al contrario , es decir que ambas piernas son iguales pero cambia el color a la inversa.
The materials I used for this amigurumi are: acrylic yarn for crocheting, sewing thread, 1.25 mm and 0.90 mm crochet hooks, anti-allergic acrylic fiber filling, copper wire for the internal structure, tweezers for jewelry, woolen needle, and sewing needle , 6 bells.
I did the work from toe to head, starting with the shoes, for the sole of the shoe I made the oval of 22 single crochet with 5 starting chains in black, then I changed to purple for the body of the shoe, when I reached the ankle I changed with black thread until almost reaching the calf where I changed again to purple, making increases and decreases to create the effect of the pants, which has some small divisions in which I used silver gray thread, the leg ends with a total of 27 stitches. To make the next leg, I did the same procedure but interchanging the black and purple colors, so that the color pattern was the opposite, that is, both legs are the same but the color changes in reverse.
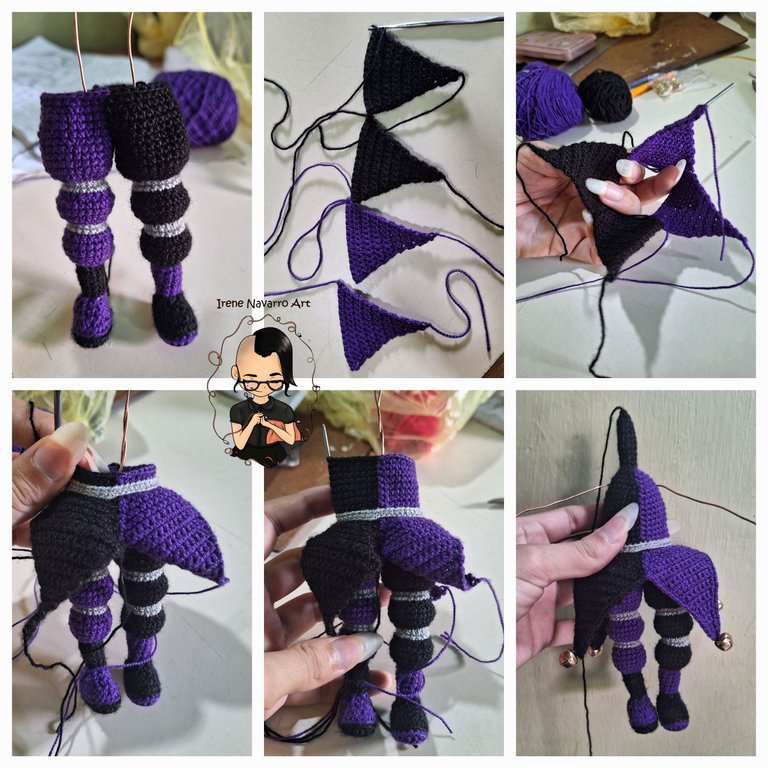
Hice una hilera de puntos bajos para unir las piernas y crear la entrepierna, pero haciendo las puntadas del color correspondiente a cada pierna, hice 6 disminuciones cada dos hileras hasta obtener 36 puntadas.
Aparte hice 4 triángulos, dos morados y dos negros, los uní para crear una forma similar a una falda que superpuse para unir a la cintura y continuar haciendo el torso, pero colocando los colores en orden inverso a las piernas. Hice una hilera con gris plata para el cinturón y continué hasta la altura de la axila, allí comencé a hacer 4 disminuciones por hilera hasta obtener 8 puntadas para el cuello.
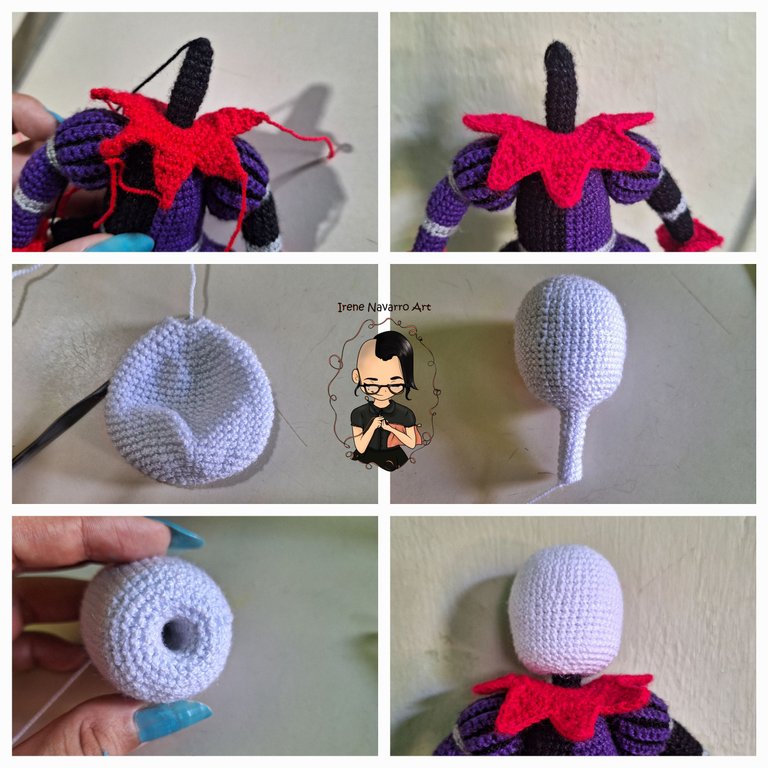
Para este amigurumi utilicé una técnica el cual la cabeza del amigurumi puede girar hacia los lados por lo que uno de los pasos que se debe hacer es hacer el cuello muy largo para que atraviese la cabeza por dentro. En la falda hice una hilera de puntos bajos por el borde y coloque los cascabeles en las puntas.
I made a row of single crochet to join the legs and create the crotch, but making the stitches of the color corresponding to each leg, I made 6 decreases every other row until I had 36 stitches.
Separately I made 4 triangles, two purple and two black, I joined them to create a shape similar to a skirt that I superimposed to join at the waist and continue making the torso, but placing the colors in reverse order to the legs. I made a row with silver gray for the belt and continued until the armpit height, there I began to make 4 decreases per row until I obtained 8 stitches for the neck.
For this amigurumi I used a technique in which the head of the amigurumi can turn to the sides, so one of the steps that must be done is to make the neck very long so that it goes through the head on the inside. On the skirt I made a row of single crochet around the edge and placed the bells at the ends.
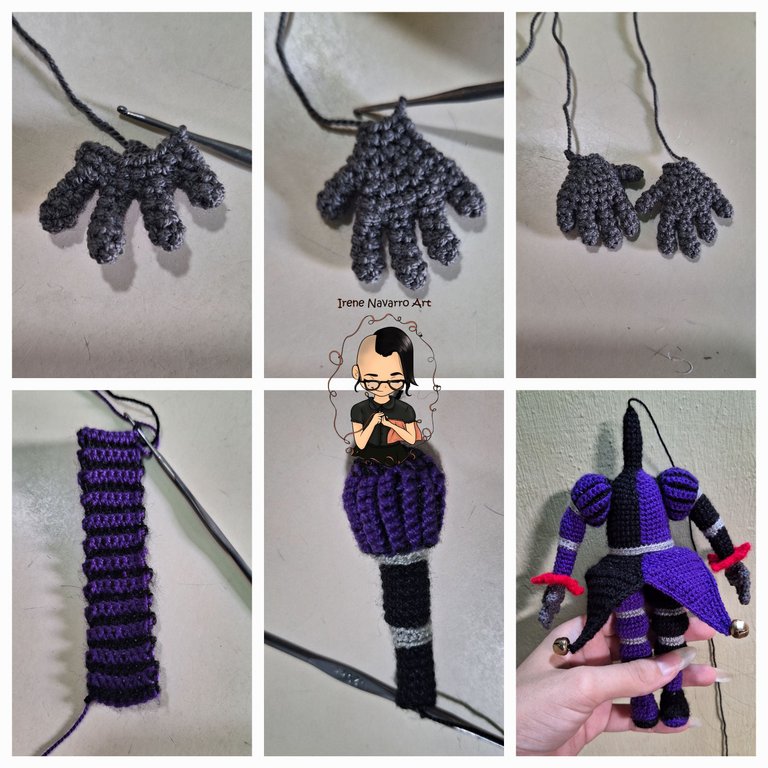
Para las manos trabajé con hilo gris plomo, haciendo cada dedo por separado y uniéndonos con puntos bajos para crear la mano, haciendo disminuciones para la muñeca
Para crear la manga abombada del traje de arlequín, hice 8 cadenas y 24 hileras intercalando el color morado con el negro, luego uní por una costura y levanté 12 puntos bajos en forma circular para crear el brazo, hice las divisiones en color gris plata e hice los volados de la manga en color rojo. El otro brazo es igual pero se invierten los colores. Introduje el alambre por dentro el relleno y cosí las manos a los brazos.
For the hands I worked with lead gray thread, making each finger separately and joining them with low stitches to create the hand, making decreases for the wrist
To create the puffed sleeve of the harlequin costume, I made 8 chains and 24 rows interspersing the purple color with the black, then joined by a seam and picked up 12 single crochets in a circular shape to create the arm, I made the divisions in silver gray and I made the sleeve ruffles in red. The other arm is the same but the colors are reversed. I inserted the wire inside the padding and sewed the hands to the arms.
Con hilo rojo levanté puntadas desde el cuello, haciendo aumentos para crear la escarola de 40 puntadas y luego hice 8 picos de 5 puntos bajos de base.
Con hilo blanco hice la cabeza comenzando con 6 puntos bajos, haciendo 6 aumentos por hilera hasta llegar a 48, hice 5 hileras, dos hileras de 3 disminuciones, luego 6 hileras y por último hice las disminuciones hasta llegar al cuello, hice 10 hileras para crear un especie de tubo, el cual al empujarlo por dentro crea el espacio para introducir el cuello , de este modo al rellenar y coser la cabeza esta se puede girar.
With red thread I picked up stitches from the neck, increasing to create the endive of 40 stitches and then I made 8 peaks with 5 base stitches.
With white thread I made the head starting with 6 single crochets, making 6 increases per row until reaching 48, I made 5 rows, two rows of 3 decreases, then 6 rows and finally I made the decreases until reaching the neck, I made 10 rows to create a kind of tube, which when pushed inside creates the space to introduce the neck, in this way when filling and sewing the head it can be turned.
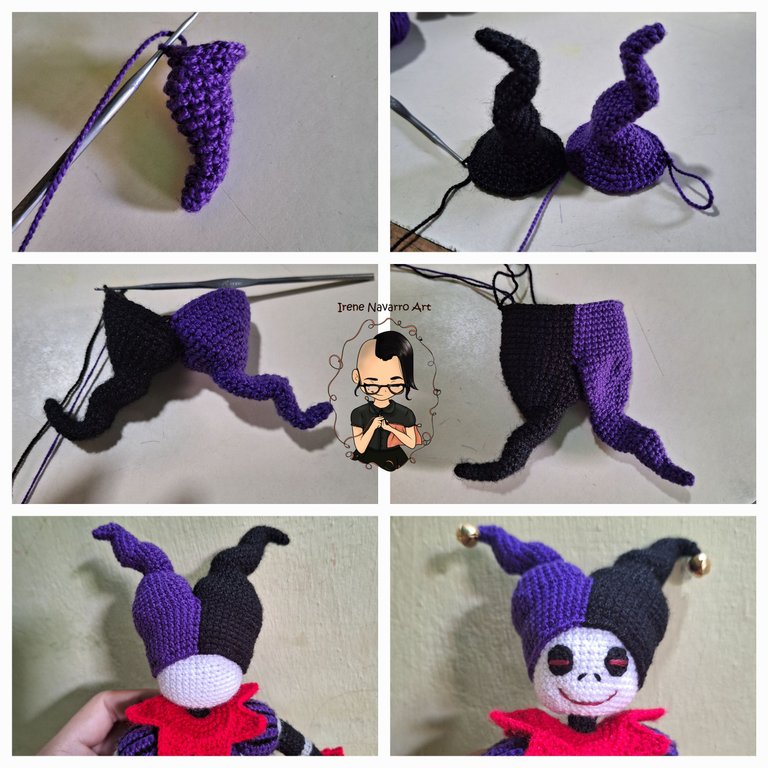
Para el sombrero con hilo morado comencé con 3 puntos bajos en un anillo, hice 1 aumento por hilera hasta llegar a 20, (hice el efecto de curva cada 6 hileras), luego hice 4 aumentos por hilera, luego 6 aumentos por dos hileras hasta obtener 36. Hice otra parte igual pero con hilo negro, uní ambas partes e hice disminuciones hasta llegar a 48 puntadas respetando el color de cada lado, luego hice 8 hileras para finalizar, cosí el gorro a la cabeza y cosí los cascabeles en las puntas.
Para los ojos use 4 hebras de hilo de coser en color negro y ganchillo de 0.90mm , hice un anillo de 8 puntos bajos y luego 8 aumentos. Bordé la línea roja y cosí a la cara, bordé la nariz y la boca con el mismo hilo.
For the hat with purple yarn I started with 3 single crochets in a ring, I increased 1 per row until I reached 20, (I did the curve effect every 6 rows), then I increased 4 per row, then 6 increases per two rows until get 36. I made another part the same but with black thread, I joined both parts and decreased until reaching 48 stitches respecting the color of each side, then I made 8 rows to finish, I sewed the hat to the head and sewed the bells on the tips .
For the eyes I used 4 strands of black sewing thread and a 0.90mm hook, I made a ring with 8 single crochets and then 8 increases. I embroidered the red line and sewed to the face, I embroidered the nose and the mouth with the same thread.
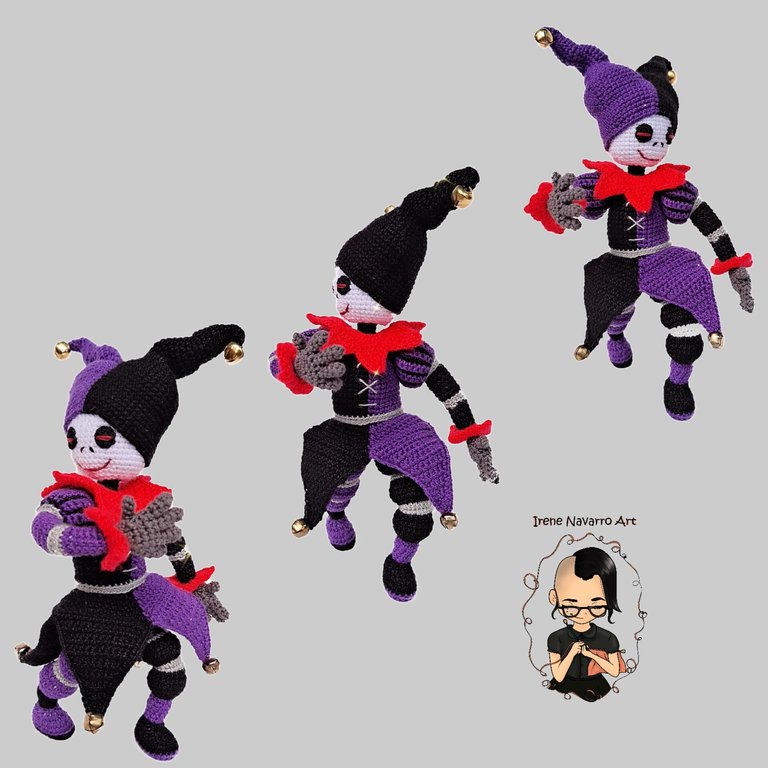
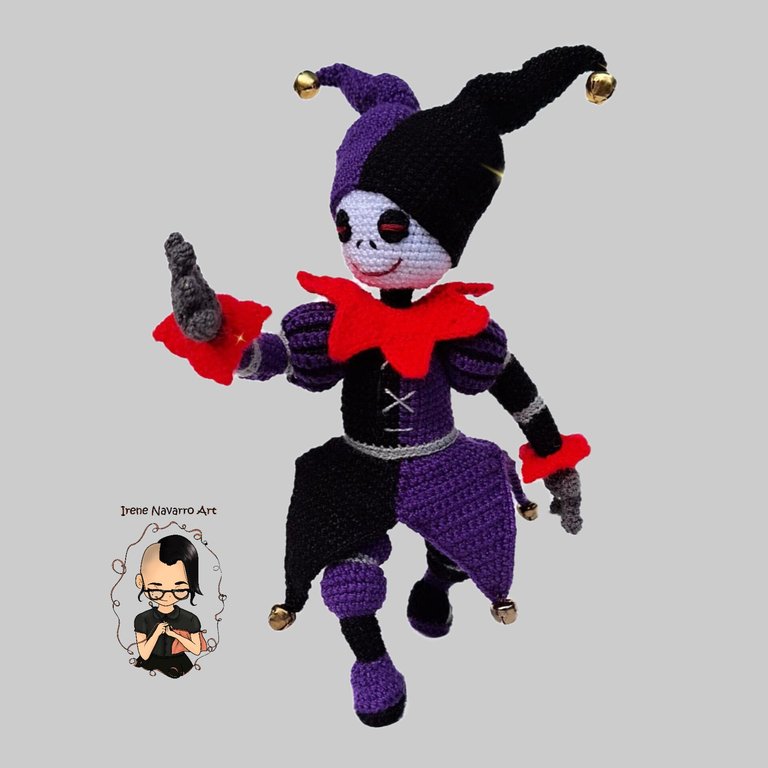
Resultado / Result
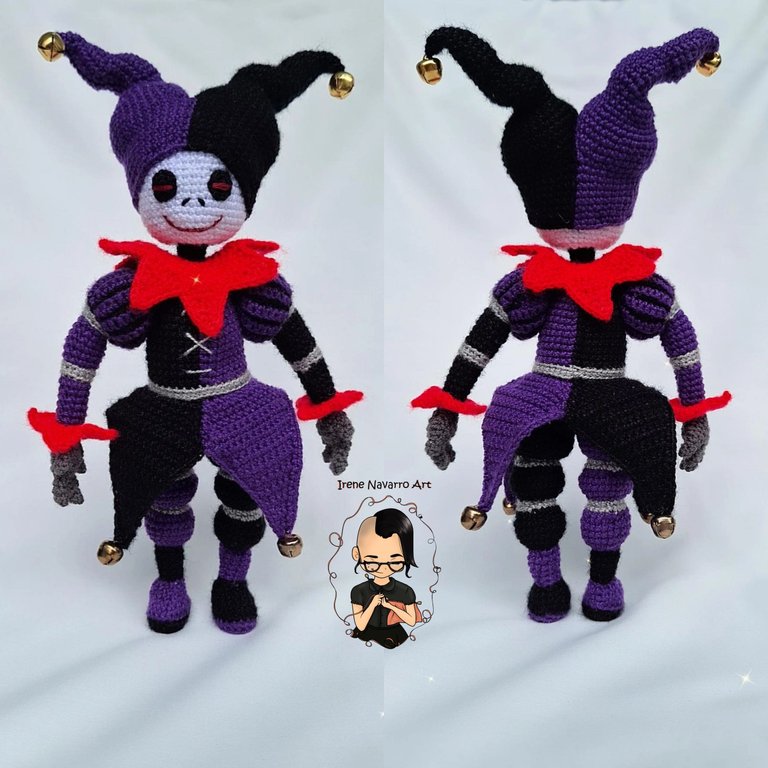
Este ha sido uno de los amigurumis con más detalles que he realizado, pero al mismo tiempo ha sido el más divertido de hacer, puesto que apliqué técnicas o trucos de crochet que normalmente no uso con frecuencia. Por ejemplo trabajar con dos colores del cuerpo de forma diferenciada, también apliqué la técnica de la cabeza giratoria y también usé elementos de decoración como los cascabeles lo cuales me gustaron mucho porque al mover el amigurumi estos suenan. Espero que les haya gustado y deseen me suerte en concurso. Abrazo 🤗
This has been one of the amigurumis with the most details that I have made, but at the same time it has been the most fun to do, since I applied techniques or crochet tricks that I normally do not use frequently. For example, working with two colors of the body in a differentiated way, I also applied the rotating head technique and also used decorative elements such as bells, which I really liked because when the amigurumi is moved they make a sound. I hope you liked it and wish me luck in the contest. Hug 🤗

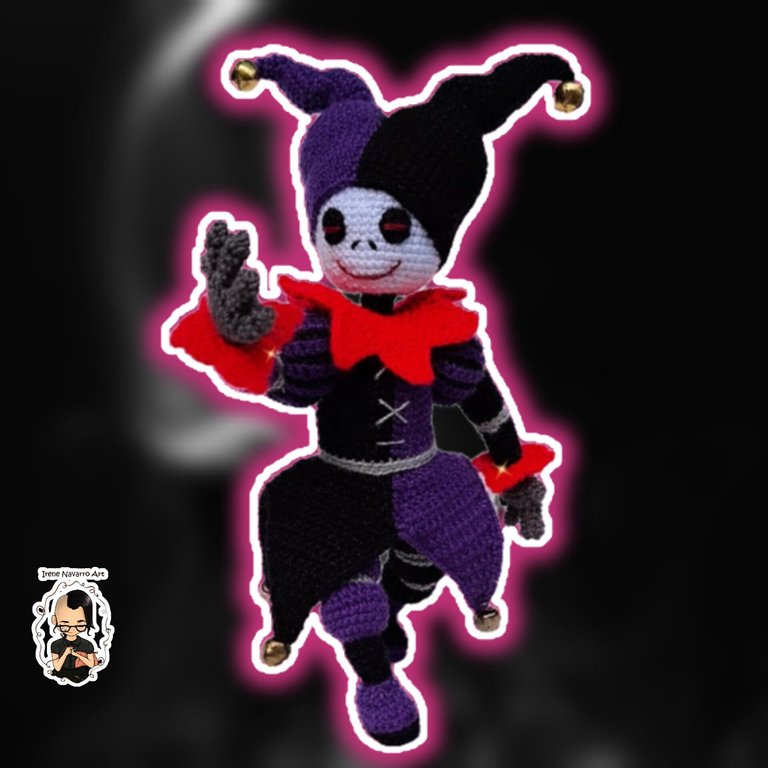
Imágenes tomadas con dispositivo Samsung A54. Portada editada en Inshot
Pictures taken with Samsung A54 device. Cover edited in Inshot
Espero les haya gustado. Les invito a leer mis próximas publicaciones y siempre estaré dispuesta a responder sus preguntas y comentarios, también pueden seguirme y contactarme en cualquiera de mis redes sociales. ¡Muchas gracias!
I hope you liked it. I invite you to read my next publications and I will always be willing to answer your questions and comments, you can also follow me and contact me on any of my social networks. Thank you!
Facebook
Twitter
Instagram
Ko-Fi
Discord: irenenavarroart#0361
Que linda la manualidad, aunque creo que es un poquito trabajoso. Un saludos .
Muchas gracias 😄 no es un poquito trabajoso, es muy trabajoso. Saludos 🤗
Jaja me imagino , pero te quedó perfecto.
https://leofinance.io/threads/irenenavarroart/re-leothreads-cuphwk2v
The rewards earned on this comment will go directly to the people ( irenenavarroart ) sharing the post on LeoThreads,LikeTu,dBuzz.
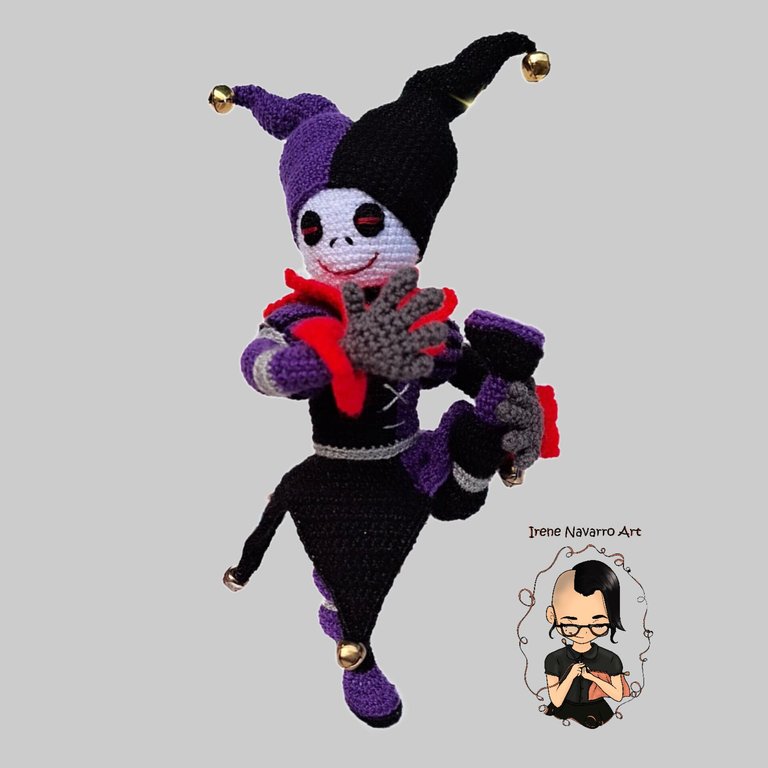
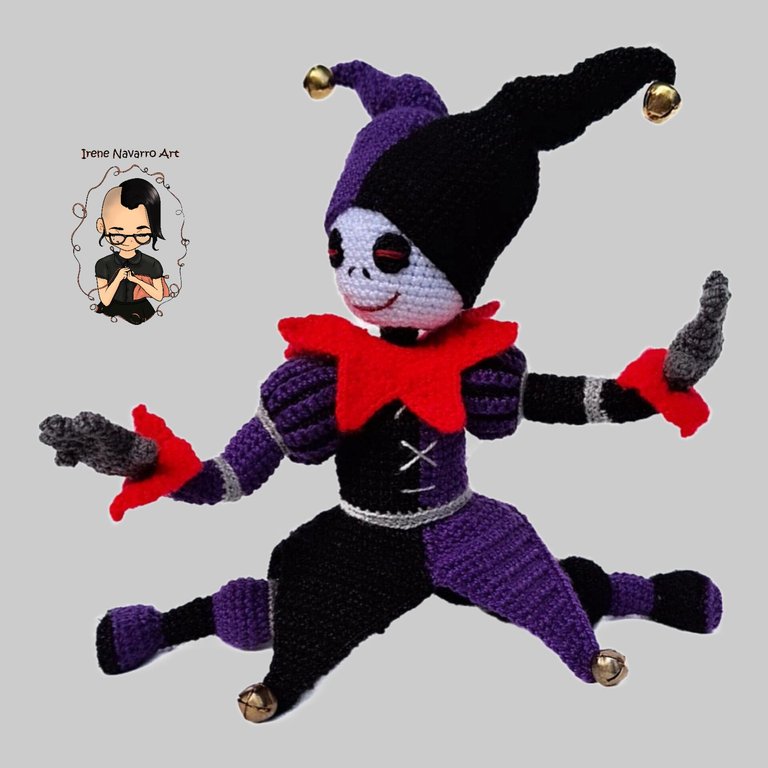
Me encanta!!! Quedo precioso el amigurumi de Twisted Jester en especial me gustaron las fotos en las que lo pusiste a hacer algunas poses divertidas, gran trabajo! ✨️💖
Muchas gracias 😊 quería que se notara que gracias a la estructura interna de alambre puede mover el cuerpo y con la técnica de cosido de la cabeza puede girar a los lados. Gracias por apreciar el esfuerzo 🖤💜
Contáctenos para saber más del proyecto a nuestro servidor de Discord.
Si deseas delegar HP al proyecto: Delegue 5 HP - Delegue 10 HP - Delegue 20 HP - Delegue 30 HP - Delegue 50 HP - Delegue 100 HP.
Gracias por el apoyo 💚
@irenenavarroart como siempre sorprendiéndome con tus hermosos Amigurumi, excelente trabajo, me encanta 😊, un abrazote 🤗
Muchas gracias 😊 abrazo 🤗
Un lindo personaje que nos comparte. Me gustan mucho sus tejidos. Bendiciones. Que Don tan bonito tiene.
!LADY
View or trade
LOHtokens.@tere.alv, you successfully shared 0.1000 LOH with @irenenavarroart and you earned 0.1000 LOH as tips. (1/1 calls)
Use !LADY command to share LOH! More details available in this post.
Muchas gracias señora Tere 🥰
Dios mío... ¡Que cosita más preciosa! 😍 Se ve tan adorable, me encanta y quiero uno 😩 Extraordinario trabajo como siempre. Está perfectamente elaborado hasta el más mínimo detalle ¡Lo amo! 😘💚
Muchas gracias por notar los detalles y el esfuerzo. Abrazo 🤗
Congratulations @irenenavarroart! You have completed the following achievement on the Hive blockchain And have been rewarded with New badge(s)
Your next payout target is 28000 HP.
The unit is Hive Power equivalent because post and comment rewards can be split into HP and HBD
You can view your badges on your board and compare yourself to others in the Ranking
If you no longer want to receive notifications, reply to this comment with the word
STOPCheck out our last posts:
Waooo! Simplemente impresionante. Te aplaudo de pie.
(Me encanta como se ve tu cabello largo) Saludos!
Ayyy muchas gracias 😄 Abrazos 🤗
Thanks for sharing! - castleberry#6859

Me fascino el resultado! Mucha suerte!
Está super genial, me encanta como quedó
Muchas gracias 🤗