[ENG/ESP] Splinterlands Art Contest Week 179- Nectar Queen
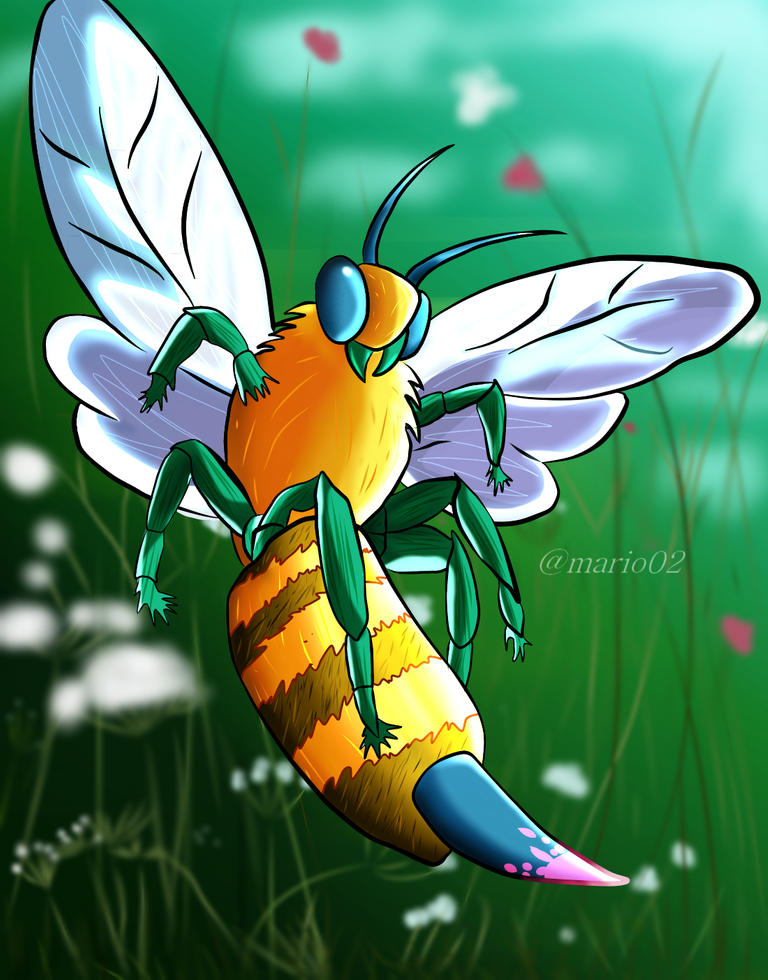
Greetings users of the #Splinterlands community, this time I want to share with all of you my entry to the #179 contest of the game for this week, so I will show the procedure I used to make this drawing, which is the second one I make digitally, so I hope to keep improving as time goes on.
Saludos usuarios de la comunidad de #Splinterlands, en esta ocasión quiero compartir con todos ustedes mi entrada al concurso #179 del juego correspondiente a esta semana por lo que mostrare el procedimiento que utilice para realizar este dibujo, el cual les comento que es el segundo que realizo de manera digital por lo que espero seguir mejorando con el paso del tiempo.

Source
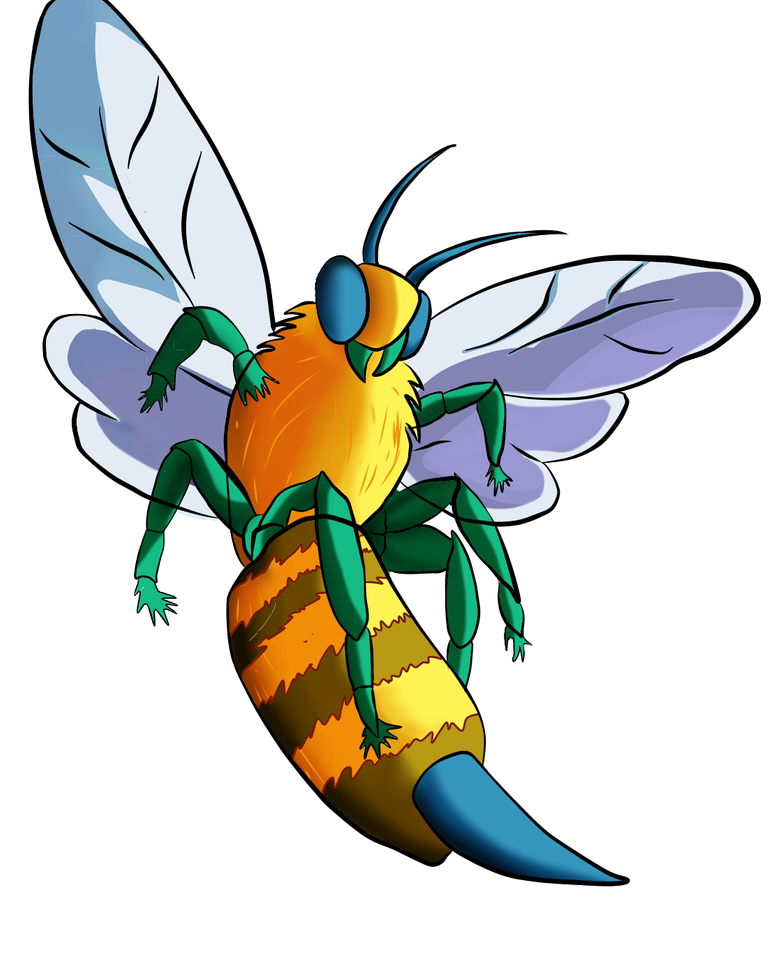
The character I chose for this week is Nectar Queen which at first glance seems to be a simple character but I called my attention mainly by the colours and tones that takes in addition to having a somewhat dynamic pose so I thought it was a good choice to draw it.
El personaje que elegí para esta semana es Nectar Queen el cual a simple vista parece ser un personaje sencillo pero que llamo mi atención principalmente por los colores y tonos que lleva además de tener una pose algo dinámica por lo que me pareció una buena opción para dibujarlo.
Materials Used | Materiales Utilizados
- HB pencil
- Letter size sheet
- MediBang Paint Pro program
- Mouse
- Lápiz HB
- Hoja tamaño carta
- Programa MediBang Paint Pro
- Ratón

Process | Proceso
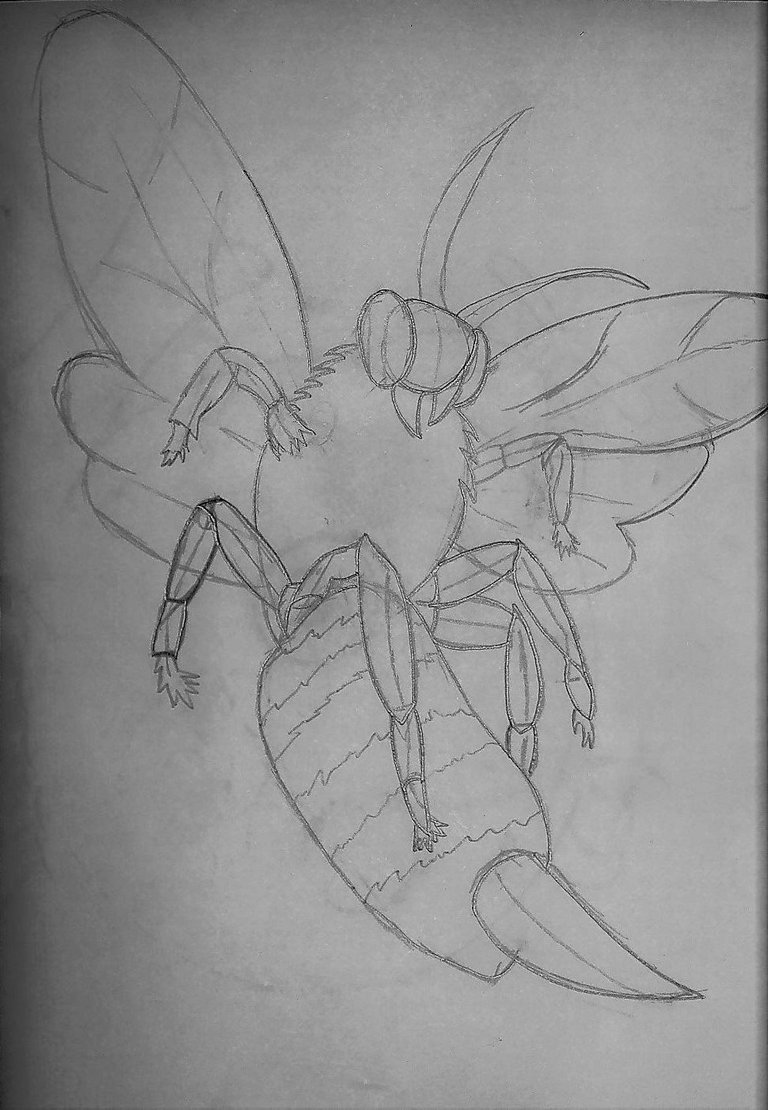
- Step #1:
We begin by making a small sketch of the character with the HB Pencil in which we leave the main lines very well marked and then take a photograph in which the lines that have been drawn on the paper can be seen very well.
- Paso #1:
Comenzamos realizando un pequeño boceto del personaje con el Lápiz HBen el que dejamos las principales líneas muy bien marcadas para luego tomarle una fotografía en la que se vean muy bien las líneas que se han trazado en el papel.
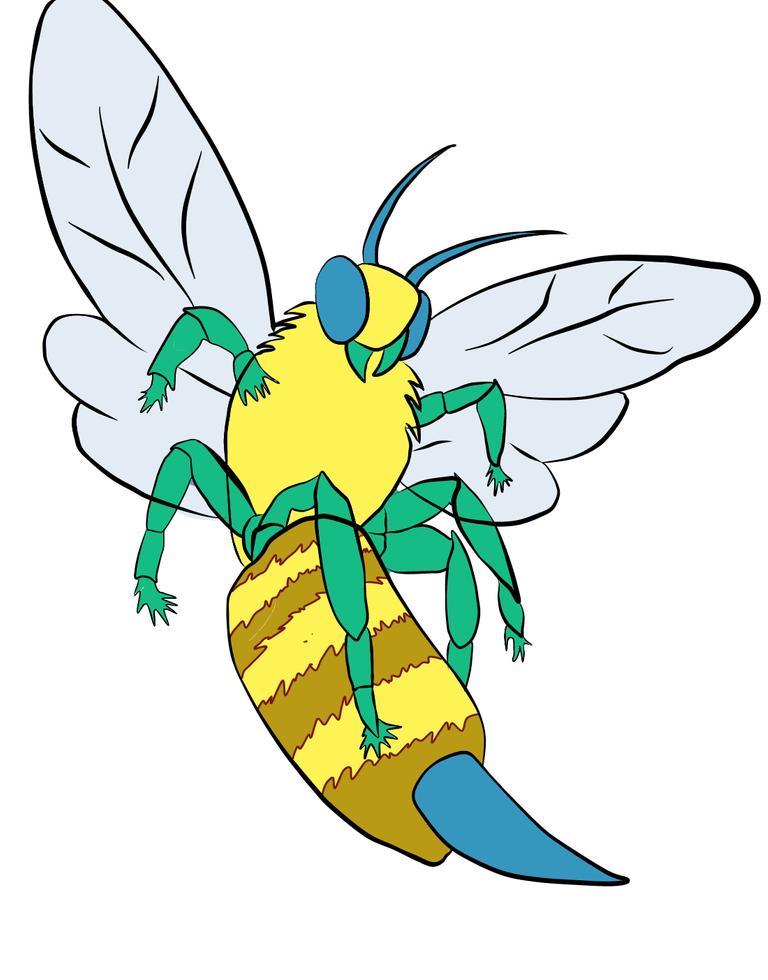
- Step #2:
Once I had the sketch and the photograph of the character I proceeded to outline it again to make the lineart of the drawing.
- Paso #2:
Una vez tenía el boceto y la fotografía del personaje procedí a delinearlo nuevamente para así hacer el lineart del dibujo.

- Step #3:
After having the lineart ready the next thing was to give the base colours to the drawing.
- Paso #3:
Luego de tener el lineart listo lo siguiente fue darle los colores base al dibujo.
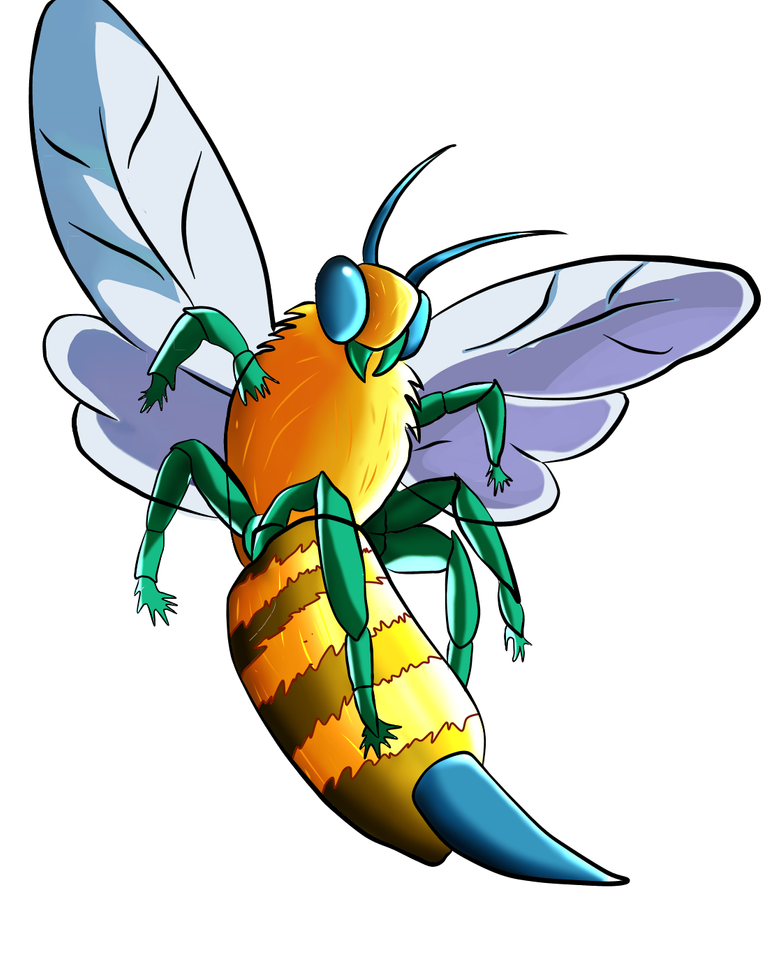
- Step #4:
After placing the base colours on the character the next thing to do was to place the shadows corresponding to the darker areas of the drawing and then I placed some highlights.
- Paso #4:
Después de colocarle los colores bases al personaje lo siguiente fue colocarle las sombras correspondientes a las zonas más oscuras del dibujo además luego le coloque algunos toques de luz.
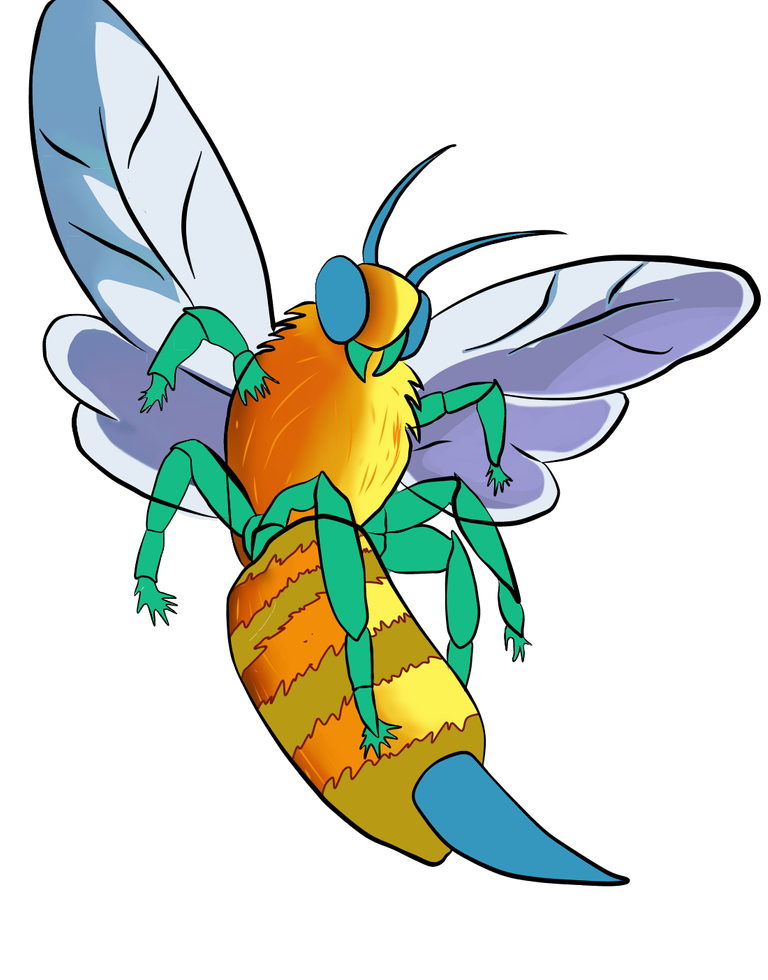
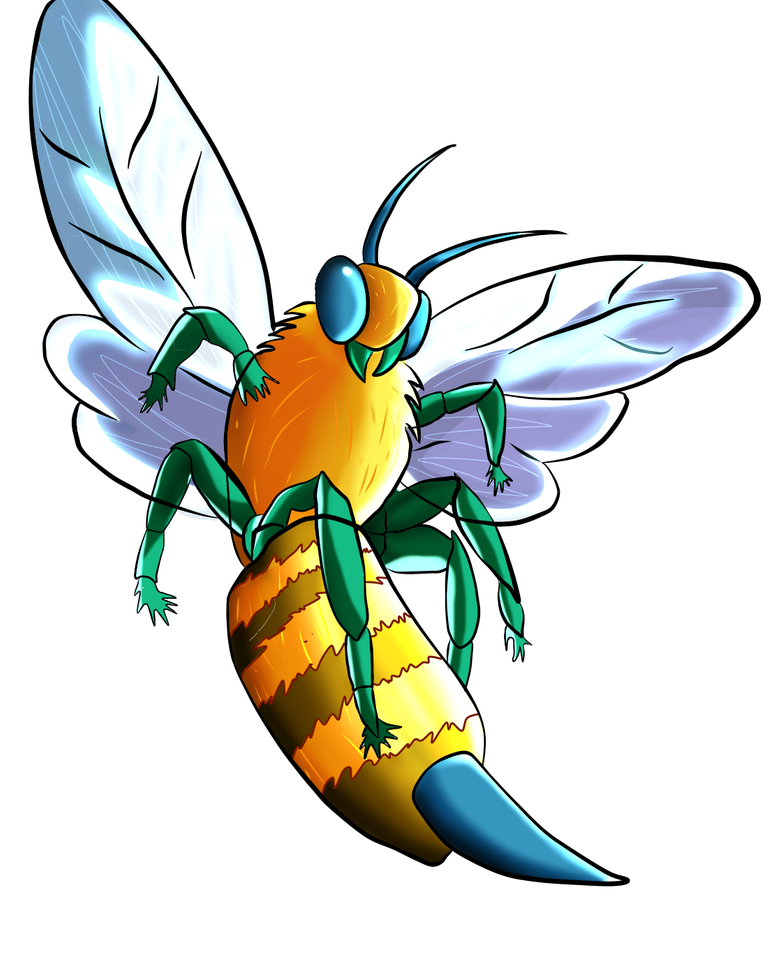
- Step #5:
After finishing with the lights and shadows I had to eliminate some lines that interfere in the drawing and at the same time I gave them the final touches or details to the drawing.
- Paso #5:
Luego de terminar con las luces y sombras me toco eliminar algunas líneas que interfieran en el dibujo y a la vez les di los toques o detalles finales al dibujo.
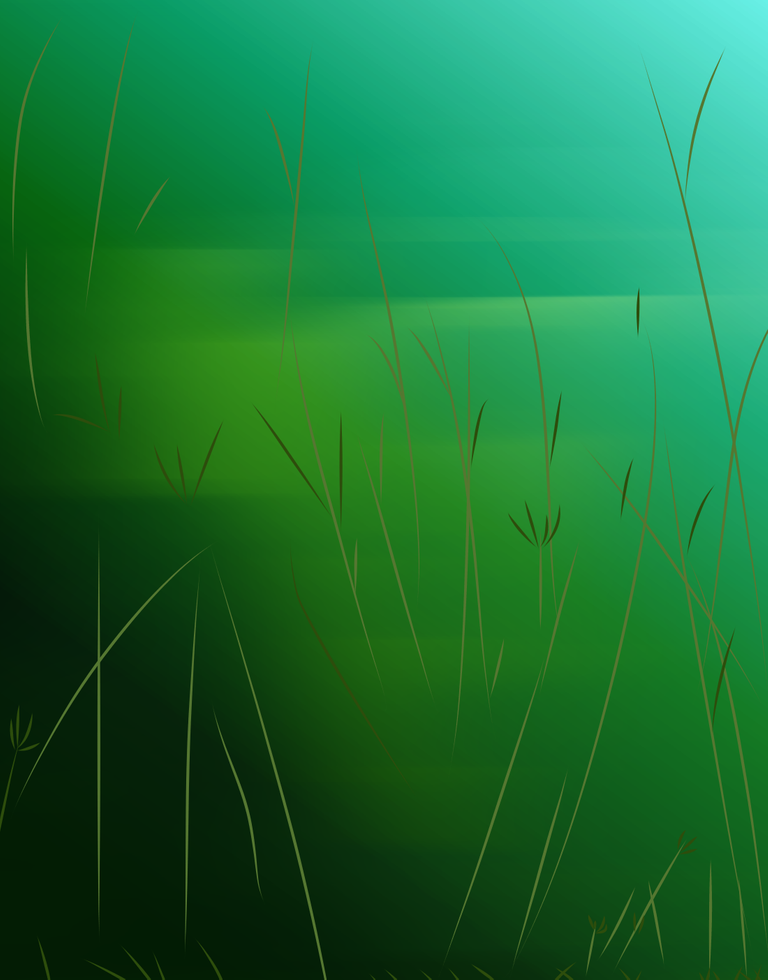
- Step # 6:
After finishing the character the next thing was to make a simple background in which I added a base gradient to later add lines of different sizes that were forming a kind of nature.
- Paso # 6:
Después de finalizar al personaje lo siguiente fue realizar un fondo simple en el que agregue un degradado base para posteriormente agregar líneas de diferentes tamaños que fueran formando una especie de naturaleza.
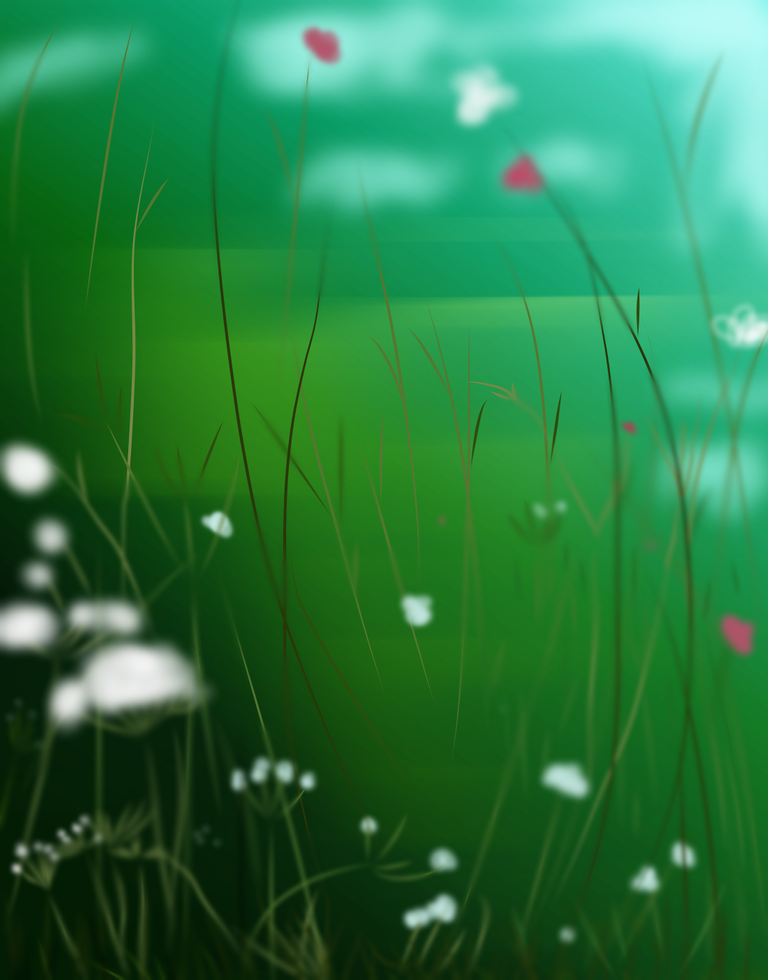
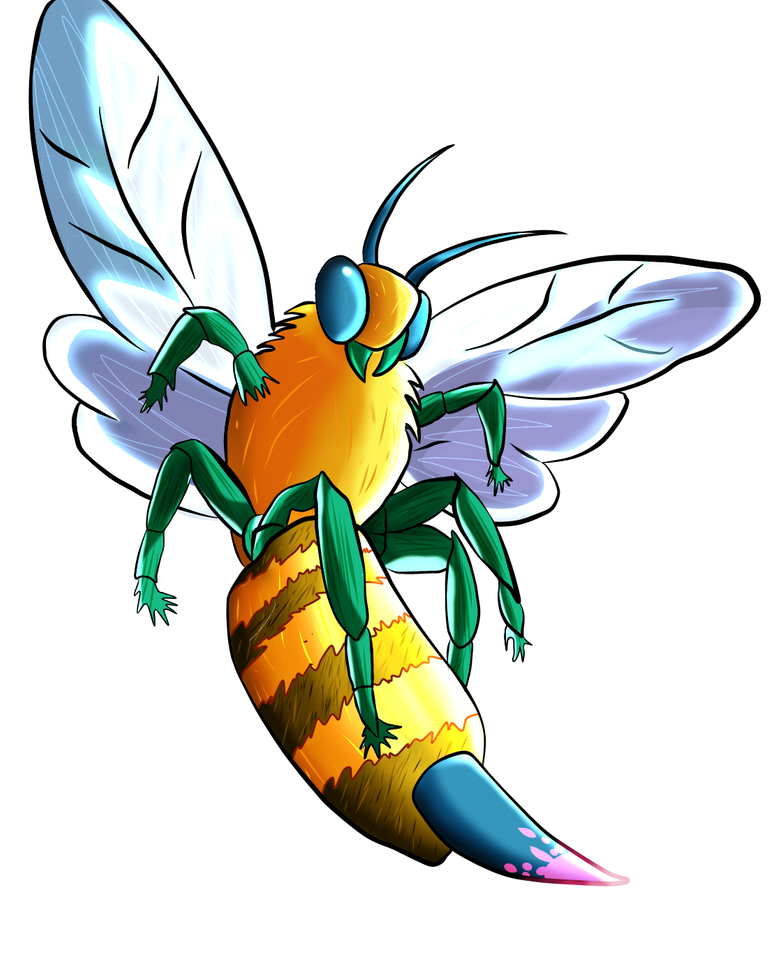
- Step # 7:
Once the background was finished I finished the drawing by joining the background with the character to give the final result.
- Paso # 7:
Terminado el fondo finalice el dibujo uniendo el fondo junto con el personaje para dar así el resultado final.
This would be all for today, personally I really enjoyed making this character giving a result that I liked a lot. If you liked it you can support me and/or leave me a comment with some advice or something like that. Thank you very much and see you next time!
Esto sería todo por el día de hoy, en lo personal disfrute mucho el hacer a este personaje dando así un resultado que me gusto mucho. Si fue de tu agrado puedes apoyarme y/o dejarme un comentario con algún consejo o algo asi. Muchas gracias y ¡Hasta la Proxima!
BUEN POST🤠
quedo genial amigo te mereces un pedazo de :
!PIZZA
Gracias por el apoyo bro!!
PIZZA Holders sent $PIZZA tips in this post's comments:
@beluhan19(1/5) tipped @mario02 (x1)
Please vote for pizza.witness!
Exelente, exito.
Muchas gracias!! 🙏
!PIZZA
Have you ever used the card in battle?
Congratulations @mario02! You have completed the following achievement on the Hive blockchain and have been rewarded with new badge(s):
Your next target is to reach 100 posts.
You can view your badges on your board and compare yourself to others in the Ranking
If you no longer want to receive notifications, reply to this comment with the word
STOPTo support your work, I also upvoted your post!
Check out the last post from @hivebuzz:
Support the HiveBuzz project. Vote for our proposal!
Thanks for sharing! - castleberry#6859

Yay! 🤗
Your content has been boosted with Ecency Points, by @mario02.
Use Ecency daily to boost your growth on platform!
Support Ecency
Vote for new Proposal
Delegate HP and earn more