[ESP/ENG] Alric Stormbringer - Splinterlands Art Contest Week 259!
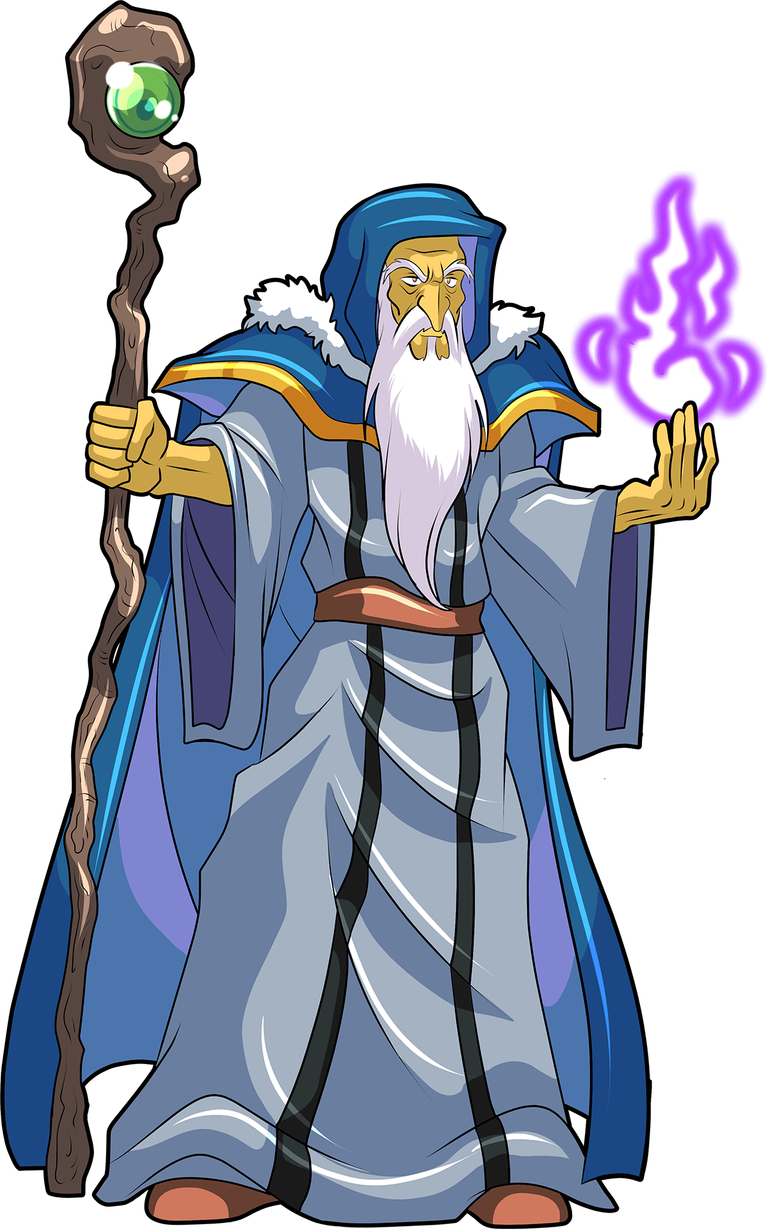
Alric Stormbringer ! 🔮
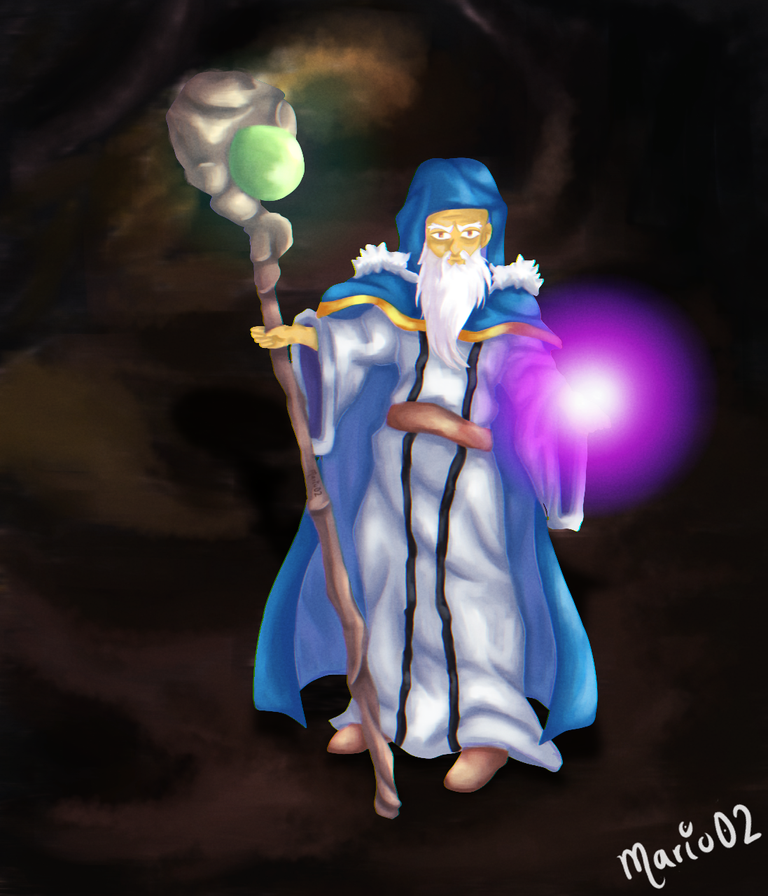
¡Hola comunidad de @splinterlands! Espero que todos se encuentren bien, sean bienvenidos a un nuevo post. El día de hoy quiero compartir mi participación al concurso de arte #259 de esta semana. He elegido como referencia al personaje de Alric Stormbringer, este siempre ha sido uno de mis personajes favoritos ya que me gustan mucho los magos y todo lo que tenga que ver con magia y la fantasía. Realizar esta ilustración me tomo algo de tiempo, de nuevo quise probar diferentes técnicas y quise de cierto modo unificar aún más las formas, ¡Espero les guste!
Hello @splinterlands community! I hope everyone is well, welcome to a new post. Today I want to share my entry to this week's art contest #259. I have chosen as a reference the character Alric Stormbringer, this has always been one of my favourite characters as I love wizards and everything that has to do with magic and fantasy. Making this illustration took me some time, again I wanted to try different techniques and I wanted to sort of unify the shapes even more, I hope you like it!

Creative Process | Proceso Creativo✏️
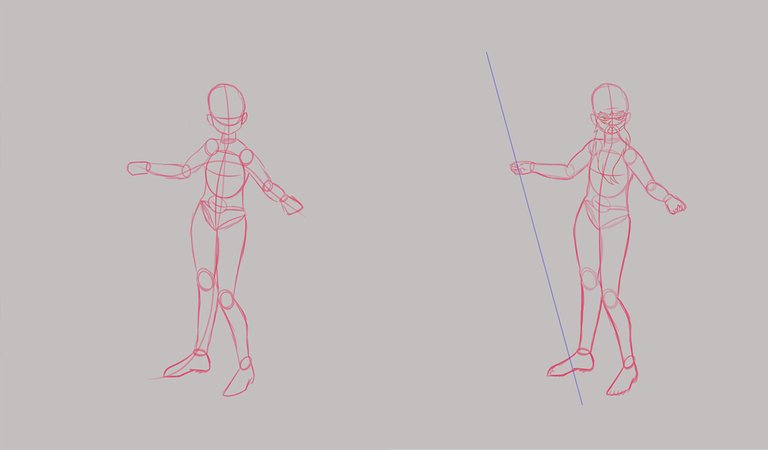
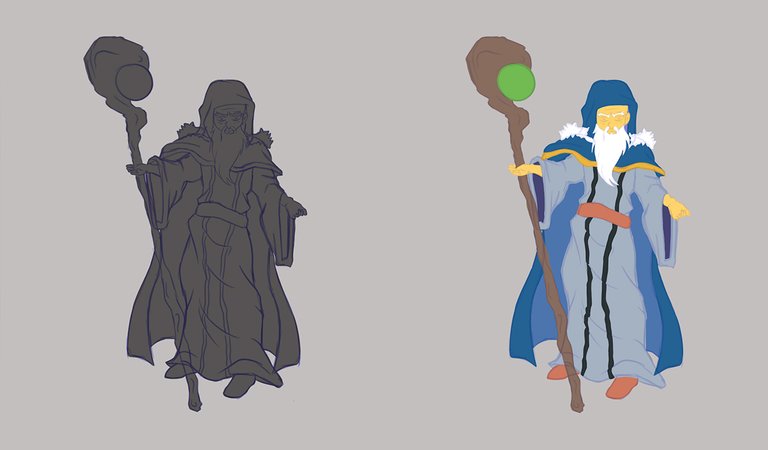
Comencé realizando un pequeño esquema para definir la idea principal del personaje, como quería realizar algo diferente fui creando un cuerpo de un tamaño estándar, dándole forma por medio de figuras básicas, teniendo la idea y pose definidos agregué algunos detalles como su barba y ojos además de trazar una línea para ubicar su característico báculo.
I started by making a small scheme to define the main idea of the character, as I wanted to make something different I created a body of a standard size, giving it shape by means of basic figures, having the idea and pose defined I added some details such as his beard and eyes as well as drawing a line to place his characteristic staff.
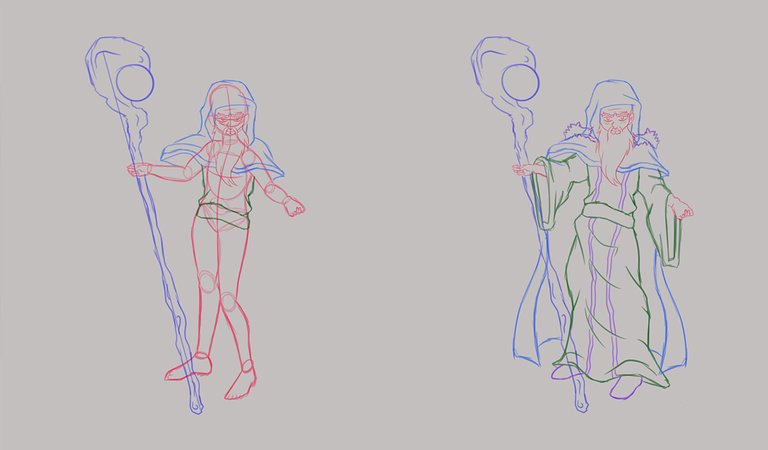
A partir de esta línea fui creando el báculo con algunos detalles, además trabajé en la vestimenta del personaje, primero realicé la capa y agregué todos los elementos en capas y colores diferentes para poder guiarme un poco mejor. Una vez termine de realizar la ropa, limpie un poco el boceto eliminando las líneas del cuerpo.
From this line I created the staff with some details, I also worked on the clothing of the character, first I made the cape and added all the elements in layers and different colours to be able to guide me a little better and different colours to be able to guide me a little better. Once I finished making the clothes, I cleaned up the sketch a bit by eliminating the lines of the body.
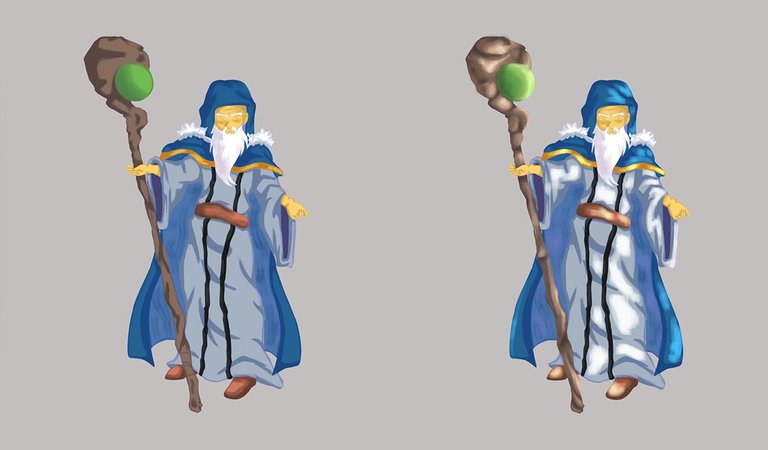
Aplique una capa base de color gris para comenzar a aplicar el color, como ya he mencionado antes esta capa me ayuda a establecer límites a la hora de aplicar los colores. Seguidamente establecí mi paleta de colores y comencé a aplicarlos en capas diferentes guiándome de los límites de cada elemento del personaje.
I applied a base layer of grey to start applying the colour, as I mentioned before this layer helps me to establish limits when applying the colours. Then I set up my colour palette and started to apply them in different layers, guided by the limits of each element of the character.
En este punto comenzaba mi proceso de dar volumen a las formas, en este paso dure algo de tiempo ya que no estaba seguro de la técnica a utilizar, luego de probar diferentes técnicas lo que mejor me funciono fue trabajar en una única capa, aplicando la forma que tendría las sombras en el personaje con un pincel de tipo Acuarela y seguidamente aplique manchas para ubicar las luces en el personaje.
At this point I started my process of giving volume to the shapes, in this step I took some time because I was not sure of the technique to use, after trying different techniques what worked best for me was to work in a single layer, applying the shape that would have the shadows on the character with a watercolour brush and then apply spots to place the lights on the character.
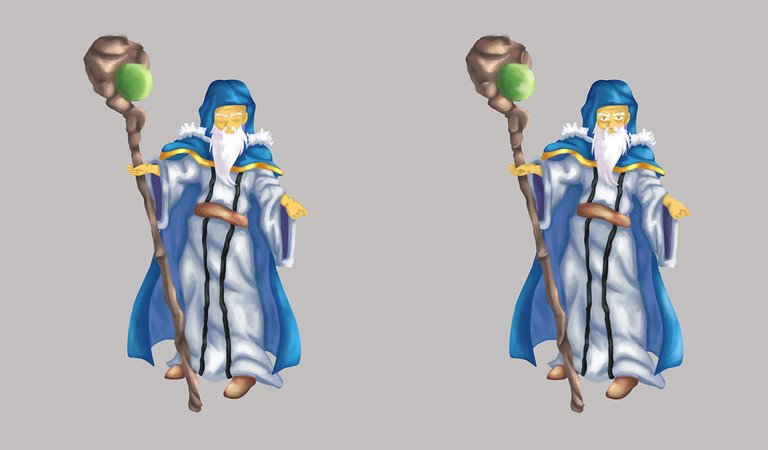
Por medio de estas manchas fui unificando y dándole la forma a los elementos, cambiando entre tonos todo el tiempo para lograr la forma deseada. Una vez tenía las formas unificadas, les agregue un poco más de luz y trate de definir un poco más las formas.
Decidí agregar unos detalles extras como una onda de energía que saliera de la mano del personaje, además trabajé en un fondo, como quería que los elementos resaltaran a la vista realice un degradado a partir de tonos marrones y fui dando forma a lo que sería una especie de cueva en la que mi personaje estaría investigando anomalías del mundo mágico.
Through these stains I was unifying and shaping the elements, changing between tones all the time to achieve the desired shape. Once I had the shapes unified, I added a little more light and tried to define the shapes a little more.
I decided to add some extra details like an energy wave coming out of the character's hand, I also worked on a background, as I wanted the elements to stand out to the eye I made a gradient from brown tones and I was shaping what would be a kind of cave in which my character would be investigating anomalies of the magical world.
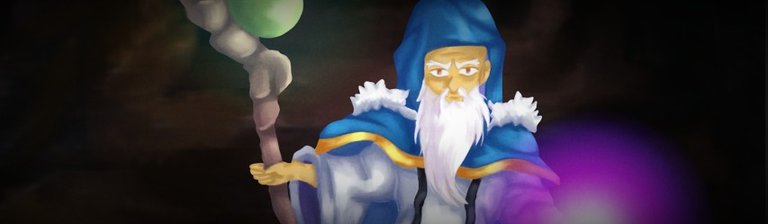
Final result of the Illustration | Resultado final de la ilustración
- Medibang Paint Pro PC version 64 bits
- PhotoMosh
- Tablet Huion H610 PRO V2
REFERENCE

The illustration and separators used in the post are my property.
Translated with DeepL (free versión)
Es increíble el cambio que da al agregado de volumen, te quedo genial una muy buena ilustración, saludos
Muchas gracias por tu comentario amigo! 👍
No luce cara de amargado como el original, eso es bastante genial.
Jajaja Gracias por compartir amigo!
Contáctenos para saber más del proyecto a nuestro servidor de Discord.
Si deseas delegar HP al proyecto: Delegue 5 HP - Delegue 10 HP - Delegue 20 HP - Delegue 30 HP - Delegue 50 HP - Delegue 100 HP.
Thanks for sharing! - castleberry#6859

Me gustó mucho la ilustración, muy buen trabajo.
Muchas gracias!