Splinterlands Art Contest Week 244 | Twisted Jester | Fan Art [EN/ES]


Hello, dear @alienarthive community, how are you?👋🤠
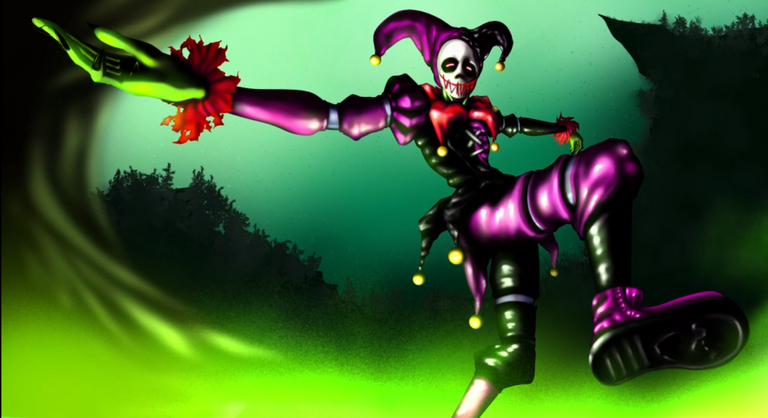
This time, I want to share my entry for the art contest by @splinterlands.
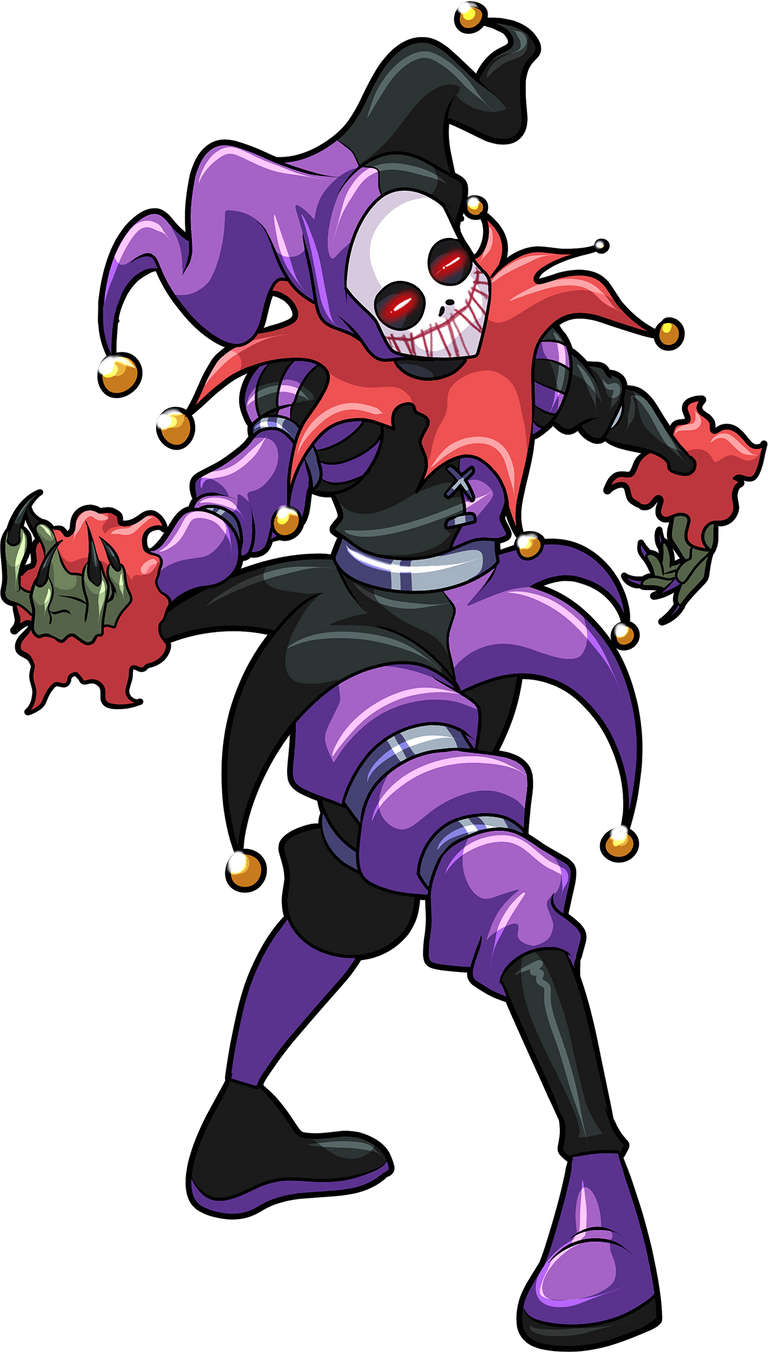
For this occasion, I used the card Twisted Jester. I really liked its colors and the shape of its mask, as well as the twisted expressions that truly live up to its name. Additionally, I've been practicing the unique art style of League of Legends called Splash Art. I really enjoy it, and I tried my best to capture that style in this illustration. I hope you all like it as much as I do. 😊
Hola querida comunidad @alienarthive, Cómo están?👋🤠
En esta ocasión les comparto mi participación para el concurso de arte de @splinterlands
Esta vez utilice la carta utilicé a Twisted Jester, me gustaron mucho sus colores y la forma de su mascara y las expresiones retorcidas que tiene haciendo honor a su nombre, adicional a esto he estado practicando el estilo particular de arte de League of Legends, denominado Splash Art, me gusta mucho y traté de plasmarlo lo mejor posible en esta ilustración, espero que les guste tanto como a mi 😊
Referencia | Reference
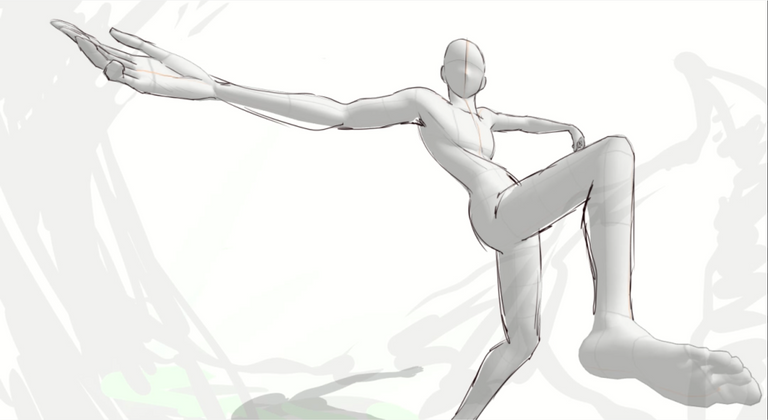
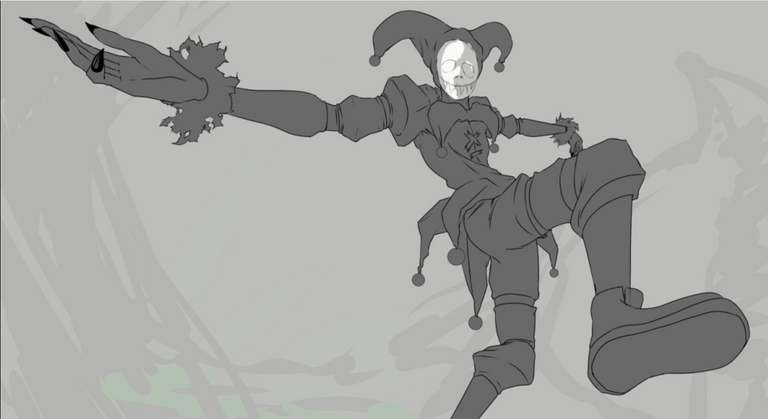
Step 1.-
On this occasion, since I wanted to create this type of art, the essence of it revolves around playing with perspective and creating a sense of ascent in the illustration. I had to rely on a 3D model offered by Clip Studio to achieve that sensation because the sketch I made myself didn't entirely convince me. In the end, I made very slight changes such as the position of the face and the foot, but it was incredibly helpful in understanding everything better.
! [castellano]
Paso 1.-
En esta ocasión ya que quería realizar este tipo de arte, la esencia del mismo va de jugar mucho con la perspectiva y de crear un sentido ascendente en la ilustración, tuve que apoyarme de un modelo 3D que ofrece clip studio para poder dar esa sensación, ya que el boceto que hice yo no me convencía del todo
Al final hice cambios muy leves como la posición de la cara y el pie, pero fue de muchísima ayuda para entenderlo todo mejor.
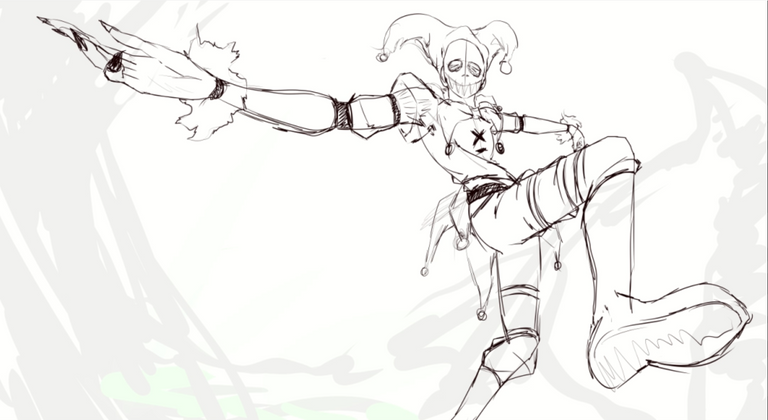
Step 2.-
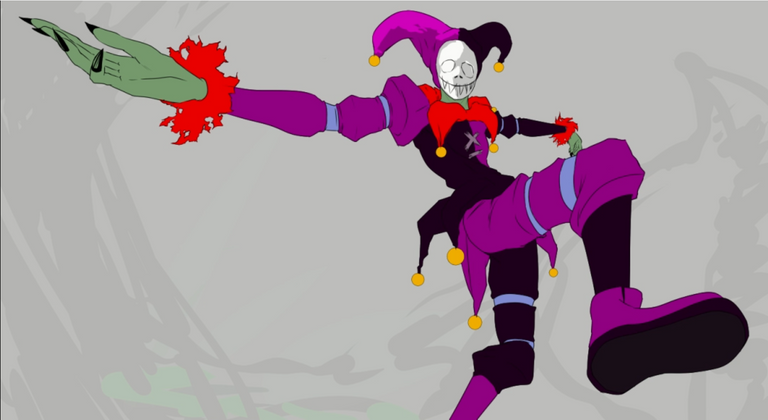
Once I finished defining the sketch, I proceeded to create the lineart and apply the base colors to the character. This time, I didn't add too many details to the lineart since they would be lost in the final rendering. It's a bit challenging for me to completely replace the lineart because I usually prefer to keep it prominent in my illustrations.
! [castellano]
Paso 2.-
Una vez definí el boceto pase al lineart y tambien el color base del personaje, esta vez no fue tan detallado ya que se perderá en cuando haga el render final, es un poco complicado para mi reemplazar el lineart del todo ya que casi siempre lo dejo muy marcado en mis ilustraciones
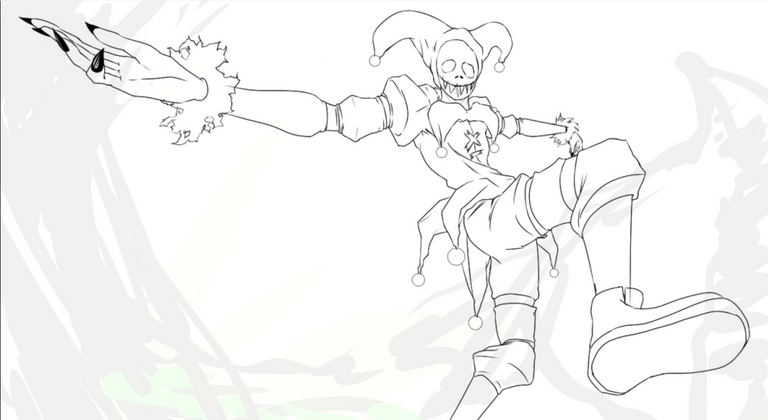
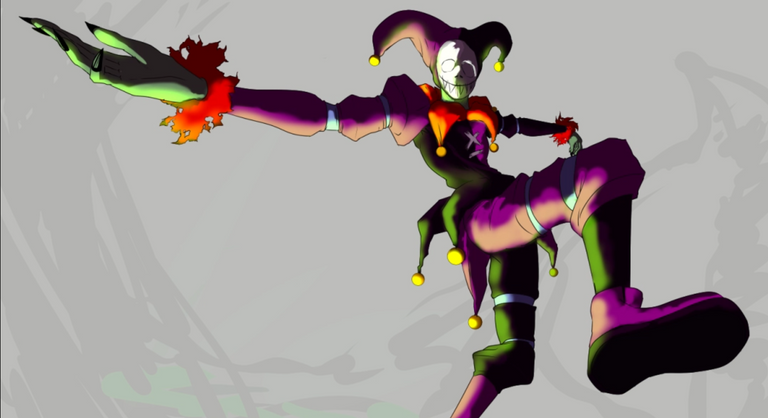
Step 3. - For the coloring part, I separated each component of the Jester, such as the mask, hat, arms, legs, etc. It was much easier for me to work on them separately and give better detail to each part. I also took the opportunity to determine where the lights and shadows would come from to avoid any issues later on. 😅
! [castellano]
Paso 3.-
Para la parte de colorear separé cada parte de Jester, como mascara, sombrero, brazos, piernas, etc. Me resultó muchísimo más fácil trabajar así por separado y darle mejor detalle a cada parte.
Lo que hice también fue definir de una vez de donde vendrían las luces y sombras para no tener problemas al final. 😅
Step 4. - At this point, the most important part remains: detailing the character. I dedicated several hours spread over two days to this task, and for a first attempt, I don't think it turned out too bad. It was very relaxing to add detail to every part of the body, as well as the clothing. Even the background, though not immediately noticeable, has its own details ;D
! [castellano]
Paso 4.-
En este punto, queda lo más importante, detallar al personaje, le dediqué varias horas distribuidas en dos días, para ser la primera vez creo que no quedó tan mal, fue muy relajante detallar cada parte del cuerpo y también la ropa, incluso el fondo que aunque no se vea a simple vista también tiene sus detalles ;D
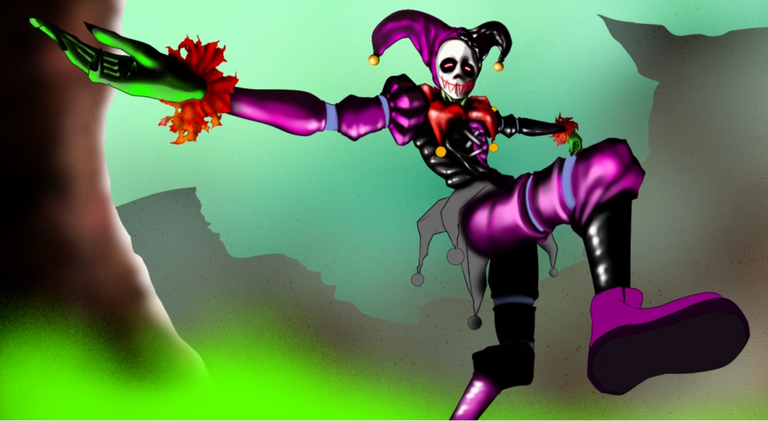
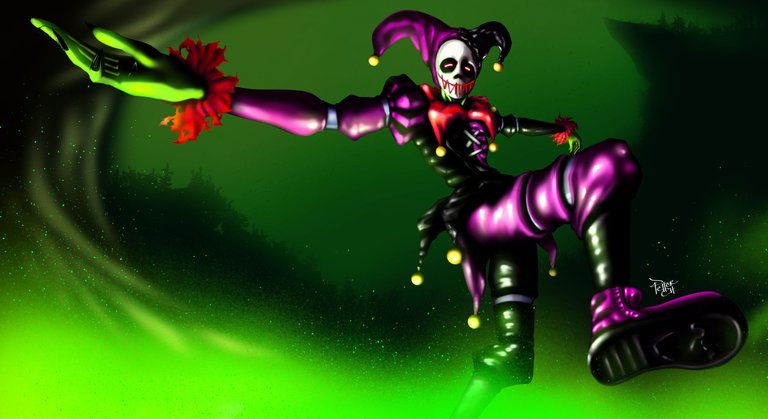
This is the final result. I played with the colors of the background to highlight the character and draw all the attention towards him. I really enjoyed trying out this new style, and I will practice it more often to improve.
I hope you liked it. Thank you for reading.👋😊
Este es el resultado final, jugué con los colores del fondo para dar resalte al personaje y que todo la atención vaya hacia a el, me gustó mucho intentar este nuevo estilo, lo practicaré más seguido para poder mejorar
Espero que les haya gustado, muchas gracias por leer. 👋😊

Tools Used
CLIP STUDIO PAINT
ONE BY WACOM
Herramientas Utilizadas
CLIP STUDIO PAINT
ONE BY WACOM
Congratulations @petterch! You have completed the following achievement on the Hive blockchain And have been rewarded with New badge(s)
Your next target is to reach 40 posts.
Your next target is to reach 200 comments.
You can view your badges on your board and compare yourself to others in the Ranking
If you no longer want to receive notifications, reply to this comment with the word
STOPTo support your work, I also upvoted your post!
Check out our last posts:
Do you know you can win a Chaos Legion pack and many other things just by following some simple steps ?? Check out our Latest Daily Showcase and Participate our latest Giveaway. Thanks
Thanks for sharing! - castleberry#6859

Bastante intimidarte
El personaje tiene mucha vibra siniestra que le favorece a primer vista.
Esta genial el arte
Gracias amigo, estoy probando este tipo de arte ahora, creo que salió bien para ser la primera :D
!luv
@janusmolinovsky, @petterch(1/10) sent you LUV. | tools | discord | community | HiveWiki |
  NFT | <>< daily
Era hacer un trabajo de arte, no humillar a piccaso