Ever-Hungry Skull Fanart || Splinterlands Art Contest Week 252 (Esp/Eng)
English version.
Hello friends, welcome to a new post! I hope you are well, in good spirits and good health.

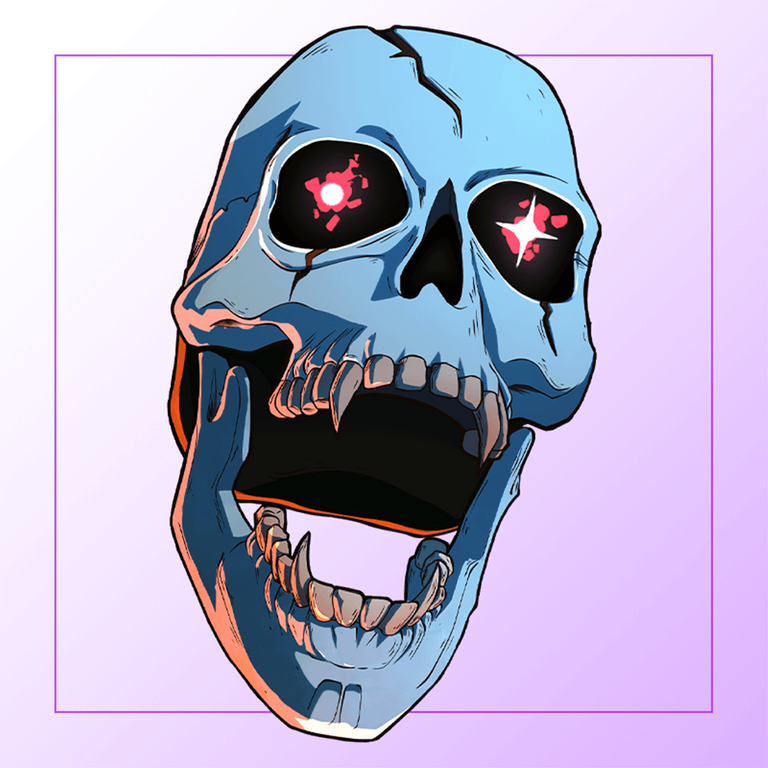
For this week's Splinterlands contest I bring a new very special fanart. This time I decided to make the Ever-Hungry Skull card. When making this fanart I felt very comfortable since I decided to use the graphite shading technique, a technique with which I have a lot of practice and I'm quite good at it. I decided to make this character because I love skulls, and more for the eyes of this character, he has a magic in his eyes quite incredible, can you get it? Without further ado, let's get to the process!
Step by step:
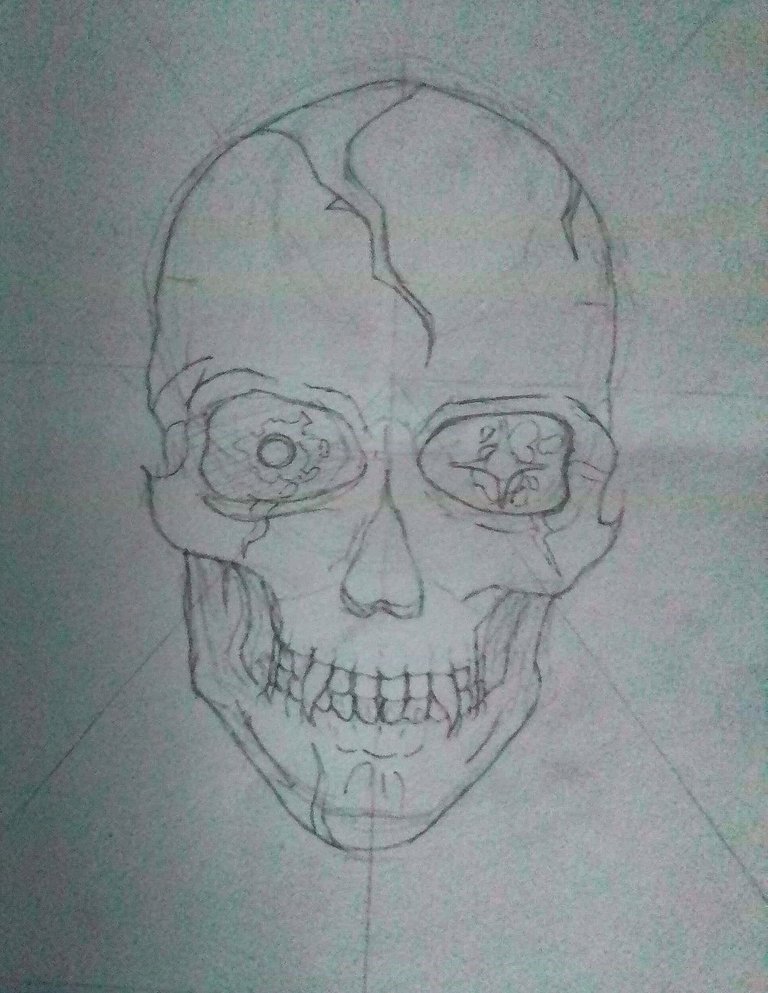
I started with the sketch, I used an HB pencil. I used a forehead skull as a reference for this drawing. This is a simple character, but generally these usually stand out more for their skills than their appearance.
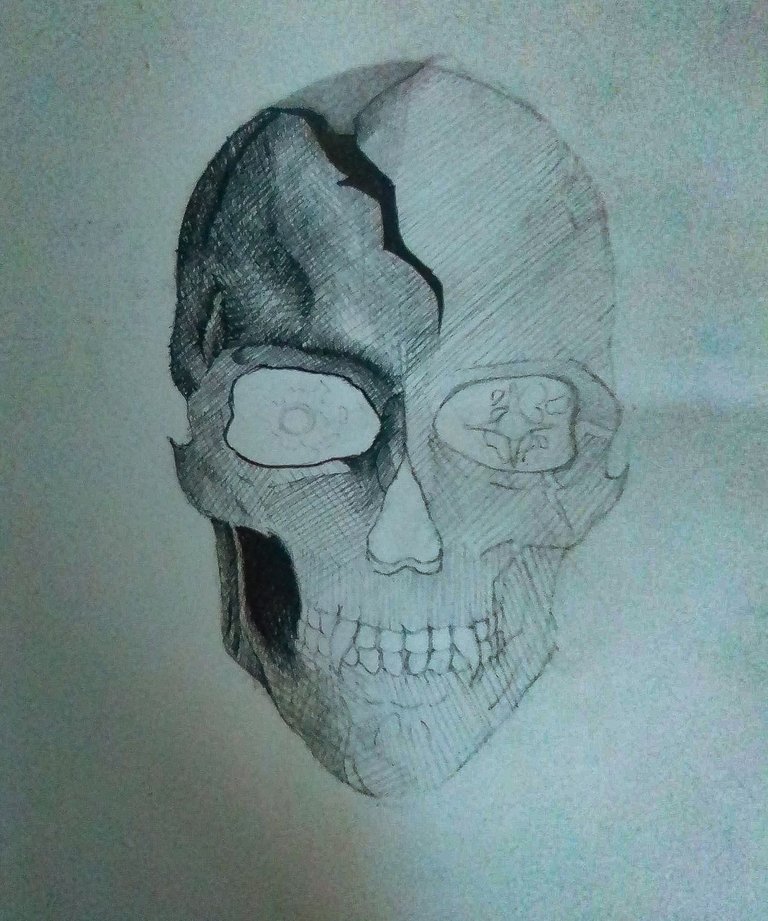
First I start shading the drawing on the left side. Here I used pencils B, 2B, 6b and 8b. I used the B pencil as a base and soft shadows, with the 2B I highlighted some lines and added depth to parts like the side of the head and the eyelid area. With the 8B what I did was to fill in the dark areas under the cheekbones or the break above the skull.
Here I continued using the pencil B to draw the whole skull, and now with the 2B I continued detailing and giving darkness, with a little less frequency, on the right side of the skull more light arrives, therefore, they have more illumination. With the 6B I shaded very specific areas and then with the 8B pencil I filled in the holes of the nose, some more cracks and the eyes, leaving space to put a lighter tone of pencil and leaving the star and the circle in the center totally white.
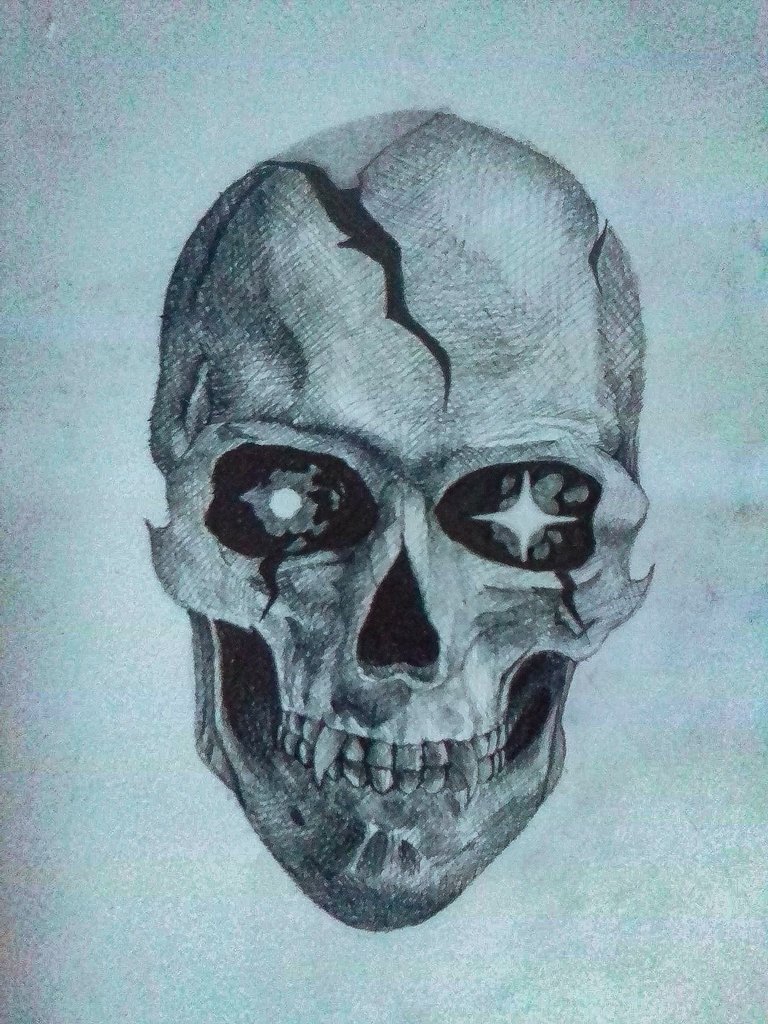
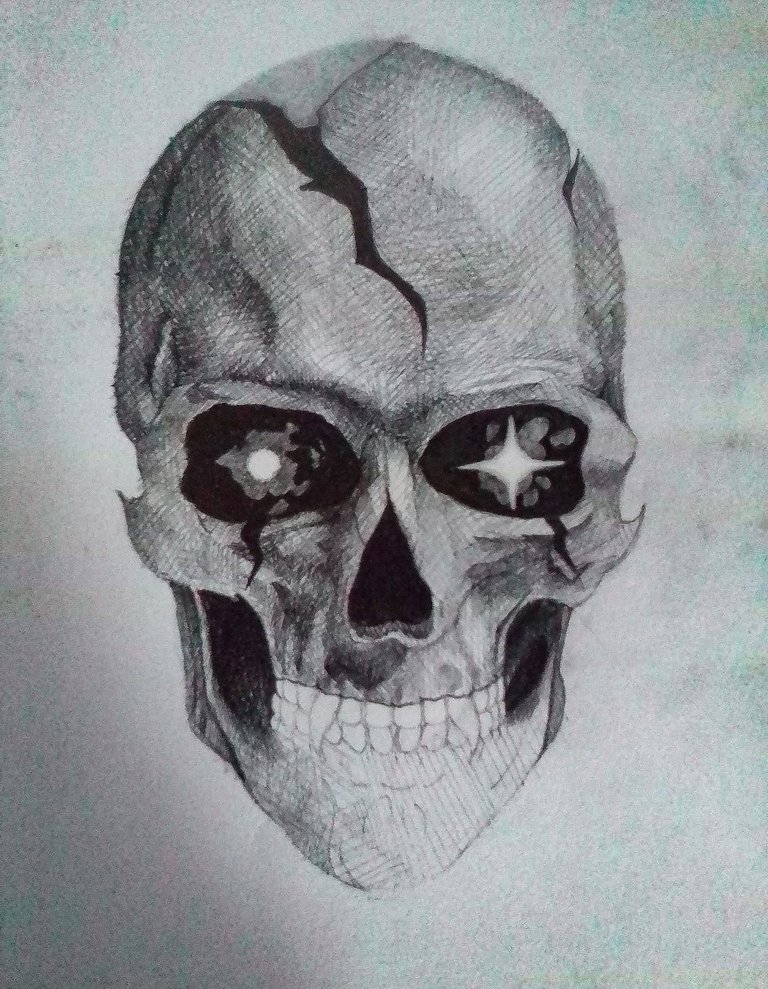
Then with pencils 2B, 4B and 6B finish the teeth and chin area.
And to finish add a background, with a special focus on the skull bringing the dark to light edges from outside to inside and putting a little decoration in the corners, some little suffering faces.
And it's done! Seeing my art I rated this drawing as one of my favorites, I liked to mix the essence of the dark light and graphite technique with a mystic eyes skull and you liked it, what did you think? I'll be reading you in the comments.
Thanks for reading, see you soon!
Versión en español
Hola amigos, bienvenidos a un nuevo post! Espero que se encuentren bien, con ánimos y buena salud.
Para el concurso de Splinterlands de esta semana traigo un nuevo fanart muy especial. Este vez decidí hacer la carta de Ever-Hungry Skull. Al realizar este fanart me sentí muy cómodo ya que decidí utilizar la técnica de sombreado con grafito, técnica con la cuál tengo mucha práctica y se me da bastante bien. Decidí hacer este personaje ya que me encantan las calaveras, y más por los ojos de éste personaje, tiene una magia en los ojos bastante increíble ¿La pueden captar? Sin mas que contarles pasemos al proceso!
Paso a paso:
Empecé por el boceto, utilice un lápiz HB. Usé como referencia una calavera de frente para este dibujo. Este es un personaje simple, pero generalmente estos suelen destacar más por sus habilidades que por su apariencia.
Primero empiezo a sombrear el dibujo del lado izquierdo. Acá usé los lápices B, 2B, 6b y 8b. Usé como base y sombras suaves el lápiz B, con el 2B resalte algunas lineas y añadí profundidad a partes como el costado de la cabeza y la zona de los párpados. Con el 8B lo que hice fué rellenar las zonas oscuras que si bajo los pómulos o la ruptura que tiene arriba del cráneo.
Acá seguí usando el lápiz B para dibujar toda la calavera, y ahora con el 2B seguí detallando y dando oscuridad, con un poco menos de frecuencia, del lado derecho de la calavera llega más luz, por ende, tienen mas iluminación. Con el 6B sombree áreas muy específicas y luego con el lápiz 8B rellene los orificios de la nariz, algunas grietas más y los ojos, dejando espacio para poner un tono de lápiz más claro y dejando la estrella y el círculo del centro totalmente en blanco.
Después con los lápices 2B, 4B y 6B termine el área de los dientes y el mentón.
Y para terminar agregue un fondo, con un enfoque especial en la calavera llevando los bordes oscuros a claros de afuera hacia dentro y poniendo una pequeña decoración en las esquinas, unas pequeñas caras de sufrimiento.
¡Y está listo! Viendo mi arte califique este dibujo como uno de mis favoritos, me gustó mezclar la escencia del claro oscuro y técnica del grafito con una calavera de ojos místicos ¿Y a ti te gustó, que te pareció? Los estaré leyendo en los comentarios.
¡Gracias por leer, hasta pronto!
Thanks!!
Thanks for sharing! - castleberry#6859

Thanks!!