Digital Art / Splinterlands Art Contest Week 258 / Lorna Shine / Eng- Esp
Lorna Shine


English
Saludos Amigos, I hope you are very well.
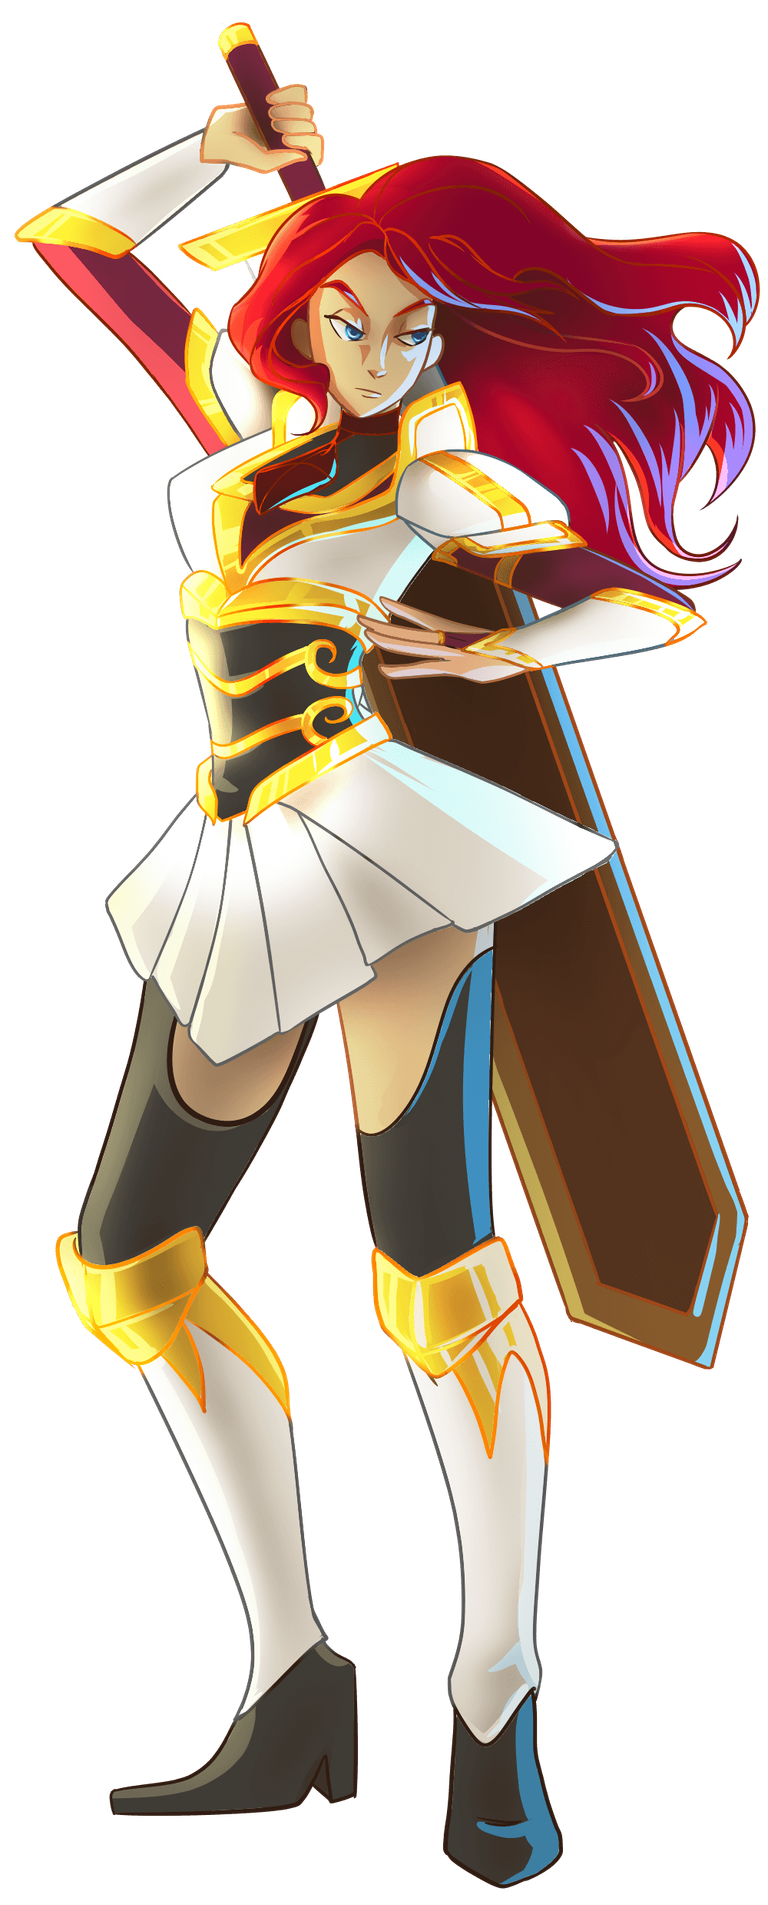
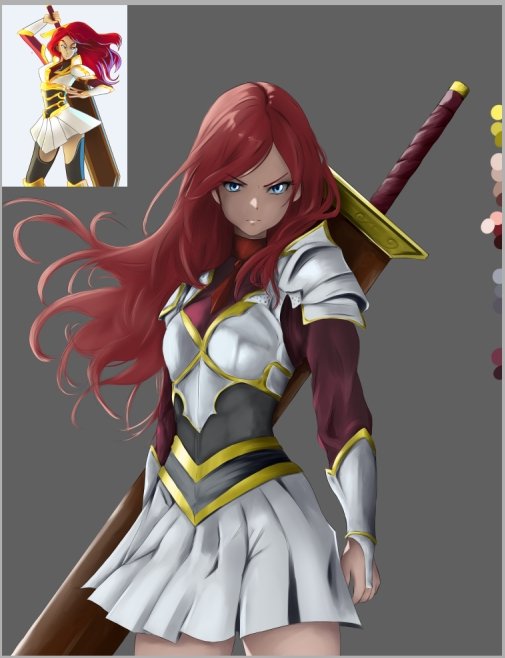
This week I want to share with you an illustration inspired by the character Lorna Shine, a really strong character in the splinterlands game against whom I lost more than I would like to admit.
I'm not entirely good at drawing armor, so I wanted to do something creative and draw an armor at my own discretion.
I'm very happy with the result, the expression on his face and his deep red hair are my favorite parts.
Let me show you how the creative process went.
Let's get started!
Español
Saludos Amigos, espero estén muy bien.
Esta semana quiero compartir con ustedes una ilustración inspirada en el personaje Lorna Shine, Un personaje realmente fuerte en el juego de splinterlands contra el cual perdí mas de lo que me gustaría admitir.
No soy del todo bueno dibujando armaduras, por lo que quise hacer algo creativo y dibujar una armadura a mi criterio.
Estoy muy feliz con el resultado, la expresión de su rostro y su cabello rojo intenso son mis partes favoritas.
Déjame mostrarte como fue el proceso creativo.
Empecemos!
Reference
Creative process
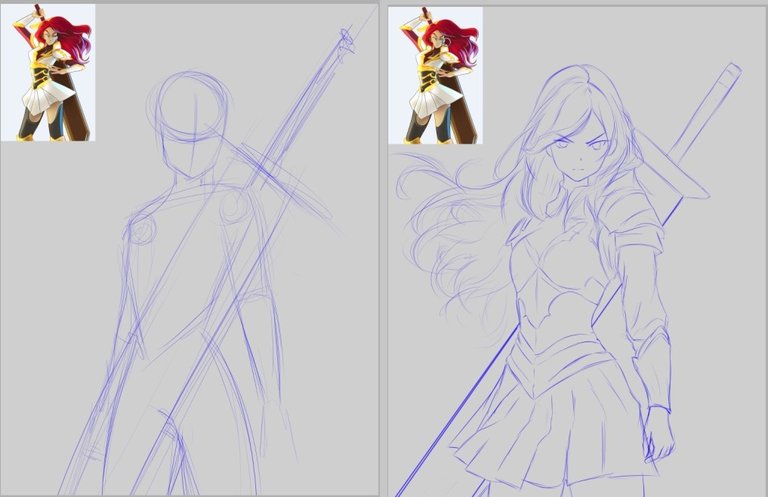
We start the sketch with the basic shape and pose of the character, once ready on another layer we start to build the second sketch with more details, at this point we add and correct where necessary.
Iniciamos el boceto con la forma básica y pose del personaje, una vez listo sobre otra capa empezamos a construir el segundo boceto con más detalles, en este punto agregamos y corregimos donde haga falta.
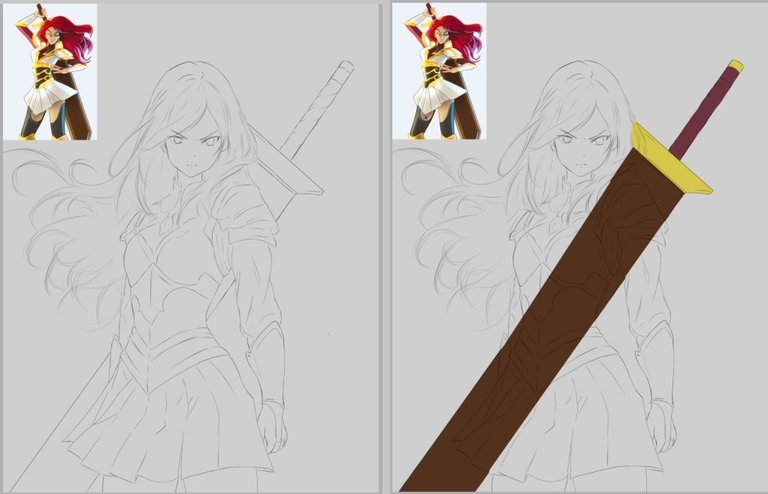
Once our sketch is ready we make the lineart, in this opportunity we use thin lines and an opacity of 60%, this stage takes your time.
Once ready we start applying the color, I wanted to start with the background objects like the sword, so I make sure that the result has some logic.
Una vez listo nuestro boceto hacemos el lineart, en esta oportunidad usé líneas delgadas y una opacidad del 60% esta etapa lleva tu tiempo.
Una vez lista iniciamos la aplicación del color, quise empezar con los objetos de fondo como la espada, asi me aseguro que el resultado tenga cierta lógica.
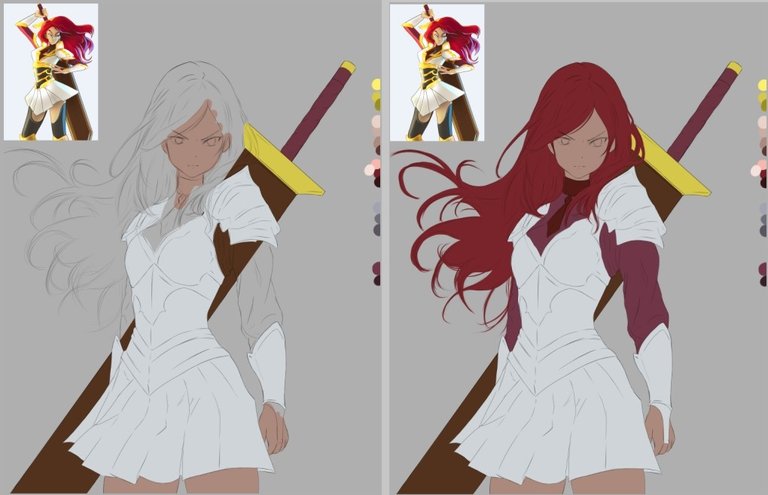
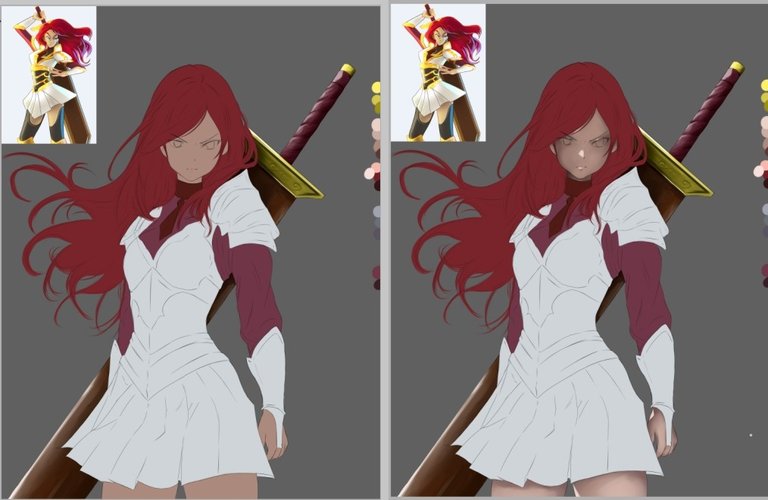
Applying the rest of the base color I wanted to leave a sample of the lights and shadows that I thought to use in each part of the character, I did this in order to save some time when choosing the right colors.
Aplicando el resto del color base quise dejar una muestra de las luces y sombras que pensé usar en cada parte del personaje, esto lo hice con la finalidad de ahorrar algo de tiempo al momento de elegir los colores adecuados.
As with the application of the base color, we begin by applying the shadows and highlights on the sword.
For the skin I chose a dark lake tone, because the face of the character does not have a direct light except in some areas like his nose.
Al igual que la aplicación del color base, empezamos aplicando las sombras y luces por la espada.
Para la piel elegí un tono lago oscuro, pues el rostro del personaje no tiene una luz directa, salvo en algunas zonas como su nariz.
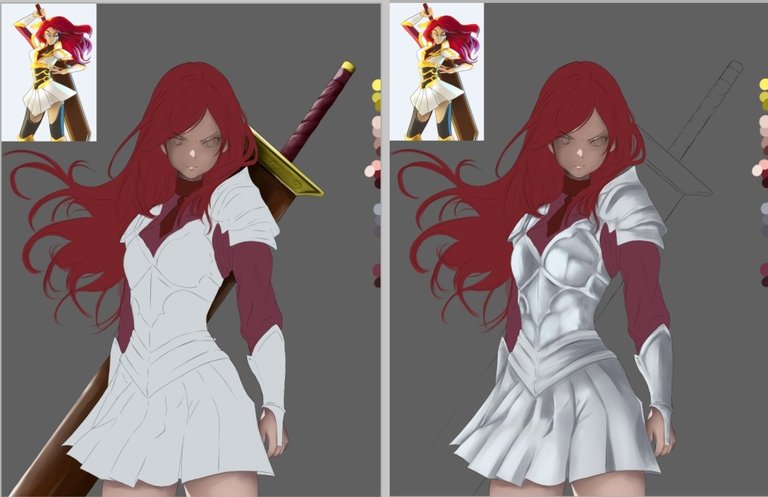
The armature stage was largely an experiment using strong lights and soft shadows in some areas.
Although the armor is white I wanted to give it a certain metallic effect.
La etapa de la armadura fue en gran parte un experimento usando luces fuertes y sombras suaves en algunas zonas.
Pese a que la armadura es de color blanco quería darle cierto efecto metálico.
After applying the golden color on the armor and certain details on the skirt, this would be the previous result.
Después de aplicar el color dorado en la armadura y ciertos detalles en la falda, este sería el resultado previo.
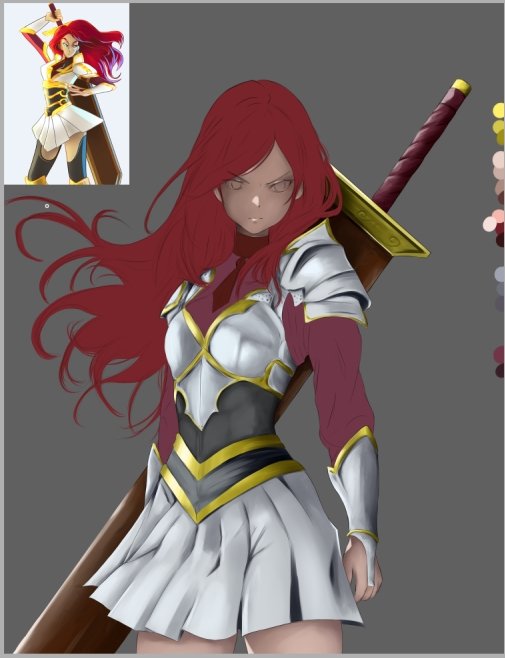
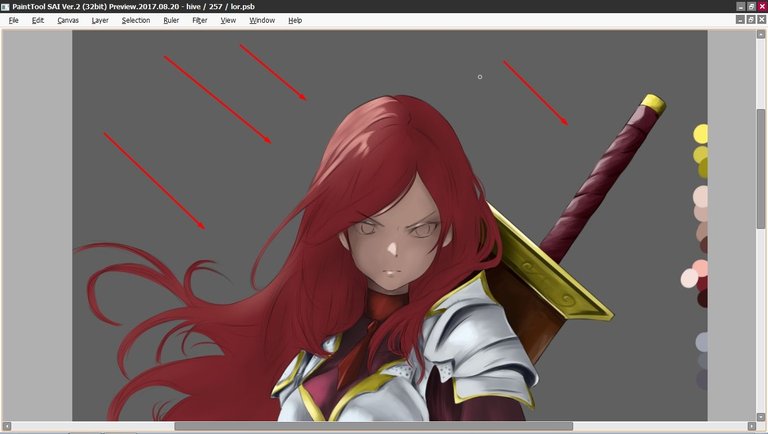
The light source comes from the back and in the left direction, always taking into account this detail we will know where to apply the brightness of each layer.
La fuente de luz viene desde atrás y en dirección izquierda, teniendo siempre en cuenta este detalle ya sabremos donde aplicar el brillo de cada capa.
I took special time to finish the eyes, I chose a shade of blue as close to the reference as possible.
Me tomé tiempo especial para terminar los ojos, elegí un tono de azul lo más parecido a la referencia.
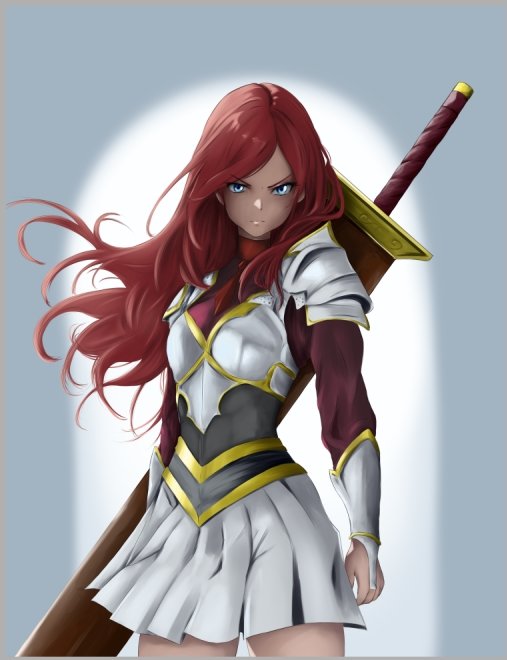
Originally, I had thought about placing a window behind it but I feel that leaving an open background with a very bright light was a better choice.
Originalmente, había pensado en colocar una ventana detrás pero siento que dejar un fondo abierto con una luz muy intensa era mejor opción.
I wanted to change the gray tone of the background for that I used the saturation and tones tool that the program has, from gray we change to the complementary color of red in that case it would be the blue color.
Quise cambiar el tono gris del fondo para eso use la herramienta de saturación y tonos que tiene el programa, de gris cambiamos al color complementario de rojo en ese caso sería el color azul.
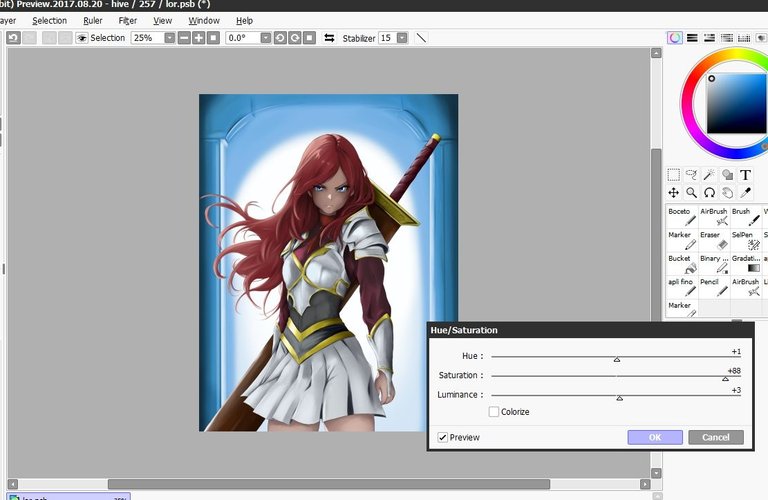
There is one last detail to change, the hair has a little saturated tone and I thought it would look much better with an intense tone to highlight. As we did with the background, we used the saturation tool to change the tone of the hair.
And finally we have our character ready, I really liked the look she has, I wanted to make her as similar as possible to the female characters of the 90's anime.
Queda un último detalle por cambiar, el cabello tiene un tono poco saturado y pensé en que se vería muchísimo mejor con un tono intenso para resaltar. De igual forma que hicimos con el fondo, usamos la herramienta de saturación para cambiar el tono del cabello.
Y finalmente ya tenemos listo nuestro personaje, realmente me gusto muchísimo la mirada que tiene, quise hacerla lo más parecida posible a los personajes femeninos de los animes de los años 90.
If you don't play splinterlands yet you can join here!
Si aún no juegas splinterlands puedes unirte aquí!
Join here // Unete aqui
Friends we reached the end of the post, I really hope you liked it as much as I did, See you cowboys!
Amigos llegamos al final del post, realmente espero que te haya gustado tanto como a mi, Nos vemos vaqueros!
Tools:
- PaintTool SAI 2
- Inspiroy H640 Pen Tablets
- Corel photo paint x3

¡Felicidades! Esta publicación obtuvo upvote y fue compartido por @la-colmena, un proyecto de Curación Manual para la comunidad hispana de Hive que cuenta con el respaldo de @curie.
Si te gusta el trabajo que hacemos, te invitamos a darle tu voto a este comentario y a votar como testigo por La Colmena.
Si quieres saber más sobre nuestro proyecto, te invitamos a acompañarnos en nuestro servidor de Discord.
Es hermosa
Wooow que bonita! Me gusta mucho las forma en la que dibujaste el cabello, su armadura y en general me gusto mucho tu narración del proceso! Mucha suerte en esta ronda!
This one is outstanding 😍
!luv it
@sephiwolf, @surrealworld(1/1) sent LUV. | connect | community | HiveWiki | NFT | <>< daily
! help(no space) to get help on Hive. InfoGreat artwork, very well done and the final finish was beautiful. I liked what you did with the colors and shadows.
This is amazing! I love staring into her eyes! :D
!PGM !PIZZA
BUY AND STAKE THE PGM TO SEND A LOT OF TOKENS!
The tokens that the command sends are: 0.1 PGM-0.1 LVL-0.1 THGAMING-0.05 DEC-15 SBT-1 STARBITS-[0.00000001 BTC (SWAP.BTC) only if you have 2500 PGM in stake or more ]
5000 PGM IN STAKE = 2x rewards!
Discord
Support the curation account @ pgm-curator with a delegation 10 HP - 50 HP - 100 HP - 500 HP - 1000 HP
Get potential votes from @ pgm-curator by paying in PGM, here is a guide
I'm a bot, if you want a hand ask @ zottone444
$PIZZA slices delivered:
@splintercell-01(2/5) tipped @sephiwolf
Wow! This is so beautiful. I love it👍
Thanks for sharing! - castleberry#6859

Brutal!