Digital Art / Splinterlands Art Contest - Week 285 / EVANGELIST / Eng- Esp
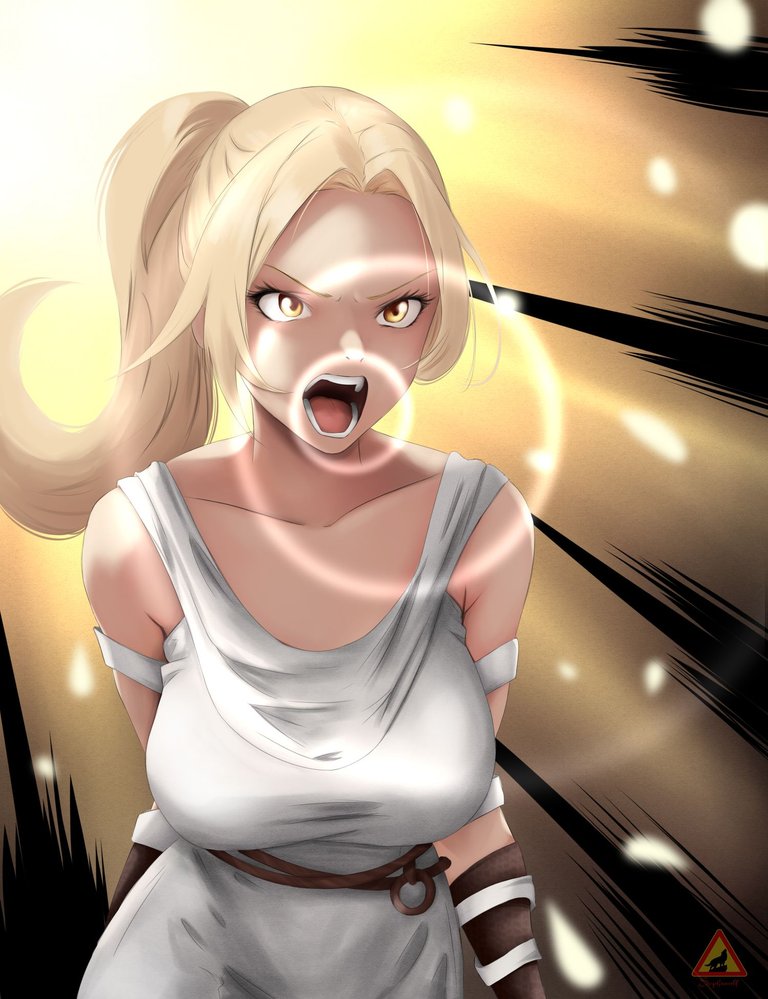
The war cry

English
Greetings dear friends! I hope you are very well.
I'm glad to be with you once again, this week I want to share with you an illustration I made inspired by the character EVANGELIST from Splinterlands.
Here thinking several artists that I follow already drew it so I decided to make my own version to see how it looks like.
It cost me a little bit to get that expression of scream and anger, after discarding several ideas I got this result.
Well friends, I don't want to bore you, let's see how was the creative process.
Español
Saludos apreciados amigos! Espero estén muy bien.
Me alegra estar una vez mas con ustedes, esta semana les quiero compartir una ilustración que hice inspirada en el personaje EVANGELIST de Splinterlands.
Aqui pensando varios artistas que sigo ya la dibujaron asi que me anime a hacer mi propia versión a ver que tal queda.
Me costo un poco conseguir esa expresión de grito y enojo, despues de descartar varias ideas conseguí este resultado.
Bien amigos, no los quiero aburrir, veamos como fue el proceso creativo.
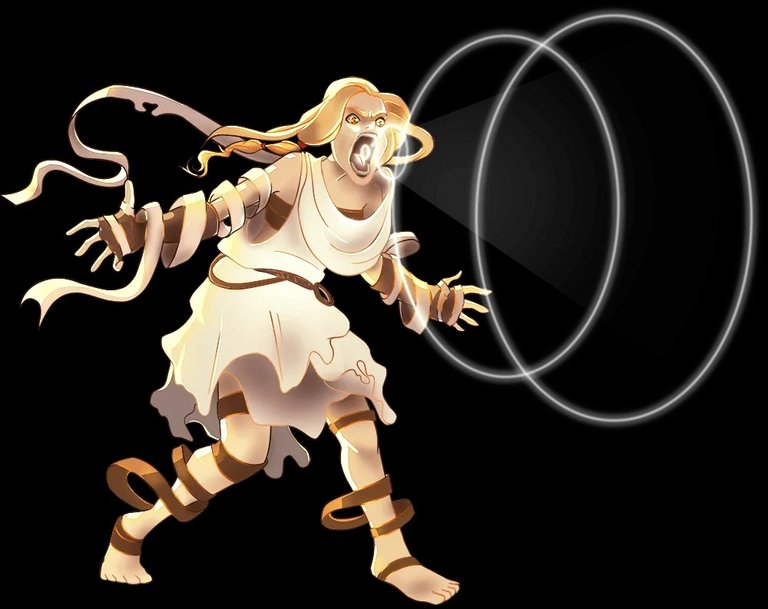
Reference
EVANGELIST
Lore
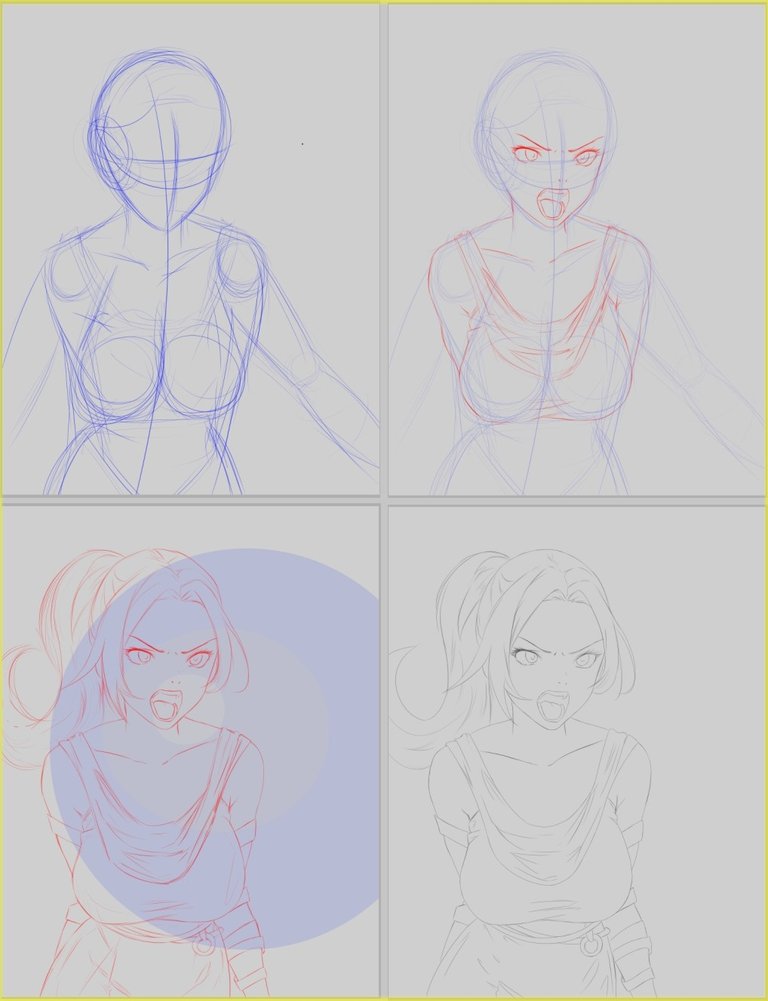
Process/Proceso
We started the sketch with the basic shape, at this point I wanted to make the character with open arms something like the reference image.
After much thought I came to the conclusion that it would look better with the arms close to the body.
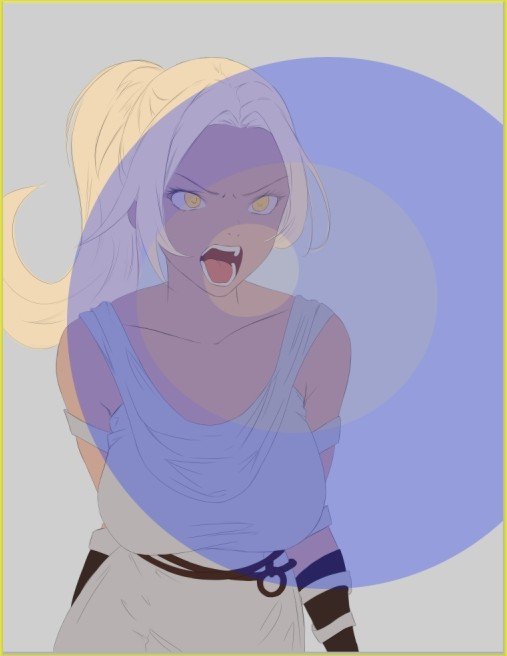
When I finished the sketch in red color, I added some circles as a guide of where the effect of the scream will go, I was hoping to do it with this same tool.
The next step is to make the lineart, using a 50% hardness brush and black color.
In this step it is important to make long lines that is to say long and firm strokes because these lines will be seen in the final design.
Empezamos el boceto con la forma básica, en este punto quería hacer el personaje con los brazos abiertos algo parecido a la imagen de referencia.
Después de pensarlo mucho llegue a la conclusión de que se ver mejor con los brazos cerca del cuerpo.
Al terminar el boceto en color rojo, agregue unos círculos como guia de donde ira el efecto del grito, tenia la esperanza de hacerlo con esta misma herramienta.
El siguiente paso es hacer el lineart, usando un pincel de dureza 50% y color negro.
En este paso es importante hacer lineas largas es decir trazos largos y firmes pues estas lineas se verán en el diseño final.
At the moment of applying the base color, this step does not have much mystery.
Use a palette similar to the one in the reference but a little less saturated.
En momento de aplicar el color base, este paso no tiene mucho misterio.
Use una paleta similar al de la referencia pero un poco menos saturada.
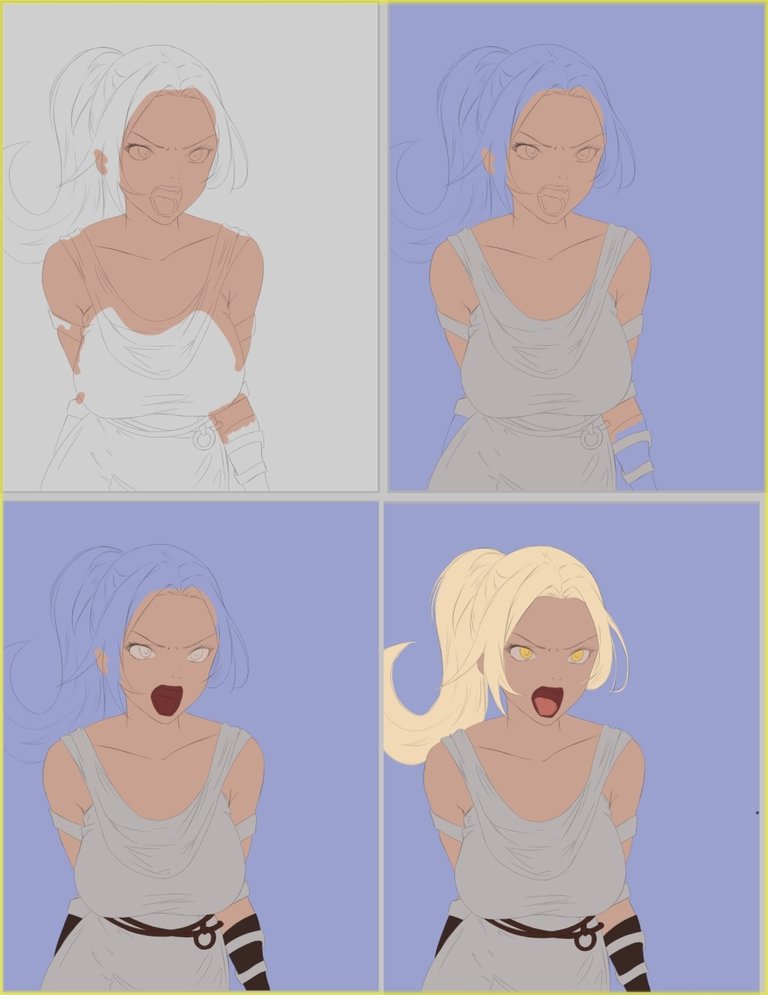
Once the base color is ready we get something like this, we can see the guide circles I was planning to use.
Una vez listo el color base conseguimos algo asi, podemos ver los círculos guias que pensaba usar.
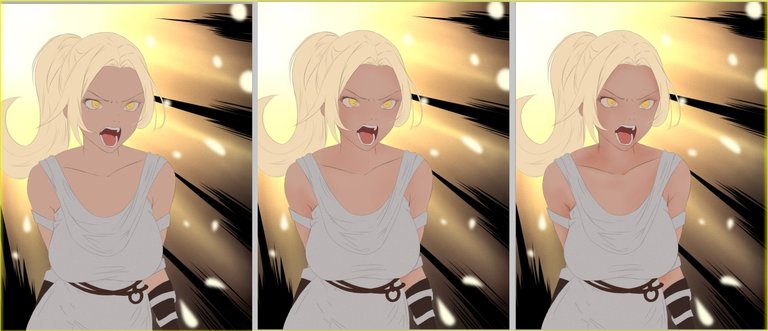
We start with the background for this one I used a yellow palette.
Also an effect I've seen in certain comics and manga.
Once the background is ready it's time to go with the part that takes the most time, at least in my case, let's go with the skin, we apply a very soft shadow with a reddish tone.
Empezamos por el fondo para este use una paleta amarilla.
También un efecto que he visto en ciertos comics y mangas.
Una vez listo el fondo es momento de ir con la parte que más tiempo lleva, al menos en mi caso, vamos con la piel, aplicamos una muy suave sombra con un tono rojizo.
For the skin I used two other shades to get the light and a little more shadow.
With the skin ready it's time to continue with the clothes, I want to emphasize that I added a fabric texture.
Para la piel use otros dos tonos para conseguir la luz y un poco mas de sombra.
con la piel lista es momento de seguir con la ropa, quiero resaltar que agregue una textura de tela.
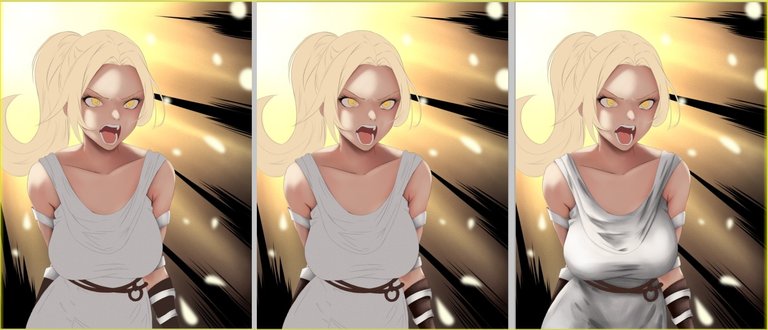
We continue adding details in the rest of the body.
You may have noticed, but I erased some of the lineart in areas like the hair.
Seguimos agregando detalles en el resto del cuerpo.
tal vez pudieron notar, pero borre parte del lineart en zonas como el cabello.
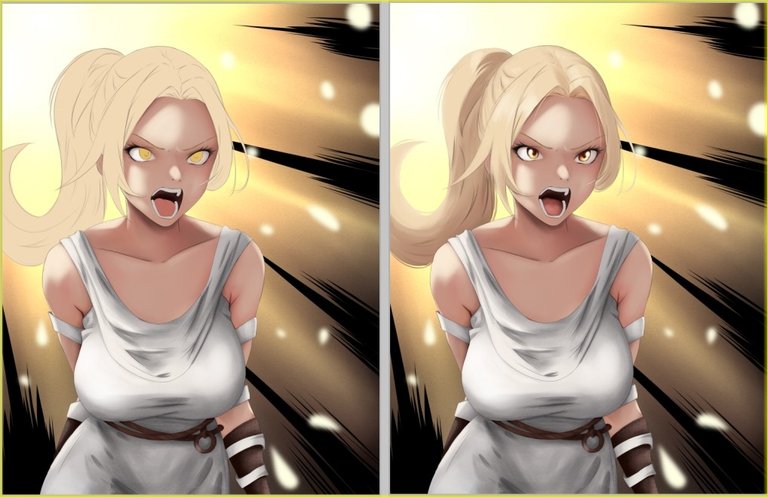
Finally, we added the effect of the scream, which I had to do in a different way than planned.
I drew a circle and then erased the center, leaving a kind of ring, I repeated this step three times until I got the desired effect.
Then I activated the multiply function.
and finally we are done!
Para finalizar agregamos el efecto del grito, esto lo tuve que hacer de otra forma a la planificada.
Dibuje un círculo y luego borre el centro, quedando una especie de aro, repetí este paso tres veces hasta conseguir el efecto deseado.
Luego active la función multiplicar.
y finalmente terminamos!

If you don't play splinterlands yet you can join here!
Si aún no juegas splinterlands puedes unirte aquí!

Join here // Unete aqui
Friends, we have reached the end. I hope you liked it as much as I did.
I really liked this character a lot and I already have a couple of ideas for other drawings with her.
See you cowboys!
Amigos llegamos al final. Espero les alla gustado tanto como a mi.
este personaje realmente me gusto muchísimo ya tengo un par de ideas para otros dibujos con ella.
Nos vemos vaqueros!
Tools:
- PaintTool SAI 2
- Inspiroy H640 Pen Tablets
- Corel photo paint x3
- https://www.deepl.com/translator

Wao hermano, se ve realmente hermoso tu dibujo, mucha suerte.
What an amazing art style bro, it looks like anime... Good luck with you entry for this week's splinterland art contest!
Checkout our BDVoter Daily Hive Showcase & Participate into our Daily giveaway to win various prize.
Este es un nivel trifásico tridimensional
It is very beautiful artwork
Thank you so much for this reproduction
Peace