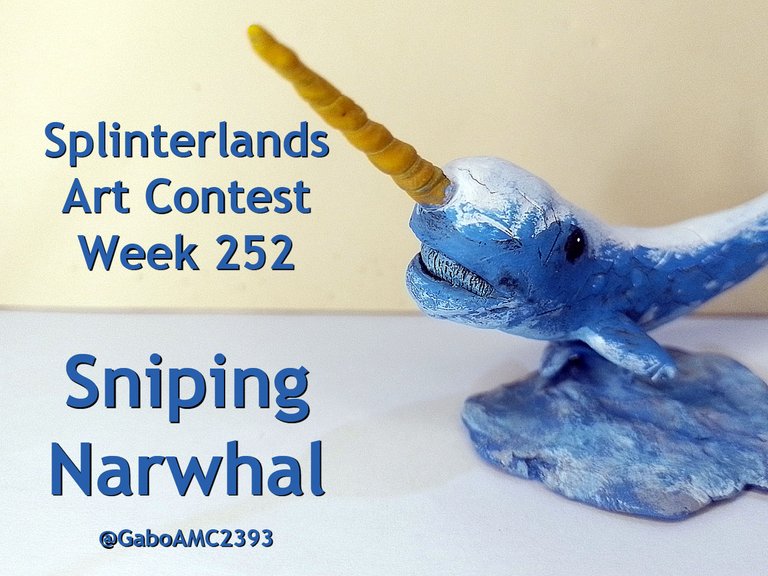
Splinterlands Art Contest Week 252: Sniping Narwhal
Greetings comrades. I bring again my participation in the splinterlands art contest.
I have created numerous sculptures for this contest, all as varied as colorful, of different elements and shapes.
This time I would like to share with you a creature that although it is very fantastic, it can also be found in the real world and the case of the Sniping Narwhal.

Saludos compañeros. Traigo otra vez mi participación en el concurso de arte de splinterlands.
He creado numerosas esculturas para este concurso, todas tan variadas como coloridas, de distintos elementos y formas.
En esta ocasión me gustaría compartir con ustedes una criatura que si bien es muy fantástica, también se puede encontrar en el mundo real y el caso del Sniping Narwhal.

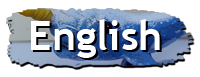
Source image / Fuente de la imagen
https://next.splinterlands.com/card-detail/171/regular/4?tab=lore
Caricatured creatures certainly have their appeal, or charm to put it another way; however, it's also great to try to give them a realistic touch and see what these creatures would be like in real life.
Las criaturas caricaturizadas ciertamente tienen su atractivo, o su encanto por decirlo de otra manera; sin embargo, también es genial intentar darles un toque realista y ver cómo serían estas criaturas en la vida real.
 |  |
|---|
Source image / Fuente de la imagen
https://next.splinterlands.com/card-detail/171/regular/4?tab=cards
Step by step
For this sculpture I used the following materials:
- Plasticine
- Wire
- Paint
- Paper
- Adhesive tape
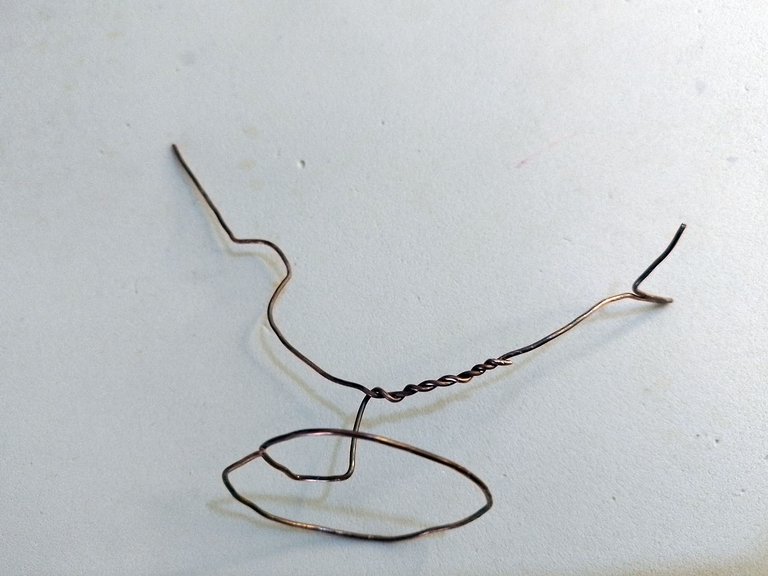
The first thing I made was the wire frame. This was a sculpture with a very well defined shape, a whale slightly tilted upward, showing its horn in a menacing manner.
With this in mind, I made a frame that could support this shape.
Paso a paso
Para esta escultura usé los siguientes materiales:
- Plastilina
- Alambre
- Pintura
- Papel
- Cinta adhesiva
Lo primer que hice fue el armazón de alambre. Esta era una escultura con una forma muy bien definida, una ballena levemente inclinada hacia arriba, mostrando su cuerno de manera amenazante.
Con esto en mente, hice un armazón que pudiera soportar esta forma.
 |  |
|---|
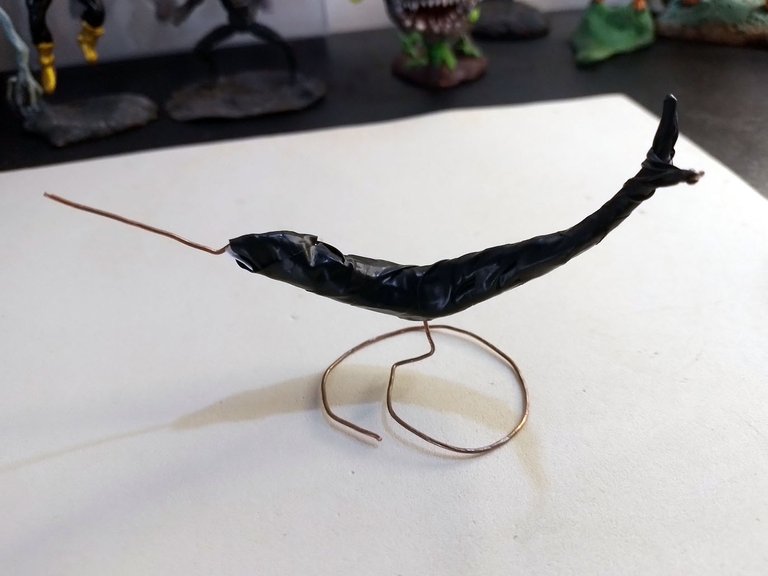
At the same time, in order not to use too much plasticine and so that the piece would not be so heavy, I covered the frame with paper and adhesive tape, ready to cover it with the plasticine.
A su vez, para no usar demasiada plastilina y para que la pieza no quedara tan pesada, cubrí el armazón con papel y cinta adhesiva, quedando listo para cubrirlo con la plastilina.
 |  |
|---|
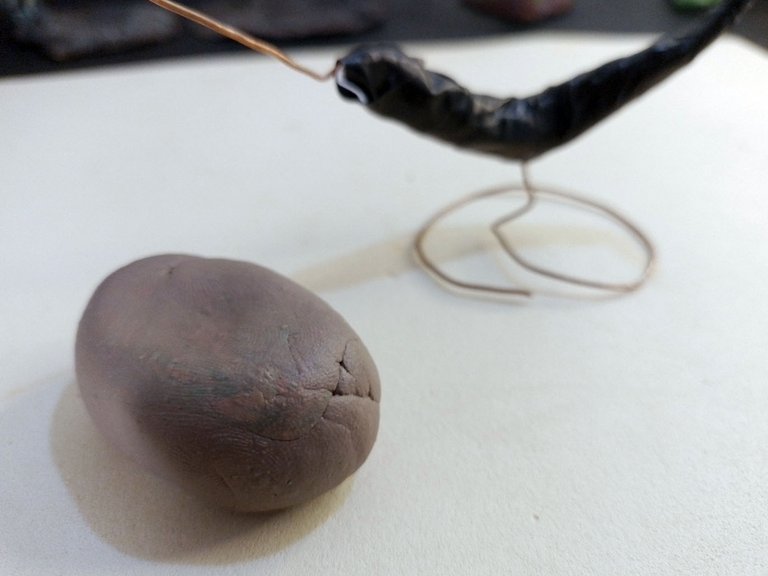
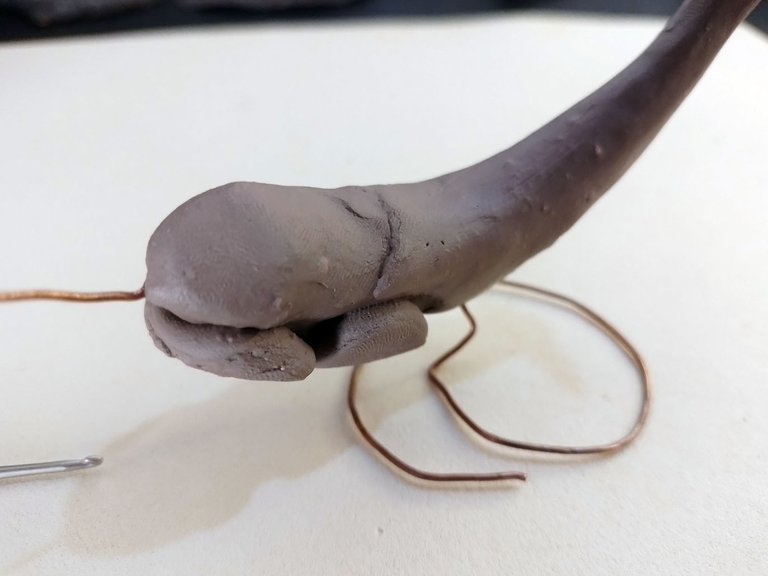
It was time to mold.
For this process I started by covering the skeleton of the cetacean with brown plasticine. Why brown? Because no matter what color I use, I'm still going to paint it, so if you would like to do something like this and you have yellow plasticine, it's okay, because you can paint it.
Llegó la hora de moldear.
Para este proceso yo comencé cubriendo el esqueleto del cetáceo con la plastilina marrón. ¿Por qué marrón? Porque no importa el color que use, igual la voy a pintar, así que si ustedes quisieran hacer algo así y tienen plastilina amarilla, está bien, porque se puede pintar.
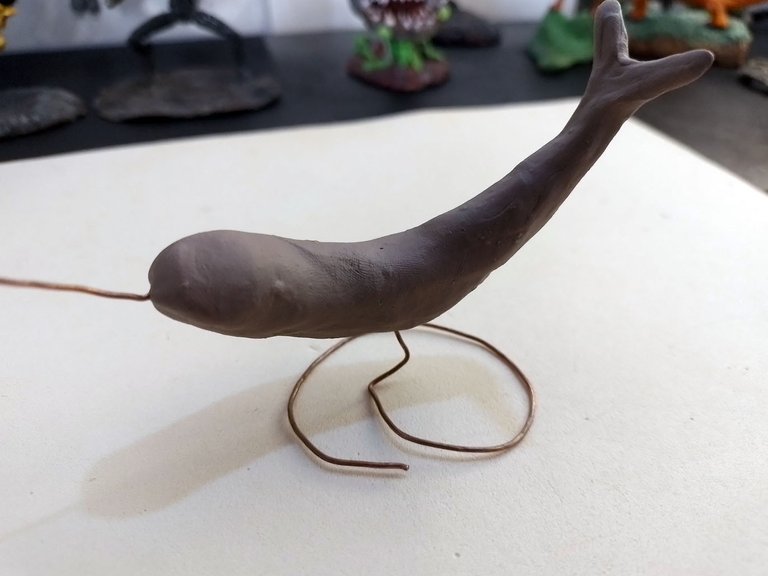
At this point I also added more plasticine in the lower area to give more thickness to the jaw and head area, then I smoothed the pieces to get the base shape of the cetacean.
En este punto también agregué más plastilina en la zona de abajo para dar mayor grosor al área de la mandíbula y la cabeza, luego alisé las pieza para que quedara con la forma base del cetáceo.
With the help of a very thin needle I made the mouth. I left an opening in what we could say is the palate of the whale. This is the way it is now.
Con ayuda de una aguja muy delgada hice le hice la boca. Le dejé una apertura en lo que podríamos decir que es el paladar de la ballena. Así quedó hasta ahora.
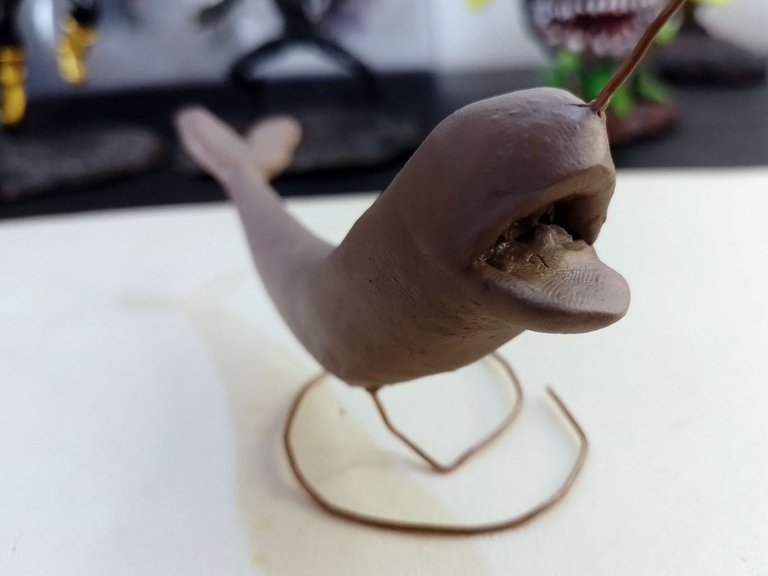
Something very important is the shape I wanted to give to the whale. Although the narwhal are a little different from the figure I am presenting, I wanted to make a mix between Moby Dick with horn, keeping features such as the narwhal's mouth and the horn itself.
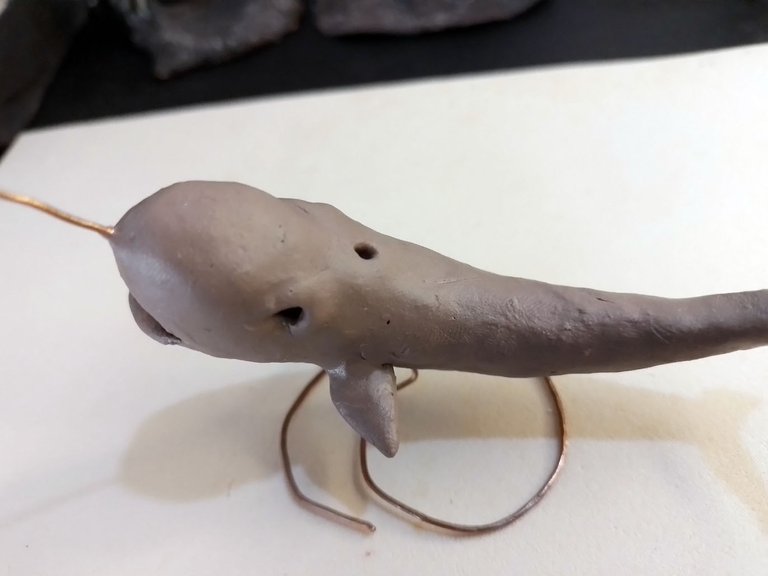
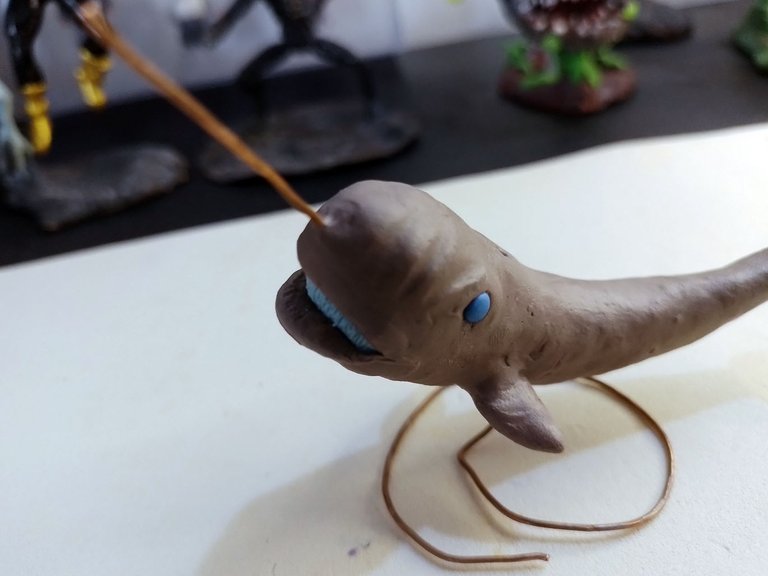
Below, you can see where I placed the creature's breathing hole and the eye sockets, which I filled with blue plasticine.
Algo muy importante es la forma que quise dar a la ballena. Si bien los narval son un poco distintos a la figura que estoy presentando, quise hacer una mezcla entre Moby Dick con cuerno, conservando rasgos como la boca del narval y el propio cuerno.
A continuación, pueden ver donde situé el orificio para respirar de la criatura y las cuencas de los ojos, las cuales rellené con plastilina azul.
 |  |
|---|
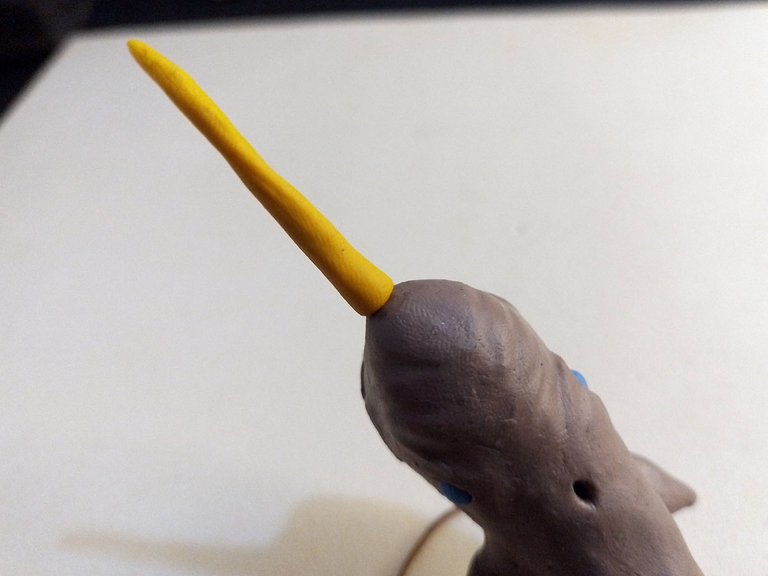
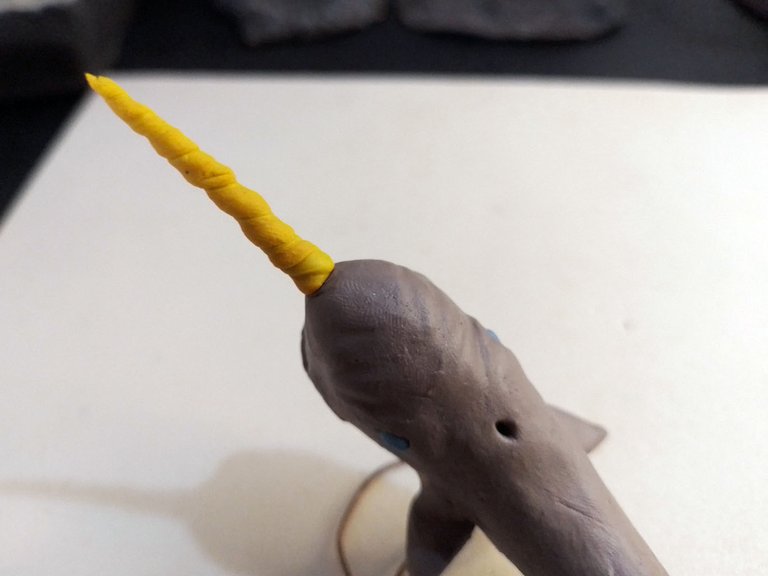
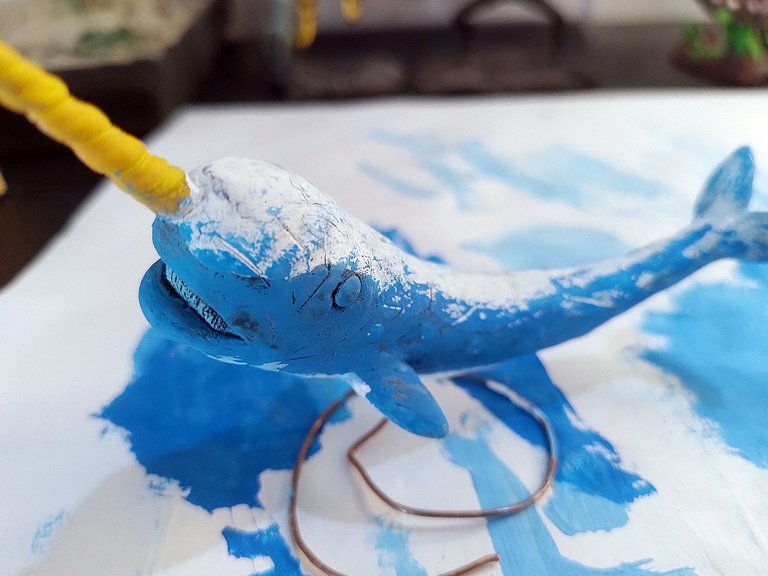
Something very important is the horn. Although it would have looked great if I had made it in gold, I didn't have this color of paint so I decided to make it a nice bright yellow.
I covered the wire support I had intended for the horn with the plasticine and twisted the plasticine to create the effect of a horn in the shape of a screw.
Algo muy importante es el cuerno. Aunque habría quedado genial si lo hubiese hecho de color dorado, no tenía este color de pintura así que decidí hacerlo de un bonito amarillo intenso.
El soporte de alambre que había destinado para el cuerno lo cubrí con la plastilina y le di vueltas a la propia plastilina, para crear ese efecto de un cuerno con forma de tornillo.
 |  |
|---|
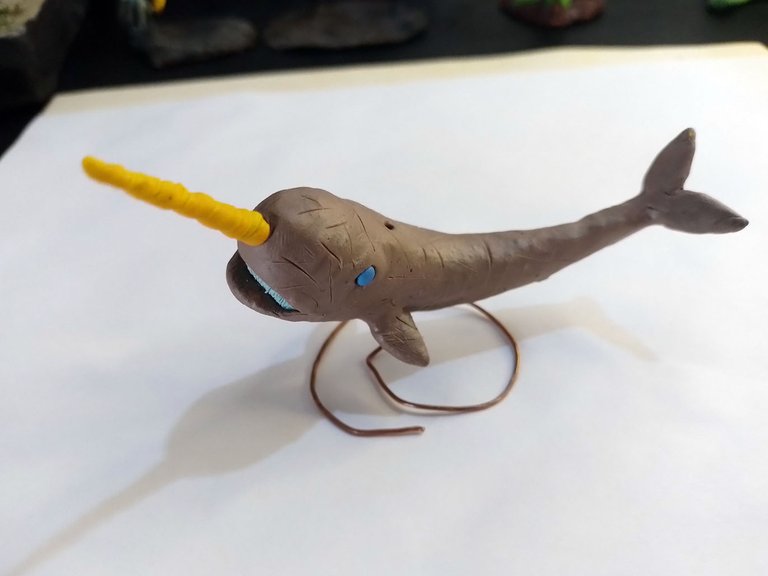
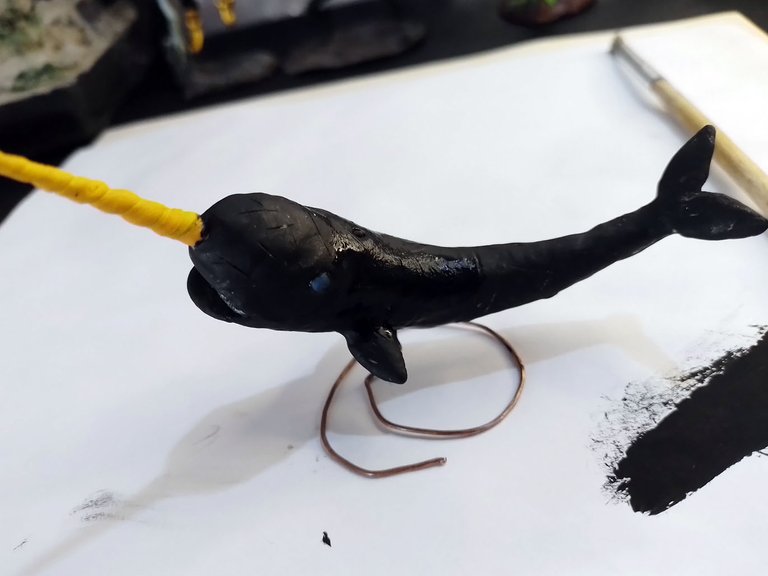
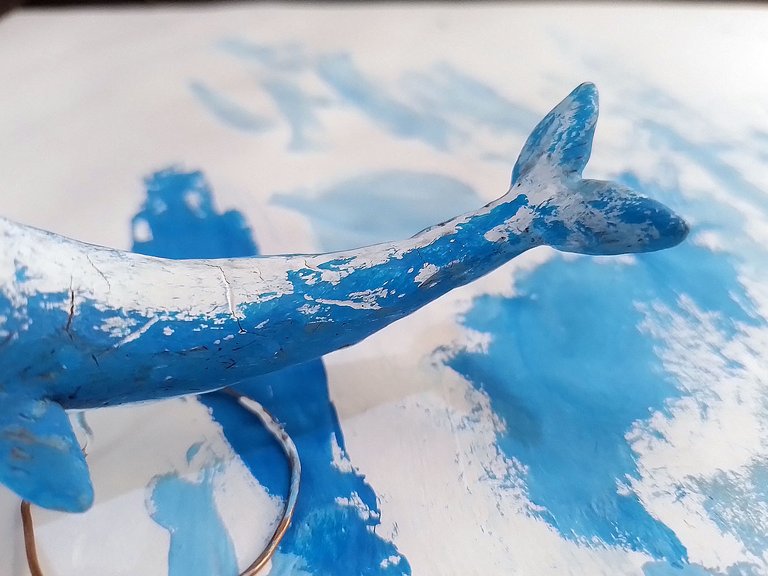
This is a warrior narwhal, so I made it with many fight scars.
Below you can see how it was coming out and in the image on the right you can see the first coat of paint with which I covered the whole sculpture, to start the painting process.
Este es un narval guerrero, así que lo hice con muchas cicatrices de pelea.
Abajo pueden ver cómo iba quedando y en la imagen de la derecha se aprecia la primera capa de pintura con la que cubrí toda la escultura, para comenzar el proceso de pintado.
 |  |
|---|
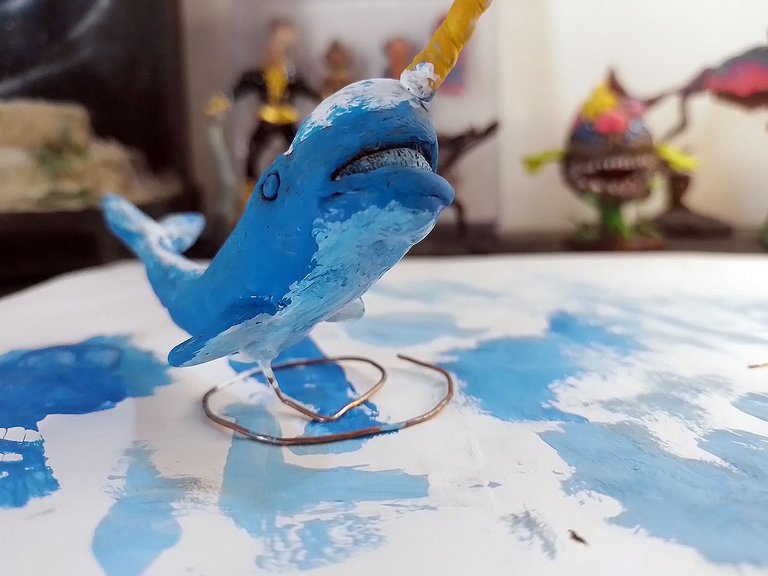
After letting the black paint dry, I continued painting with paint scales ranging from white to sky blue.
Below you can see pictures of this process.
Después de dejar que se seque la pintura de color negro, continué pintando con escalas de pintura que van desde el blanco al azul cielo.
Abajo pueden ver imágenes de este proceso.
 |  |
|---|
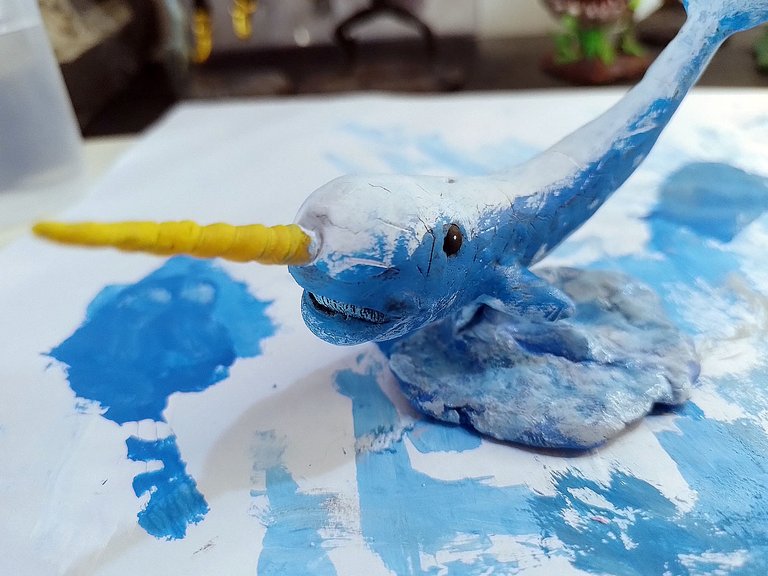
The eyes are the mirror of the soul, so they say, so I made the eyes black for this creature to make them a little different from the rest of the colors.
To give it a more special touch, I painted a small white dot on both eyes.
Los ojos son el espejo del alma, según dicen, así que le hice los ojos negros a esta criatura para que se diferenciaran un poco del resto de los colores.
Para darle un toque más especial, pinté un pequeño punto blanco en ambos ojos.
 |  |
|---|
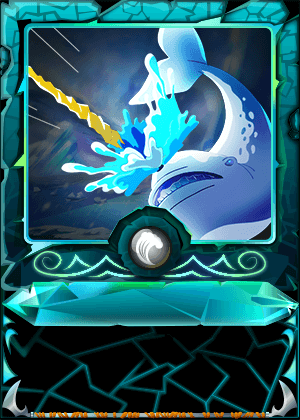
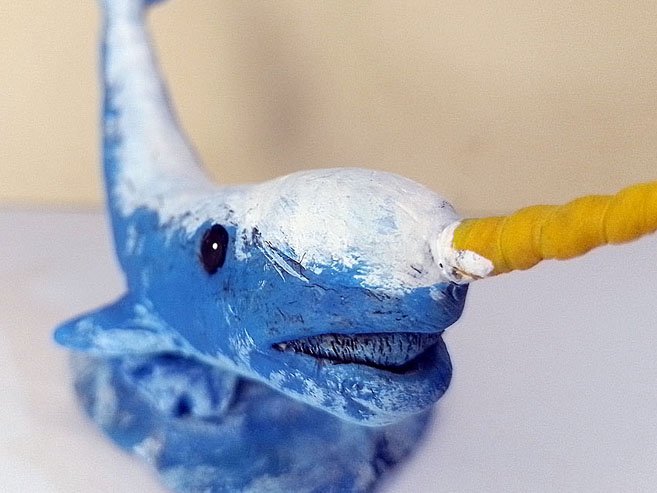
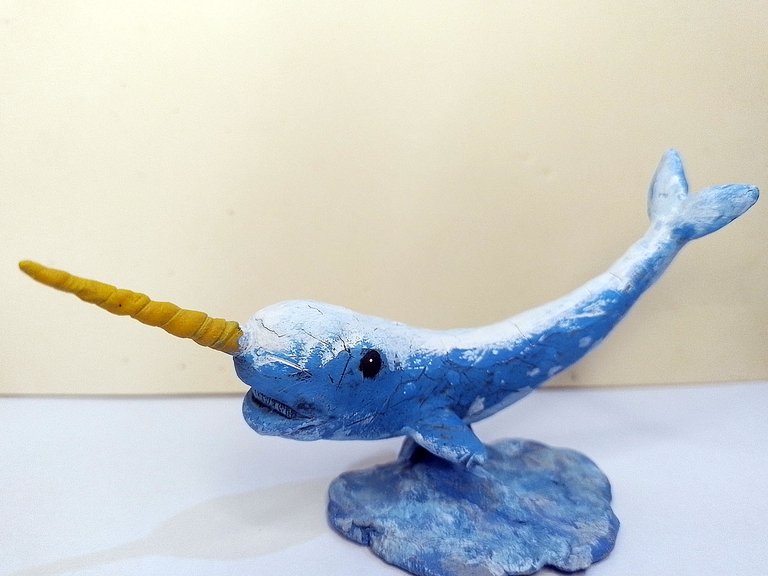
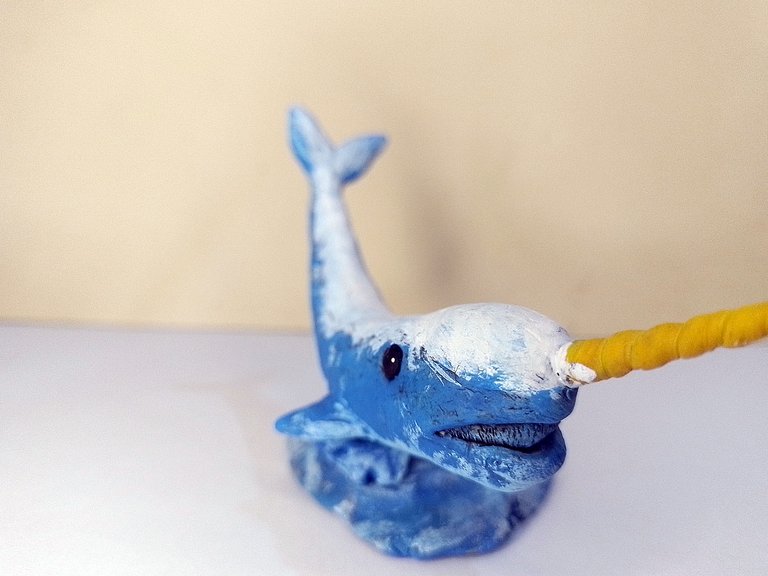
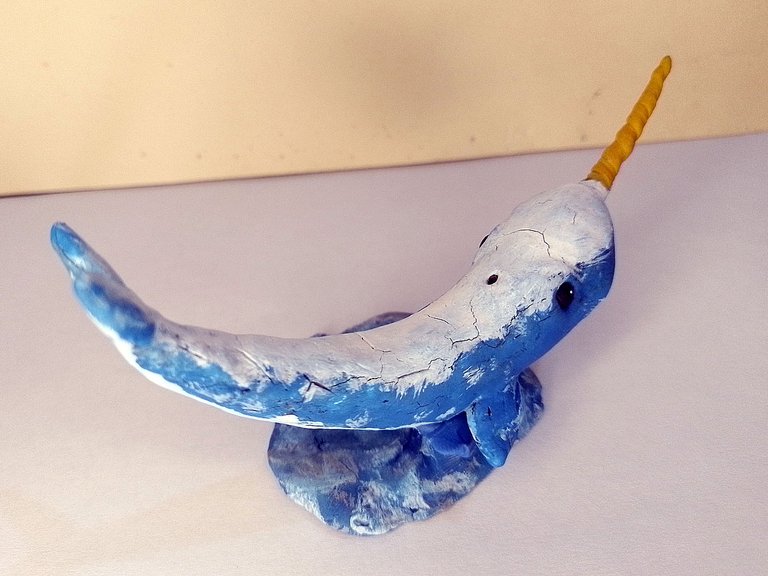
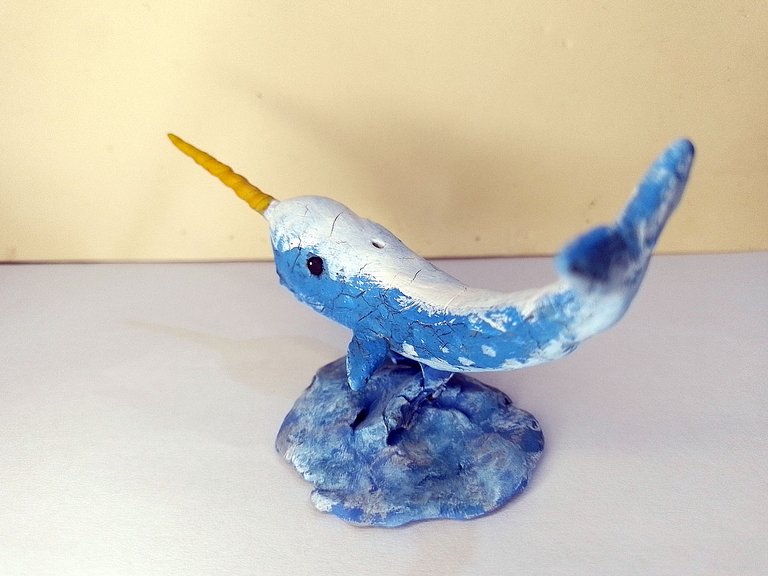
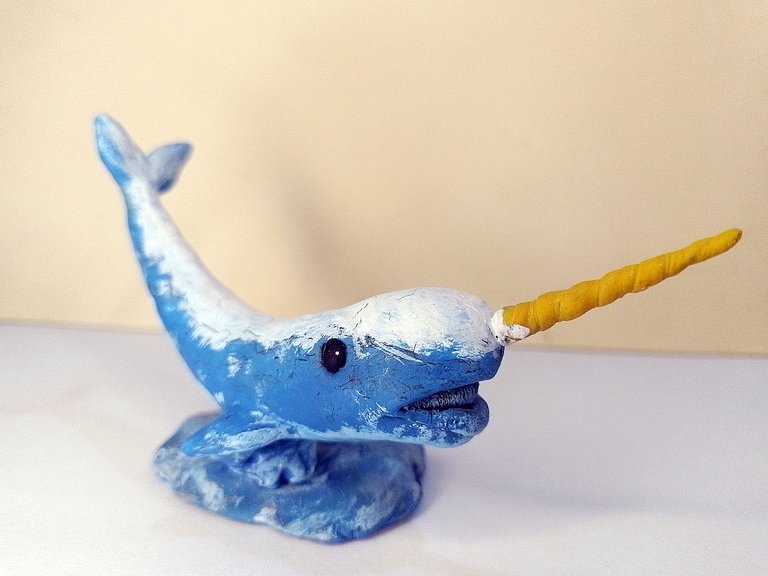
Finally I placed a base to the sculpture to cover the wire that supports it, so it was in a kind of base that simulates water.
Here is a series of photographs of the final result:
Finalmente le coloqué una base a la escultura que cubriera el alambre que la soporta, así quedó en una suerte de base que simula el agua.
A continuación una serie de fotografías del resultado final:


Well friends, that's all for now, what did you think of this sculpture? For me it has been a pleasure to have brought you this little piece of art.
If you would like to know more about the contest you can read the following link:
https://peakd.com/hive-13323/@splinterlands/splinterlands-art-contest-week-252
I invite you to leave your opinions below in the comments, as always I will be happy to read them. I appreciate that you took the time to read my post, without more to add, I take my leave then...
See you next time!
Bien amigos, eso ha sido todo por ahora. ¿Qué les ha parecido esta escultura? Para mi ha sido un placer haberles traído esta pequeña pieza de arte.
Si gustas saber más del concurso puedes leer el siguiente enlace:
https://peakd.com/hive-13323/@splinterlands/splinterlands-art-contest-week-252
Los invito a dejar sus opiniones abajo en los comentarios, como siempre estaré encantado de leerlos. Agradezco que se tomaran el tiempo de leer mi post, sin más que agregar, me despido entonces...
¡Hasta la próxima!


Thanks for the support!
Guao mi querido! Pero es que siempre te superas, subes y subes la dificultad! sencillamente genial!
jejeje vaya, se hace lo que se puede jejeje me alegra que te haya gustado!
Ohhhh. Un trabajo mega espectacular como lo que acostumbras a regalarnos. Cada detalle es maravilloso y más que hayas querido darle ese toque de realismo. Te felicito.
La mejor de las suertes en el concurso @gaboamc2393 ✨
!DIY
!MEME
!PIZZA
!WEED
Credit: yintercept
Earn Crypto for your Memes @ HiveMe.me!
Vaya mega espectacular es una palabra mega espectacular para definir este trabajo jejeje gracias por pasar a comentar!
$PIZZA slices delivered:
@dayadam(1/5) tipped @gaboamc2393
You can query your personal balance by
!DIYSTATSCongratulations @gaboamc2393! You have completed the following achievement on the Hive blockchain And have been rewarded with New badge(s)
Your next target is to reach 7500 replies.
You can view your badges on your board and compare yourself to others in the Ranking
If you no longer want to receive notifications, reply to this comment with the word
STOPCheck out our last posts:
Congratulations, your post has been upvoted by @dsc-r2cornell, which is the curating account for @R2cornell's Discord Community.
Enhorabuena, su "post" ha sido "up-voted" por @dsc-r2cornell, que es la "cuenta curating" de la Comunidad de la Discordia de @R2cornell.
Thanks for the support!
Thanks for sharing! - castleberry#6859

Thank you for your support! I'm glad you liked it! ❤️