[ESP/ENG] Fanart Sola Ranjell - Splinterlands Art Contest Week 247 !
SOLA RANJELL! ✨
!Saludos nuevamente comunidad de Aliens! Les deseo un maravilloso día a todos ustedes. En esta ocasión me gustaría compartir mi ilustración para participar en el concurso de arte de @splinterlands. Para variar un poco, esta semana he decidido utilizar como inspiración a un personaje poco conocido, se trata de Sola Ranjell, luego de darle un vistazo me pareció una buena referencia para llevar a cabo mi propia version del personaje. Esta ilustración me sirvió mucho para practicar un poco más el estilo anime, en especial el Chibi el cual es un estilo que me gusta bastante. ¡Espero que les guste tanto como a mí y les doy las gracias por tomarse el tiempo de leer mi publicación!
Greetings again Aliens community! I wish you all a wonderful day. This time I would like to share my illustration to participate in the @splinterlands art contest. For a change, this week I decided to use a little known character as inspiration, it's Sola Ranjell, after taking a look at her I thought it was a good reference to make my own version of the character. This illustration helped me a lot to practice a bit more the anime style, specially the Chibi which is a style I like a lot, I hope you like it as much as I do and I thank you for taking the time to read my post!

Creative Process | Proceso Creativo✏️

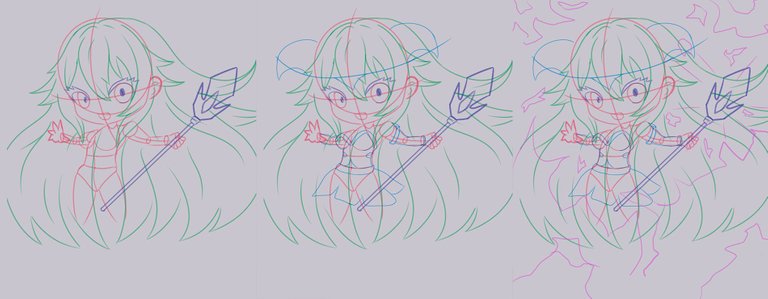
Para llevar a cabo esta ilustración me propuse trabajar por etapas. Estas estarían divididas en: boceto, línea, capa base, colores base, sombras, luces y edición final. Siguiendo esta alineación, comencé realizando el boceto del personaje, busqué algunas referencias que me permitieran abordar detalles como el cabello y un poco de la anatomía en sí que tendría el personaje, esta tendría una pose algo dinámica con un cabello bastante abundante, siendo el mayor enfoque sus grandes ojos. Partiendo de esta idea poco a poco fui agregando detalles como su vestimenta, cachos y arma además se me ocurrió crear una especie de rayos provenientes de su arma que estarían por todo el alrededor del personaje creando así una composición bastante llamativa.
To carry out this illustration I proposed to work in stages. These would be divided into: sketch, line, base layer, base colours, shadows, lights and final edition. Following this alignment, I began by making the sketch of the character, I looked for some references that allowed me to address details such as the hair and a little of the anatomy itself that the character would have, this would have a somewhat dynamic pose with a fairly abundant hair, being the main focus his big eyes. Starting from this idea little by little I was adding details such as his clothes, hats and weapon, besides I thought of creating a kind of rays coming from his weapon that would be all around the character creating a quite striking composition.
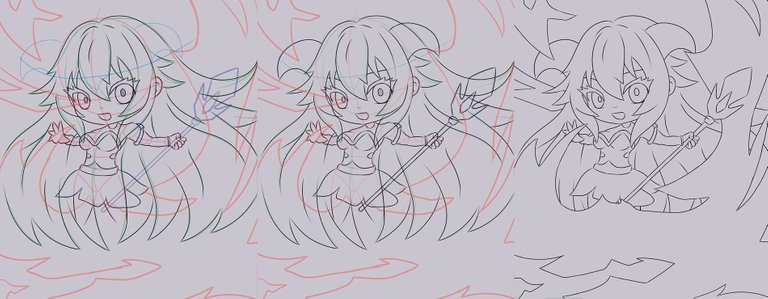
Después de terminar el boceto comencé a trabajar en mi segunda etapa de este proyecto, la aplicación de la línea. Para ello utilicé un pincel con un grosor delgado y con presión del trazo, este me permitió crear líneas bastante limpias y variadas lo cual le dio un aspecto un poco más real a la ilustración además de resaltar un poco más el diseño del personaje.
After finishing the sketch I started working on my second stage of this project, the application of the line. For this I used a brush with a thin thickness and stroke pressure, this allowed me to create quite clean and varied lines which gave a more realistic look to the illustration as well as highlighting the character's design a little more.
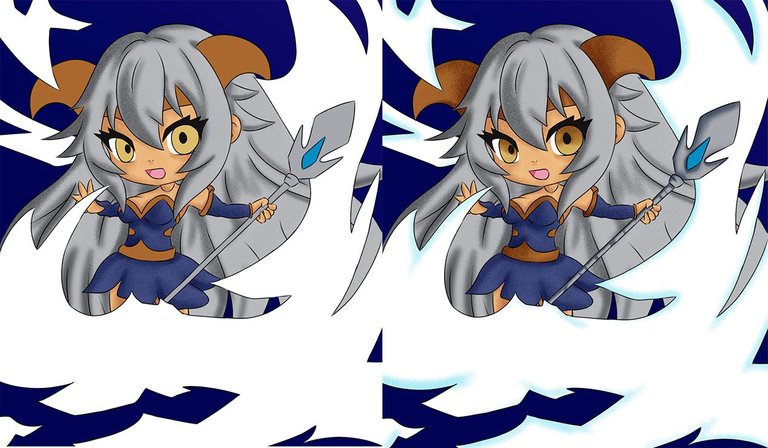
Empecé mi tercera etapa, en esta trabajé en la aplicación de los colores base del personaje. Realice una capa base de color gris, para posteriormente aplicar el color de una forma más sencilla en la ilustración. Antes de comenzar con la aplicación del color armé mi paleta de colores, utilice tonos diferentes a los de la imagen de referencia, en este caso la paleta de colores tendría colores un poco más saturados y oscuros ya que mi objetivo era resaltar los rayos que emanan del personaje. Teniendo mi paleta lista, comencé a aplicar los tonos base en capas diferentes, empezando desde los elementos que estarían en la parte inferior de la ilustración hasta llegar a los elementos superiores.
I started my third stage, in this one I worked on the application of the base colours of the character. I made a base layer of grey, to later apply the colour in a simpler way in the illustration. Before starting with the application of the colour I assembled my colour palette, I used different tones to those of the reference image, in this case the colour palette would have slightly more saturated and darker colours as my objective was to highlight the rays emanating from the character. Having my palette ready, I started to apply the base tones in different layers, starting from the elements that would be at the bottom of the illustration to the upper elements.
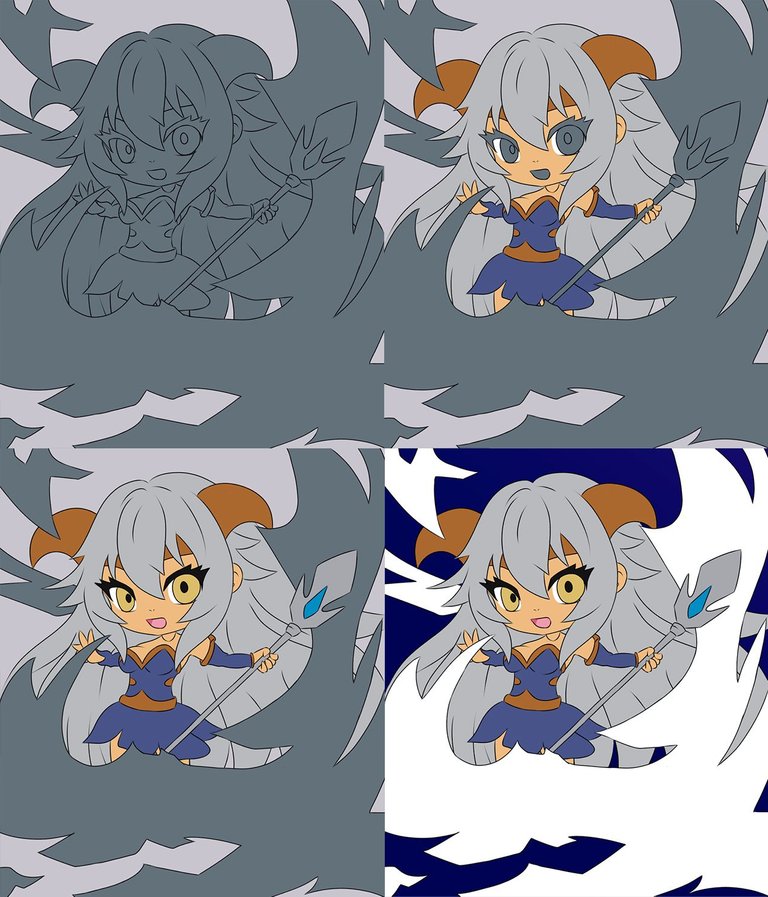
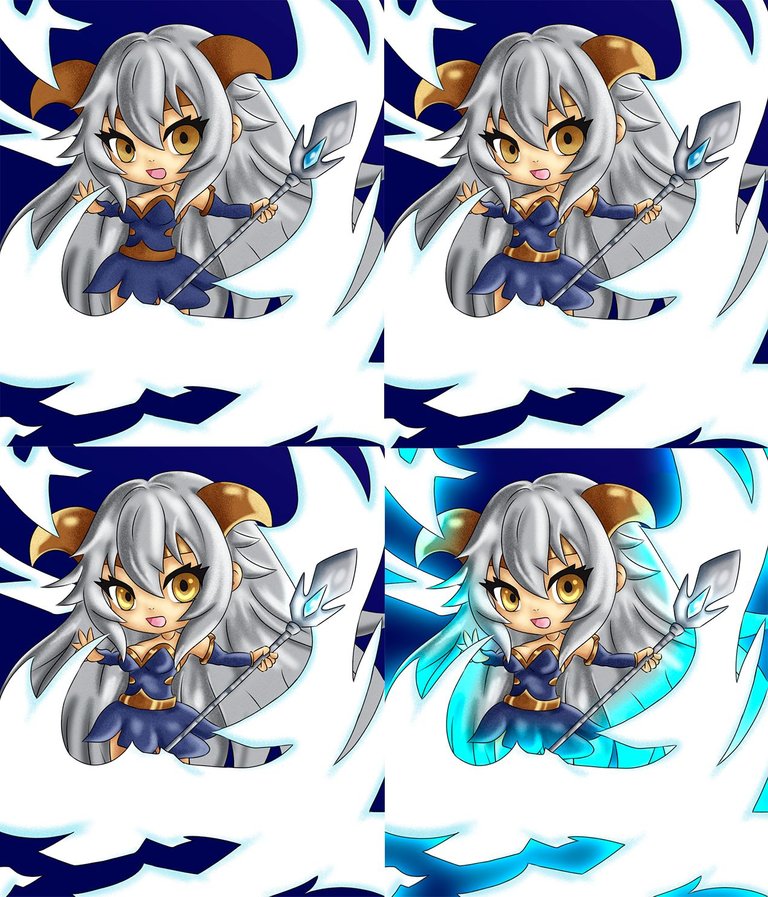
Teniendo los colores aplicados comencé mi etapa final, dar volumen con luces y sombras. Empecé a aplicar primero las sombras, con un pincel texturizado comencé a aplicar toques suaves por todos los elementos, como mi luz en este caso vendría desde la parte derecha de la imagen apliqué la mayor cantidad de sombras en la parte izquierda y en las zonas donde muy difícilmente llegaría la luz, dando así unas sombras bastante suaves y respetando mi luz principal asi como la de los rayos que posee el personaje.
Having the colours applied I started my final stage, giving volume with lights and shadows. I started to apply the shadows first, with a textured brush I started to apply soft touches all over the elements, as my light in this case would come from the right side of the image I applied most of the shadows in the left side and in the areas where the light would hardly reach, giving soft shadows and respecting my main light as well as the rays that the character has.
Para finalizar con el coloreado del personaje comencé a aplicar los detalles y brillos finales a la ilustración. Este para mi es el paso más importante de todos ya que de aquí depende el resultado final de la ilustración en sí, siguiendo el mismo proceso de aplicación de sombras en este caso fui dando toques suaves con un color más claro a los colores base originales. Para dar aún más detalle trabaje con dos niveles de luz, esto me permitió dar aún más volumen y profundidad a todos los elementos presentes en la ilustración, ademas aplique un pequeño degradado de fondo el cual usaria de base para crear el fondo final.
To finish with the colouring of the character I started to apply the final details and shines to the illustration. This for me is the most important step of all as the final result of the illustration itself depends on it, following the same process of applying shadows in this case I was giving soft touches with a lighter colour to the original base colours. To give even more detail I worked with two levels of light, this allowed me to give even more volume and depth to all the elements present in the illustration, I also applied a small background gradient which I would use as a base to create the final background.
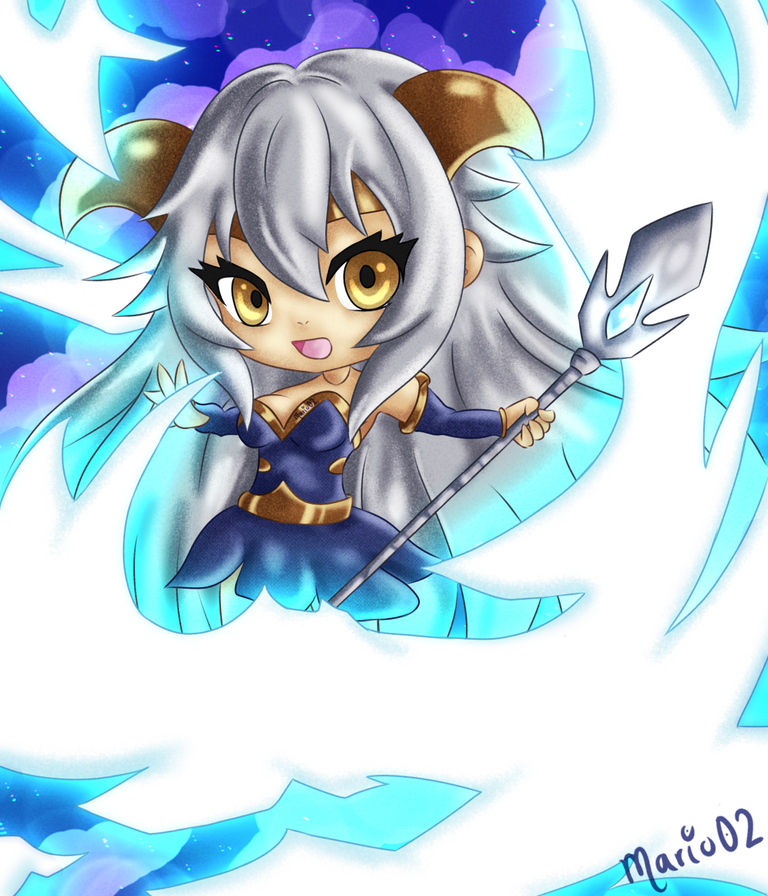
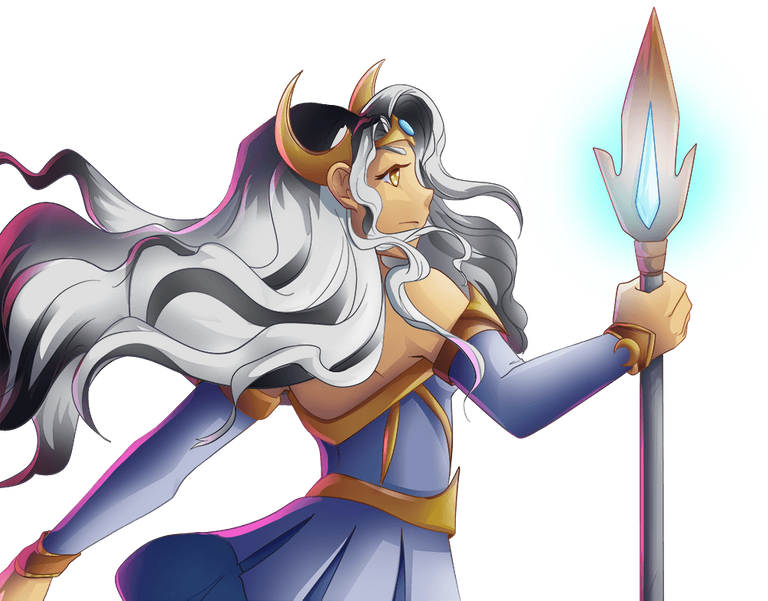
Final result of the Illustration | Resultado final de la ilustración
Y así doy por culminada esta ilustración, para resumir y no hacer el post aún más largo como detalles finales le agregue aún más degradados y elementos al fondo para que este se viera un poco mejor, además de le di color al lineart lo cual le dio un aspecto que me gusto bastante. Espero que haya sido del agrado de todos ustedes, si deseas puedes apoyarme y/o dejarme un comentario con algún consejo u opinión y con gusto te lo agradeceré ¡Muchas gracias por ver hasta el final y hasta la próxima!
And so I finish this illustration, to summarize and not make the post even longer as final details I added even more gradients and elements to the background to make it look a little better, plus I gave colour to the lineart which gave it an aspect that I liked a lot. I hope you all liked it, if you want you can support me and/or leave me a comment with any advice or opinion and I'll be glad to thank you. Thank you very much for watching until the end and see you next time!
Tools Used | Herramientas Utilizadas:
- Medibang Paint Pro PC version 64 bits
- Tablet Huion H610 PRO V2
REFERENCE

The illustration and separators used in the post are my property.
Translated with DeepL (free versión)
El resultado final luce bastante bien, muy bueno su estilo amigo.
Muchas gracias por tu comentario amigo, es uno de los trabajos más complejos que he hecho!
Muchas gracias!
This post has been manually curated by @steemflow from Indiaunited community. Join us on our Discord Server.
Do you know that you can earn a passive income by delegating to @indiaunited. We share more than 100 % of the curation rewards with the delegators in the form of IUC tokens. HP delegators and IUC token holders also get upto 20% additional vote weight.
Here are some handy links for delegations: 100HP, 250HP, 500HP, 1000HP.
100% of the rewards from this comment goes to the curator for their manual curation efforts. Please encourage the curator @steemflow by upvoting this comment and support the community by voting the posts made by @indiaunited.
¡Felicidades! Esta publicación obtuvo upvote y fue compartido por @la-colmena, un proyecto de Curación Manual para la comunidad hispana de Hive que cuenta con el respaldo de @curie.
Si te gusta el trabajo que hacemos, te invitamos a darle tu voto a este comentario y a votar como testigo por La Colmena.
Si quieres saber más sobre nuestro proyecto, te invitamos a acompañarnos en nuestro servidor de Discord.
Muchas gracias por el apoyo!
Que cosita chibi tan bonita <3, mori de amor!
Muchas gracias!!! Me alegra un montón que les haya gustado 💯
Thanks for sharing! - castleberry#6859

Thank you team!!
Congratulations on a job well done